Shipmate for Merchants
Introduction
The Shipmate Web Portal for Merchants allows you to quickly and easily set up your Shipmate account to start sending Shipments.
You can configure your Carriers, Delivery Services and Routing Rules using our simple interface as well as start sending Shipments via the new Parcel form or by importing a CSV of orders from your Order Management Software.
Within Shipmate you can track the status of all of your Shipments with our unified tracking events as well as receive proactive notifications when there is a problem with a delivery.
This help guide explains how to configure your account and start sending Shipments with Shipmate.
Printing
Printing Labels
You can print labels directly to almost any printer using the Shipmate Desktop Printer App.
The Shipmate Desktop Printer App is available to download for both Windows and Mac computers, and provides a direct link from Shipmate to your printer, printing labels and customs declarations on demand immediately, without the need for opening print dialogue boxes, scaling or any other complicated settings.
Simply log into the Shipmate Desktop Printer App using the same details you use to access the Shipmate Web Portal, configure your printer and you're ready to start printing labels.
Printing Labels on Windows
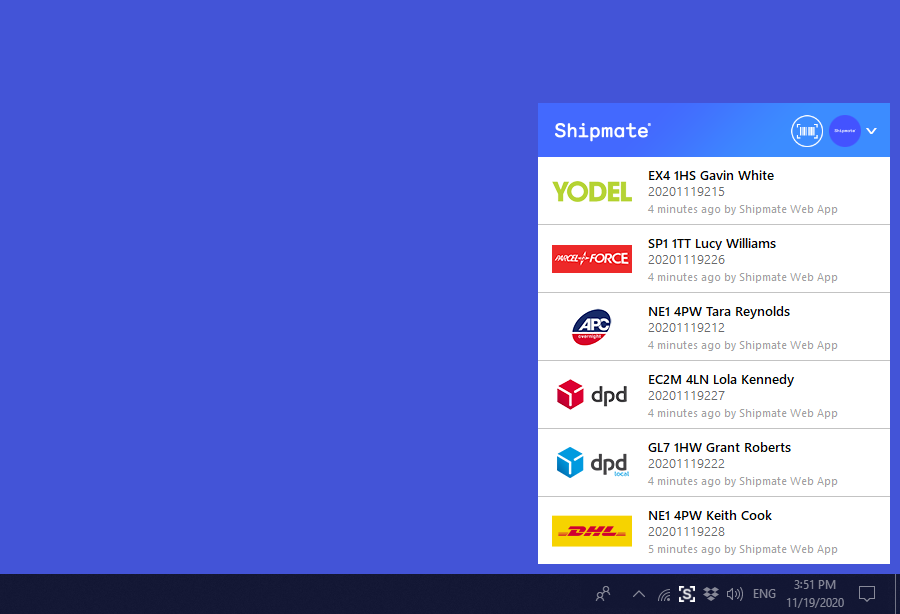
The Shipmate Desktop Printer App for Windows provides single-click printing from within Shipmate and many supported plugins and platform integrations.
The Desktop Printer App runs as a taskbar icon application next to the clock in the bottom-right corner of your Windows screen and acts as a link between our print server and your computer, on which you can configure your label printer.
The Windows version also offers a Directory Poller for CSV files, ideal for connecting to legacy on-premise applications with little to no development effort to integrate systems.
Quick links:
Download Shipmate Desktop Printer App for Windows
Printing Labels on macOS
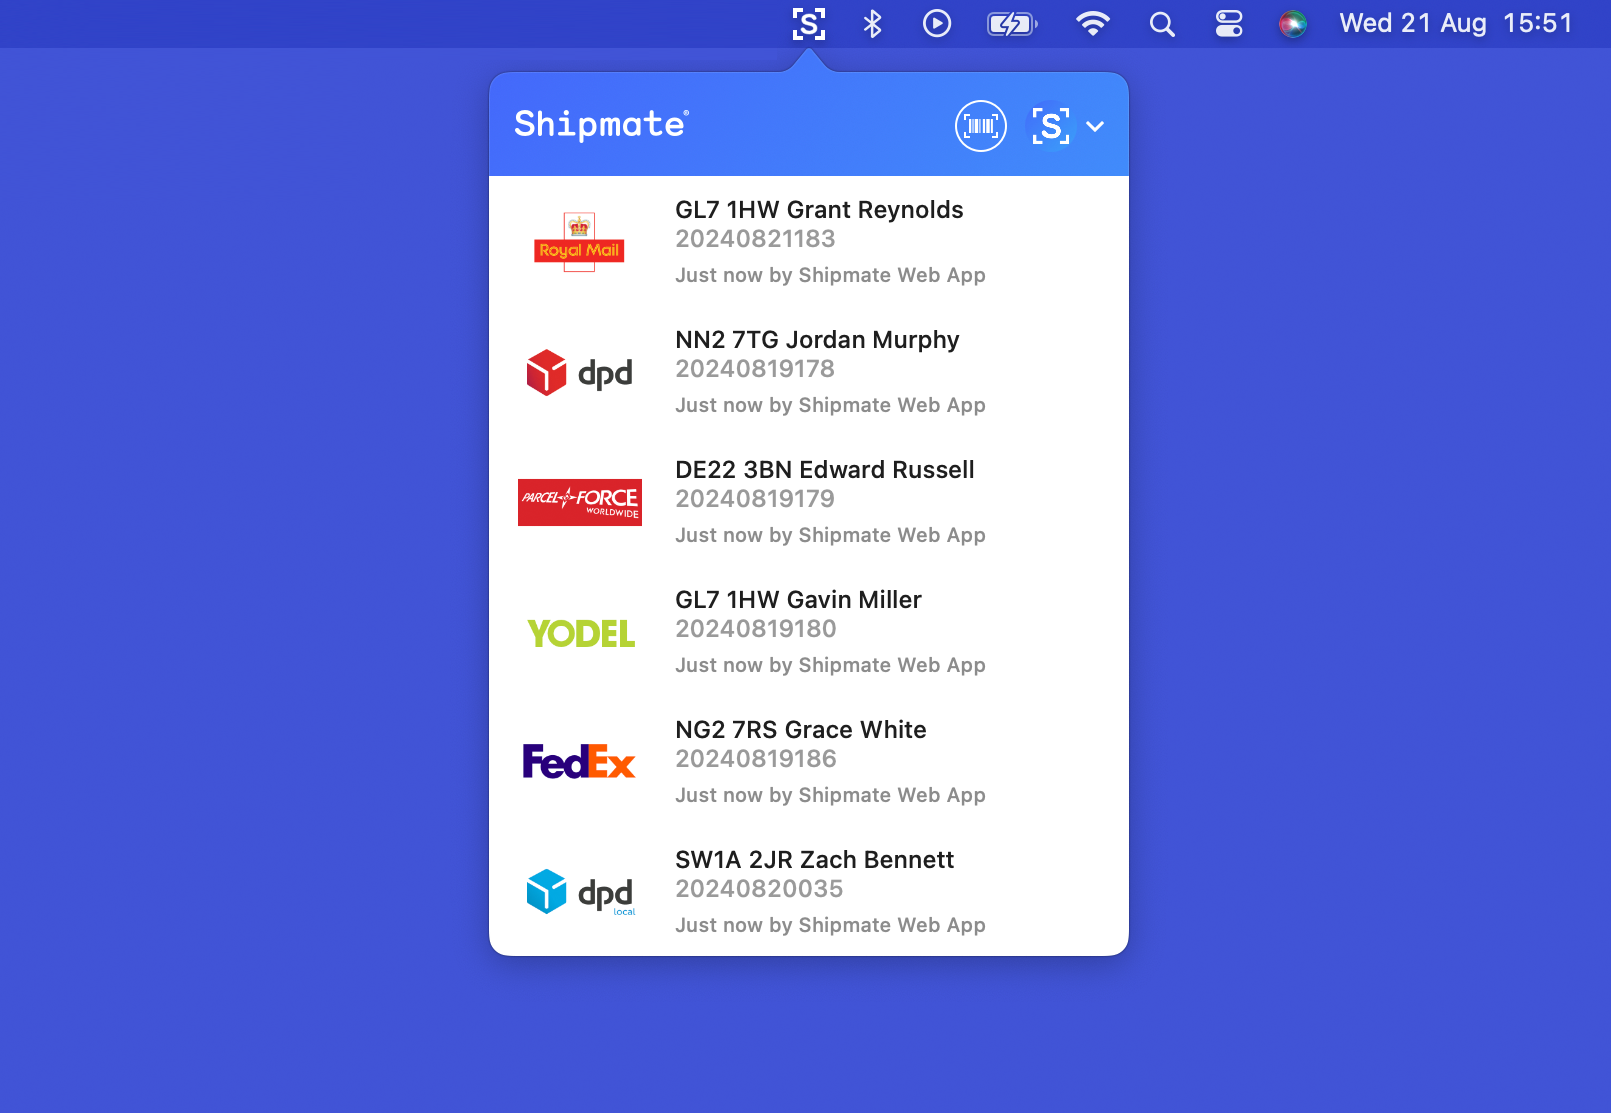
The Shipmate Desktop Printer App for macOS provides single-click printing from within Shipmate and many supported plugins and platform integrations.
The Desktop Printer App runs as a menu bar icon application next to the clock in the top-right corner of your macOS screen and acts as a link between our print server and your computer, on which you can configure your label printer.
Quick links:
Download Shipmate Desktop Printer App for macOS
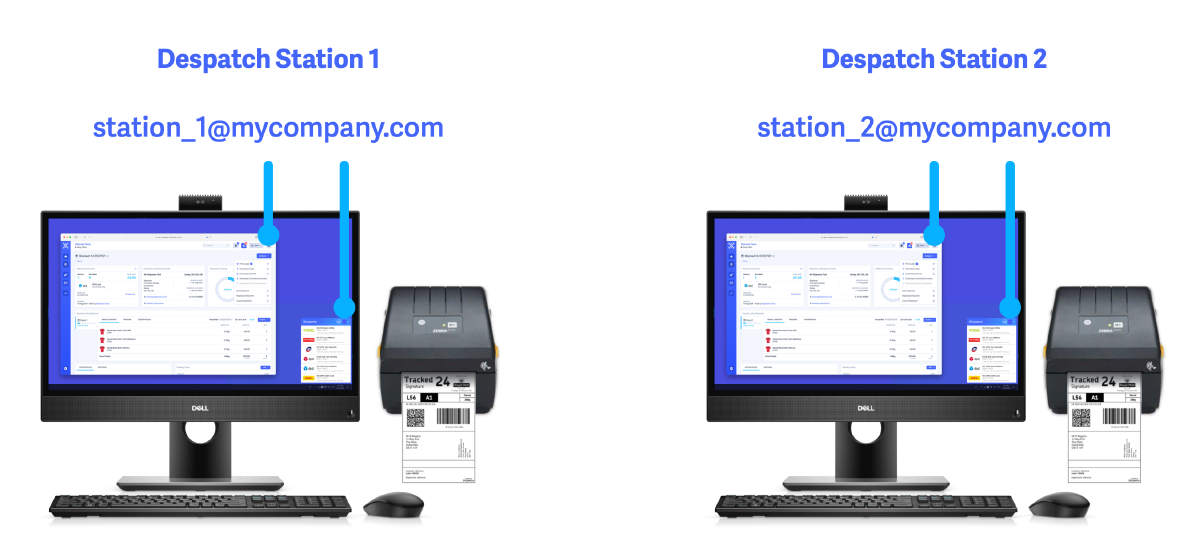
Multi-User Printing
Each user on your Shipmate account can print independently, meaning you can run a concurrent parcel despatch operation that scales with your demand.
Simply install the Shipmate Desktop Printer App on each of the computers that you use to despatch your parcels.
To make sure labels are only printed on one machine at a time, there is a restriction that each user account may only be signed in to the Desktop Printer App on one computer at any time. Signing in on another computer using the same user account will 'kick' the other computer out from printing.
You should therefore set up user accounts for each of the users you need to access Shipmate. Alternatively, you might want to set up users for each physical workstation you are using.
When printing from the Shipmate web portal or some browser-based plugins such as Shopify, you will need to make sure the user is signed in to both the web portal and Desktop Printer App using the same user account.
Network Print Server
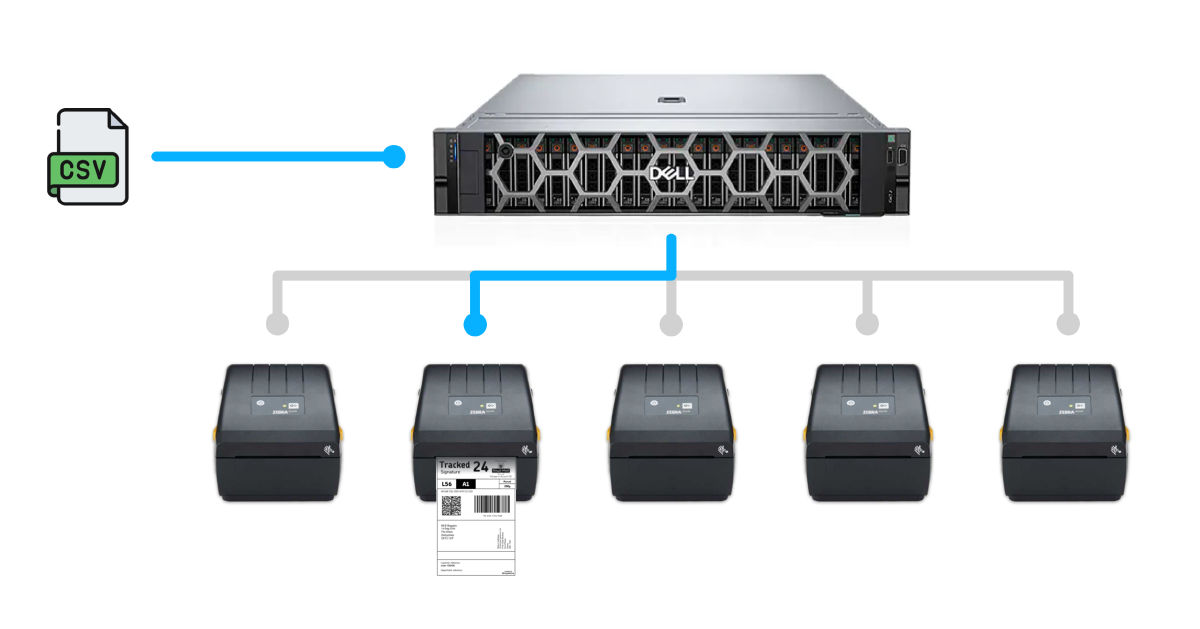
For Enterprise customers, we can offer a Network Print Server variant of the Windows Desktop Printer App that can manage multiple printers from one server.
This option works well for environments with multiple despatch clients using a remote desktop environment with no physical connectivity to a printer, and where printers are connected directly to the server or over the network.
The configuration tool allows you to add multiple printers with the ability to name each printer with a unique key that can be used in CSV uploads or API requests.
A Windows Service is installed to run the print operation headlessly and automatically on server boot.
Quick links:
User Guide for Shipmate Print Server
Printer Compatibility
Shipmate works with almost any printer, including many of the popular thermal label printers by Zebra, Citizen, Toshiba and Honeywell.
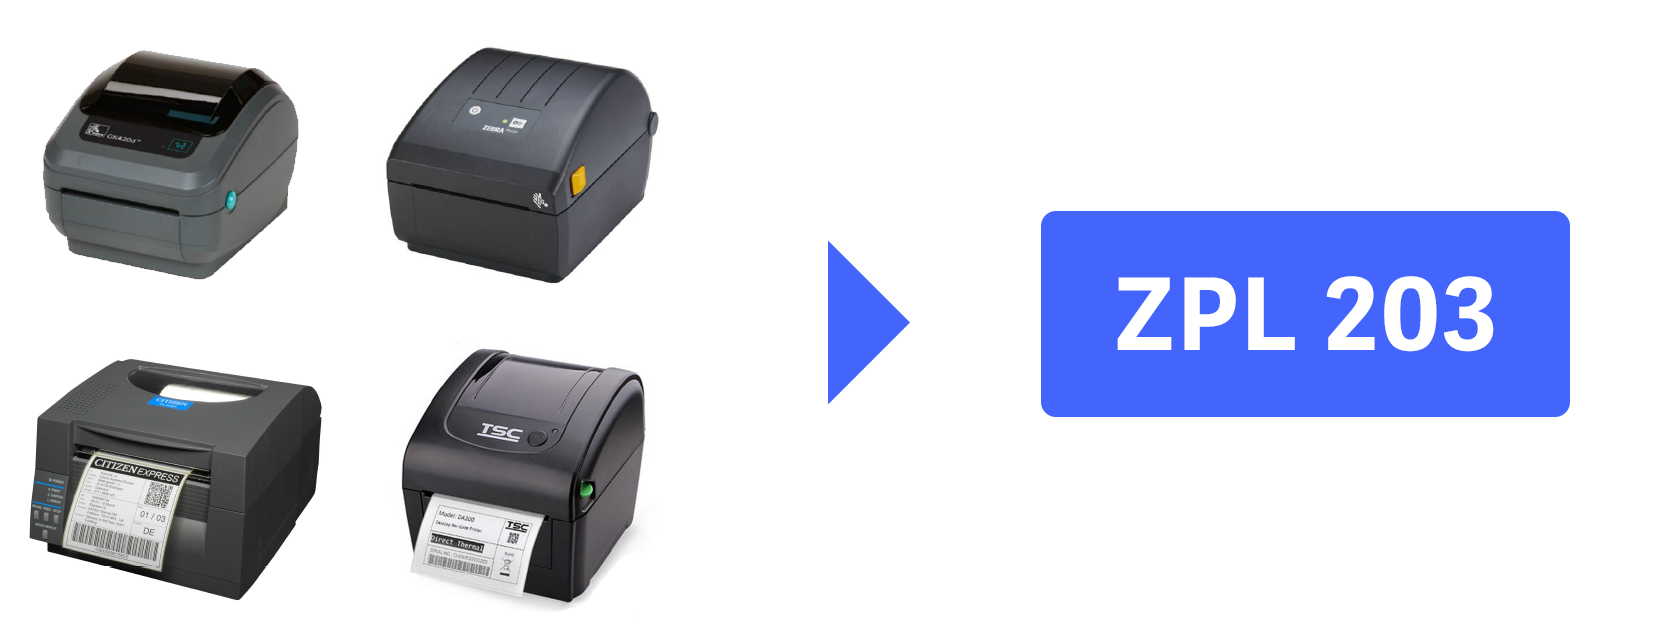
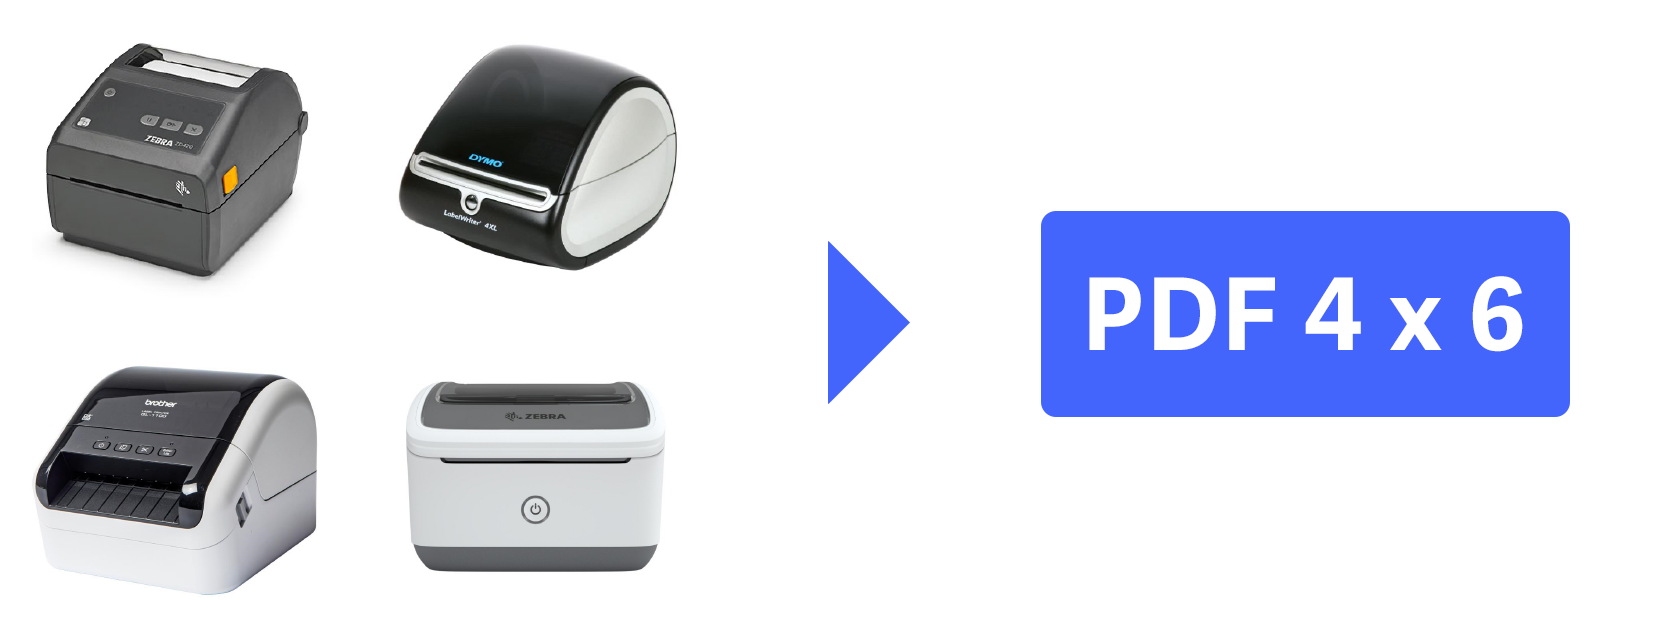
If your label printer supports ZPL-II at 203dpi, this is the recommended method for printing labels. If not, Shipmate can also output labels in PDF format for printing on any supported printer, including standard laser and inkjet printers.
Labels are standardised in a 4 x 6" (101.6 x 152.4mm) format, so please use suitable media in your printer.
Commonly used printer models that should be used in each mode are listed below.
ZPL 203 ("Thermal Label"):
- Zebra GK420d
- Zebra ZD220 / ZD221 (203dpi)
- Zebra ZD420 / ZD421 (203dpi)
- Citizen CL-S521
- TSC DA210 / DA220
- Any 4" 203dpi ZPL-II compatible printer
PDF 4 x 6":
- Zebra ZD420 / ZD421 (300dpi)
- Zebra ZSB 4" Printer
- Dymo LabelWriter 4XL
- Brother QL-1100
- Any 4" 300dpi+ thermal label printer
PDF A4:
- Any A4 inkjet or laser printer
In-line Despatch Note Labels
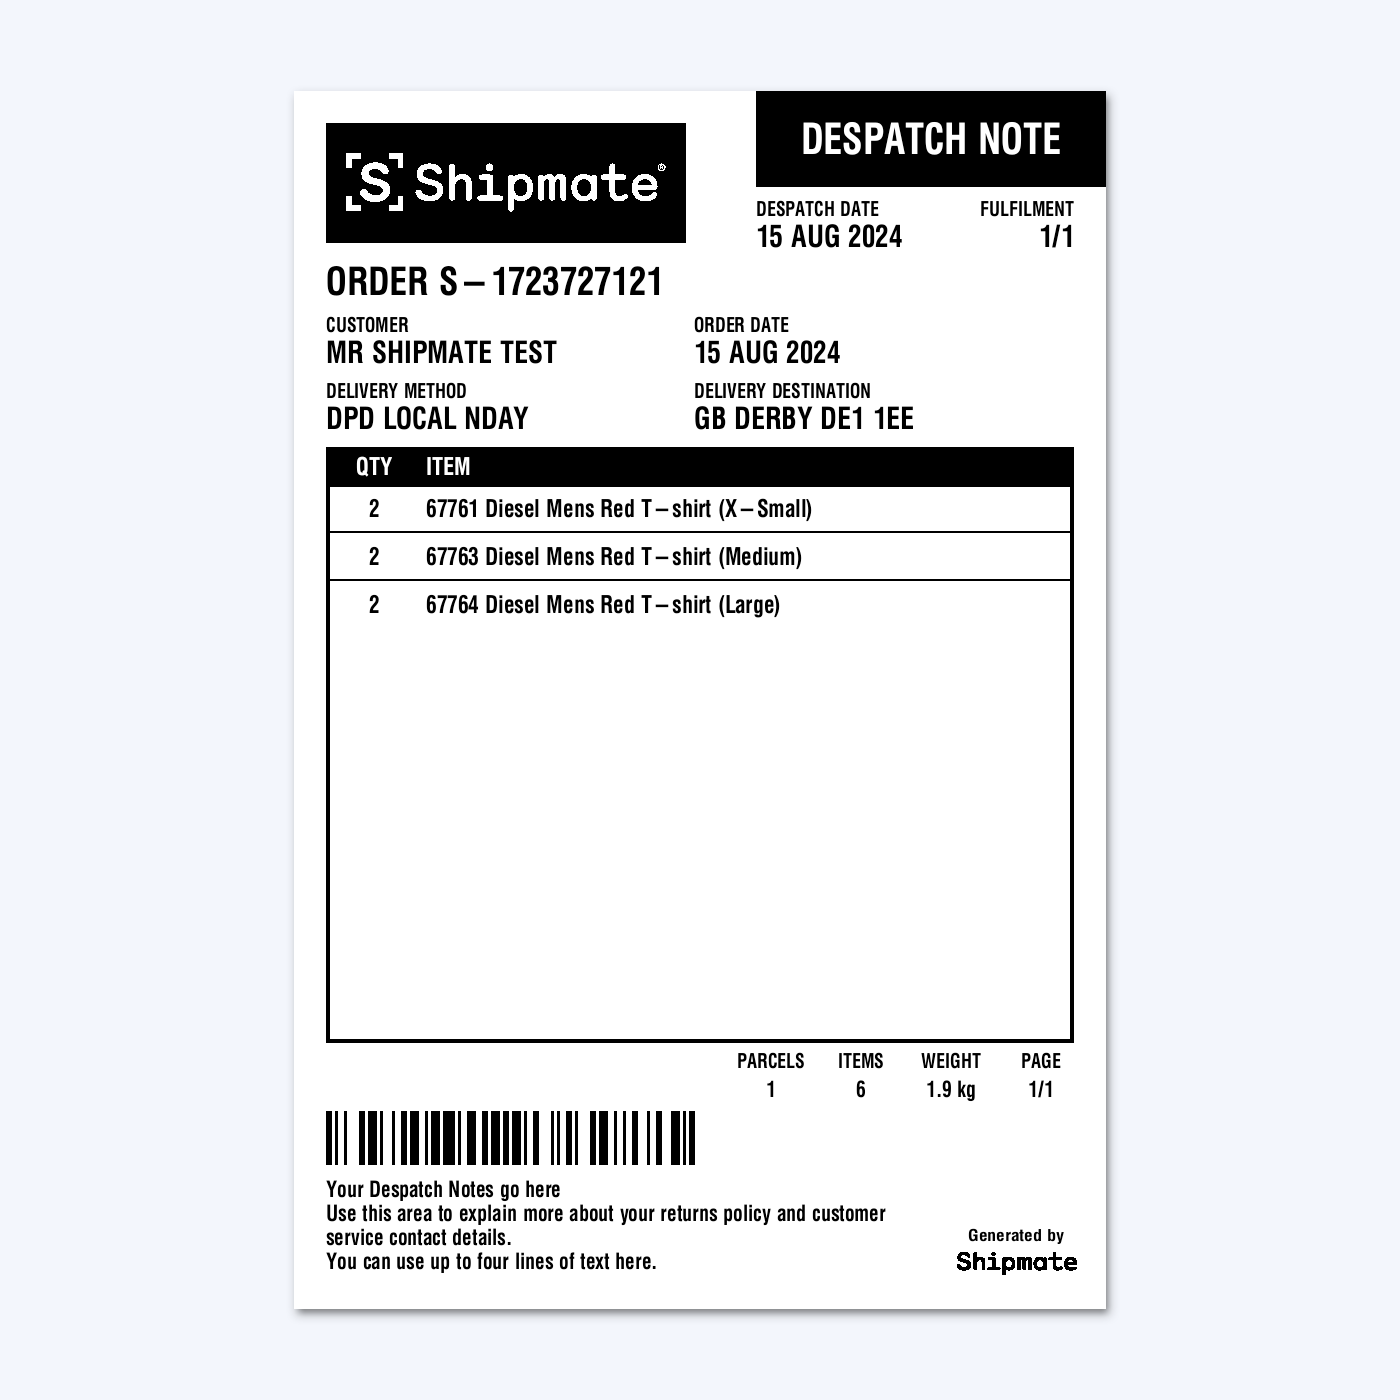
Shipmate can output an in-line Despatch Note label when printing your shipping labels.
Despatch Notes assist with the packing process, while providing useful information for your customers if you place them inside the parcel when packing orders.
In-line Despatch Notes can be configured to output before or after the Shipping Labels, according to your preference, and print on the same label printer as the shipping labels in a 4 x 6-inch format.
The barcode contains the order reference number and can be used to search for the Shipment using the search bar. You could also use this to find the order in other systems you use to manage orders.
The Despatch Note will use the logo and notes for the Brand the shipment corresponds to. You can upload your logo and configure the free text notes that will be applied to the bottom of the Despatch Note label such as returns information, contact details or other customer-facing messages in Brands.
You can enable In-line Despatch Notes in Account Settings.
S16 Integrated Labels
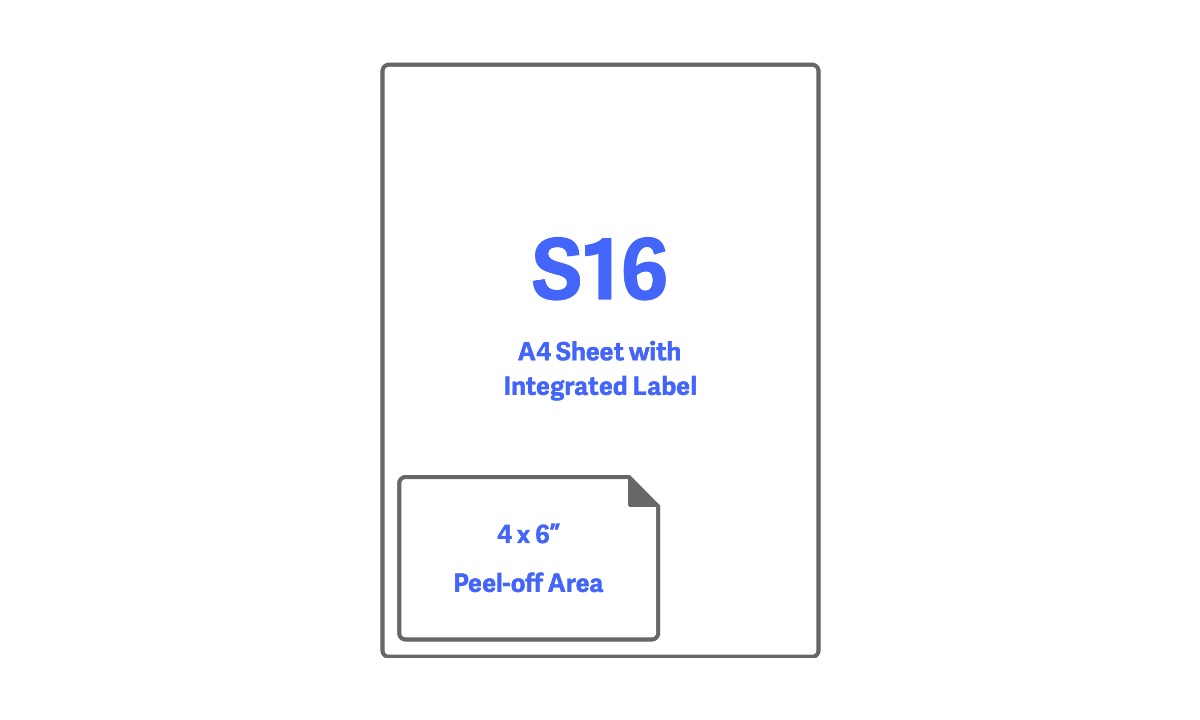
When using regular A4 printers, the S16 paper format is ideal as it contains a 4 x 6" peel-off label as part of an A4 sheet of paper.
Shipmate can output to S16 in three ways:
- Integrated Despatch Note - Shipmate adds a customer-friendly Despatch Note to the rest of the page to place inside the parcel
- Integrated Picking List - Shipmate adds picking details to assist your staff with the despatch process
- Label Only - Just the label is printed and the rest of the page is blank - use this to overprint with your own despatch note documents
Integrated Despatch Notes
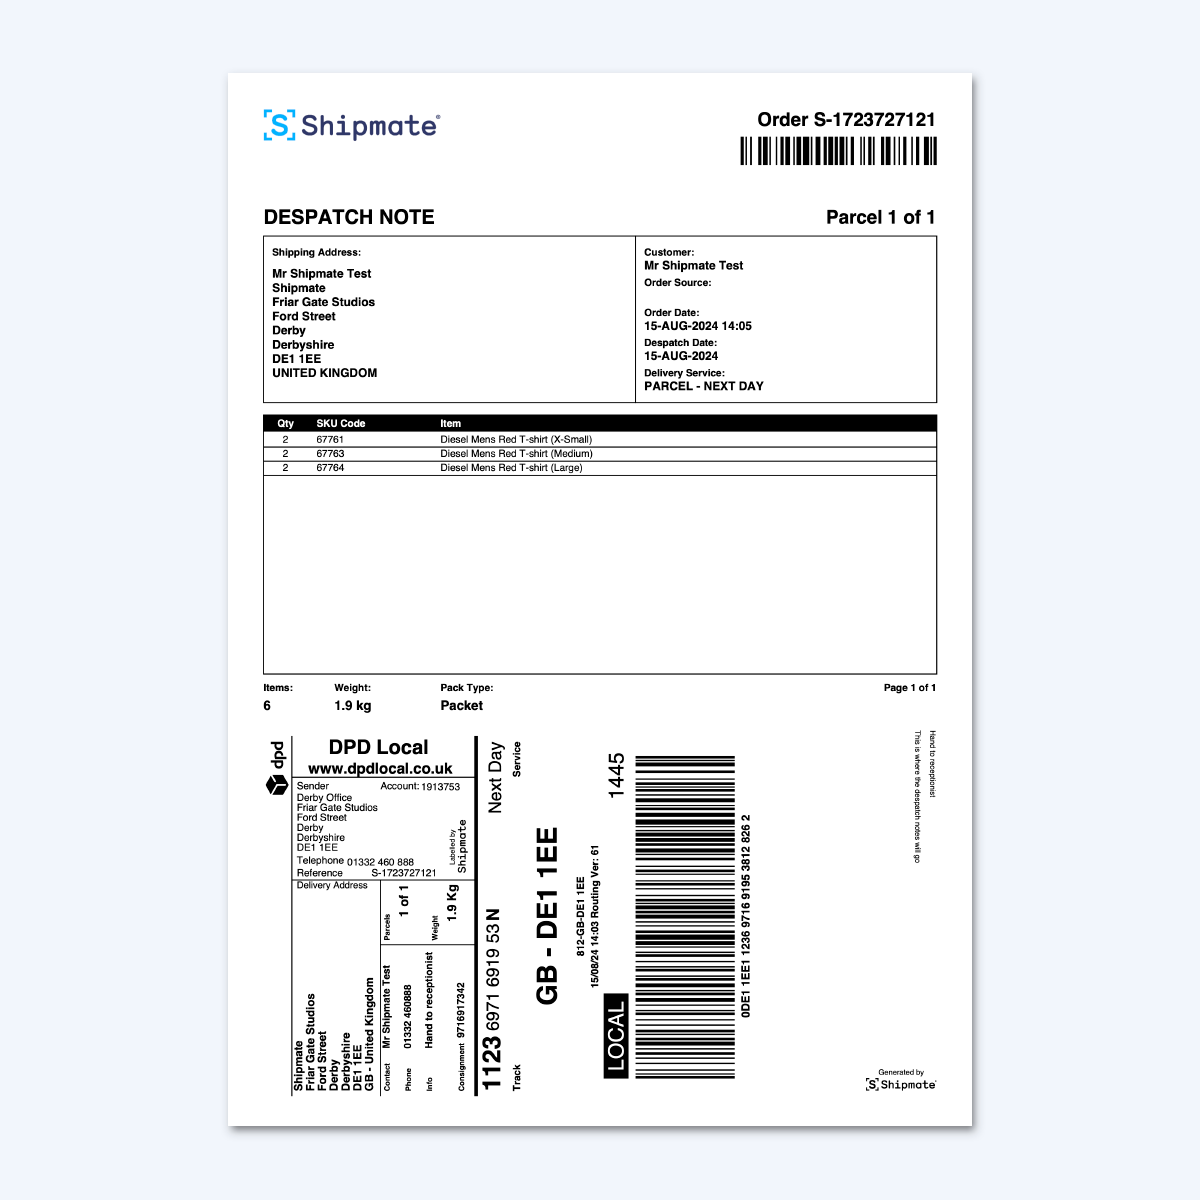
Using PDF output, you are able to print labels onto an integrated document also containing a Despatch Note you can include inside the parcel for your customer.
The Despatch Note includes your logo, the Order Reference along with a barcode for that Order Reference, the customer's address, a synopsis of the order and a list of items inside the parcel, if using the SKU Inventory.
The Despatch Note will use the logo and notes for the Brand the shipment corresponds to. You can upload your logo and configure the free text notes that will be applied to the bottom of the Despatch Note label such as returns information, contact details or other customer-facing messages in Brands.
To use Despatch Notes, from the Desktop Printer App, choose PDF output, then select the S16 Integrated Despatch Note PDF Template.
Integrated Picking Lists
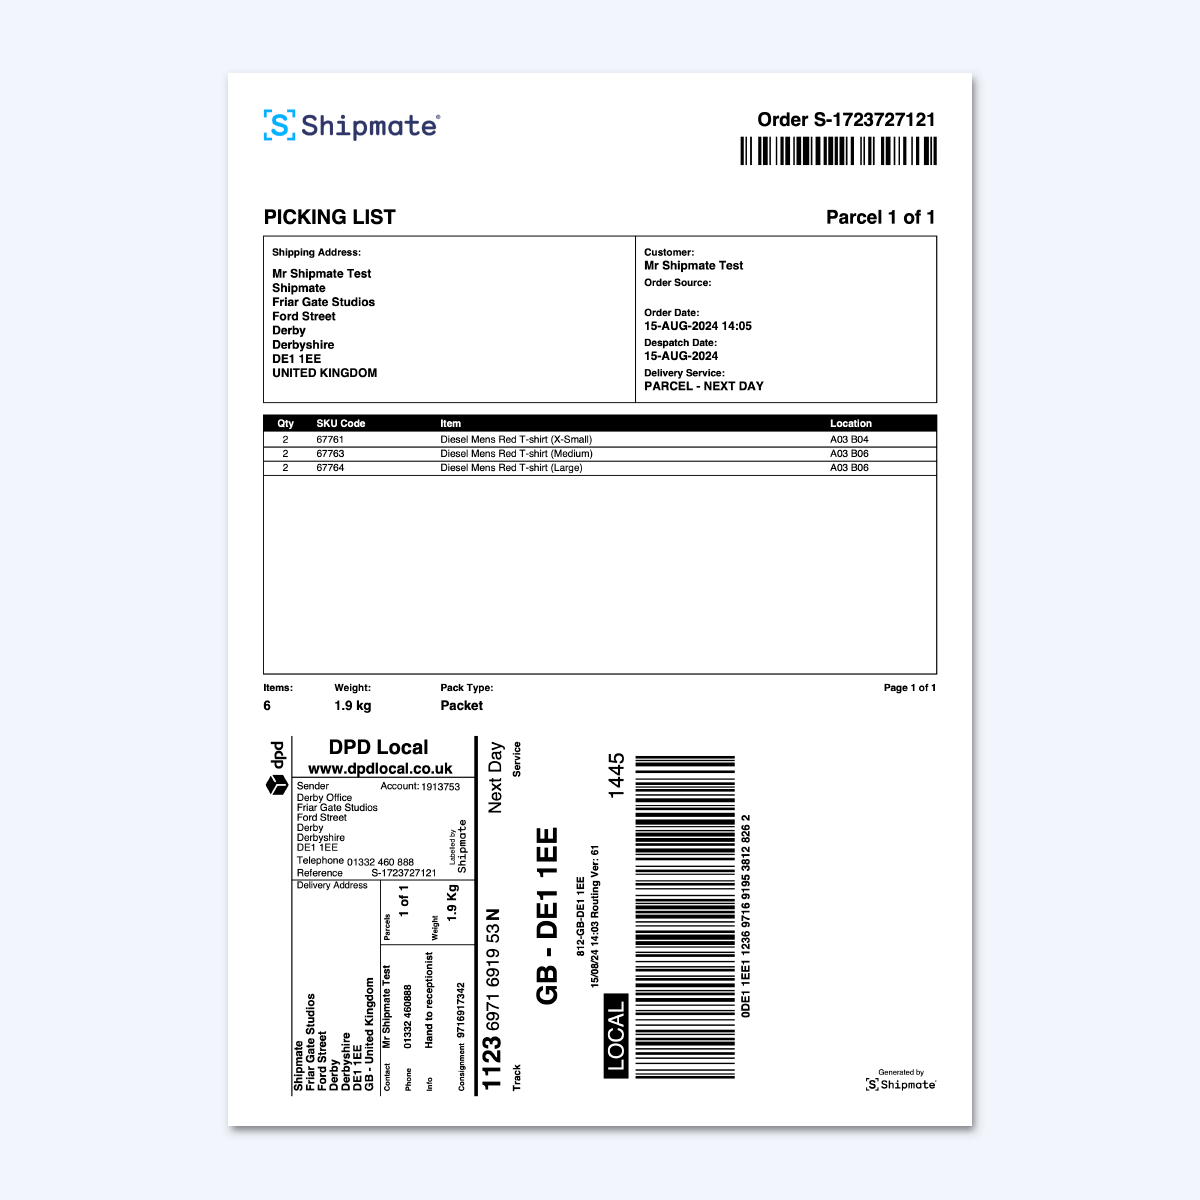
Using PDF output, you are able to print labels onto an integrated document also containing a Picking List your despatch operatives may use to simplify the pick and pack process.
The Picking List includes your logo, the Order Reference along with a barcode for that Order Reference, the customer's address, a synopsis of the order and a list of items inside the parcel, each with their picking locations if using the SKU Inventory.
The Picking List will use the logo for the Brand the shipment corresponds to. You can upload your logo in Brands.
To use Integrated Picking Lists, from the Desktop Printer App, choose PDF output, then select the S16 Integrated Picking List PDF Template.
Shipments
Sending Shipments
Shipments may be created directly from the Shipmate web portal. This is ideal for processing ad-hoc deliveries, or in situations where volume is low and a direct link to another system is not required.
Using the Shipment form, you are able to send multi-parcel Shipments to both domestic and international destinations, with all the details necessary to ensure a successful delivery.
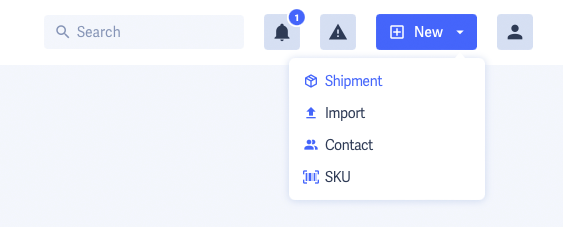
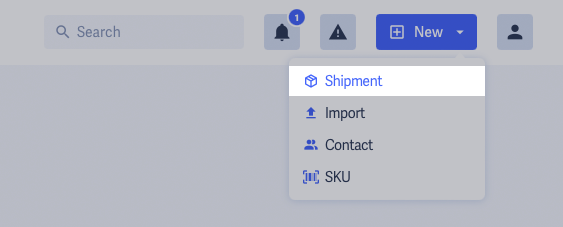
To create a new Shipment, click the ‘New’ menu from the top bar, then select Shipment. You can also click the New Shipment button on the Shipments list page, or press the N key while on the Shipments list page.
The Shipment form is split into three key sections:
- Collection & Recipient Details
- Parcels
- Parcel Contents
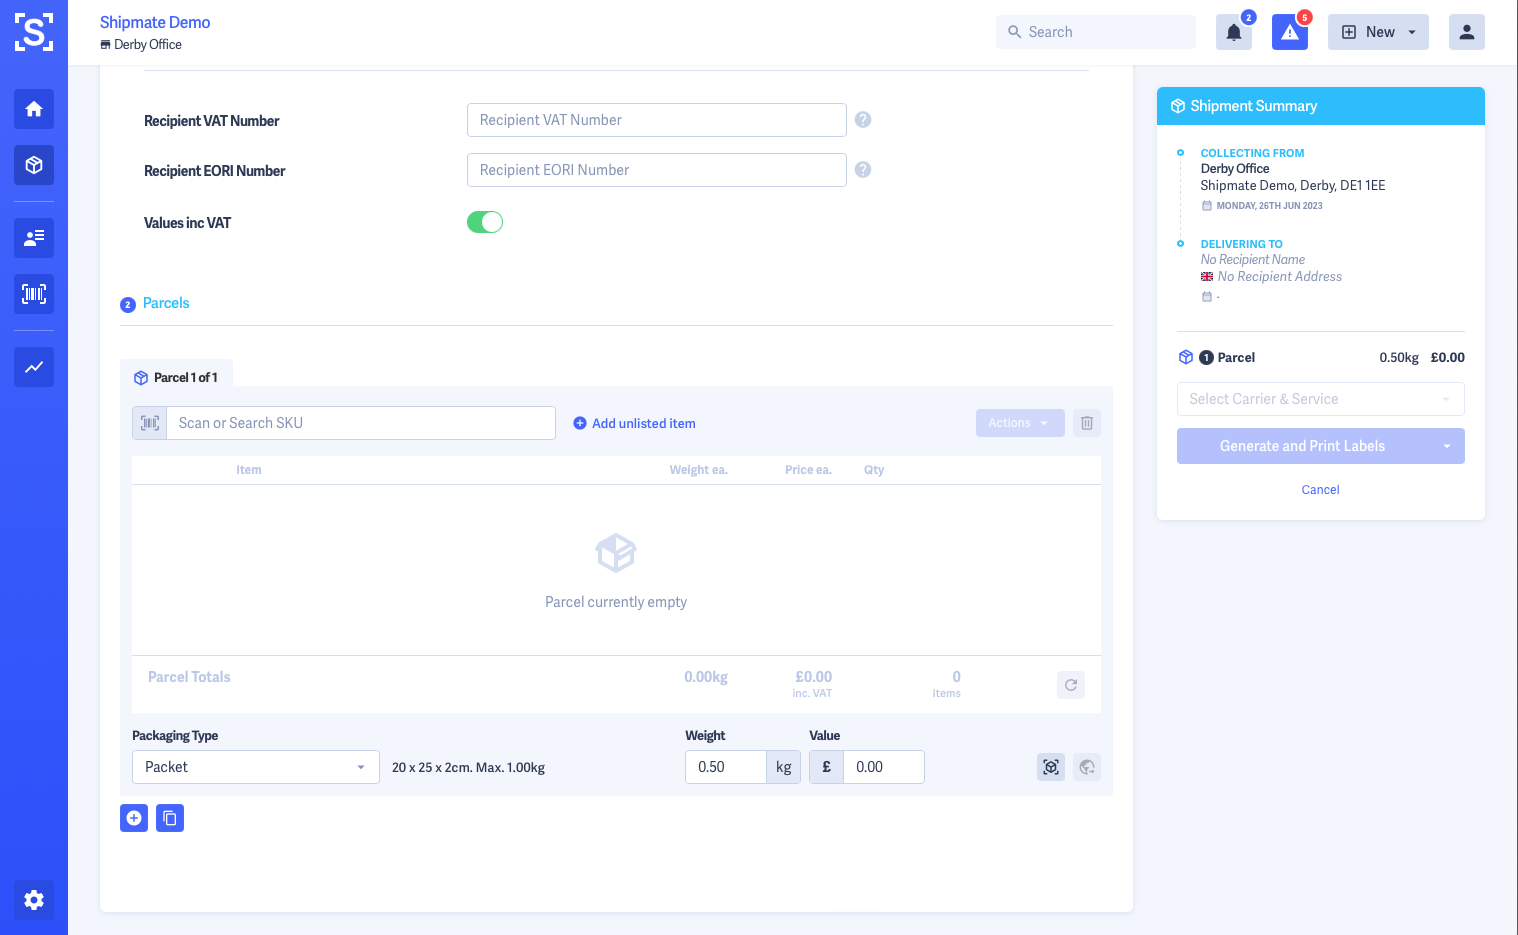
Collection & Recipient Details
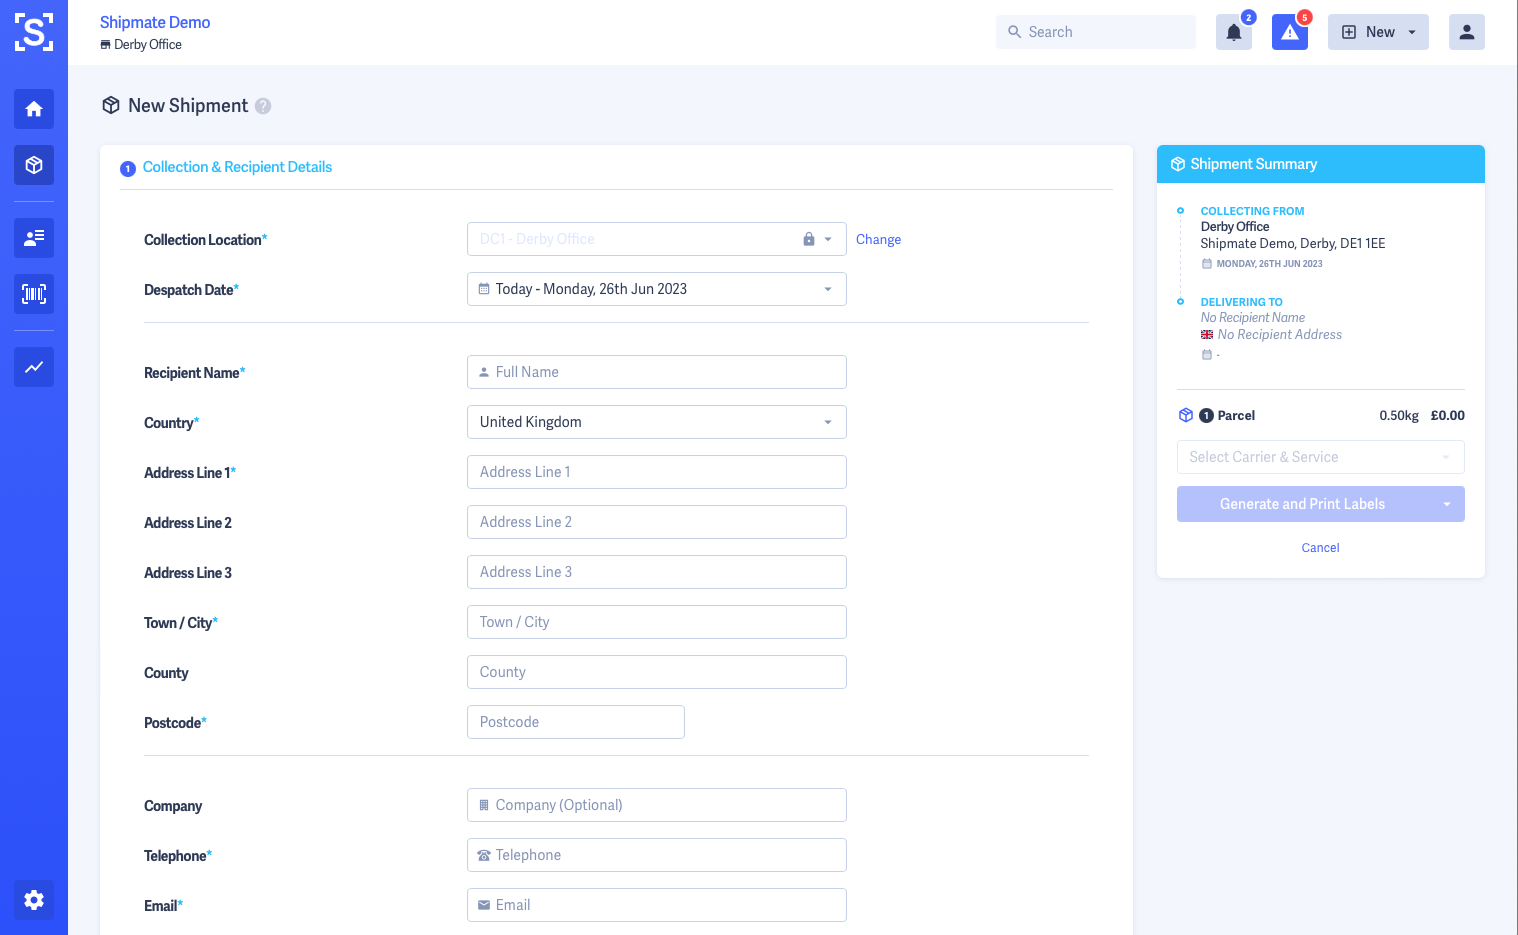
In this section you can supply details about how you are despatching this Shipment, together with all recipient details needed to ensure a successful delivery.
If you have multiple Locations set up on your account, choose the Location you are sending this Shipment from. Your account's default Location will be selected automatically.
Next, choose your Despatch Date. This will be pre-selected to today's date.
You can then add your recipient's name, address and contact details. If you have Contacts saved in your Contacts Directory, you can simply start typing their name and they will be suggested in a drop-down menu to populate the rest of this section.
Otherwise, for UK addresses you can start typing the address, or enter the post code into the Address Line 1 input box, and Shipmate will carry out a lookup to help speed up your data entry. If you prefer to enter the address manually, or you are sending to a non-UK address, simply type out the address into the given input boxes.
Below the address entry area, you can provide additional contact information including a company name, telephone number and email address. When provided, these will be passed on to the carrier to assist with the delivery or, where available and activated, facilitate recipient notifications via email, SMS or app.
Finally you are able to provide an Order Reference and Delivery Instructions. The Order Reference can make finding this Shipment easier later on, and also acts as a useful reference for your recipient. The Delivery Instructions will inform the delivery driver how to complete the delivery successfully, or what to do if the recipient isn't available at the time of delivery.

Parcels
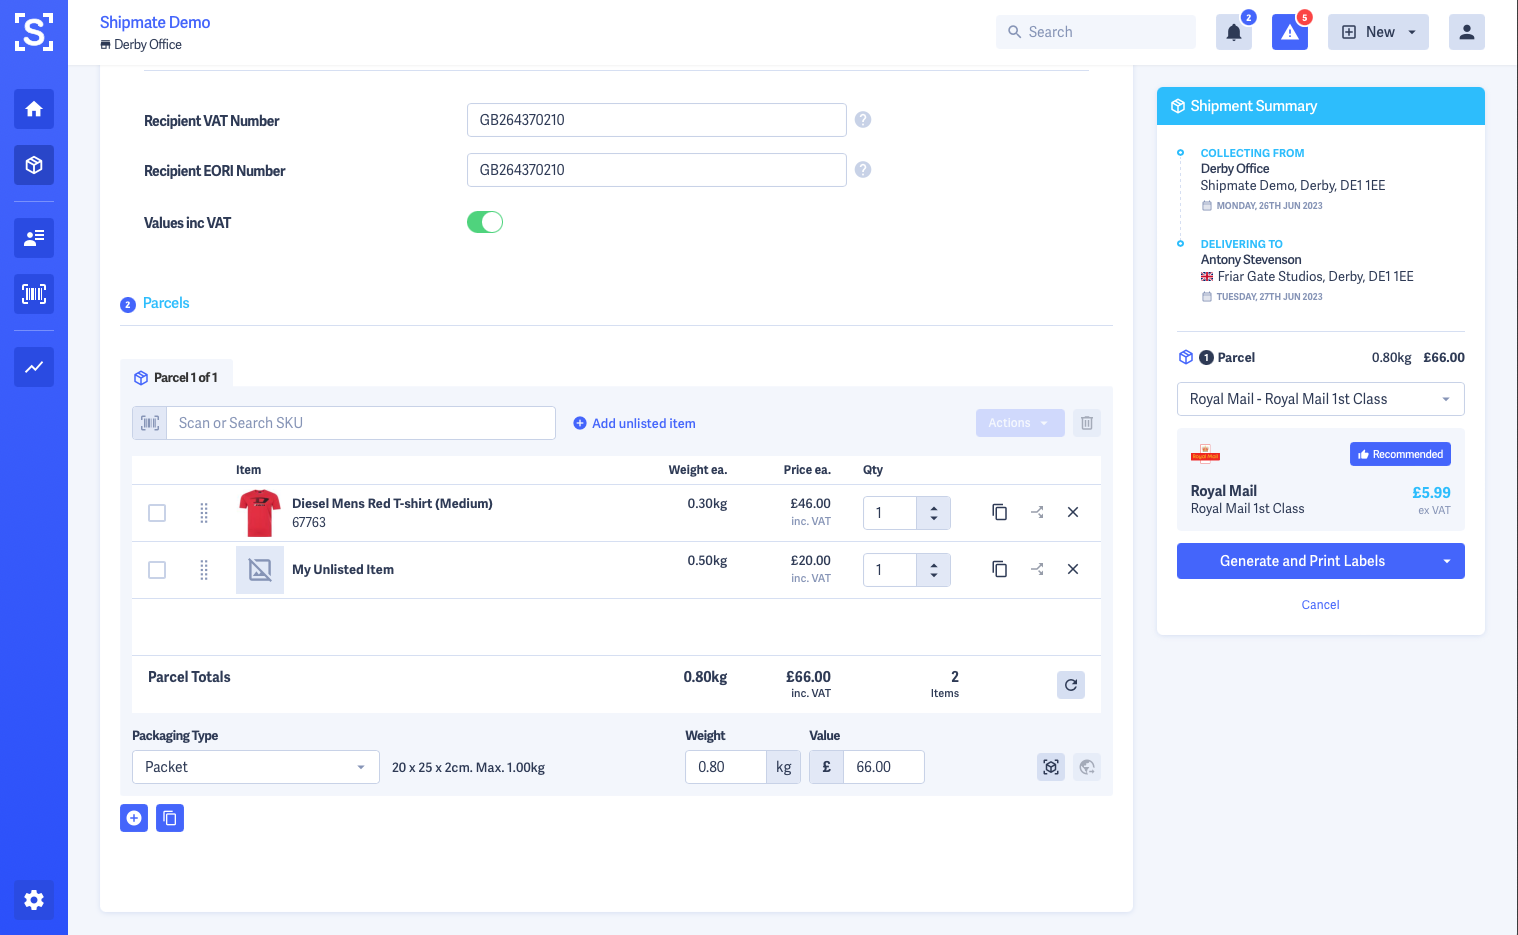
In this section you define the number and size of Parcels you are sending in your Shipment. If you have configured Packaging Types on your account, the initial Parcel will be set to your default Packaging Type, but you are able to change the Packaging, or override the dimensions and weight if your parcel is a different size or weight.
You can add as many Parcels as you require for your Shipment, either by adding a new Parcel, which will apply your default Packaging Type each time, or by using the Duplicate Parcel button, which will copy over details from the last Parcel in the list you have created so far.

Parcels - Adding SKUs
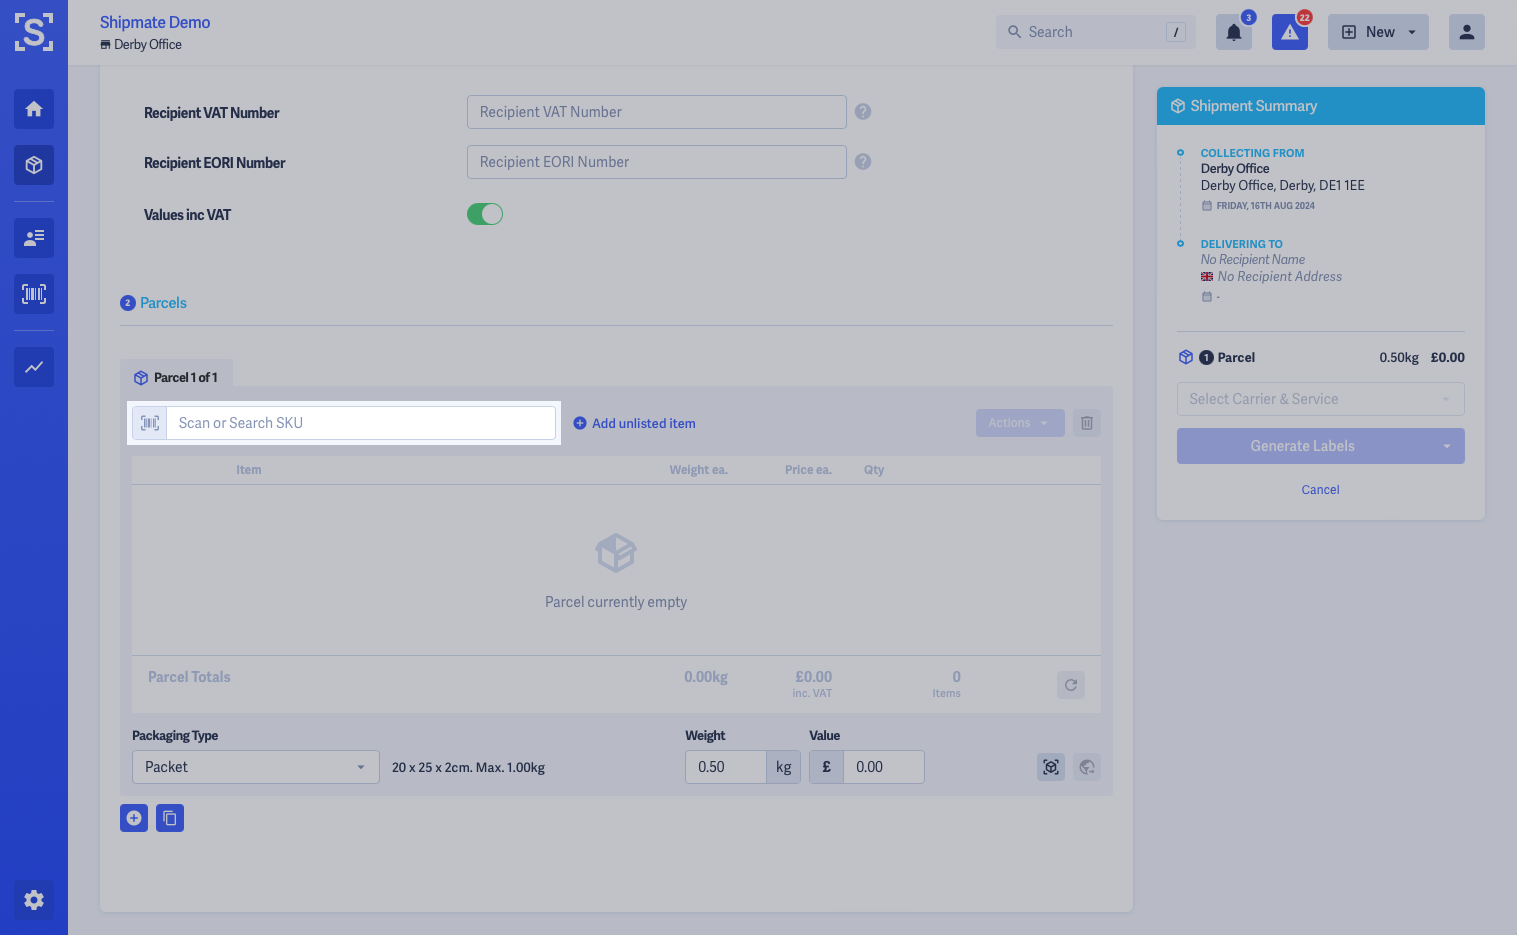
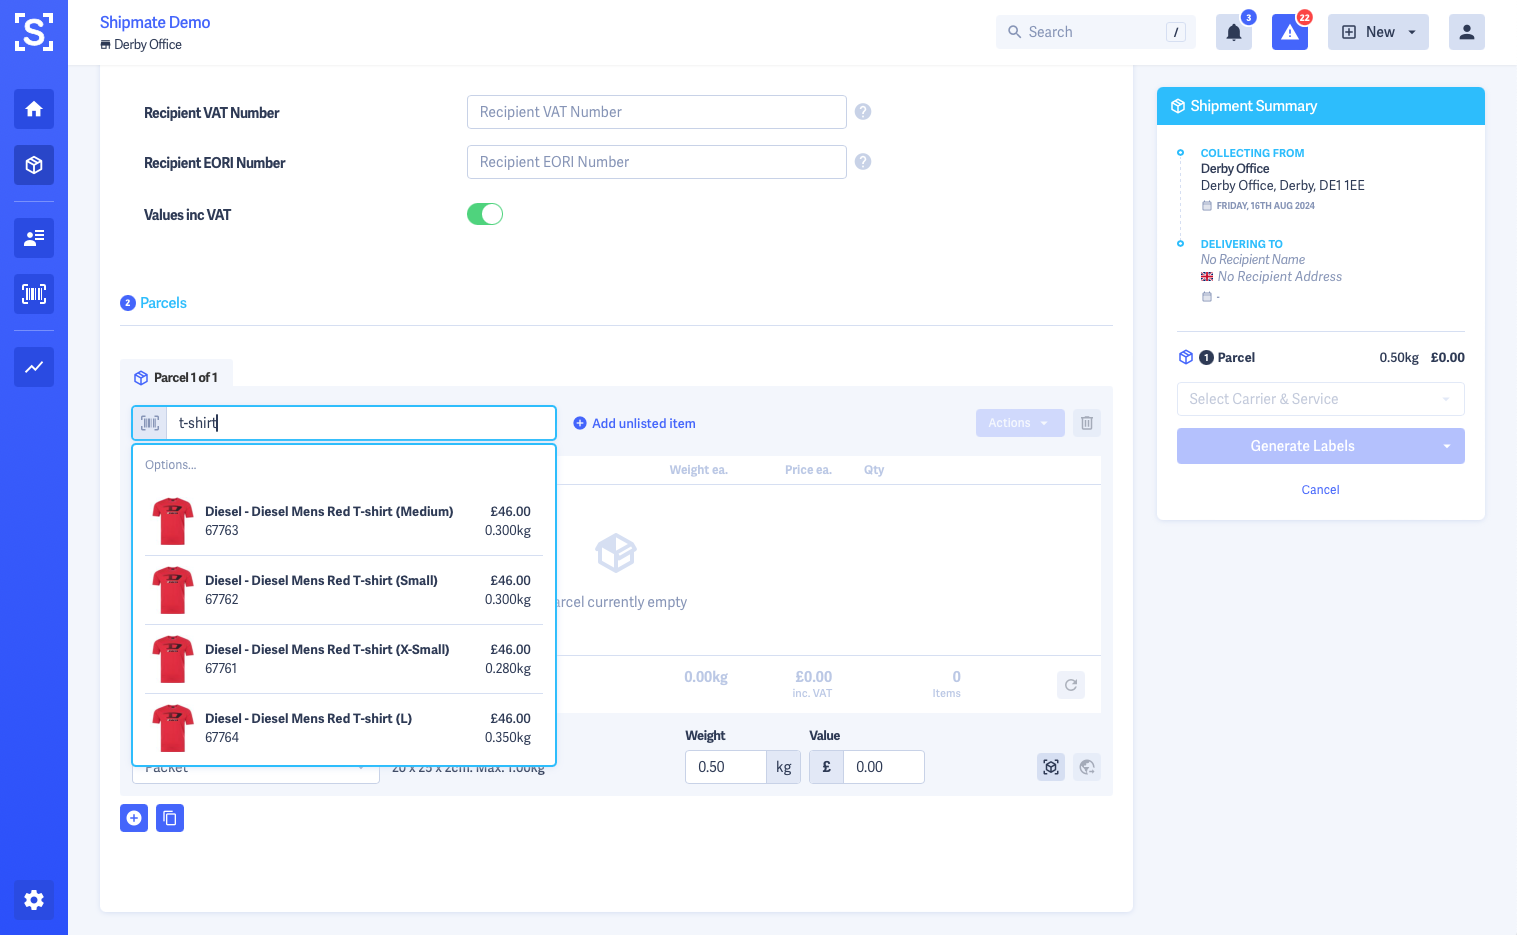
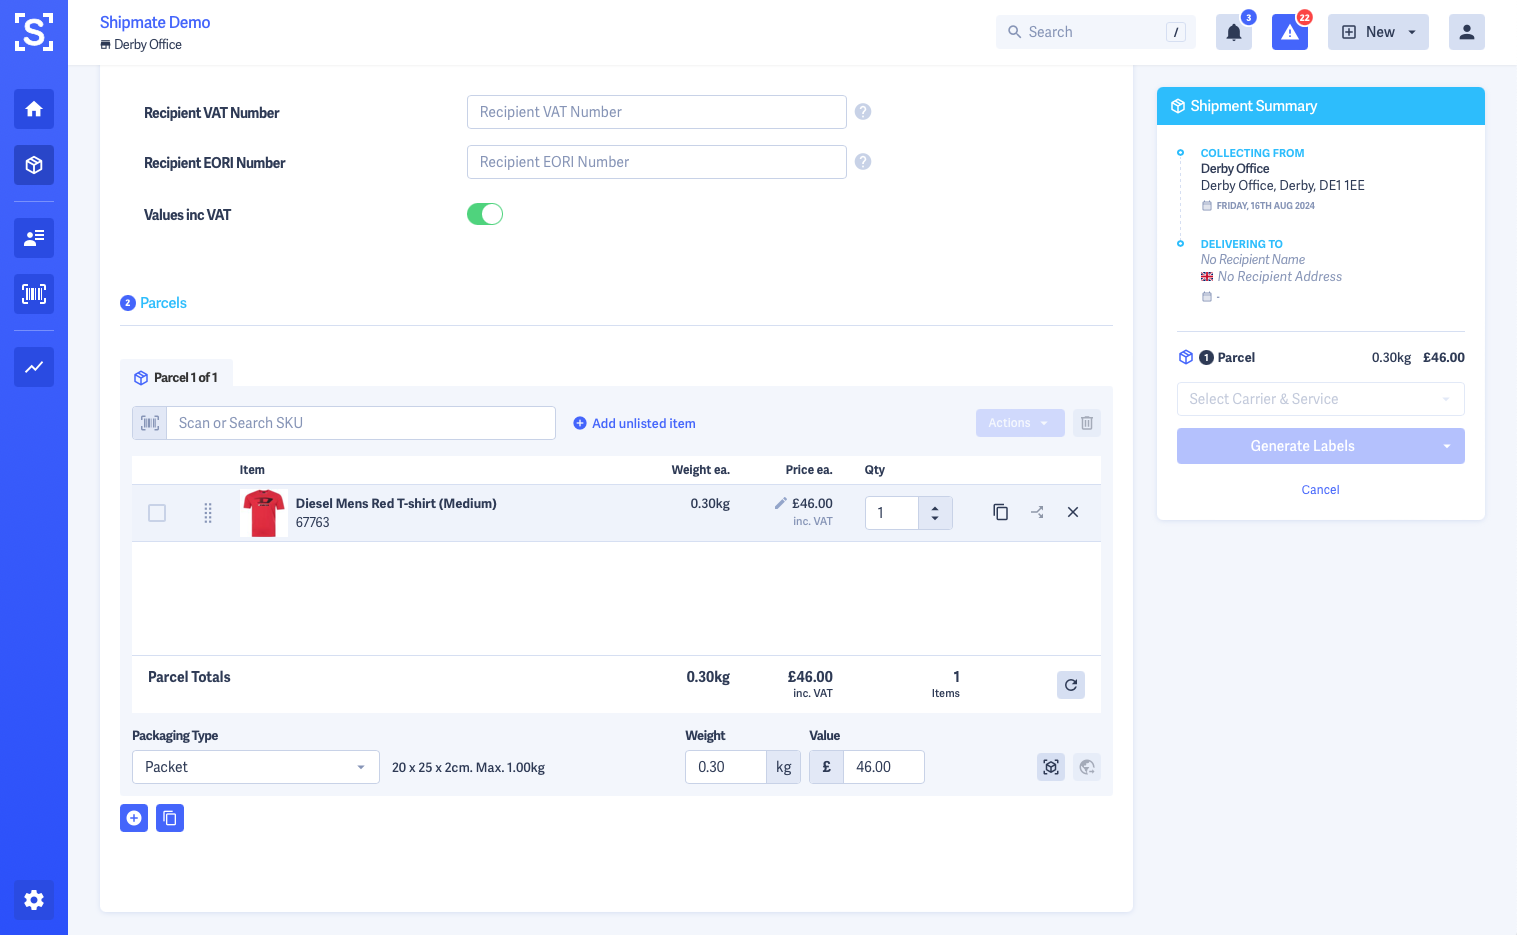
You can add SKUs to your parcels by using the SKU search facility, or scan in products using their barcode.
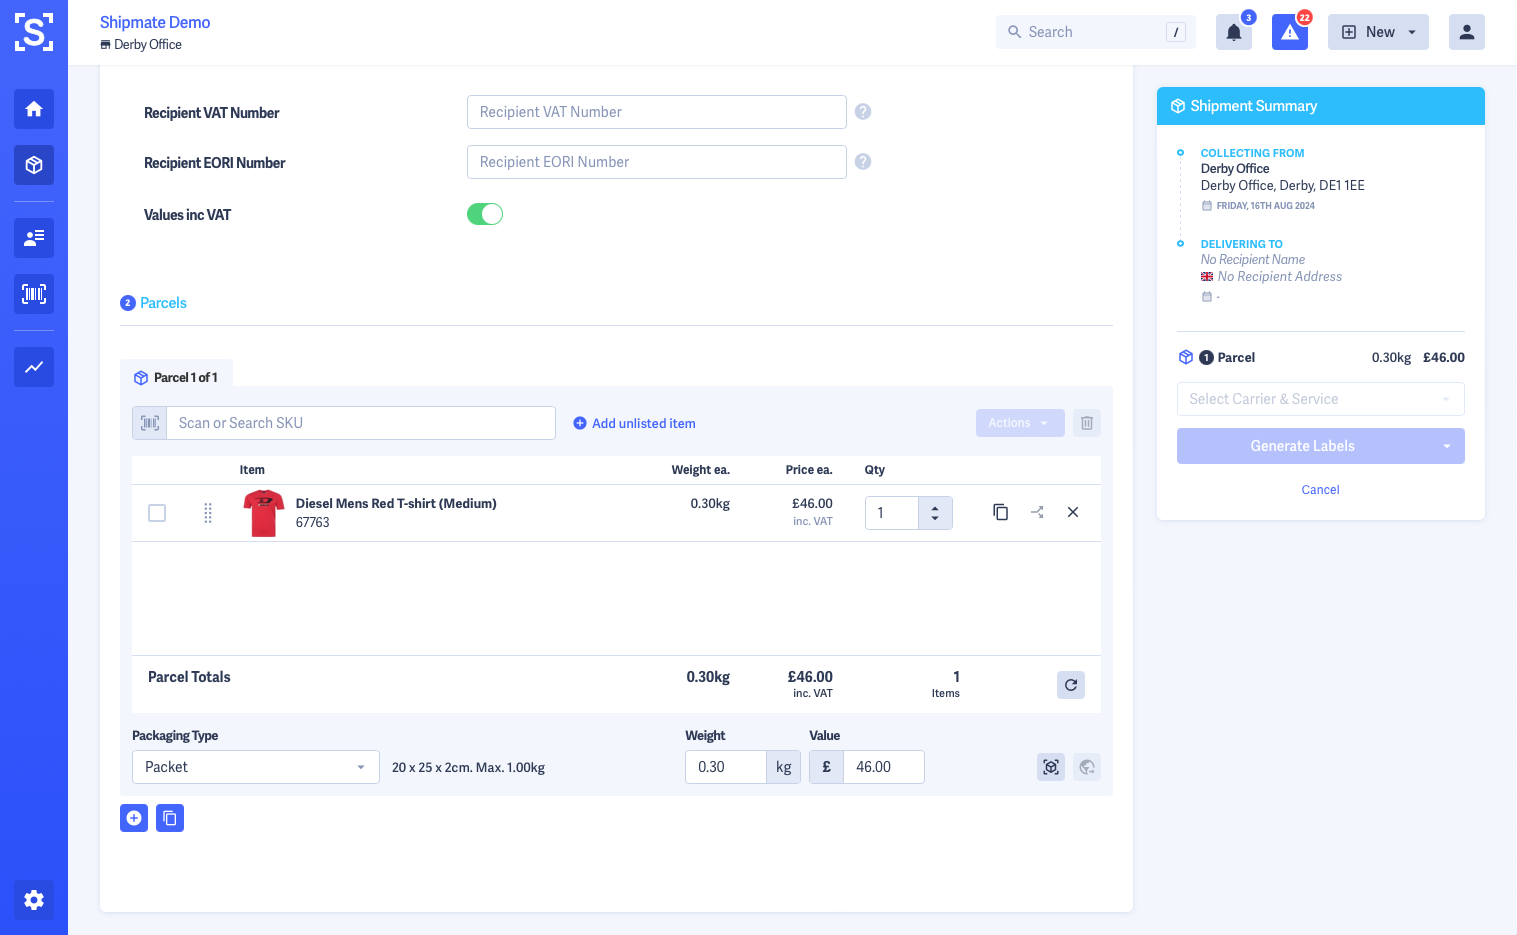
The parcel's weight and value will be automatically updated when you select the SKU. You can adjust SKU quantity, split items and drag them between parcels.
If you are shipping to an international destination, all corresponding SKU customs data will be automatically applied to the shipment and passed on to the carrier.
If you need to amend the value of the item you are sending, hover over the item and click the pencil icon next to the value of the item to amend it. This will only affect the current Shipment and does not update the value held in the SKU Inventory.

Parcels - Adding Unlisted Items
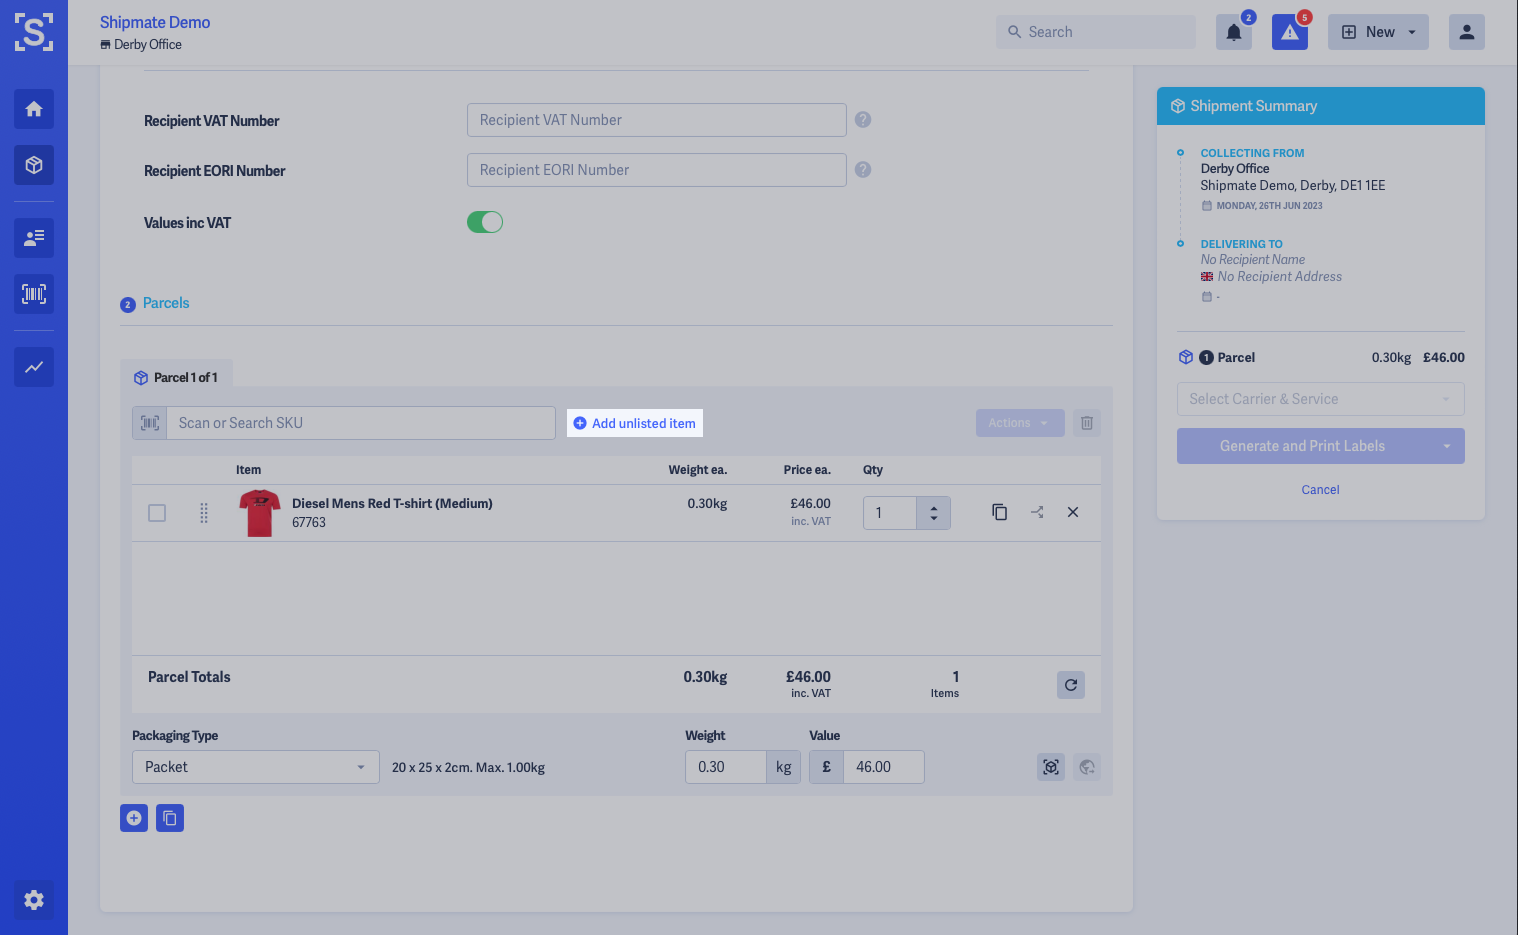
If you wish to add an item that is not in your SKU Inventory, you can add an Unlisted Item.
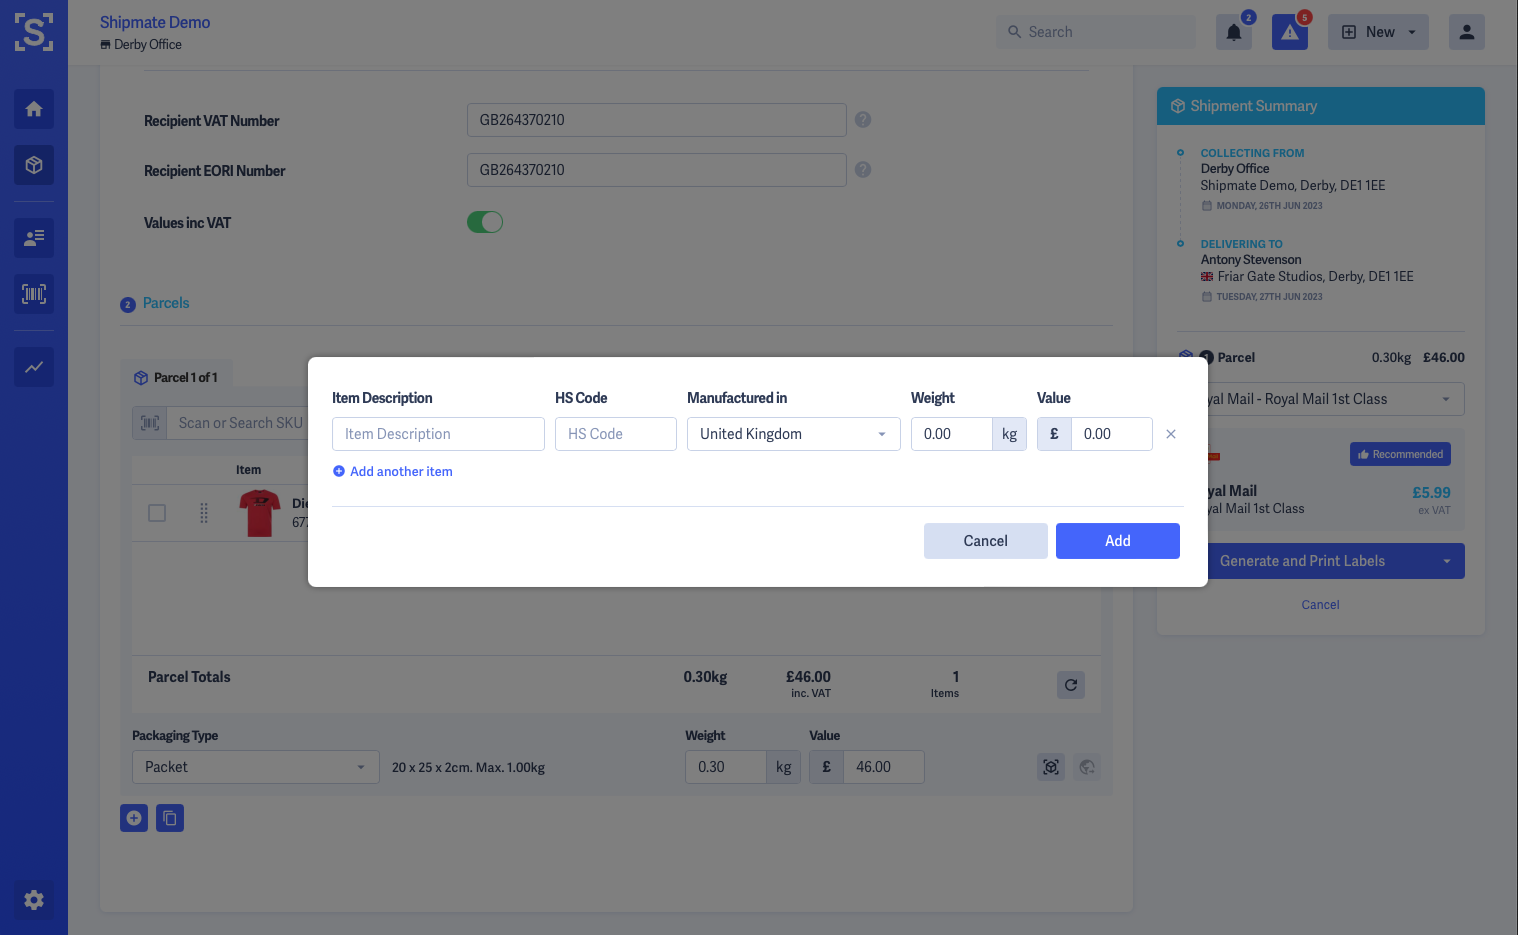
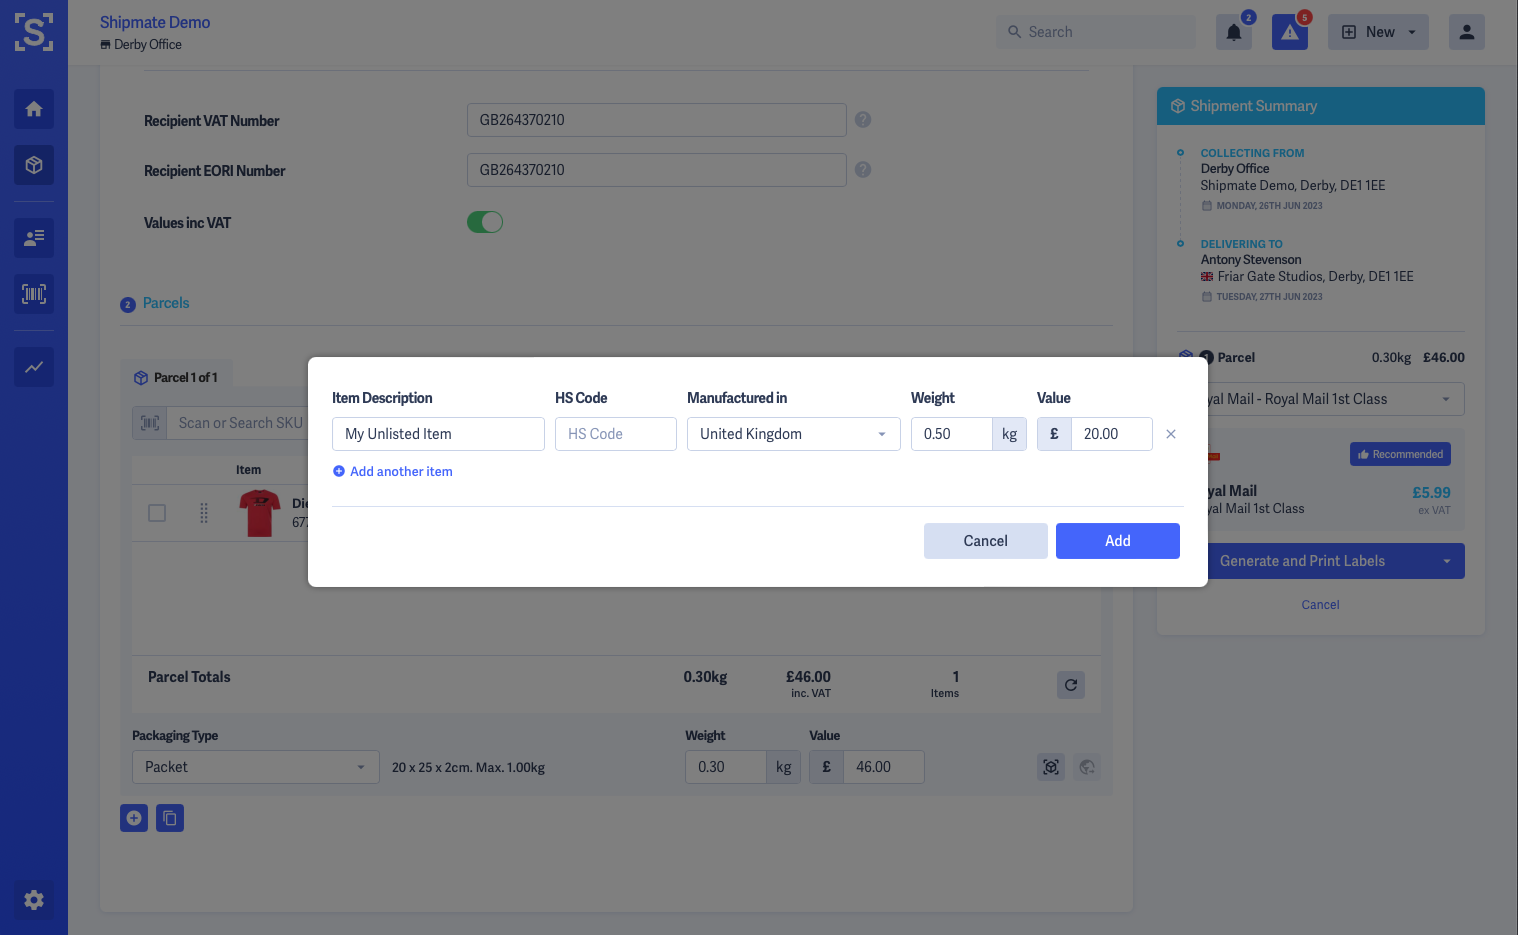
Click the Add unlisted item link next to the SKU search box. A pop-up will appear allowing you to enter the details manually.
If you are shipping to an international destination, you will need to supply an HS Code and Country of Origin.
Once the unlisted item has been added to a parcel, it behaves in the same way other items do - you can amend the quantity, split it and move it between parcels.

Selecting a Carrier & Service
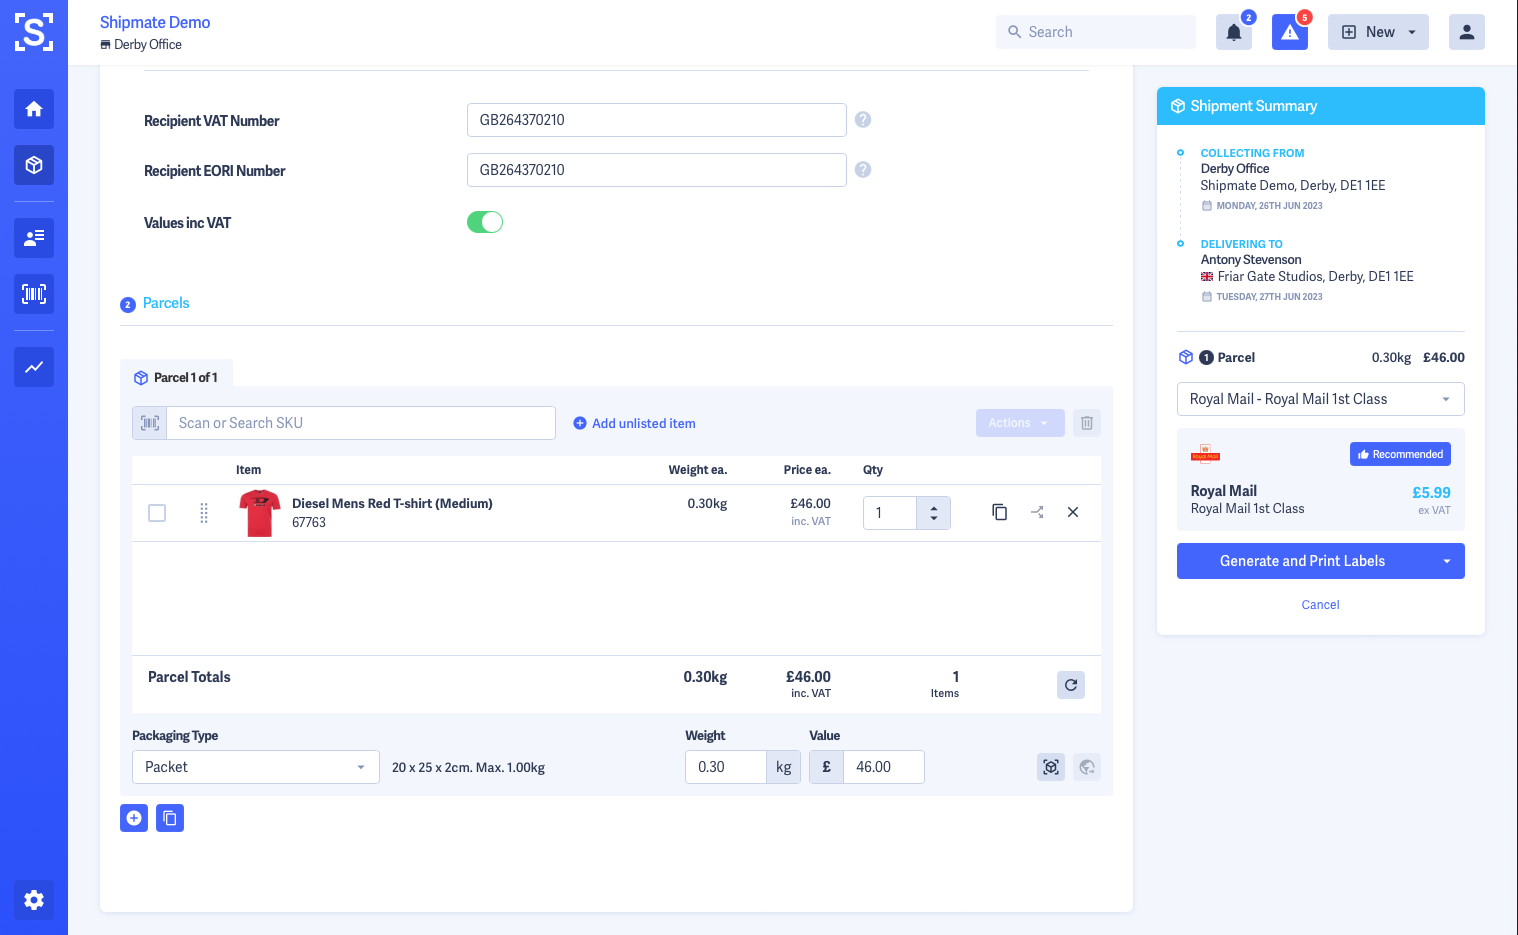
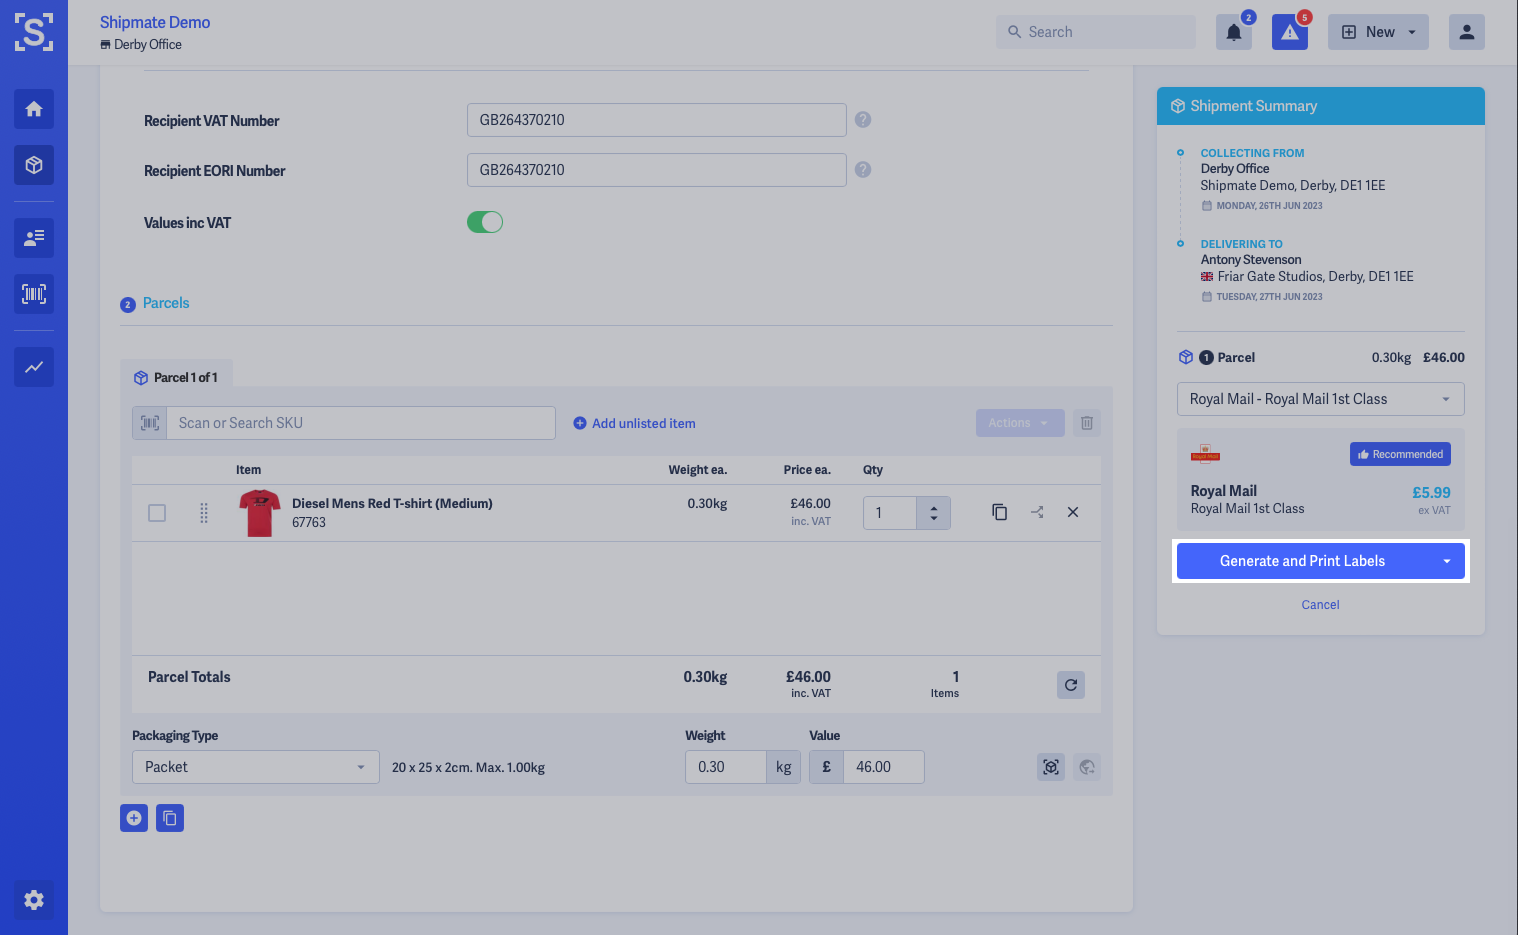
As you supply details about your Shipment, Shipmate will automatically check through your active Routing Rules and Delivery Service Conditions and select the best Carrier and Delivery Service for your Shipment, with the cheapest matching service highlighted as being the Recommended Service for this Shipment.
The most suitable delivery service will be shown on the right-hand side of the screen, alongside a quote for using the service, based on costs applied in Settings.
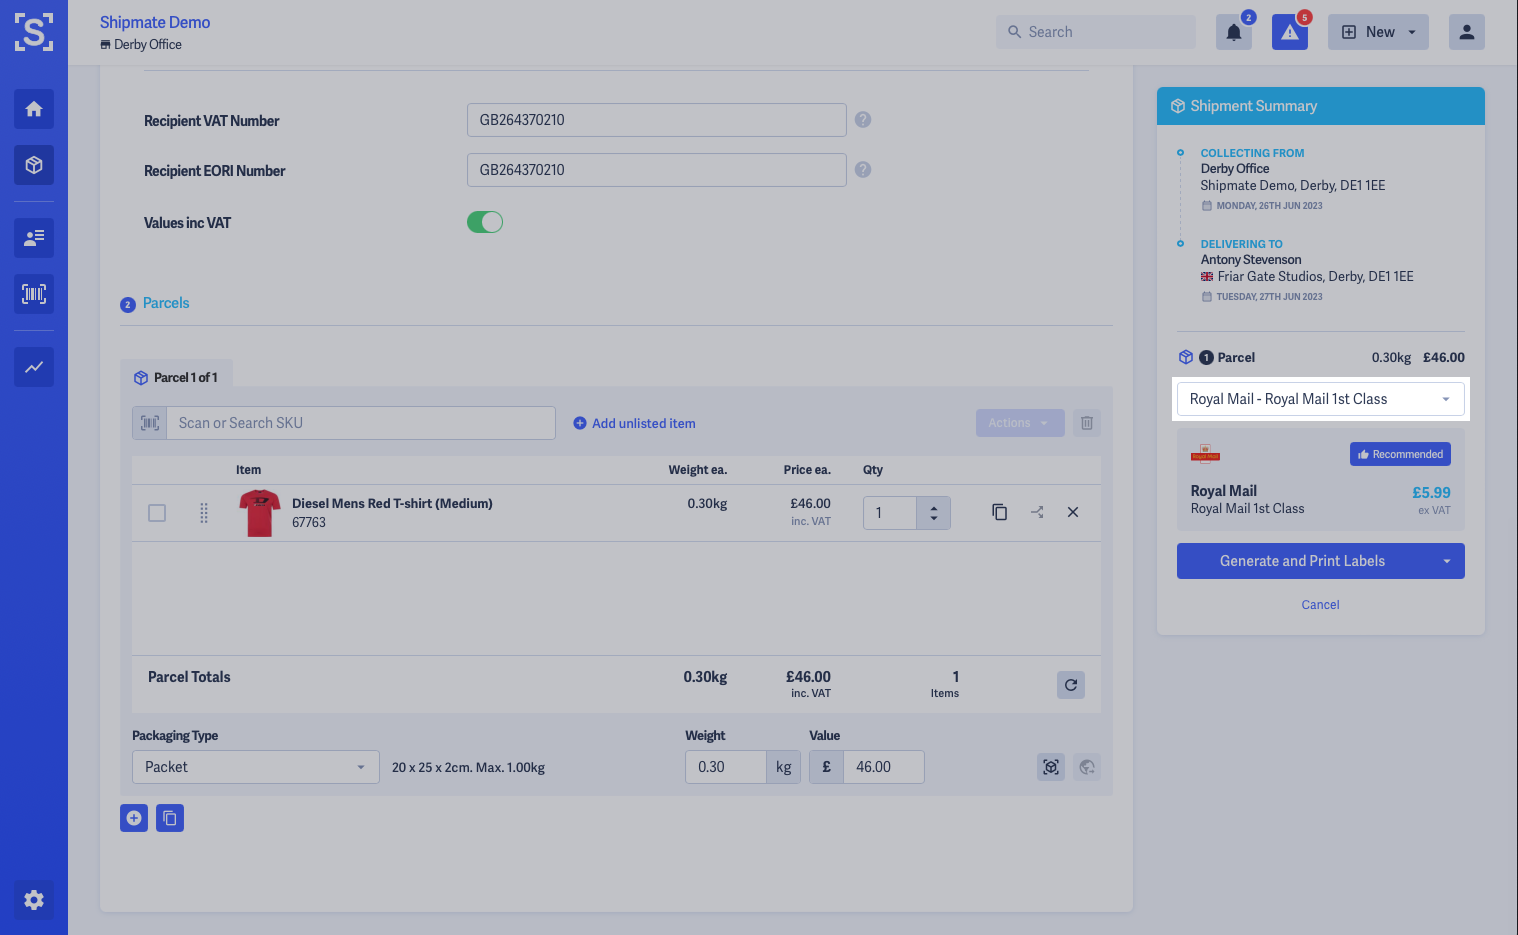
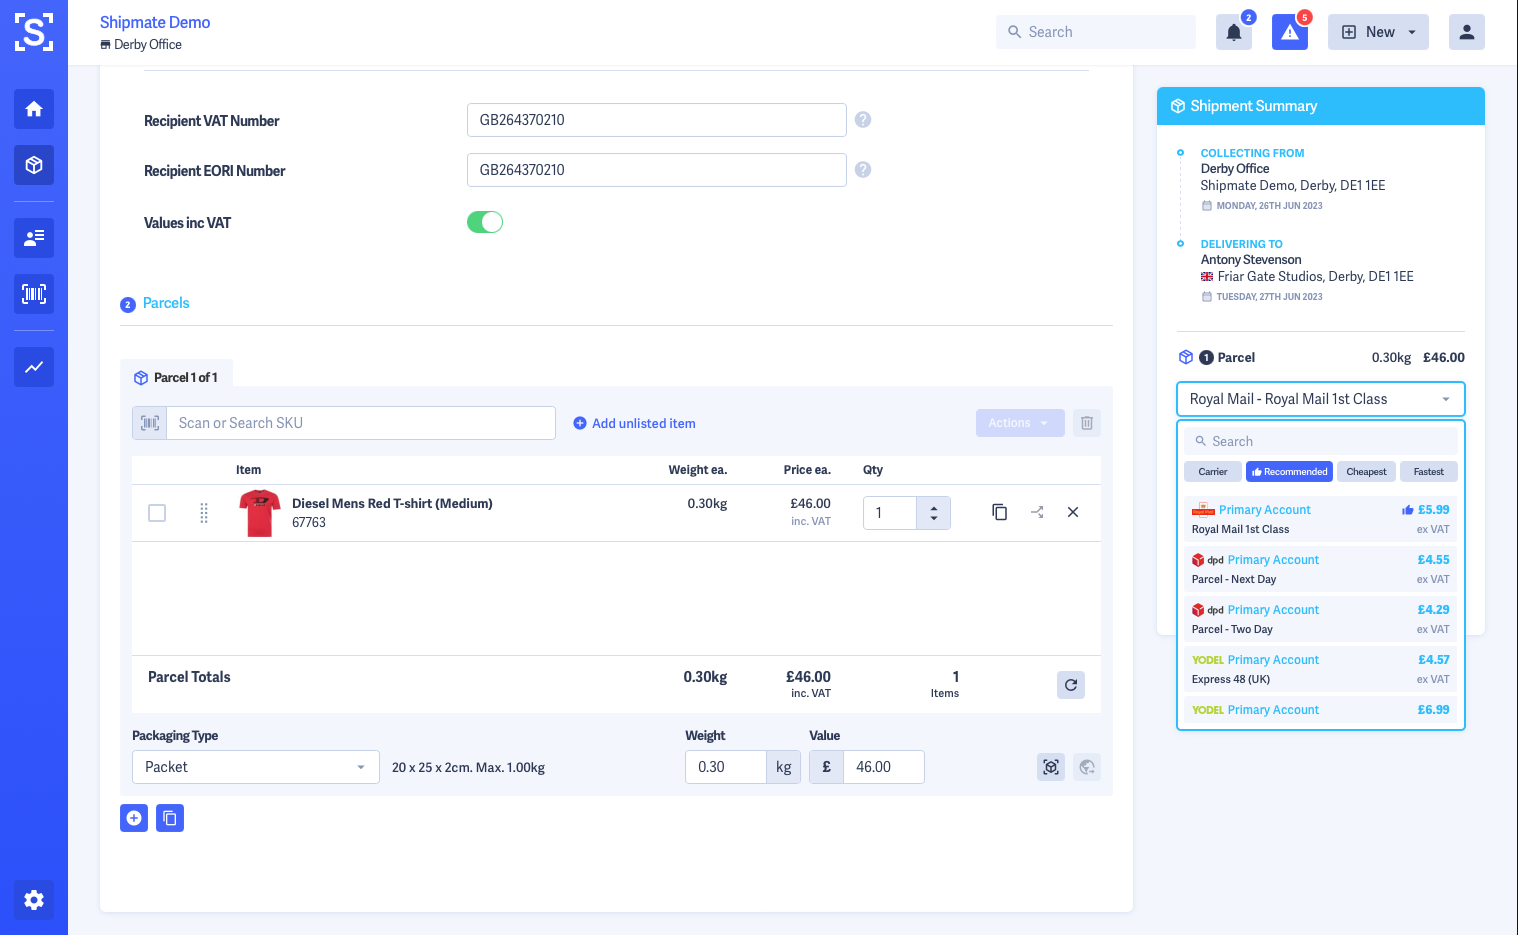
If you wish to change the service, simply click the Delivery Service drop-down menu.
All Delivery Services matching the criteria of your Shipment will be available to choose from by selecting the Carrier and Service drop-down menus.
Simply choose the service you wish to use, then click Generate Labels.
If you have the Desktop Printer App running, there will also be a Generate and Print Labels option. This will automatically print the labels upon creation.

Generating Labels
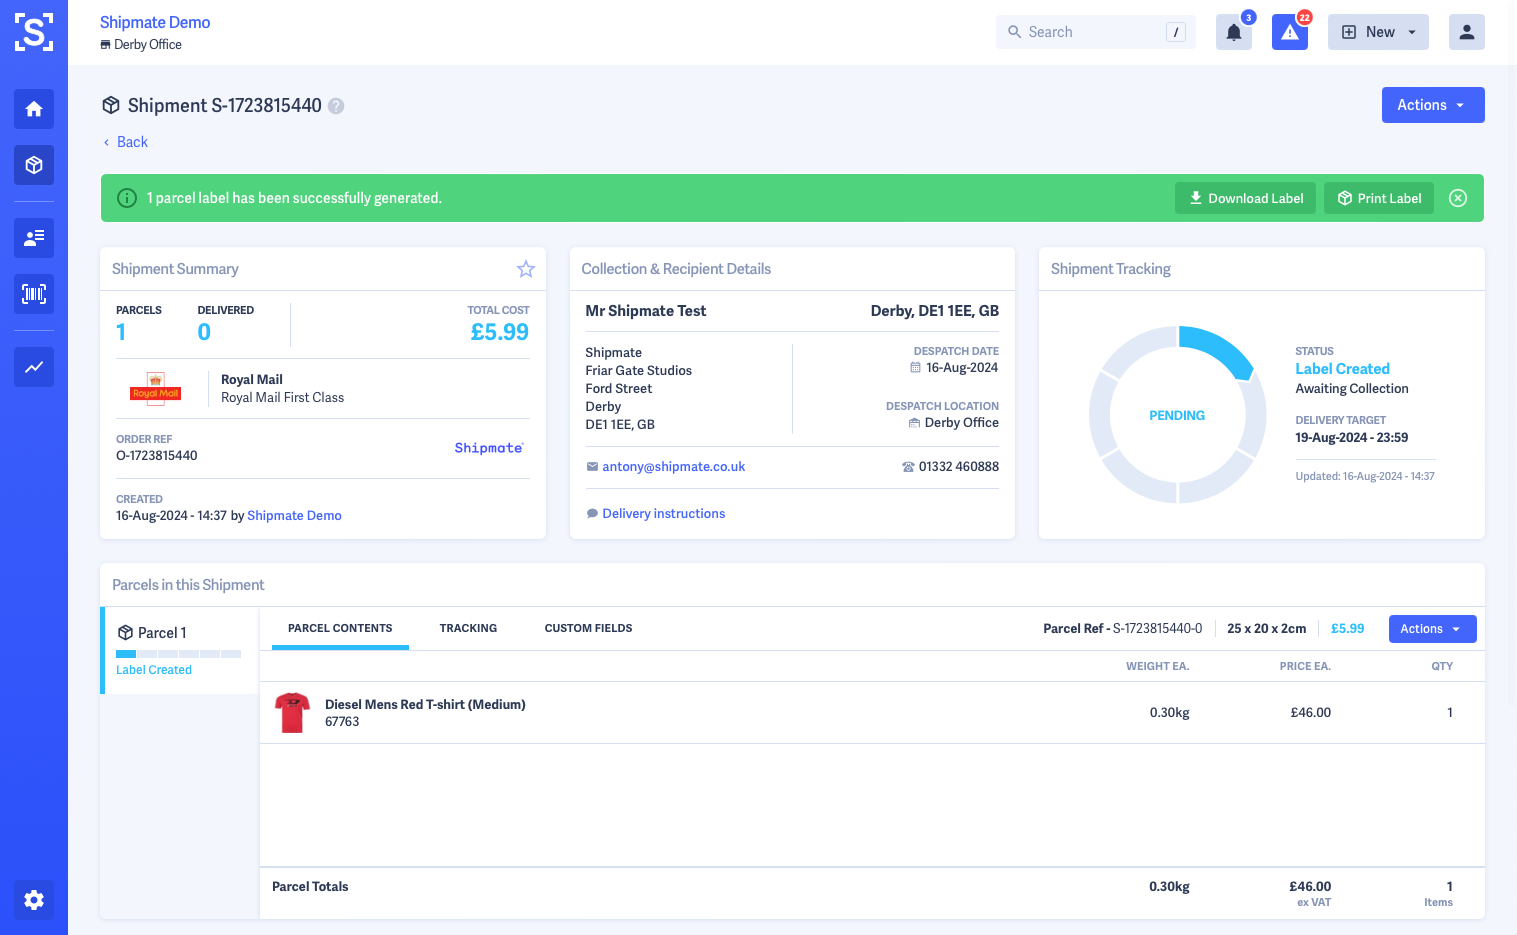
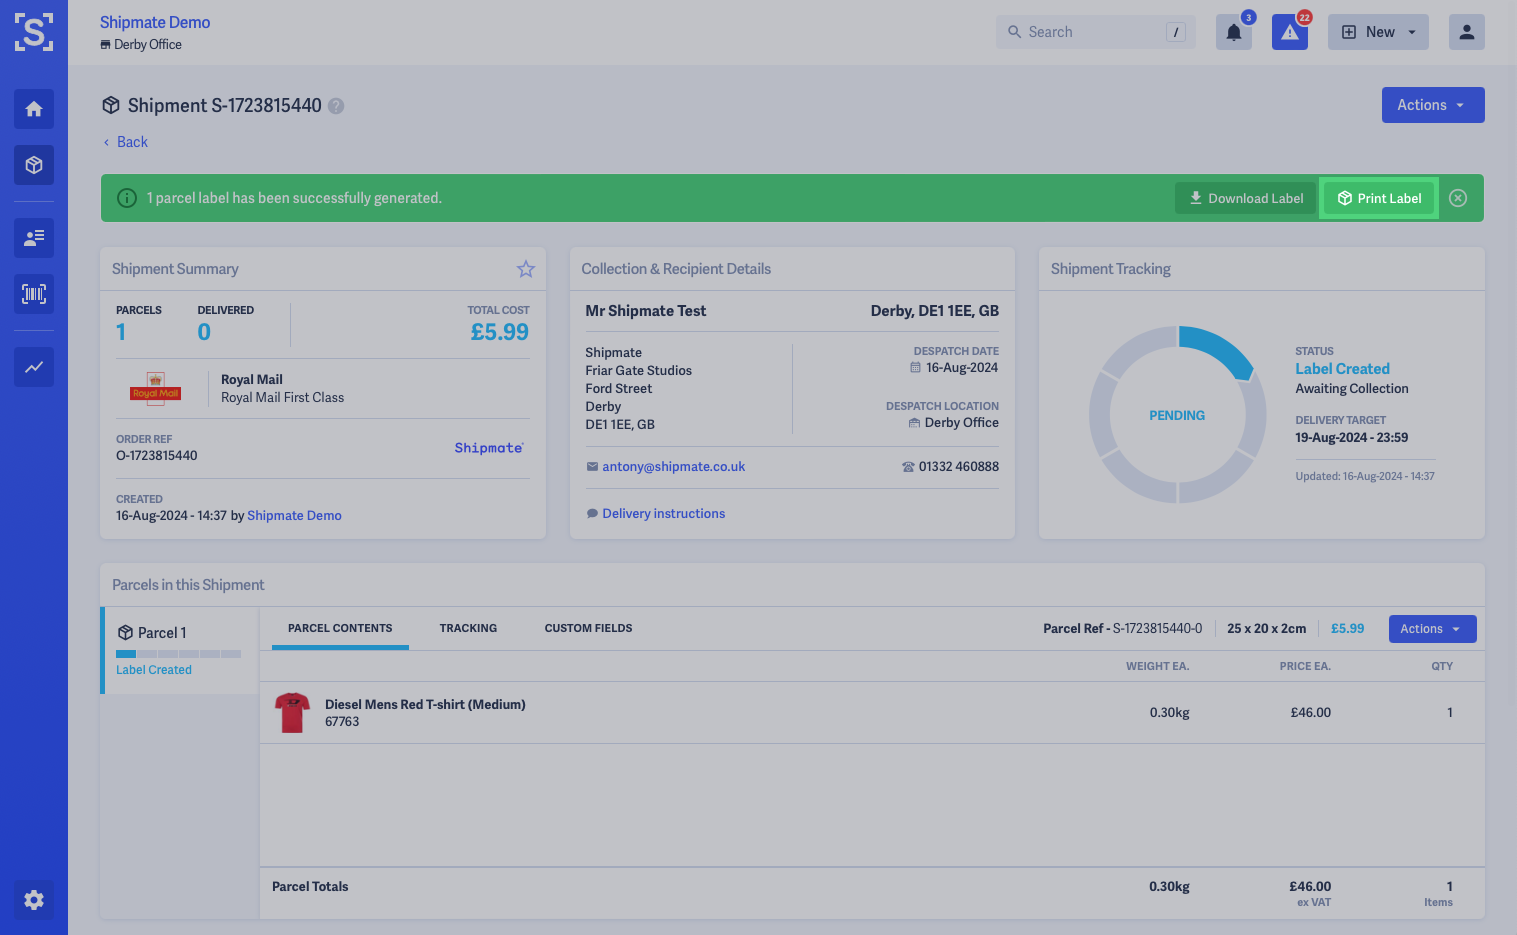
To generate the labels, simply click the Generate Labels button and you will be taken to a screen where you can see an overview of the newly created Shipment's details.
If you have the Desktop Printer App running, there will also be a Generate and Print Labels option. This will automatically print the labels upon creation.


Stop! Action Required Labels
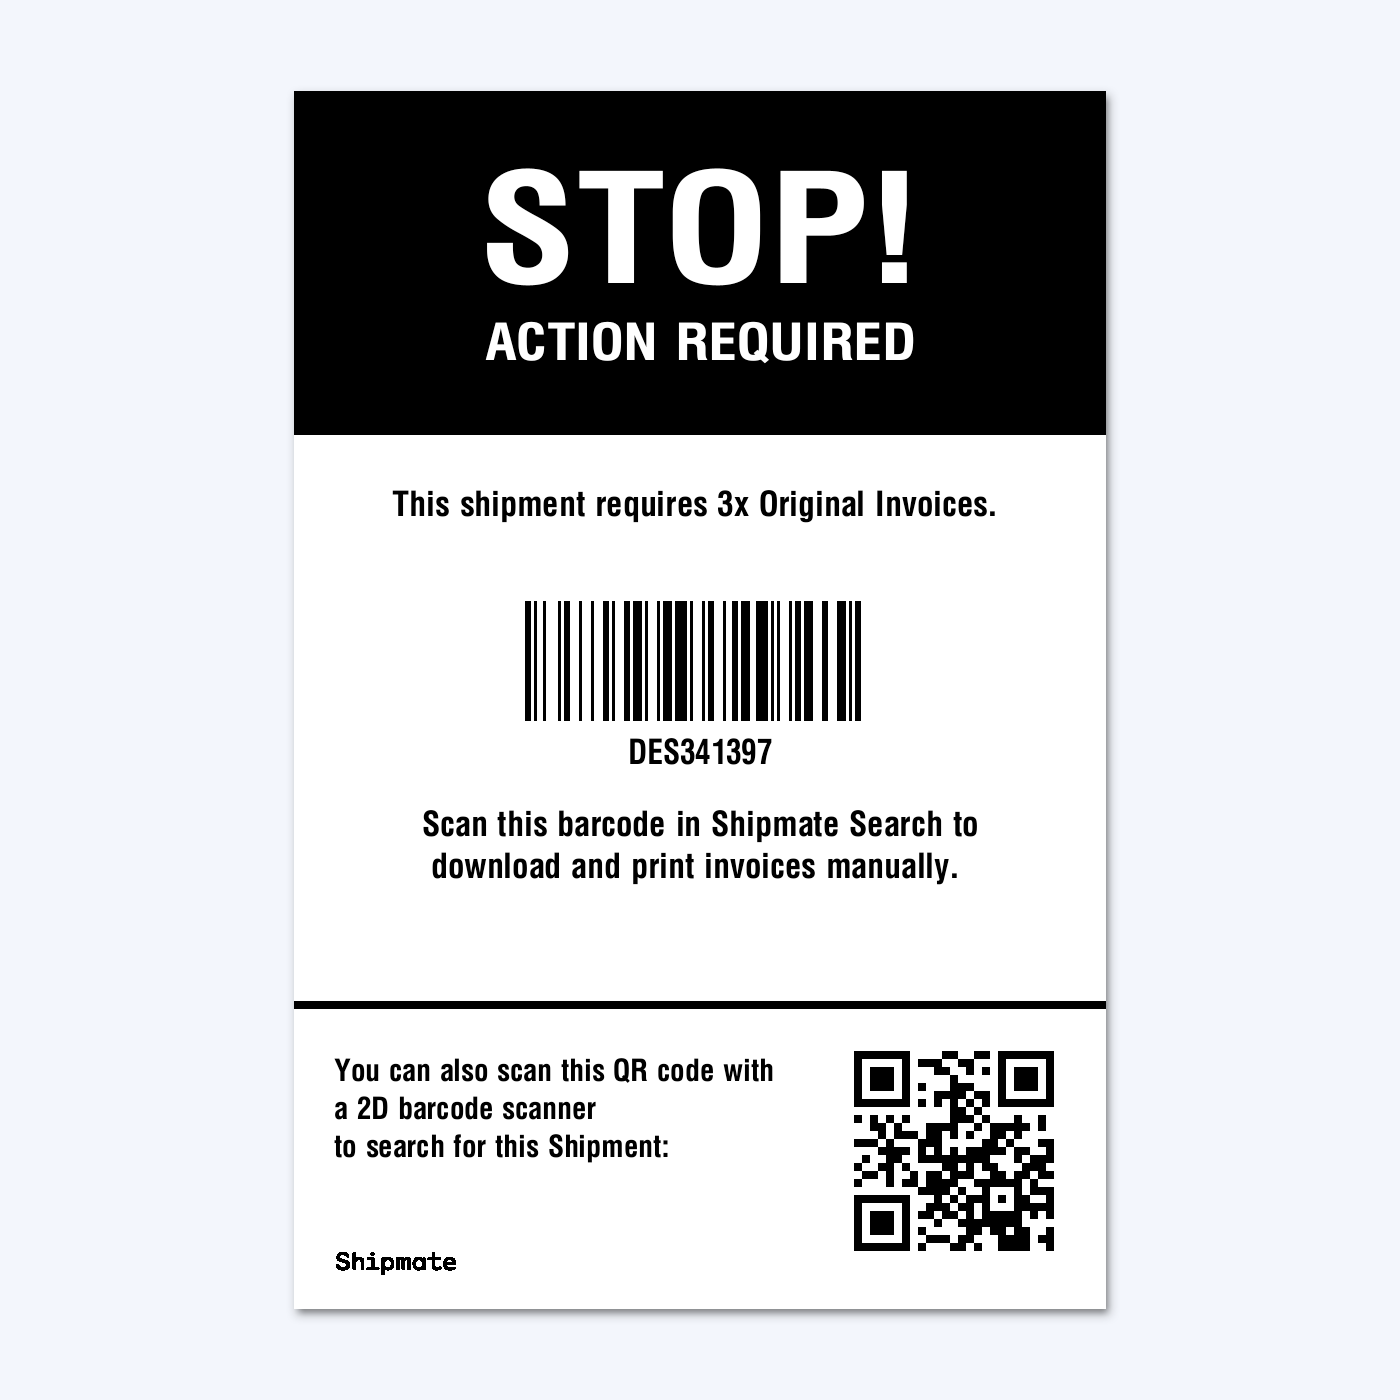
In some cases there are additional actions that have to be taken to complete the Shipment process.
One such example is the requirement to print out paper copies of Commercial Invoices when exporting to certain territories.
Shipmate brings this to your attention by printing out a 'STOP' label with instructions of the additional actions that need to be taken.
The Stop Label also includes a barcode containing the Shipment reference and QR code, both of which can be used to find the Shipment easily using the search bar on the web portal.
International Shipments
You are able to export to international destinations using many carriers with Shipmate. Our carrier integrations typically facilitate Electronic Trade Documentation (ETD), meaning the customs declaration and contents information is transmitted to the carrier alongside the Shipment booking, and the carrier is able to handle the import aspects of your Shipment.
In some cases, you will need to print additional documentation such as CN22 Customs Declarations or Commercial Invoices. The carrier may also generate additional labels for you to affix to the parcel.
When sending to international destinations you must provide item-level details including the correct Tariff (Harmonised) Code, short item description, country of origin and its value.
These details can be passed from our first-party supported plugins including Shopify and WooCommerce, or via API.
You can also use the SKU Inventory to maintain a database of the products you despatch with all the necessary details required to send internationally. These details are then mapped across automatically when the SKU is added to a Shipment, either by another plugin, CSV file import or API request. Shipmate does this by matching the SKU code provided and enriches the data with that held on the SKU Inventory database.
CN22 Customs Declarations
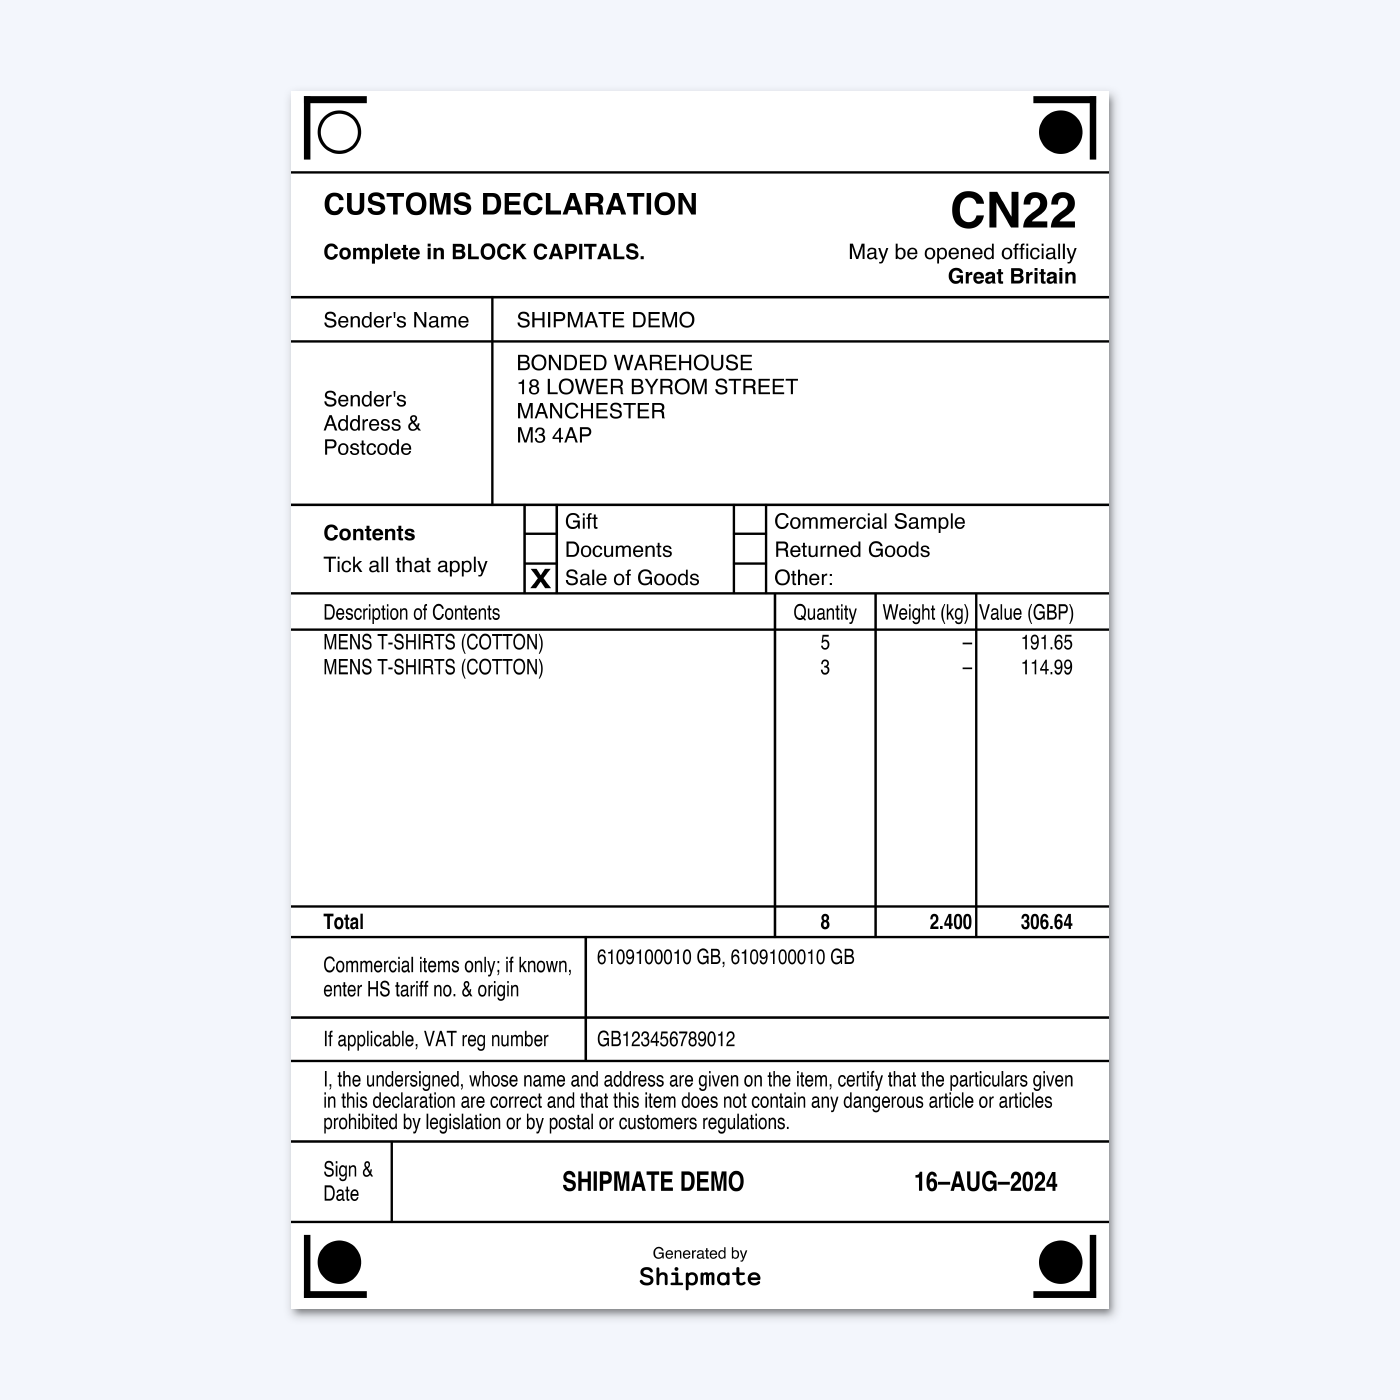
For international Shipments, many carriers generate their own Customs Delcaration documents that are printed automatically with your shipping labels. Shipmate can also generate a CN22 Customs Declaration document alongside your shipping labels for carriers that don't generate their own version.
You can switch CN22 Customs Declaration label generation on and off in Settings > VAT & Customs.
Commercial Invoices
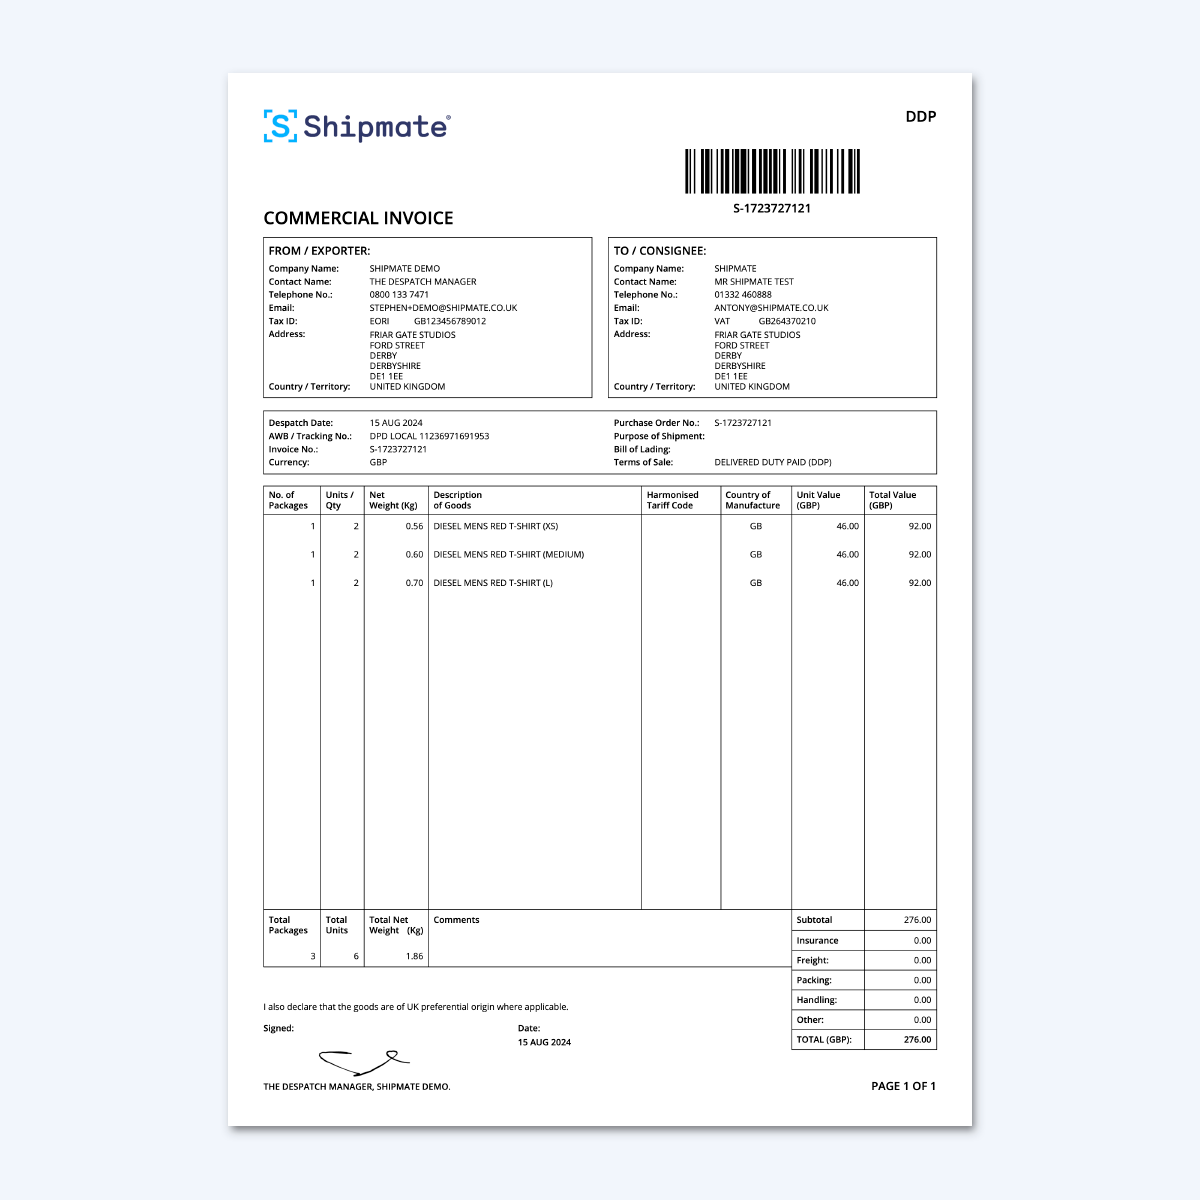
For international Shipments over a certain value or weight you may need to affix Commercial Invoices to the parcels.
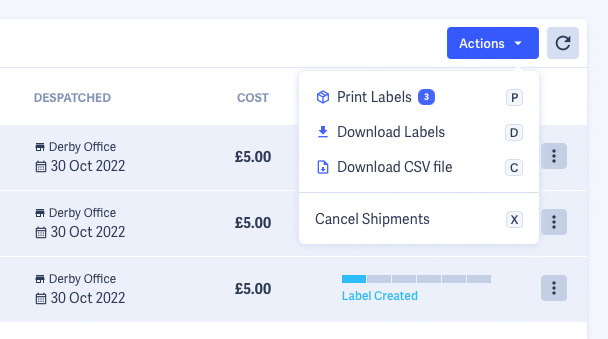
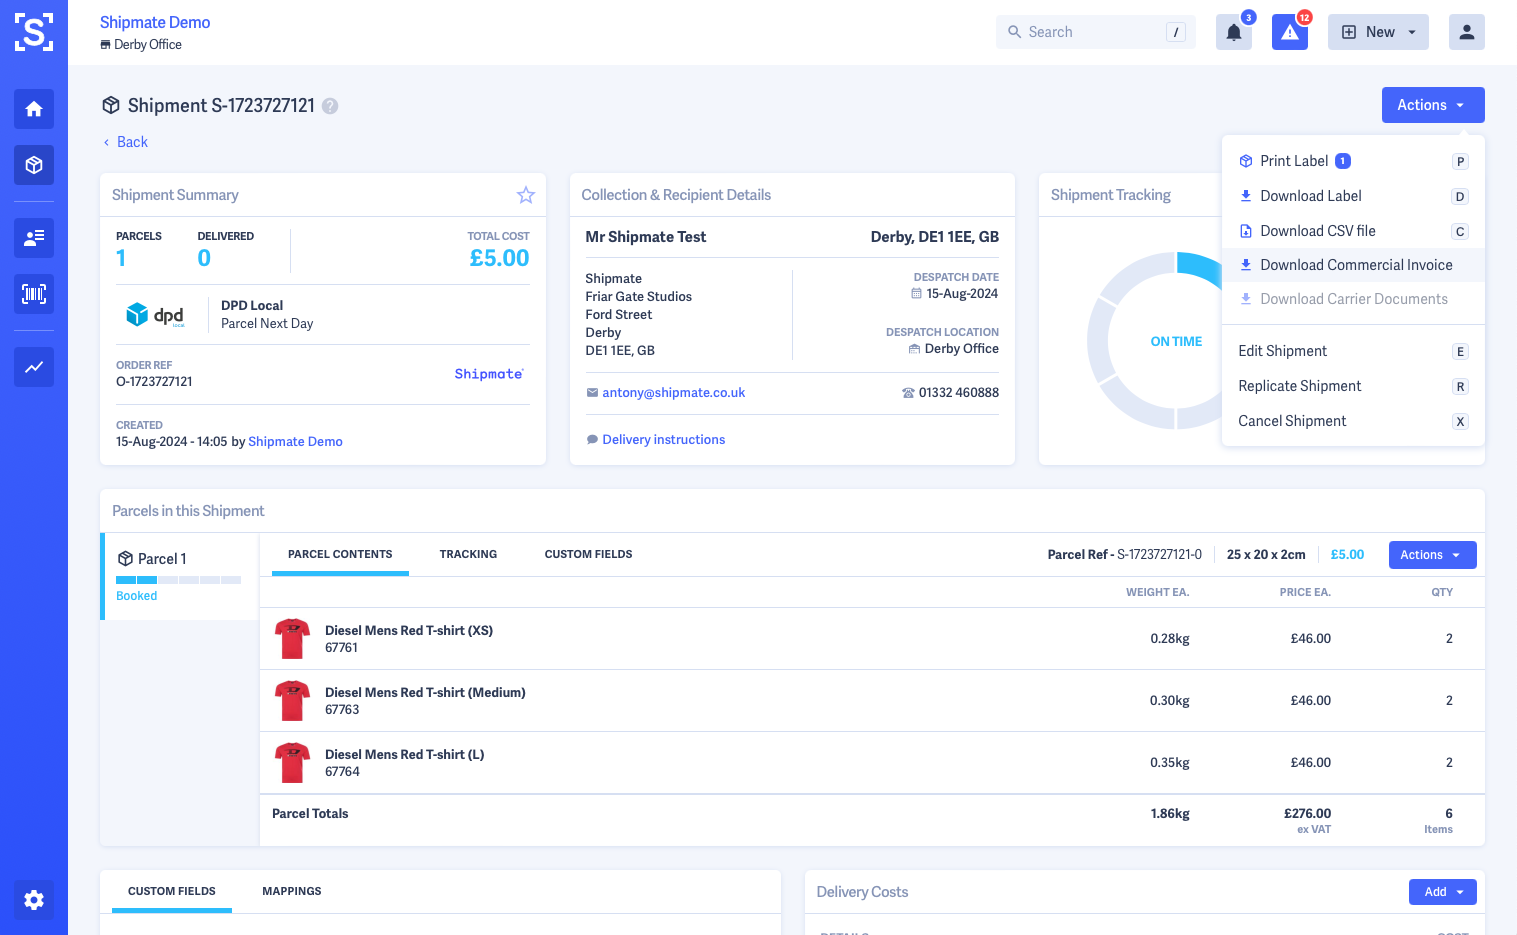
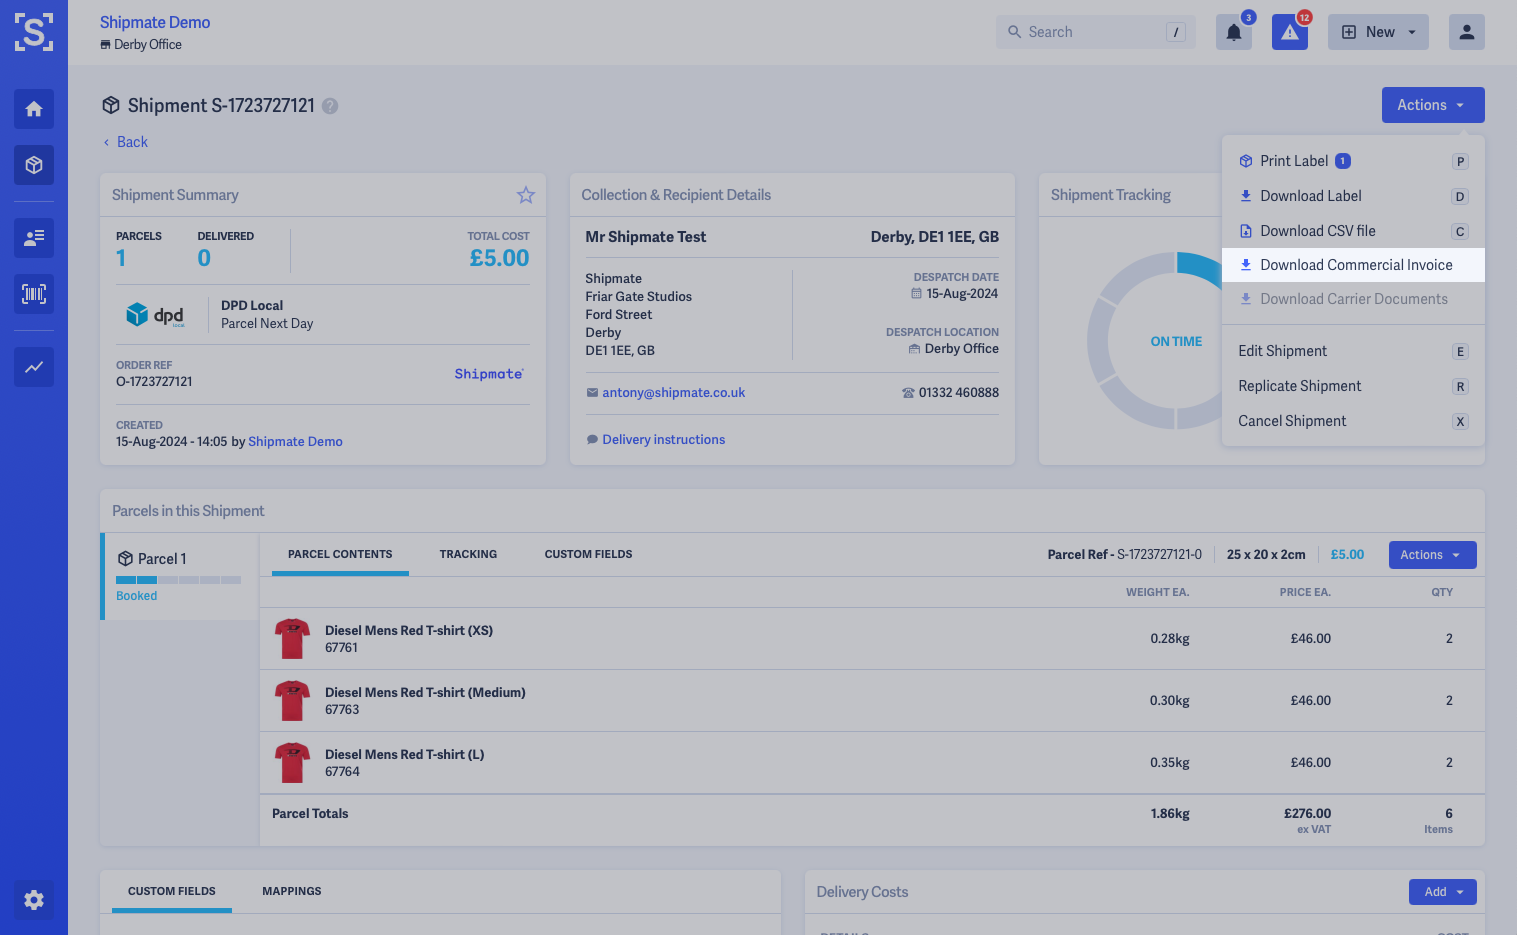
A Commercial Invoice is generated for every Shipment and can be accessed from the Actions menu by clicking Download Commercial Invoice.
You can upload your company's logo in Settings > Account Settings, and set the name and signature of the person responsible for export in Settings > VAT & Customs.
Importing Order Files
You can upload an order file from almost any platform to import your parcels into Shipmate. Simply download a file extract from your order processing system, choosing options that include a header row and output as a comma separated text, or CSV file.
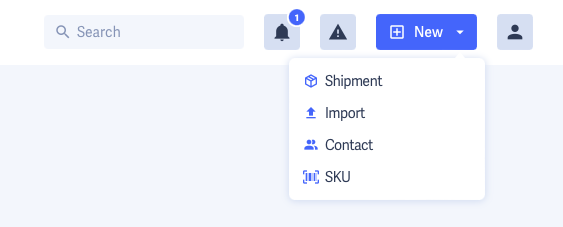
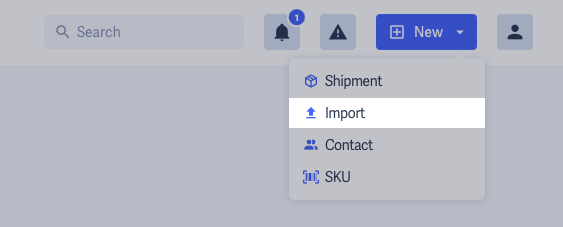
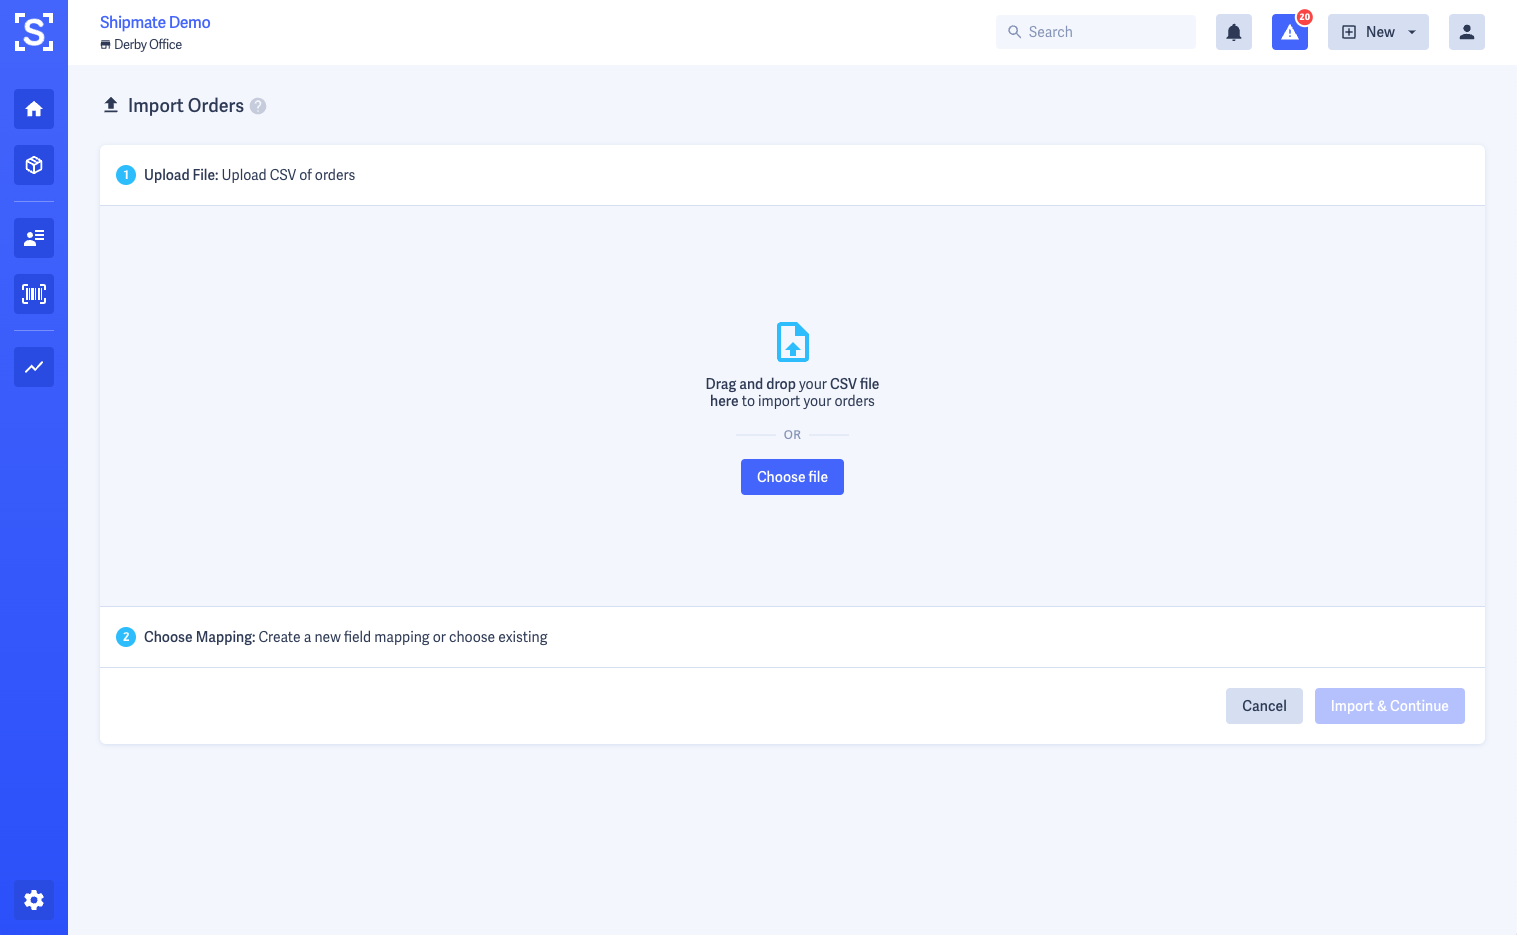
To access the upload area, click the ‘Import’ button from the New drop-down menu in the top right of the screen then simply upload your file by dragging it to the drop-zone area or by clicking the ‘Choose File’ button to find the file on your computer.
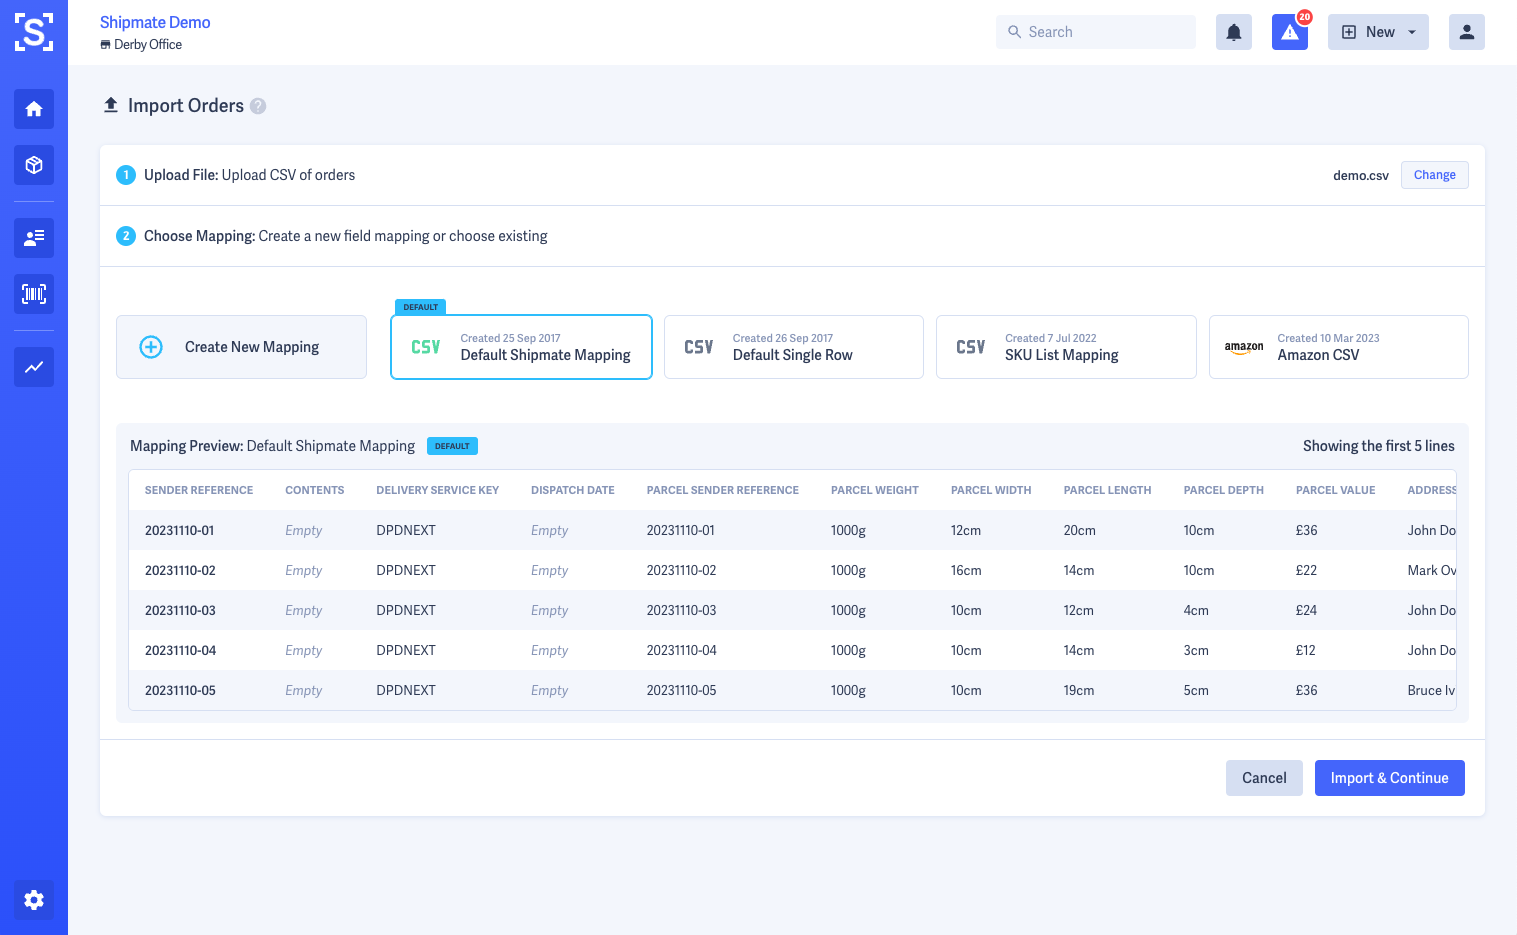
Your file will be checked to ensure it can be processed, then you can select the file type from a list of file mapping presets you have previously configured, or set up a new mapping.
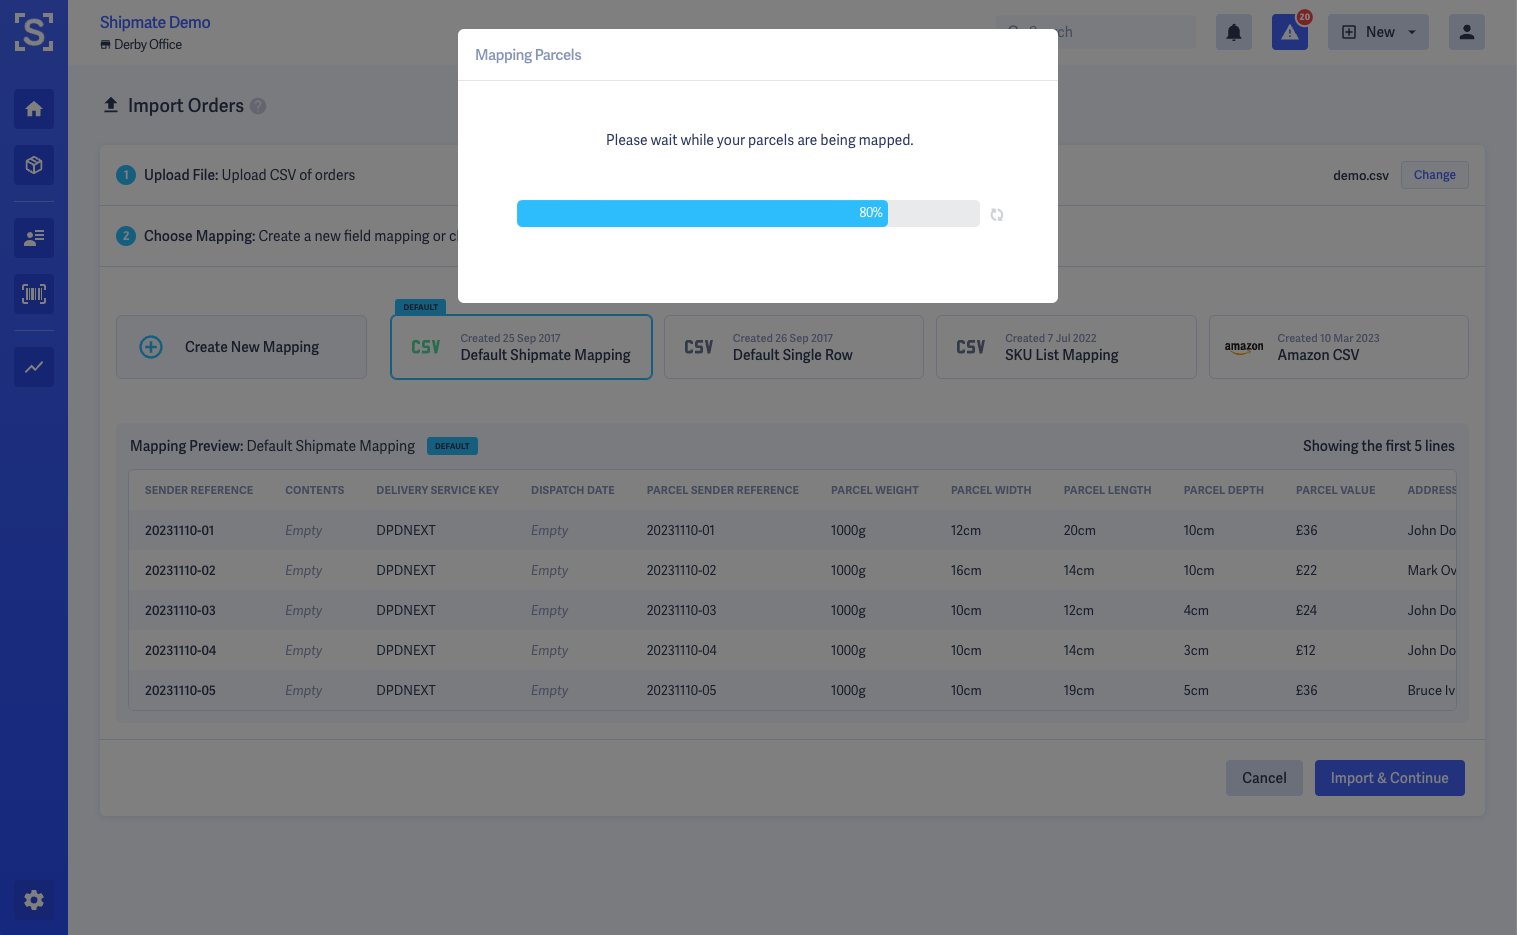
Selecting a mapping preset gives you a preview of the first few rows so you are able to make sure the correct format has been selected, ready for processing. Click Import & Continue to import the file.
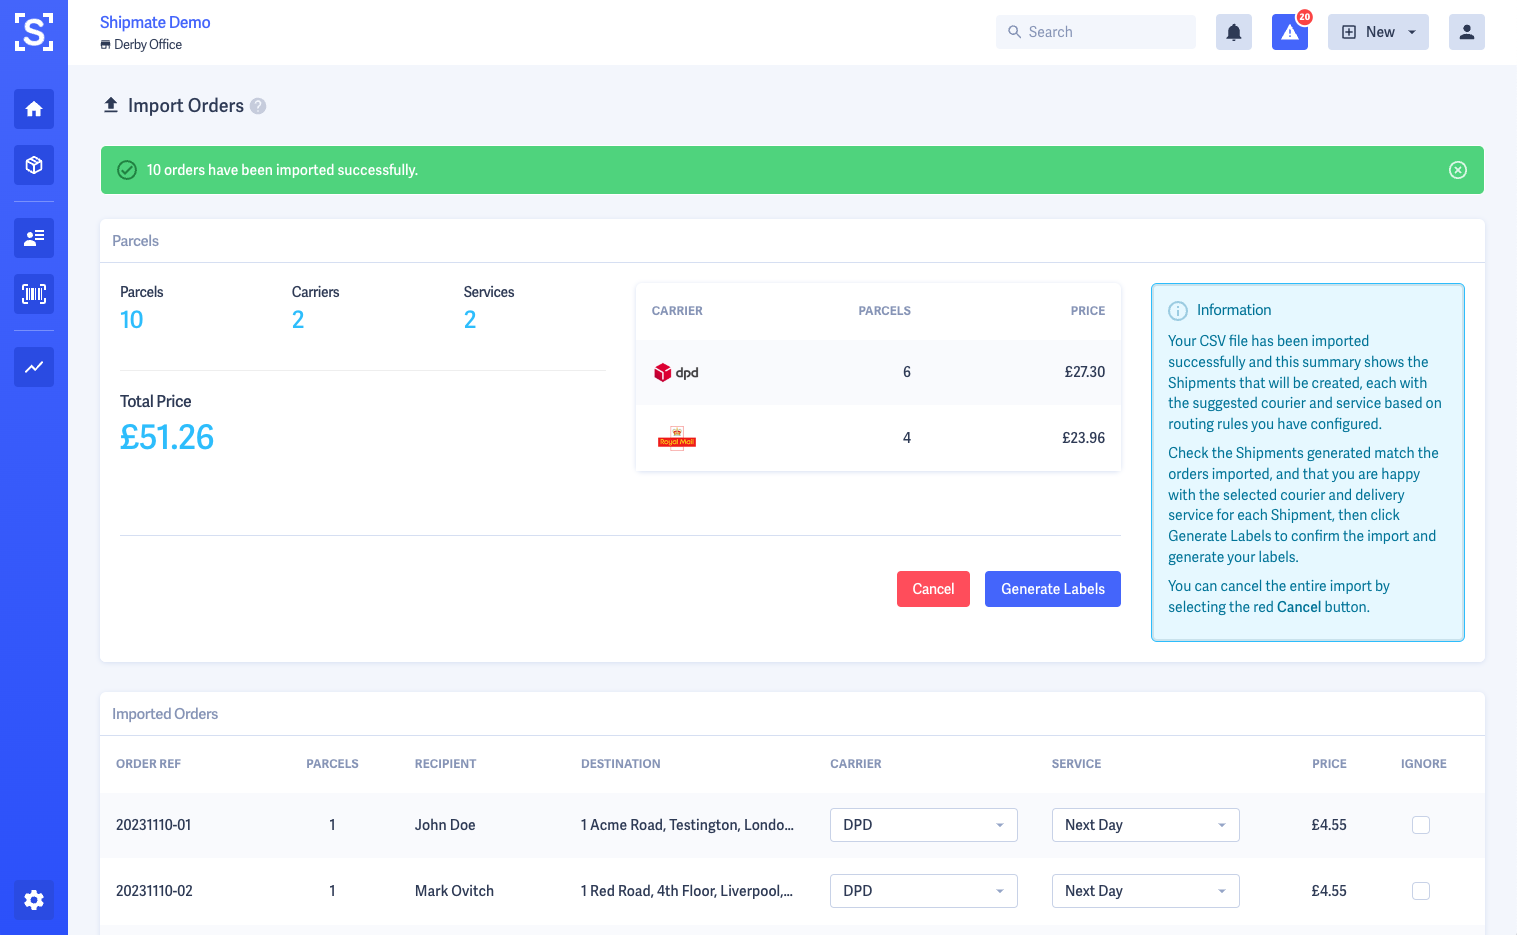
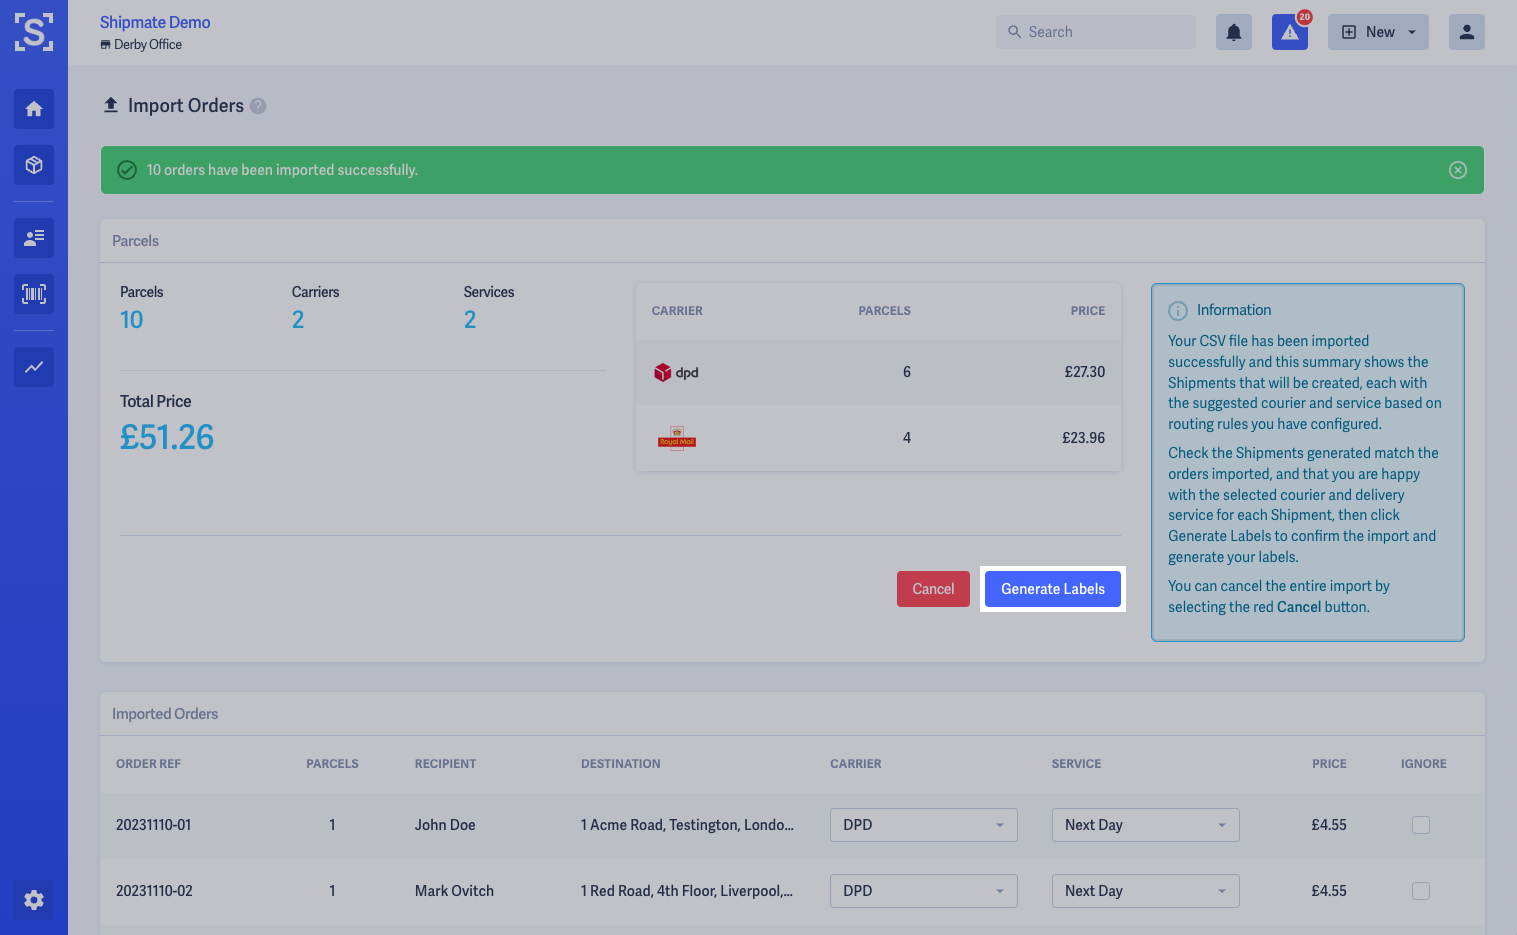
Once your file has been processed, you can confirm the Carrier and Delivery Service for each parcel, then click the Generate Labels button to process your import.
Create New CSV Mapping
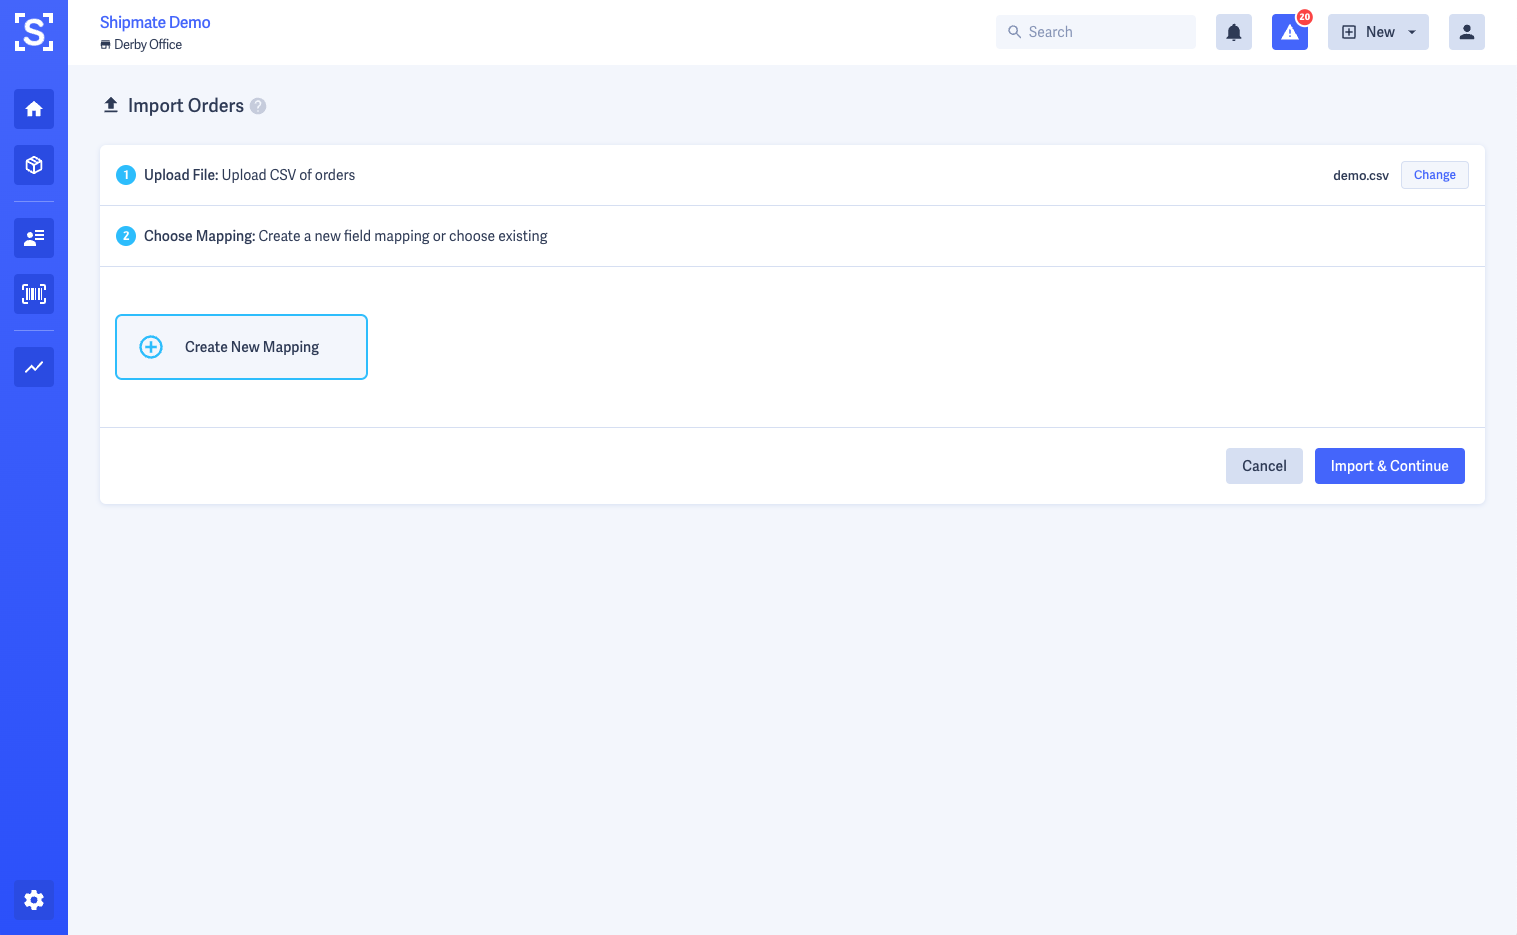
To create a new CSV mapping, first select the Import option from the New drop-down menu in the top right of the screen.
Then upload your file by dragging it to the drop-zone area or by clicking the Choose File button to find the file on your computer.
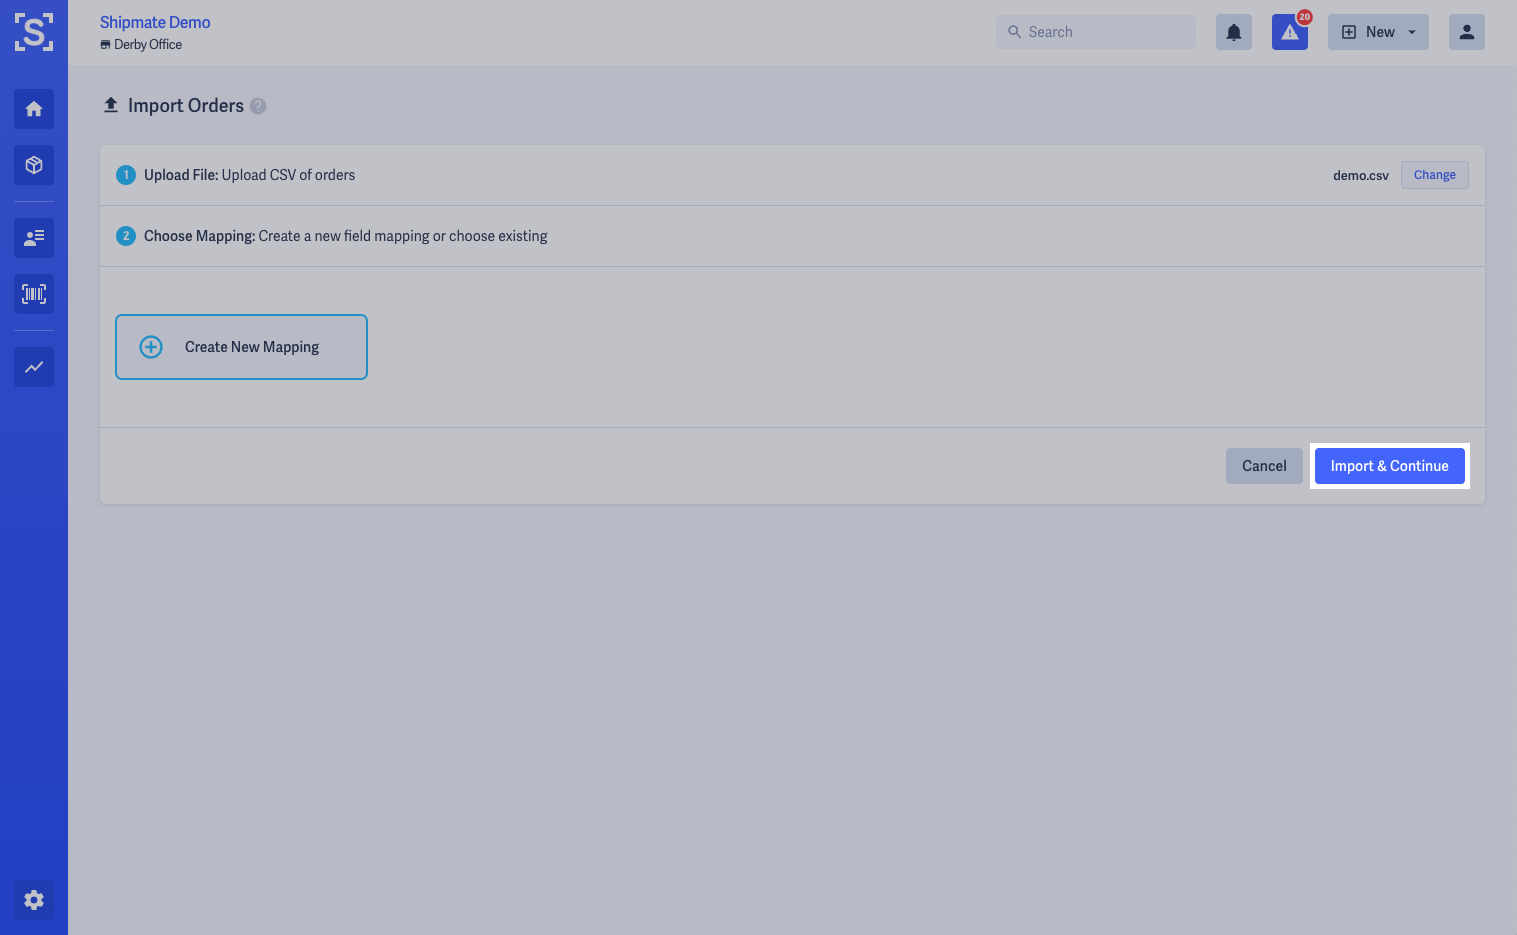
Once your file has been checked for compatibility, select the Create New Mapping option, then click Import & Continue.
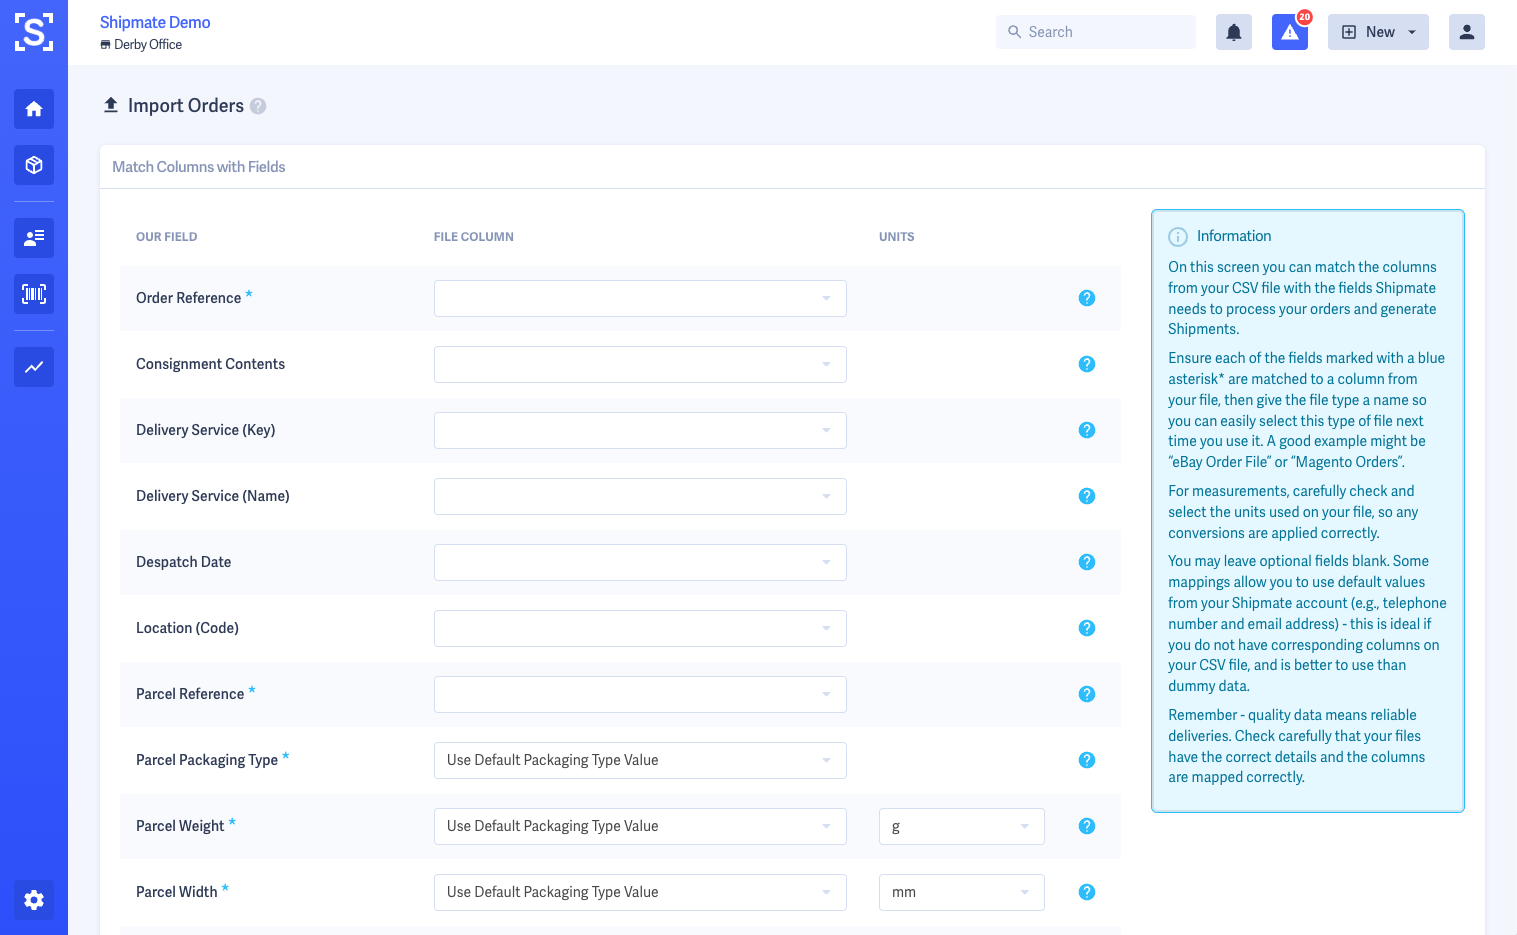
You will then be able to match columns from your CSV file to data required inside the Shipmate platform.
Make sure each of the fields marked with a blue asterisk (*) are matched to a column from your file. For any measurement values, double-check the units that your import will be in match your selection so Shipmate knows how to handle them.
Finally, give the mapping a name so you can easily select this type of file next time you use it. A good example might be “eBay Order File” or “Amazon Orders”.


Choose CSV Mapping Icon
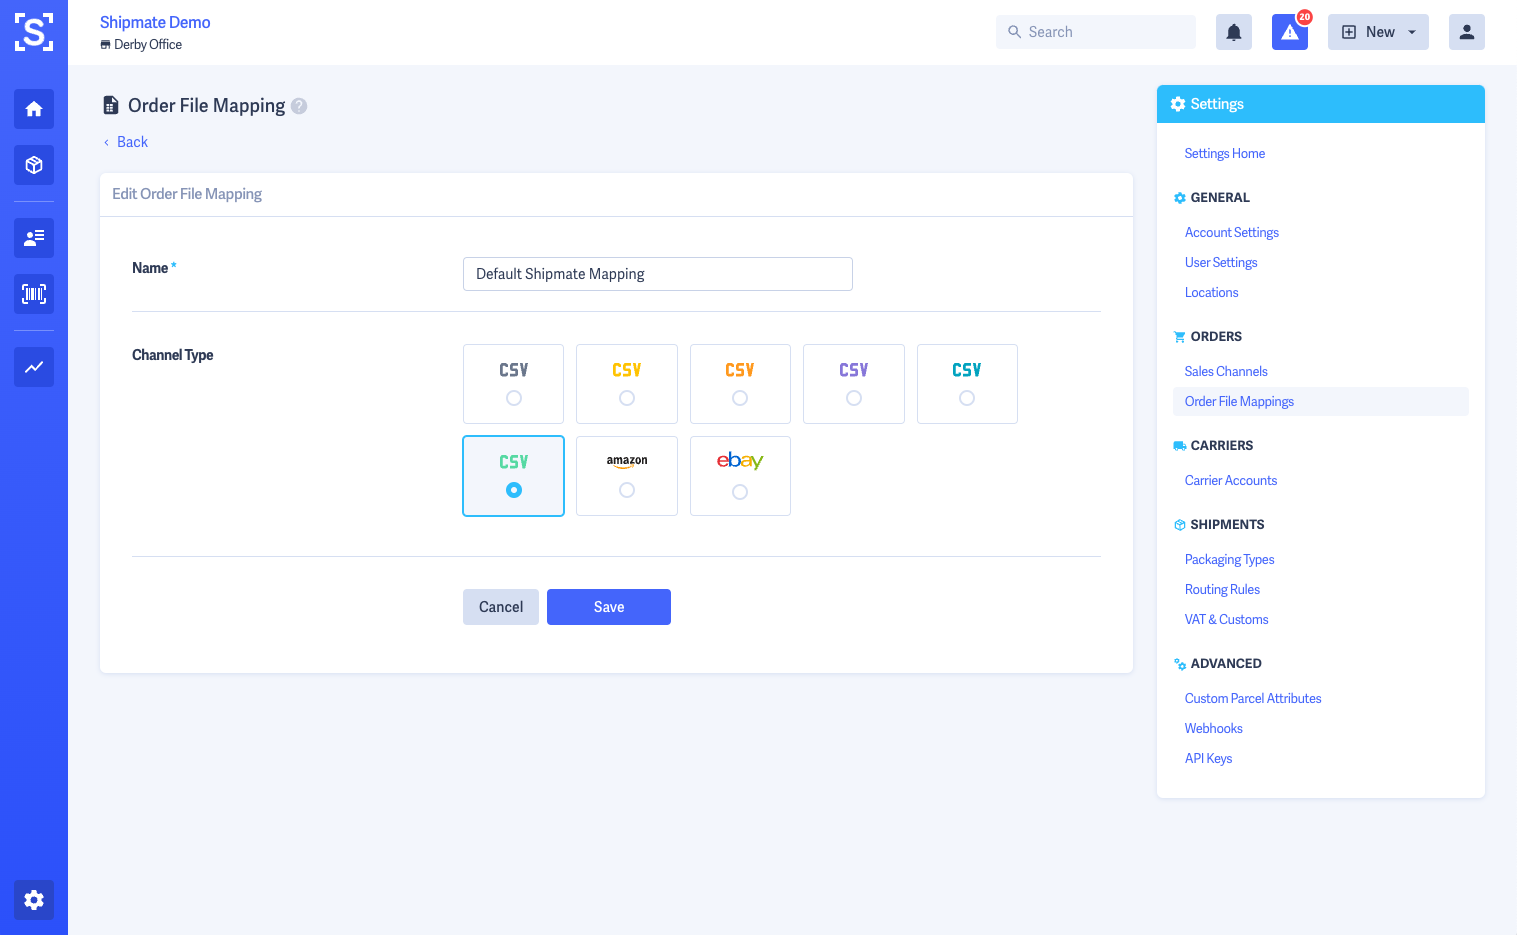
To help make selecting the correct CSV mapping easier, you can choose from a selection of CSV icons, showing different colours alongside commonly used sources of CSV files, including eBay and Amazon.
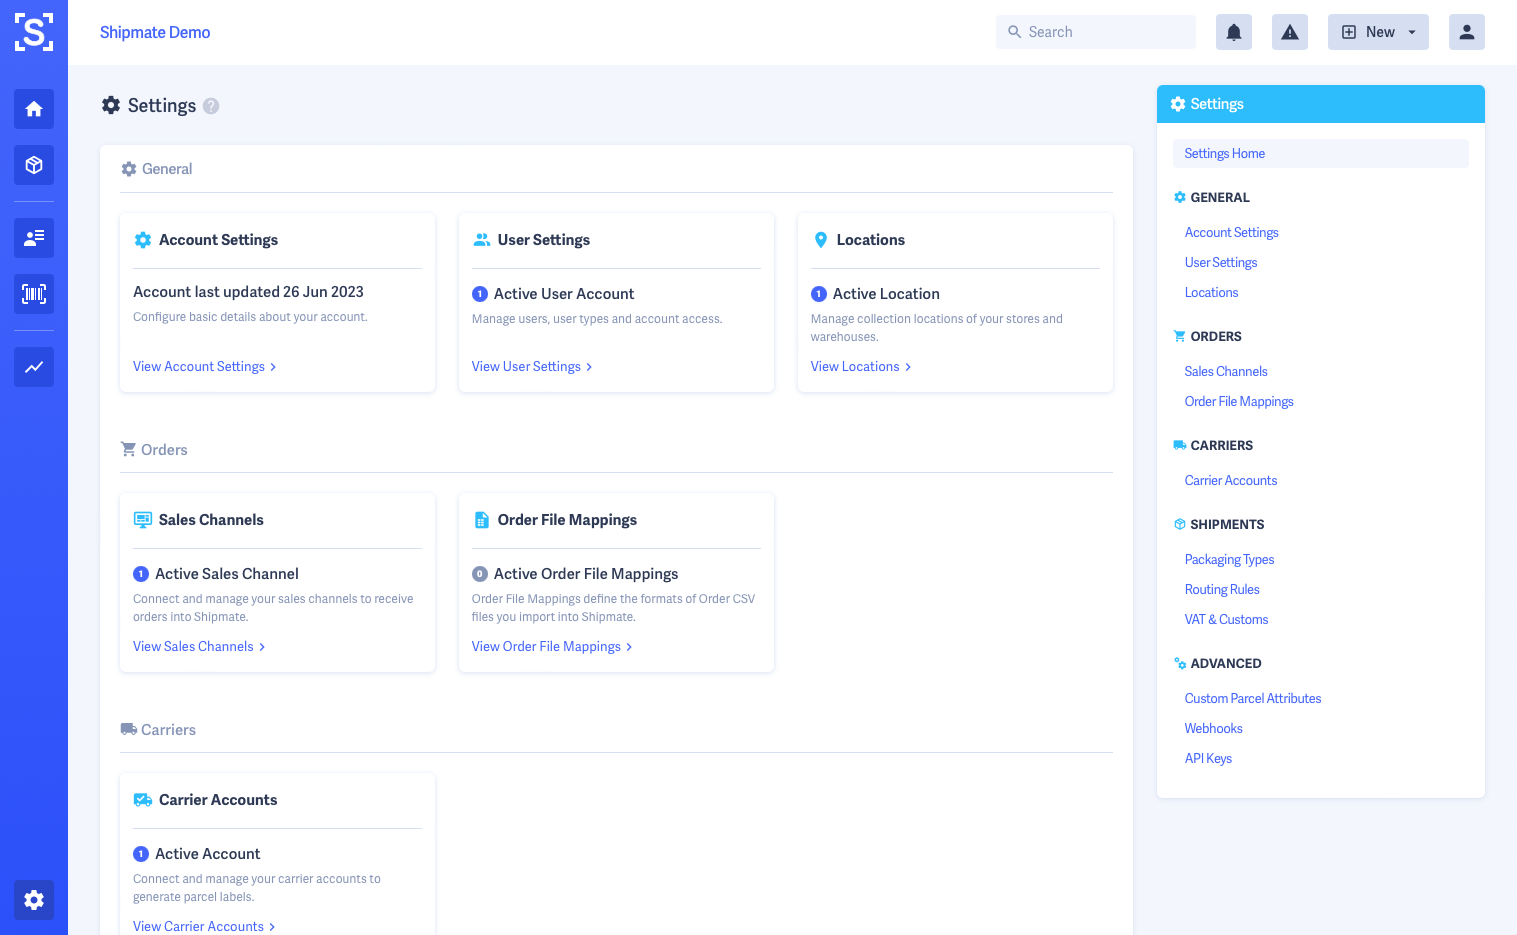
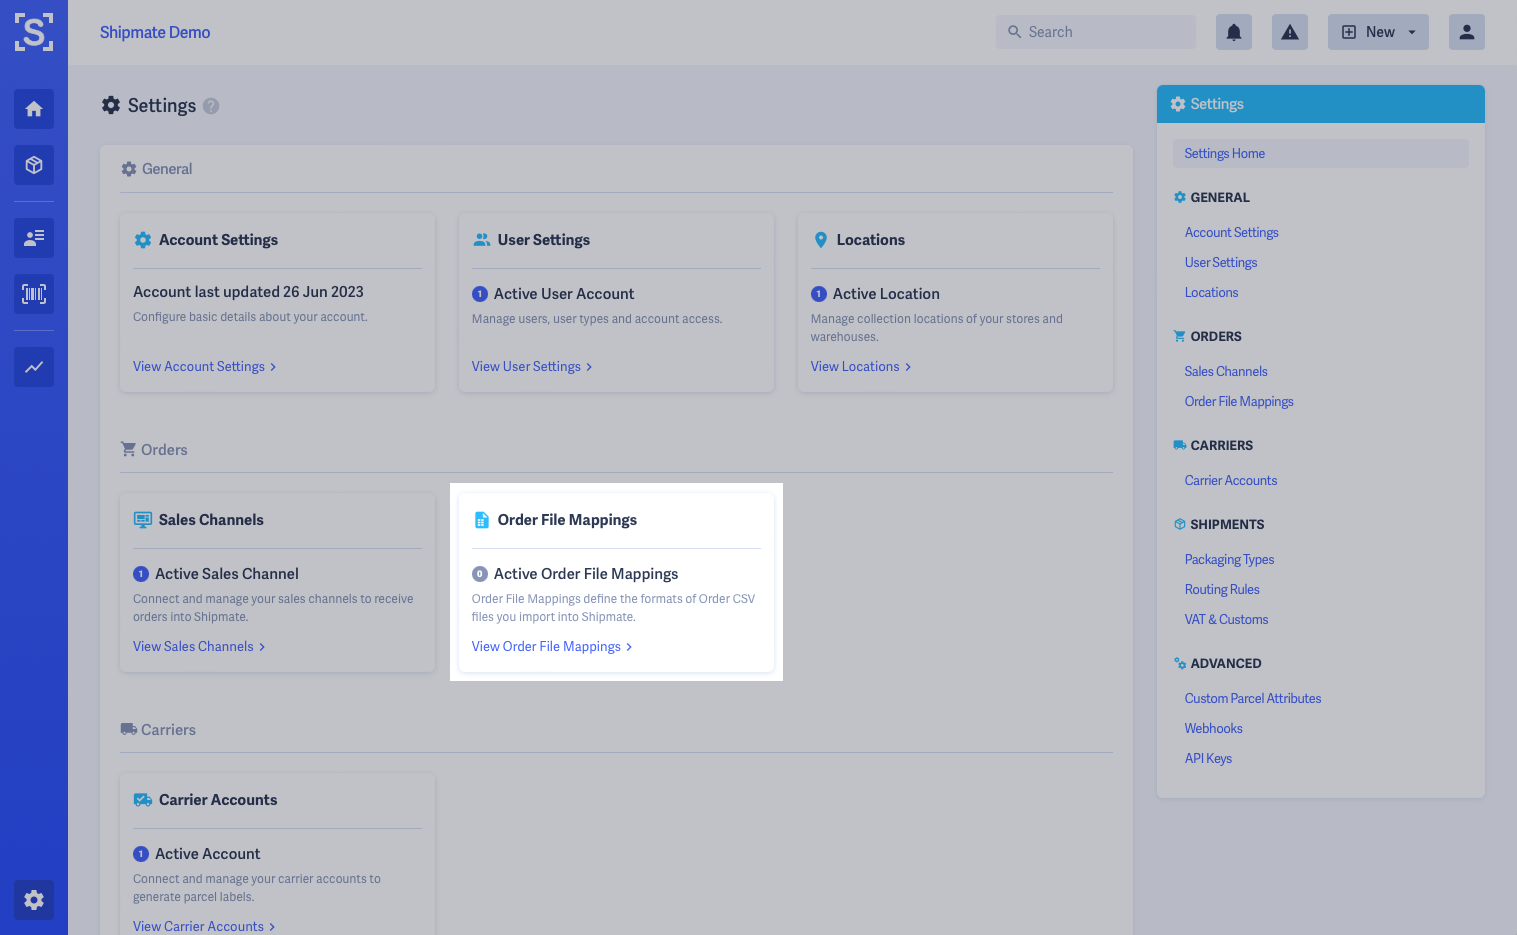
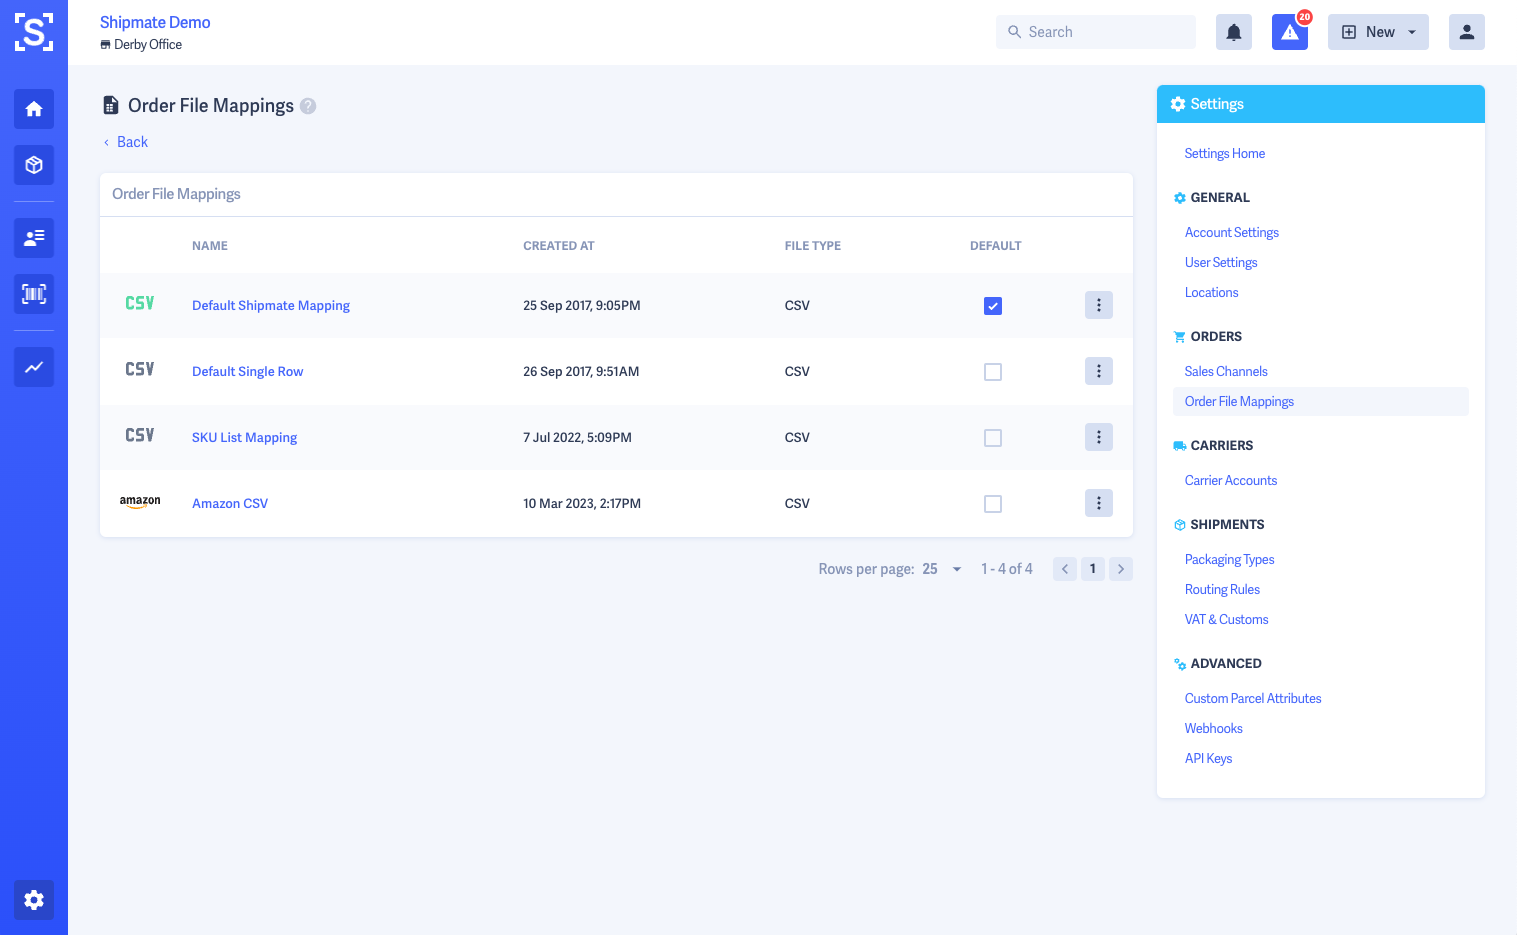
To update an Order File Mapping icon, click Settings then choose the Order File Mappings option.
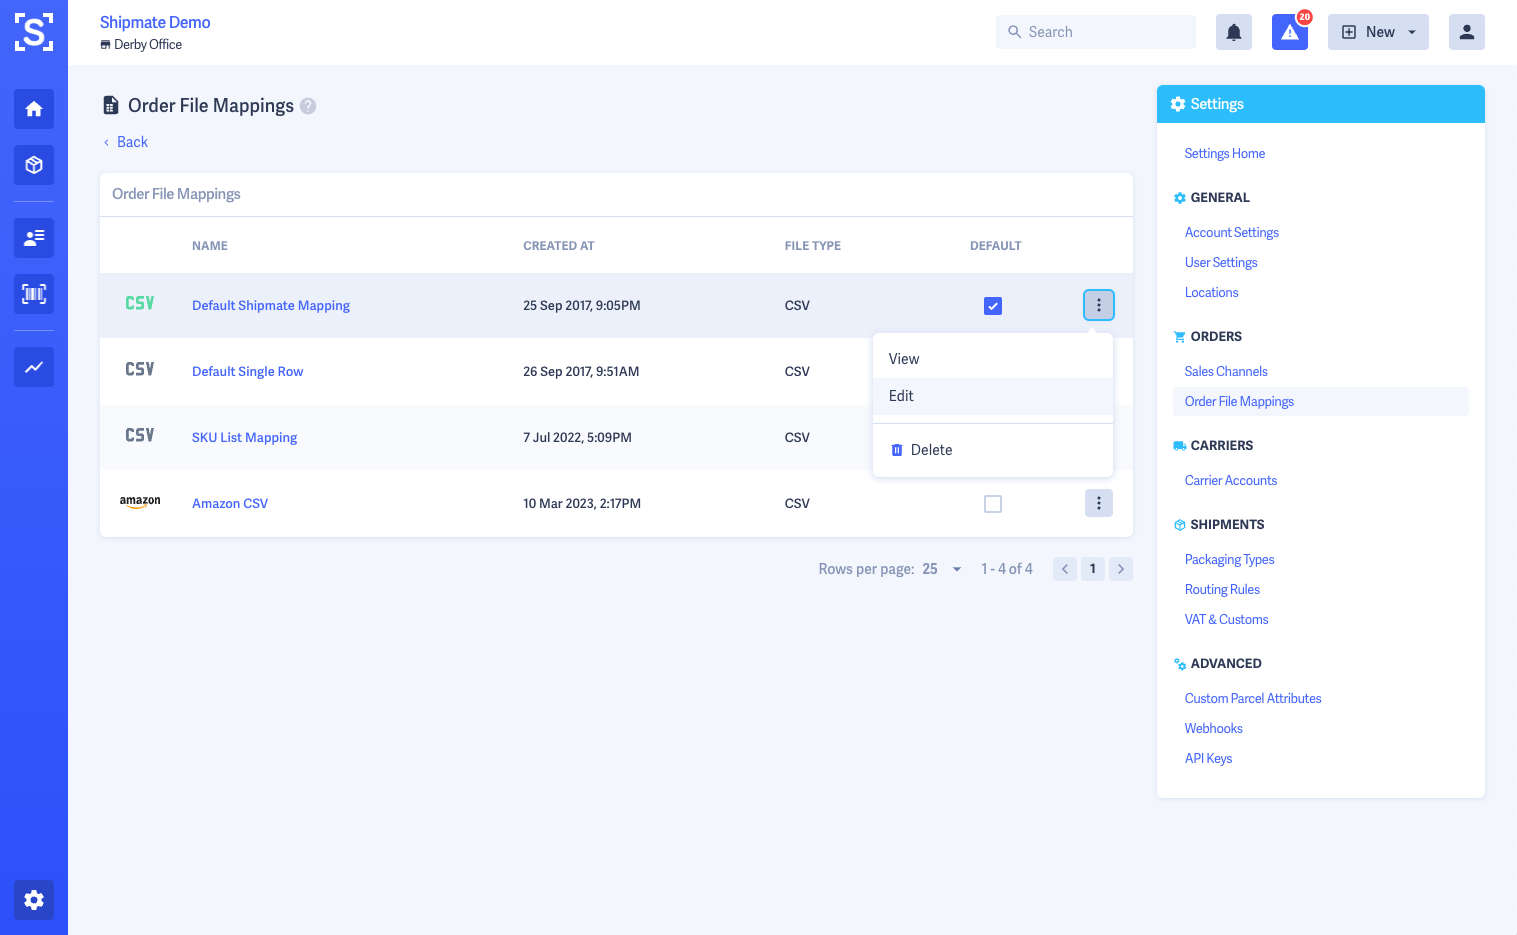
A list of all the available Order File Mappings will be shown - click the ⋮ adjustment menu button and select the Edit option.
Choose from the selection of available icons, then click the Save option.
Set Account Default Mapping
If your organisation imports CSV files primarily from the same source, it is possible to reduce the number of clicks required to import files by setting a Default CSV Mapping.
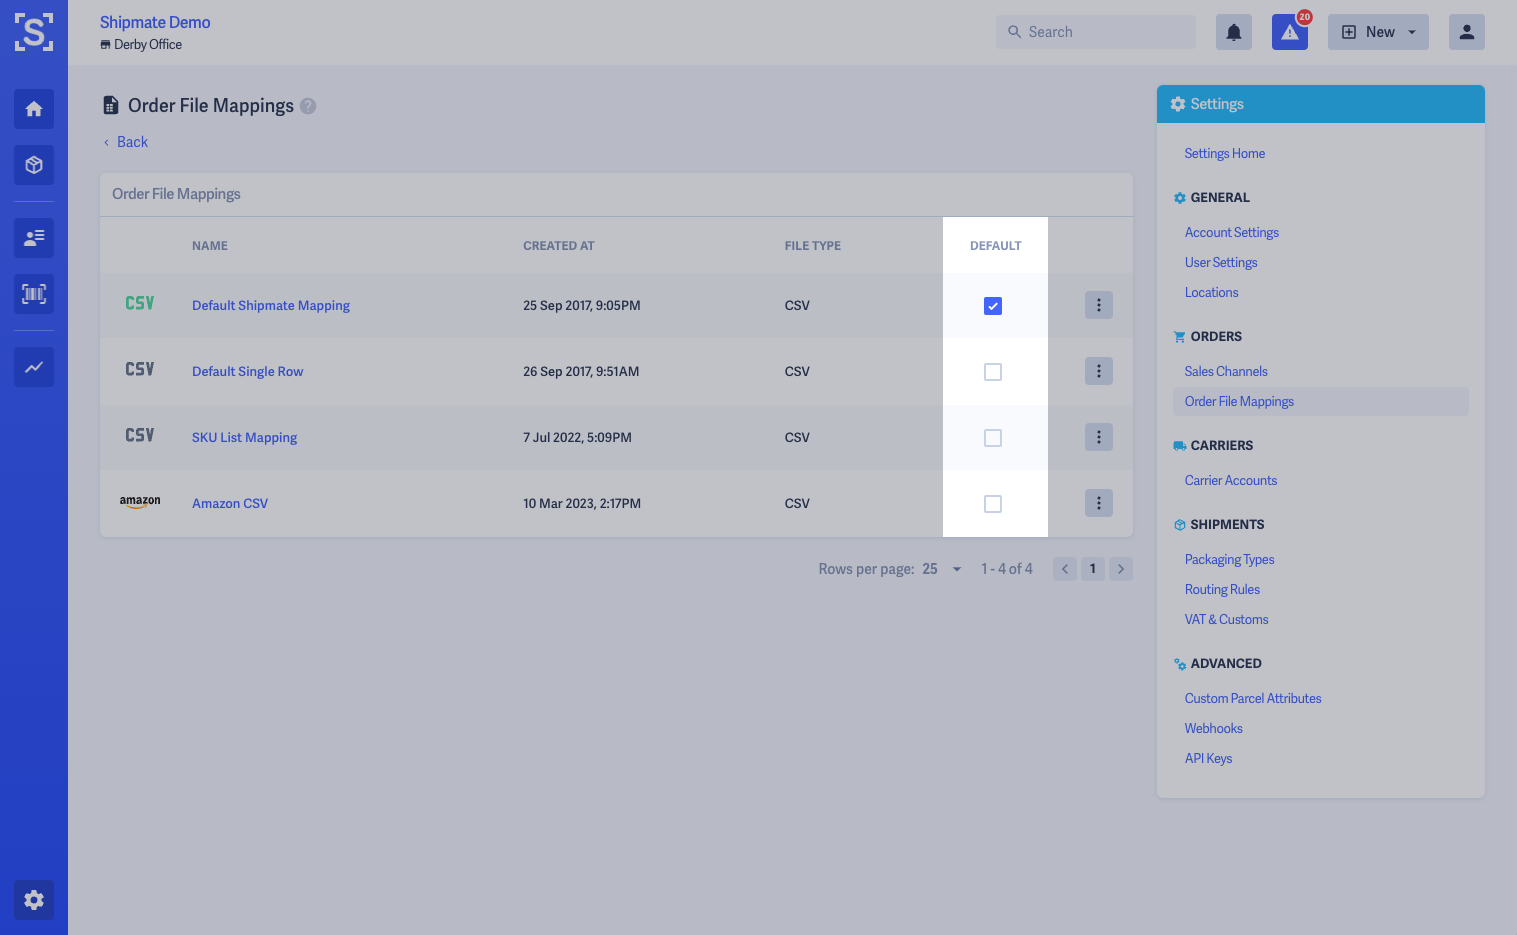
To choose your organisation's default CSV mapping, click Settings then choose the Order File Mappings option.
A list of all the available Order File Mappings will be shown - simply check the Default tickbox for the mapping you wish to make default.
This change will apply to all users on your account. This can be overridden at user level by Setting a User Default Mapping.


Set User Default Mapping
If you import CSV files primarily from the same source, it is possible to reduce the number of clicks required to import files by setting a Default CSV Mapping for your user account.
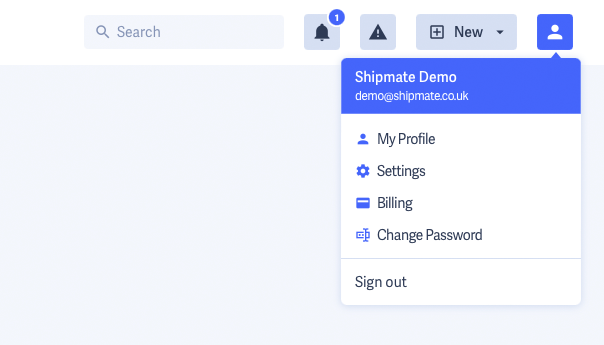
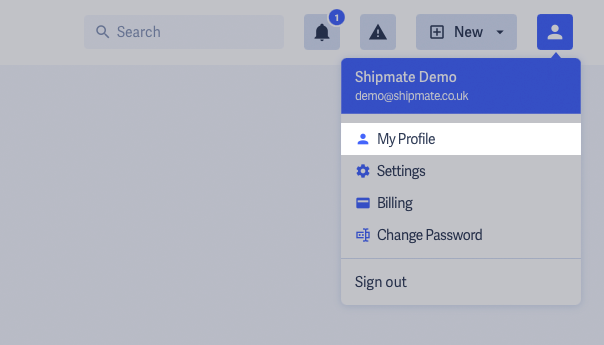
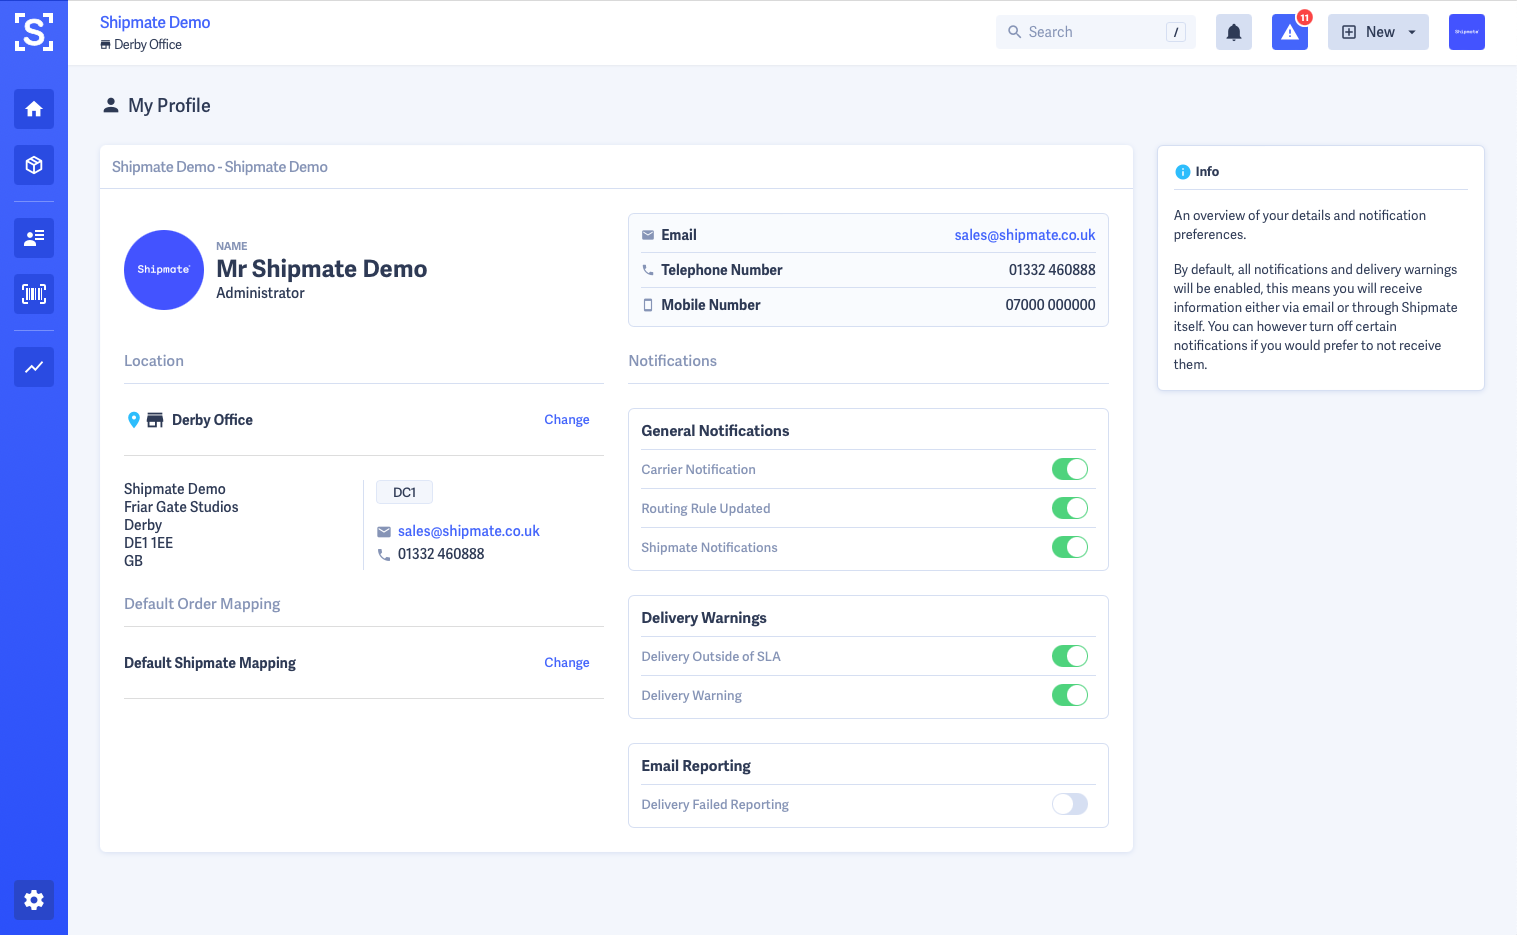
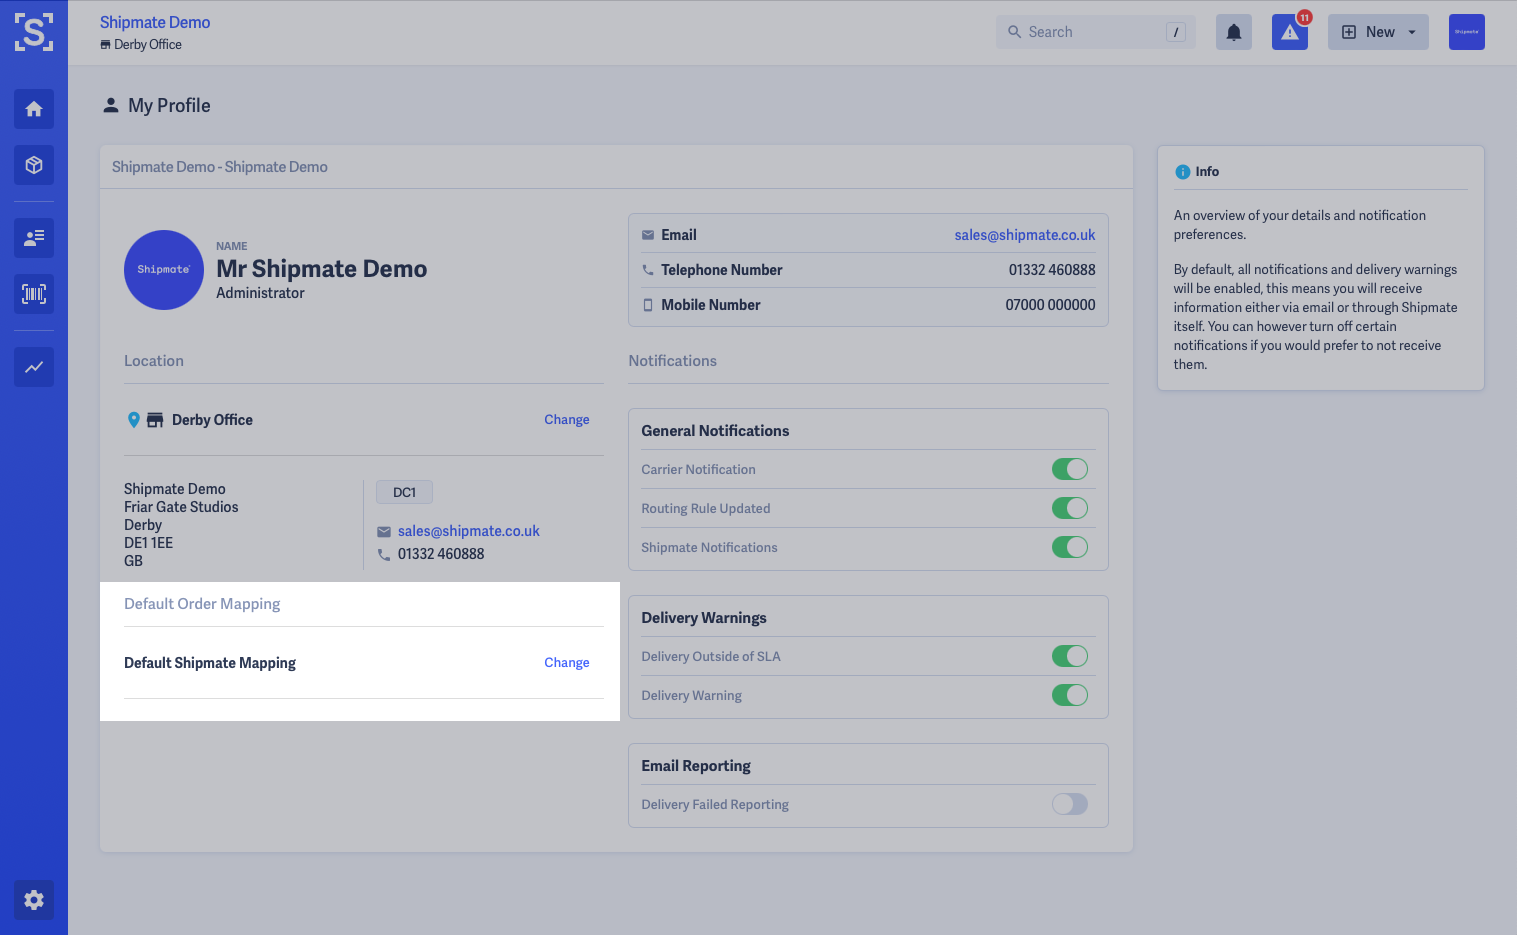
To choose your personal default CSV mapping, click My Profile from the profile menu in the top-right of the screen, then select a Default Order Mapping from the drop-down menu then click Save.
This will override any organisation account-level default, so is ideal for scenarios where different despatch stations are used to process orders from different sources, too.
Windows Directory CSV Polling
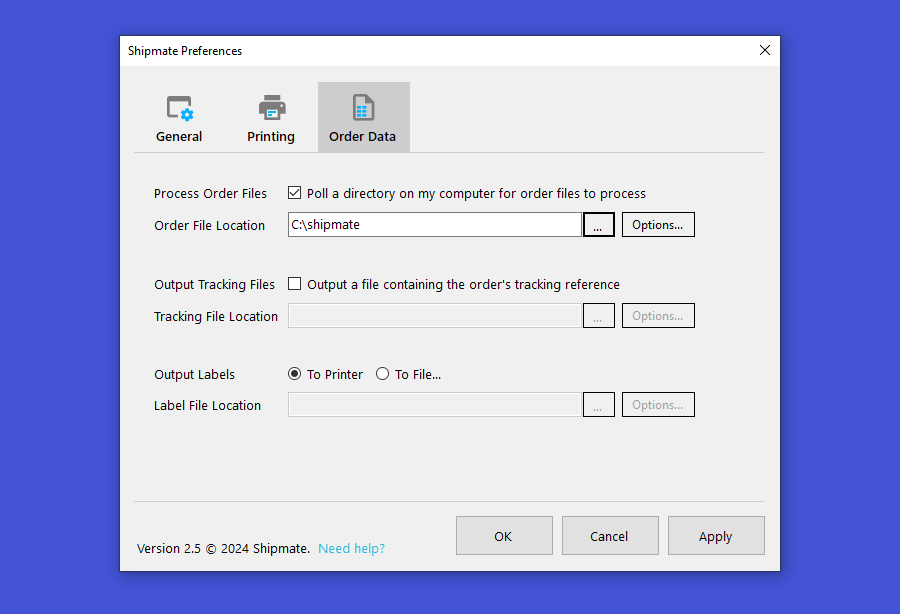
Using the Shipmate Windows companion application it is possible to continually poll a directory on a local computer or network drive for CSV files for processing.
Searching for Shipments
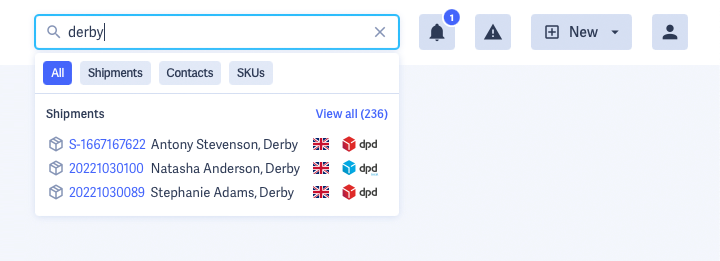
To quickly find an individual Shipment, you can use Quick Search in the top menu. Simply start typing a key detail of the Shipment, such as the post code, name, order number or tracking number and a short list of matching Shipments will be shown.
If the Shipment you are looking for is displayed, simply click on it or use your keyboard's up and down arrow keys to highlight it, then press Enter on the keyboard.
If you are looking for another Shipment, click the View all link, which will also show the total number of matching Shipments.
Shipments List
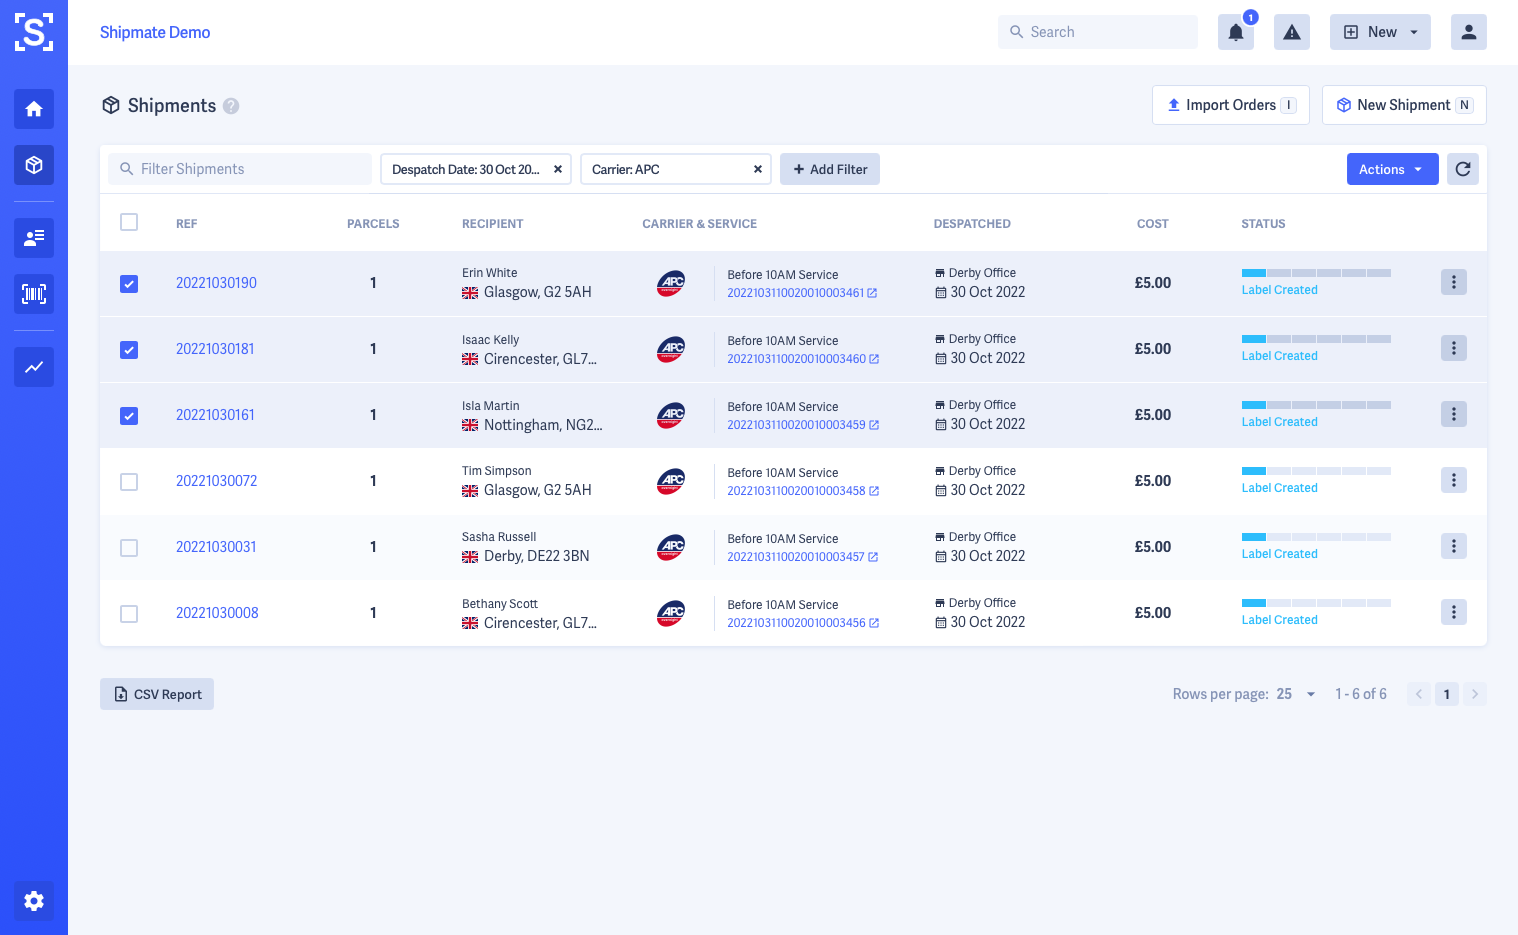
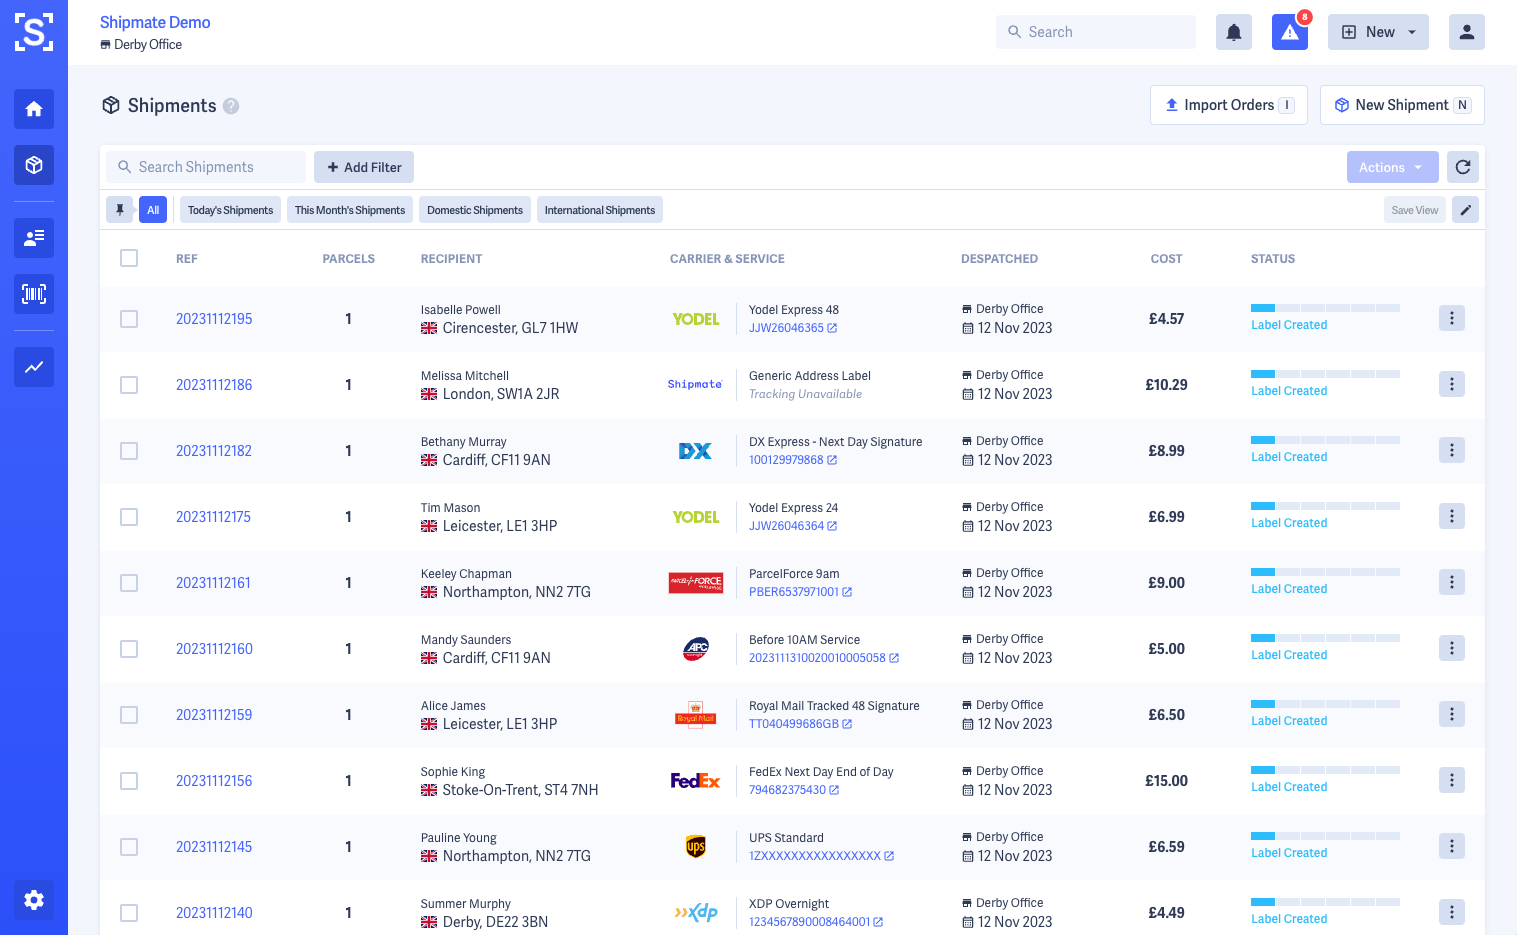
The Shipments List is where you can see all Shipments that have already been generated on the Shipmate platform.
This is ideal for tracking the progress of your Shipments, while providing insightful Management Information and all the details necessary to provide proactive customer service.
To access the Shipments List, click the Shipments button in the main menu on the left-hand side of the screen. This will show all your recent Shipments, with the newest shown at the top of the screen.
Filtering Shipments
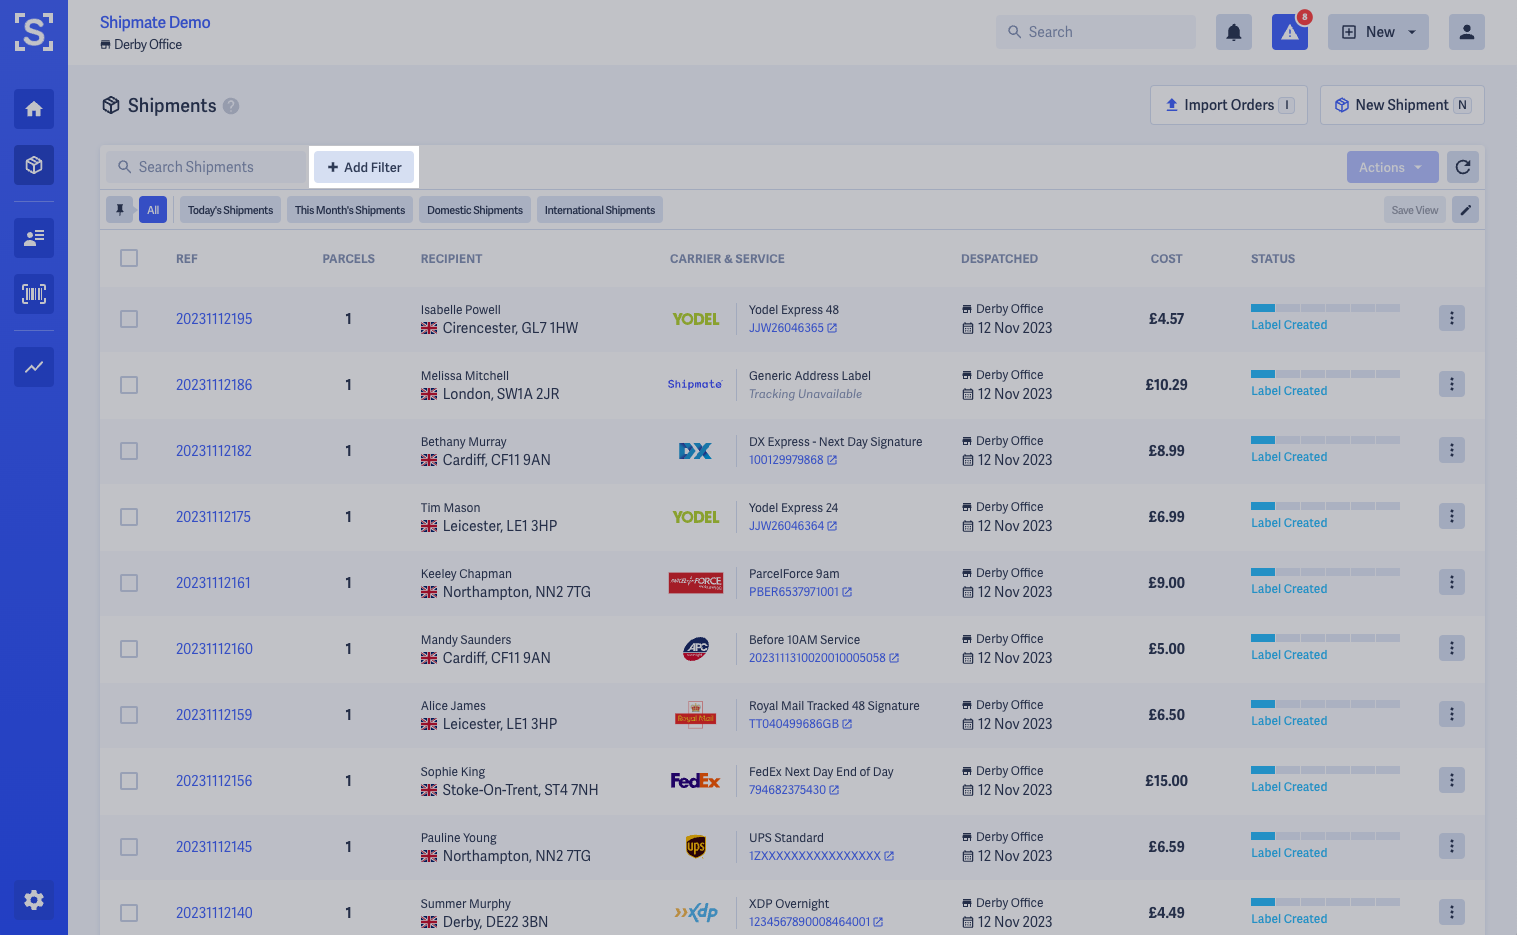
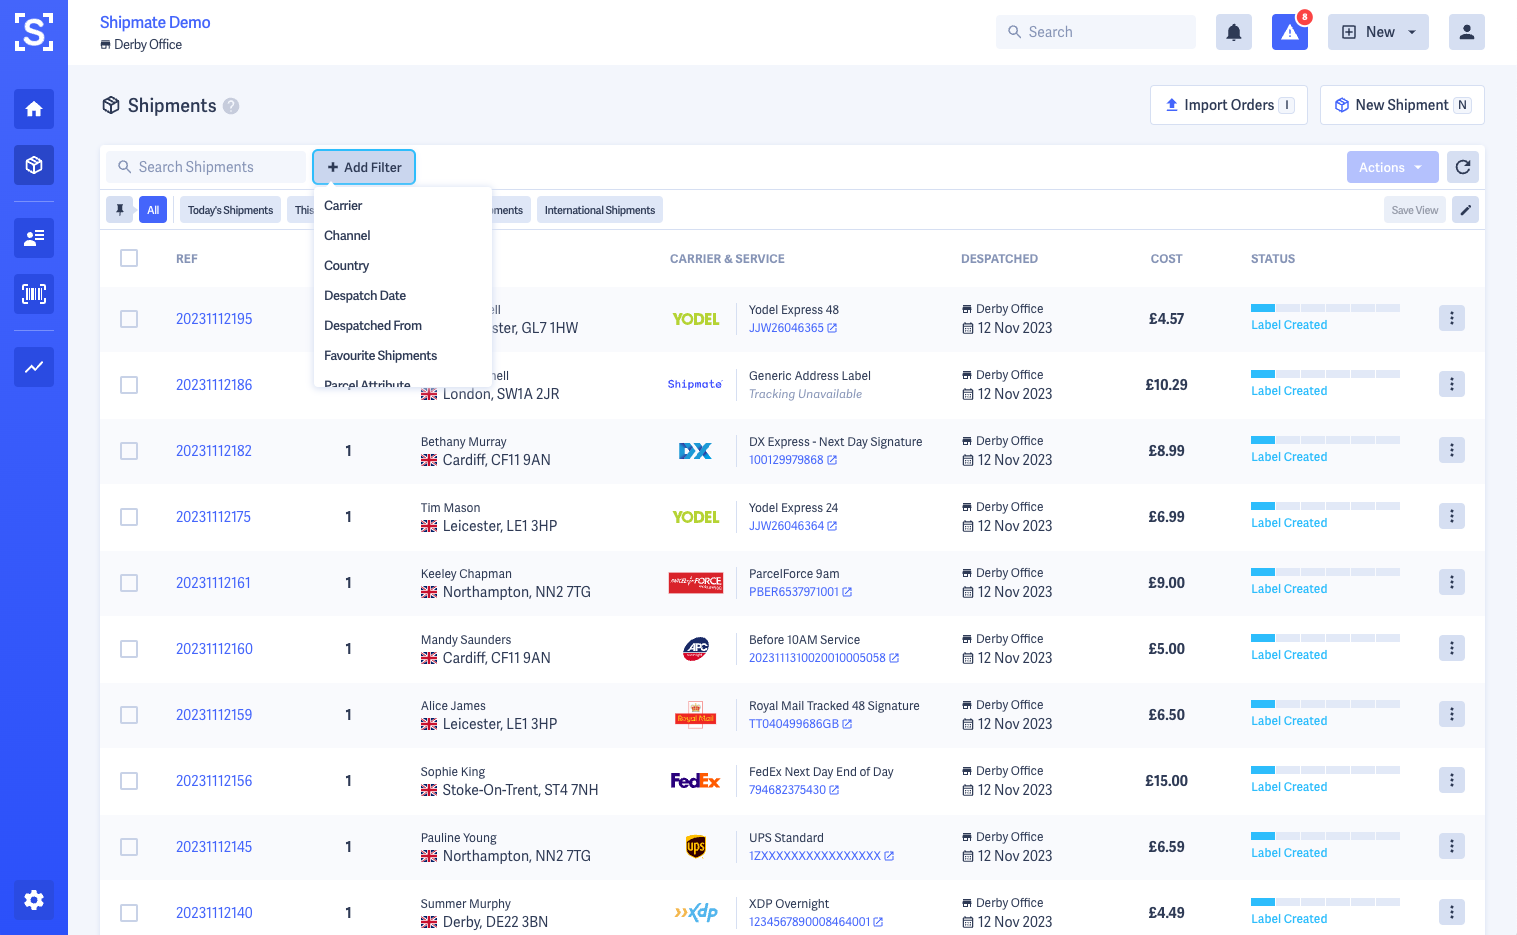
Using the Filters Bar along the top of the Shipments List, you can narrow down your Shipments based on a wide range of criteria, including:
- Name or address using the free text filter
- Despatch Date range
- Carrier
- Channel
- Tracking Status
- Despatch Location
- Country
- Favourite Shipments
- Service Performance
- Custom Fields
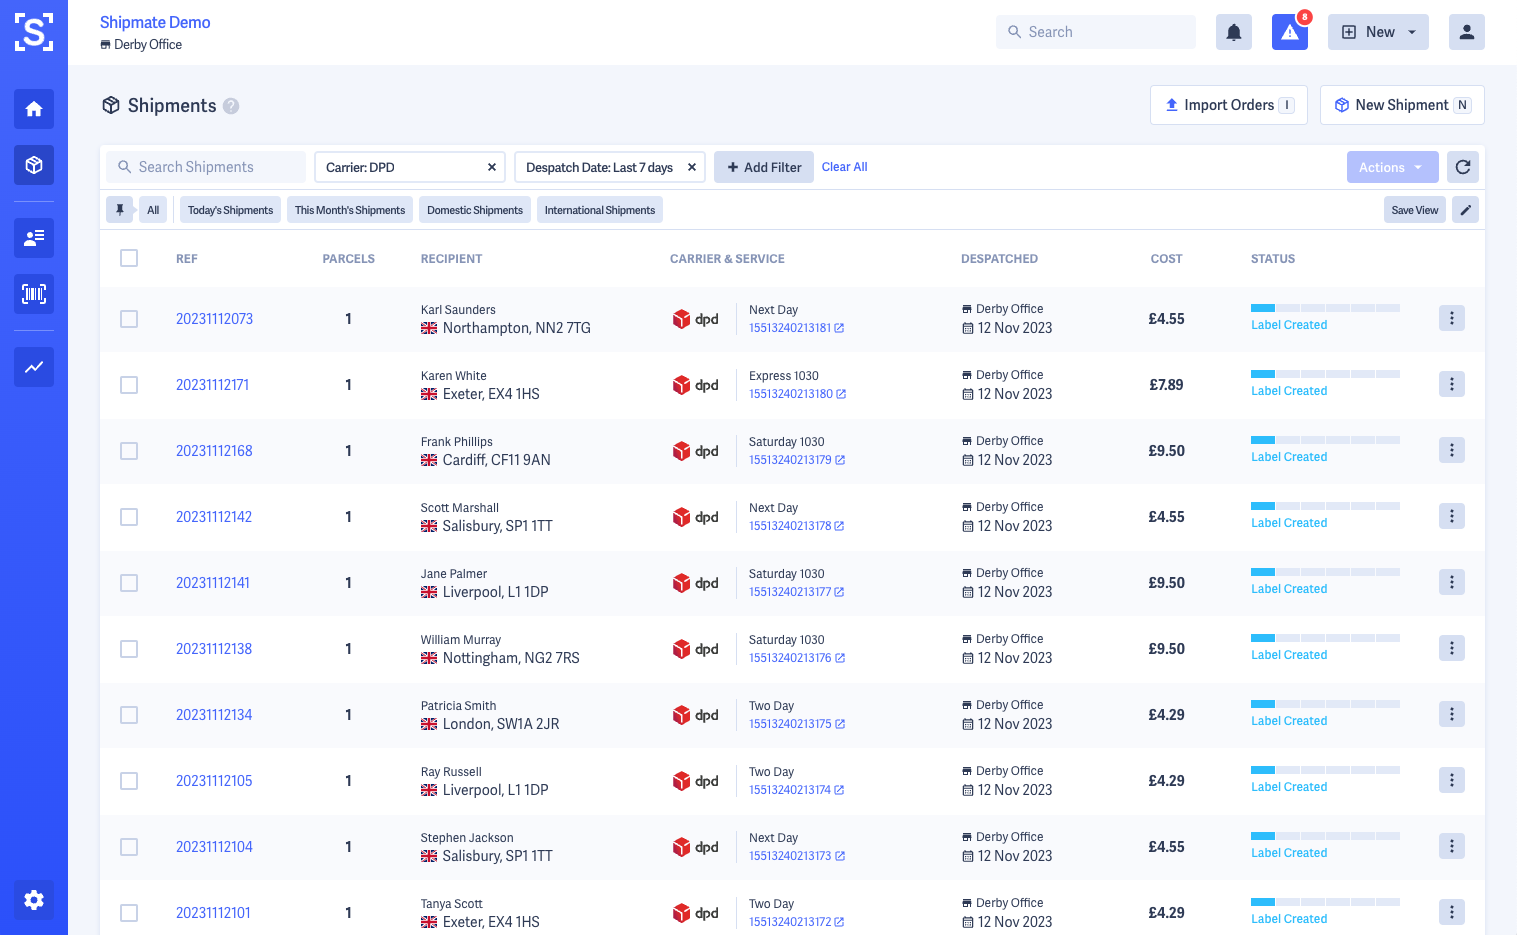
You can add multiple filters, each one narrowing down your search further. This is ideal for searching for all Shipments in a given date range for a particular carrier, for instance.

Saved Views
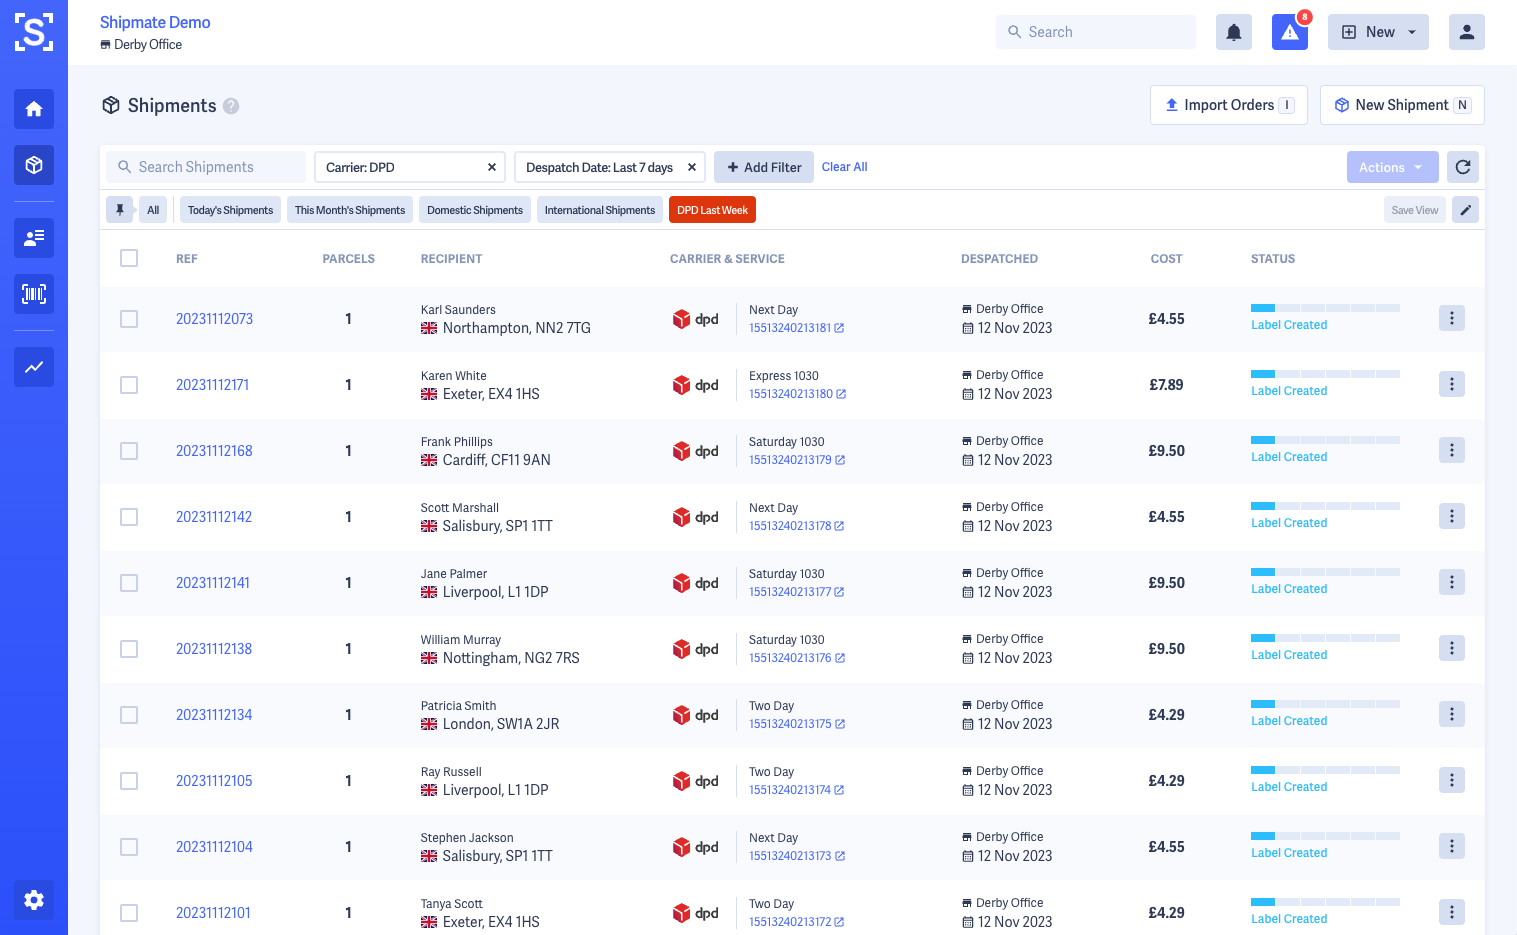
You can quickly access commonly used filters and table options with just one click using Saved Views. These appear just above the Shipments table and help you quickly access data you need as part of your daily routine.
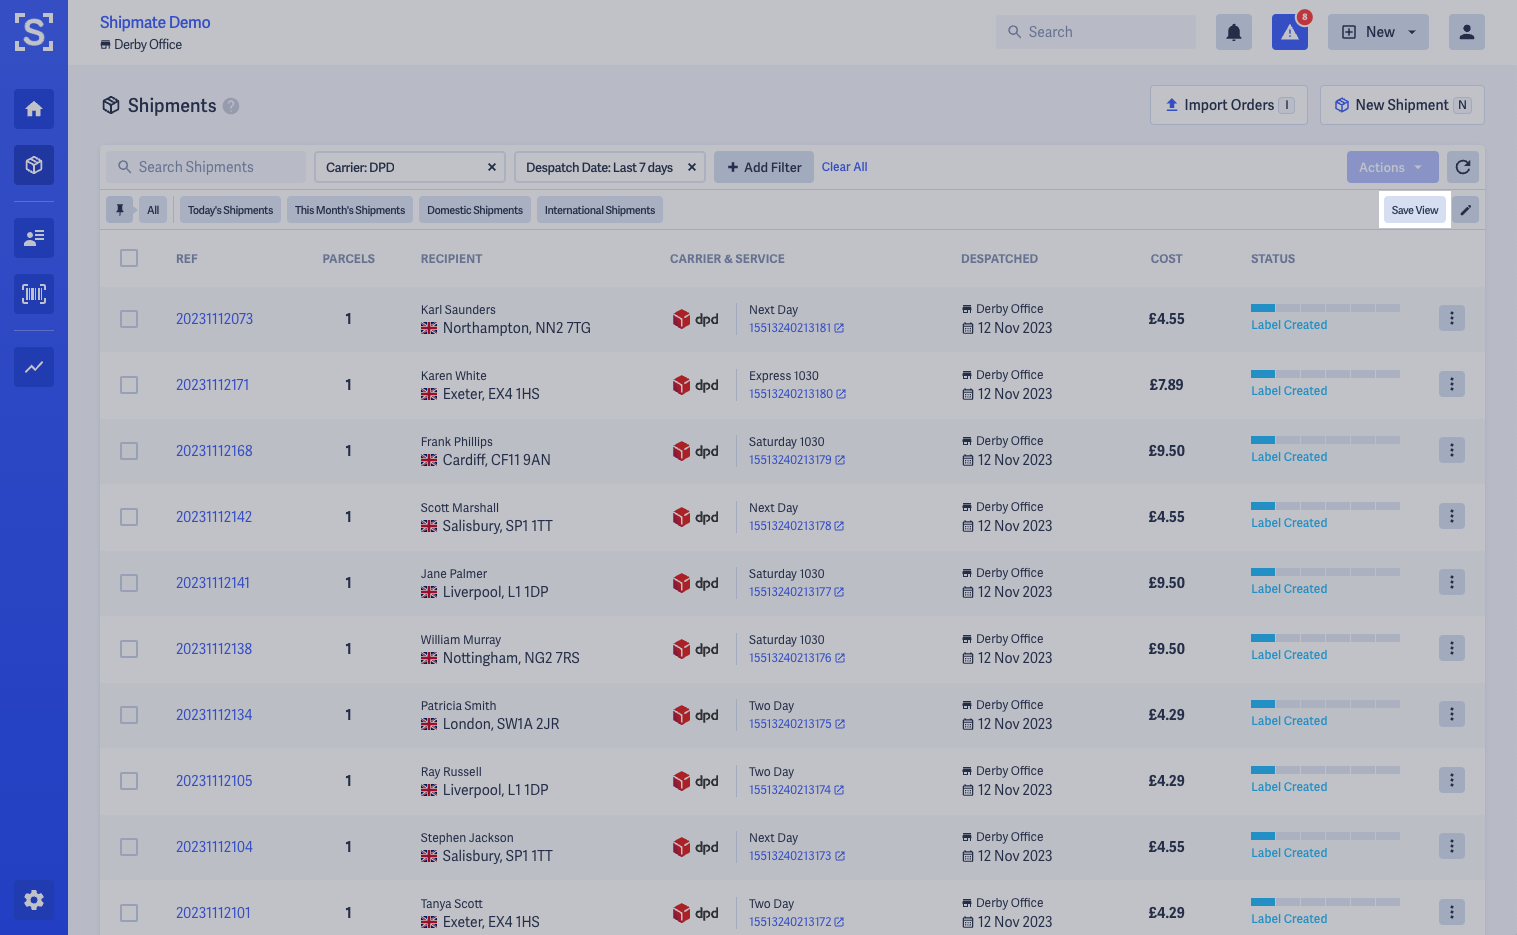
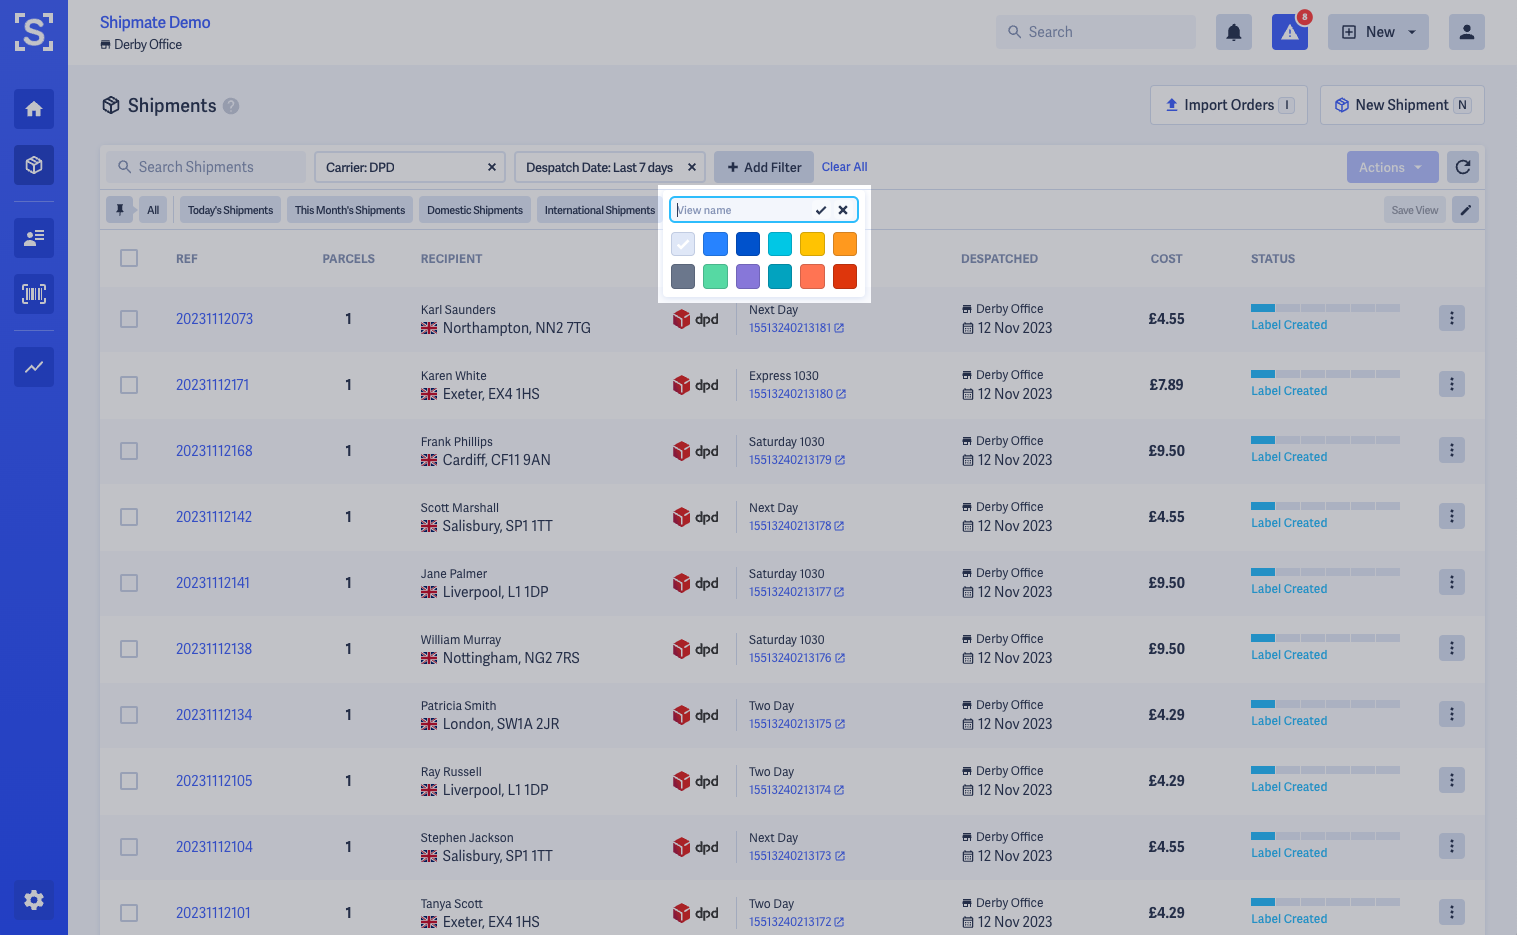
You can save any combination of filters and pagination options – once you have the view how you like it, click the Save View button and give it a name. There are a few examples in your account to get you started.
You can re-order, rename and remove your Saved Views using the Edit button. You can even give each of your Saved Views a different colour from one of twelve ready-made themes, making identifying your views even easier.

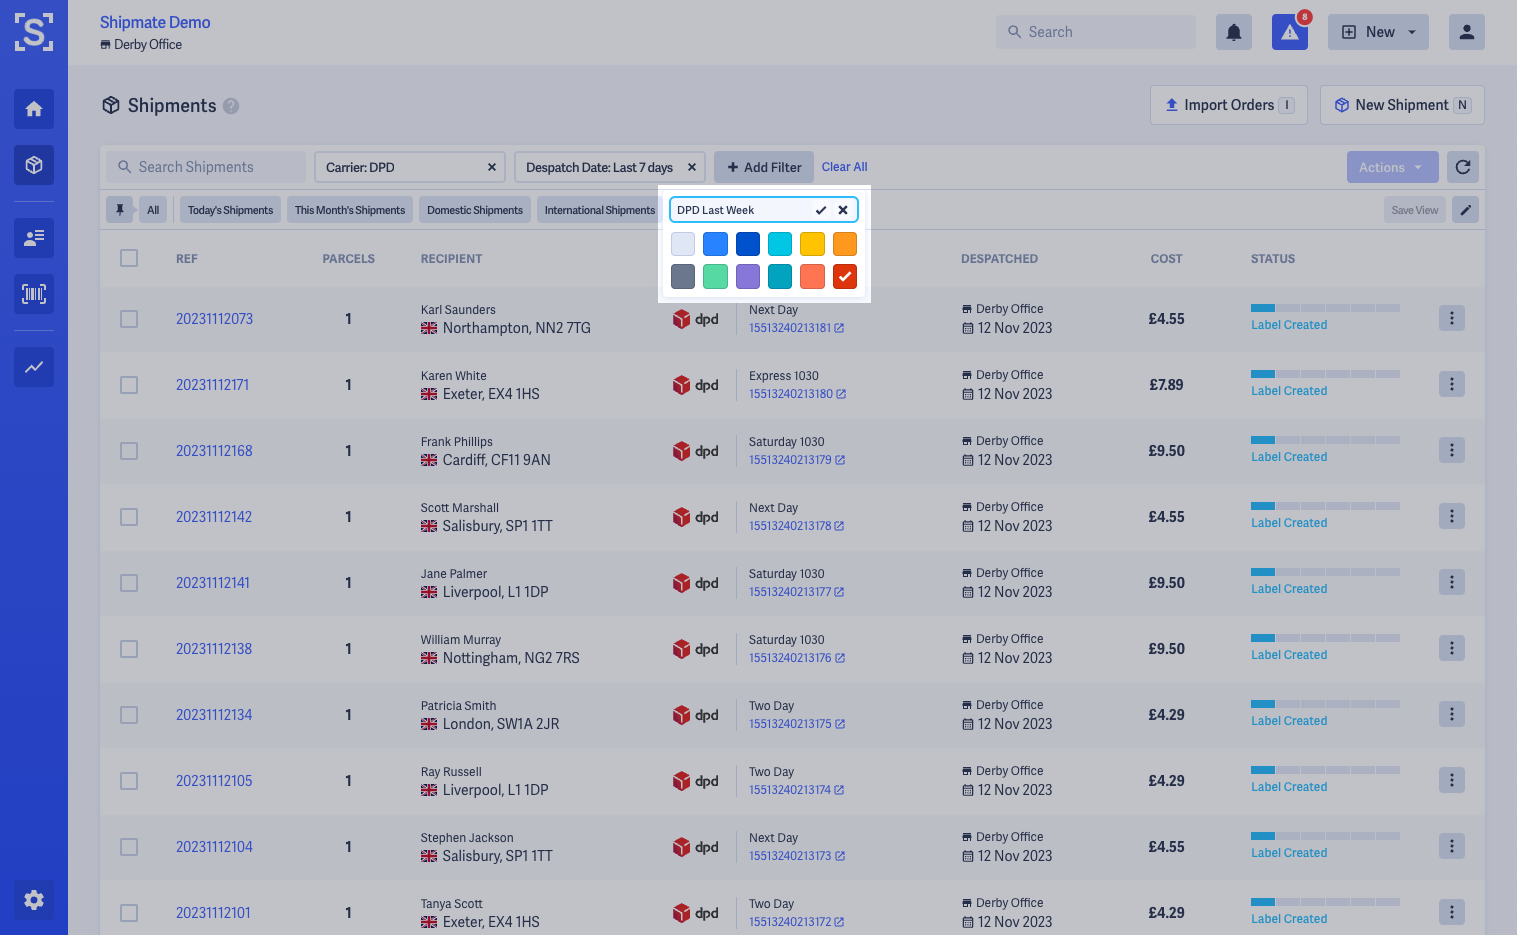
Pinned View
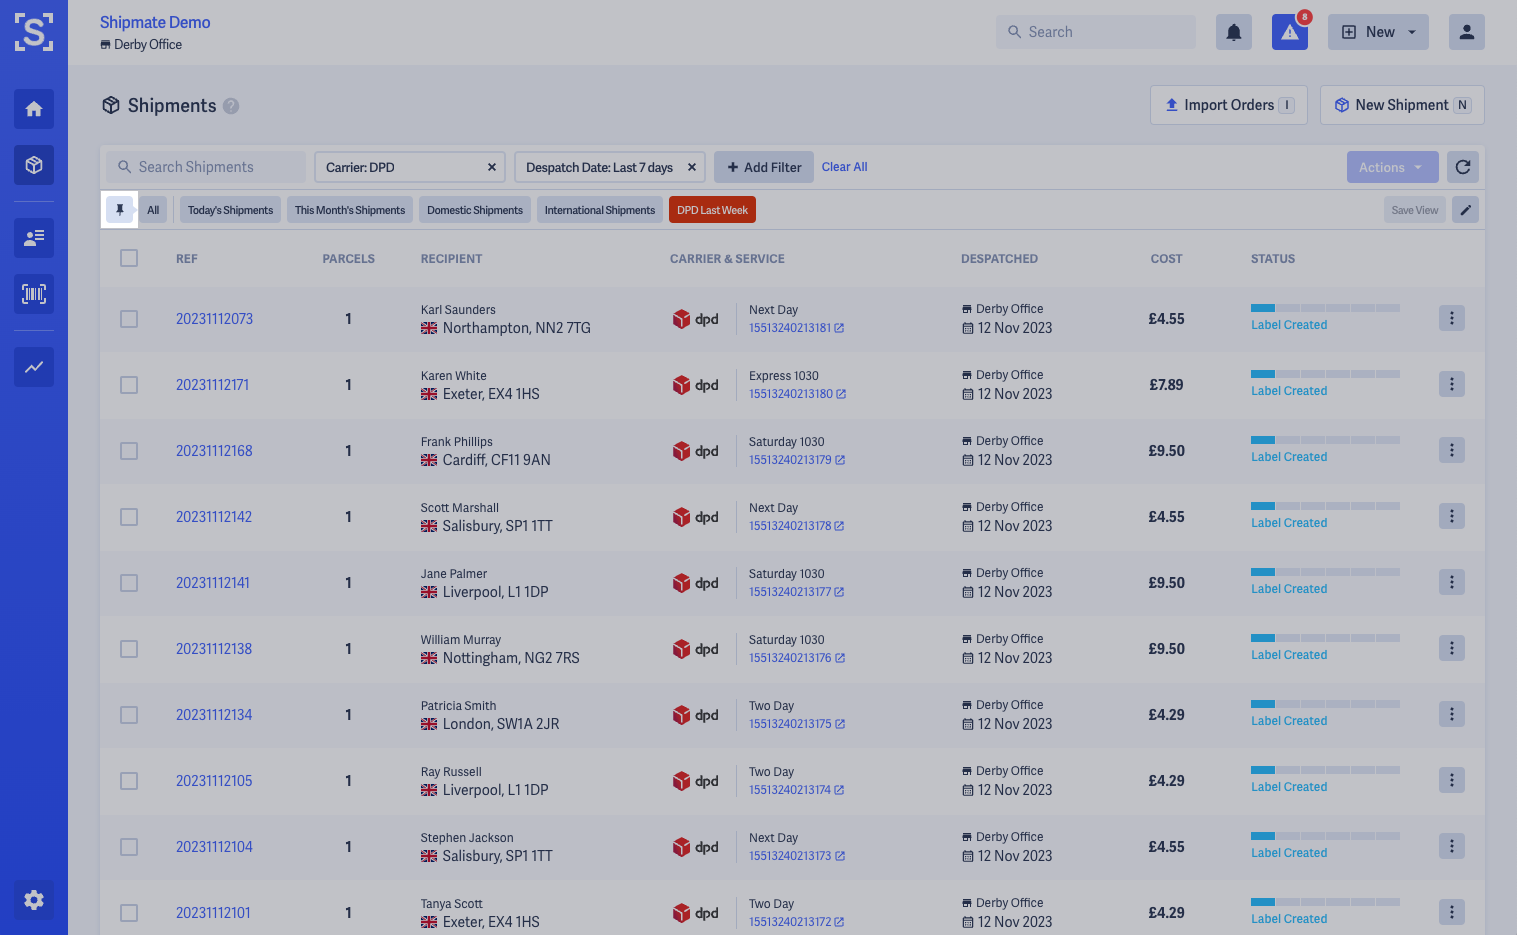
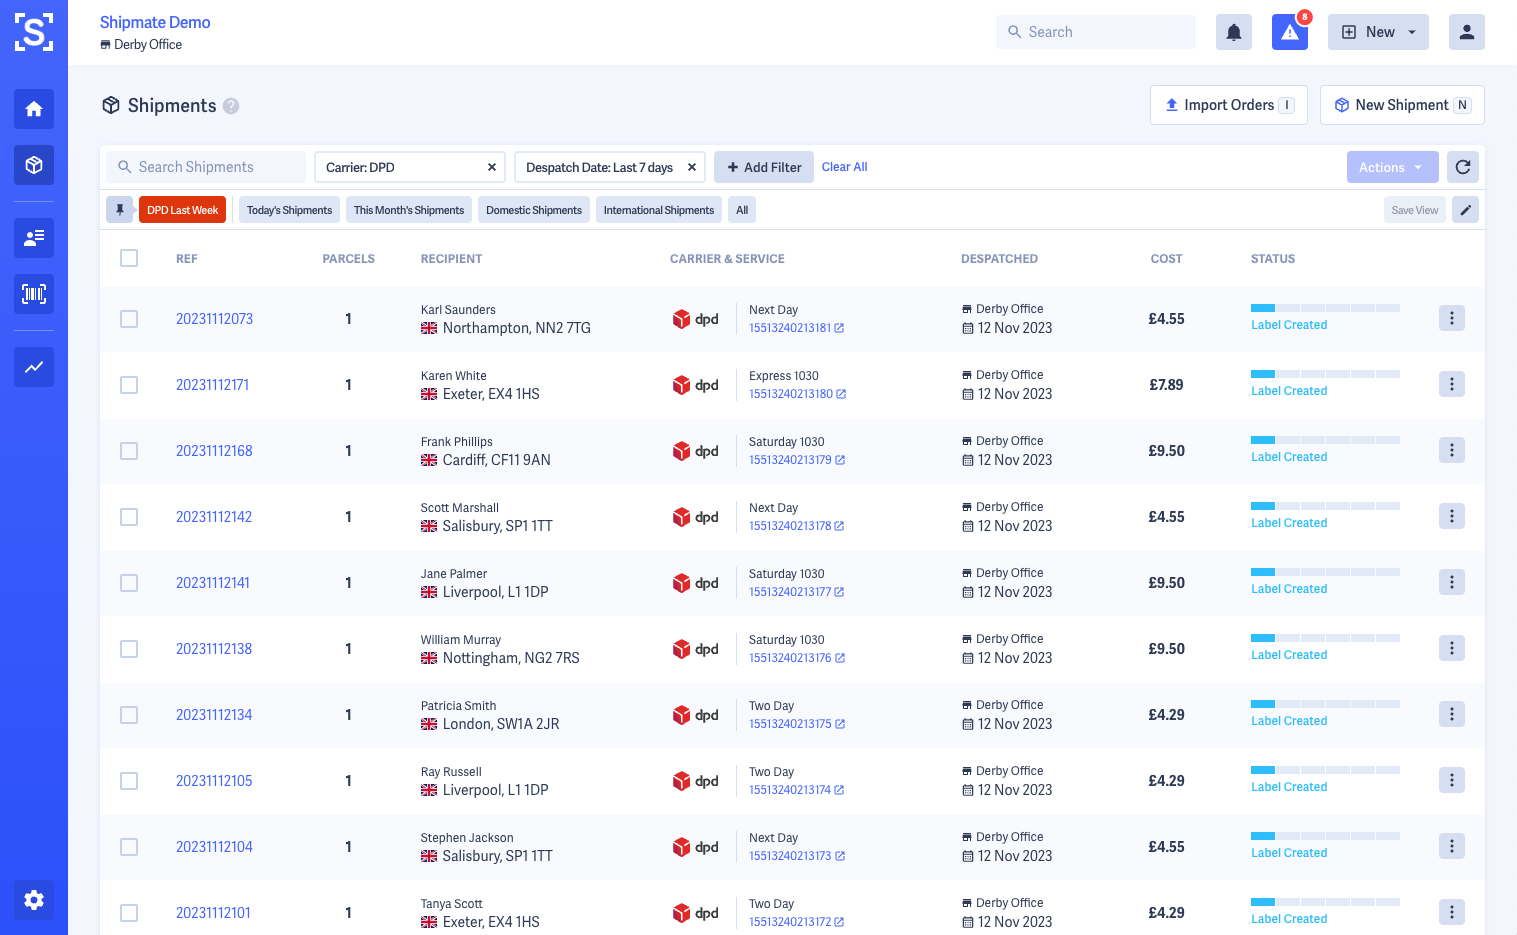
You can choose which Saved View you want to load by default when viewing Shipments, using Pinned Views. When your favourite Saved View is selected, click the Pin icon. This will pin your chosen view and load it automatically from now on.

Editing Shipments
To edit a Shipment, you can use the menu button on the right side of the row of the Shipment in the Shipments List and select Edit Shipment.
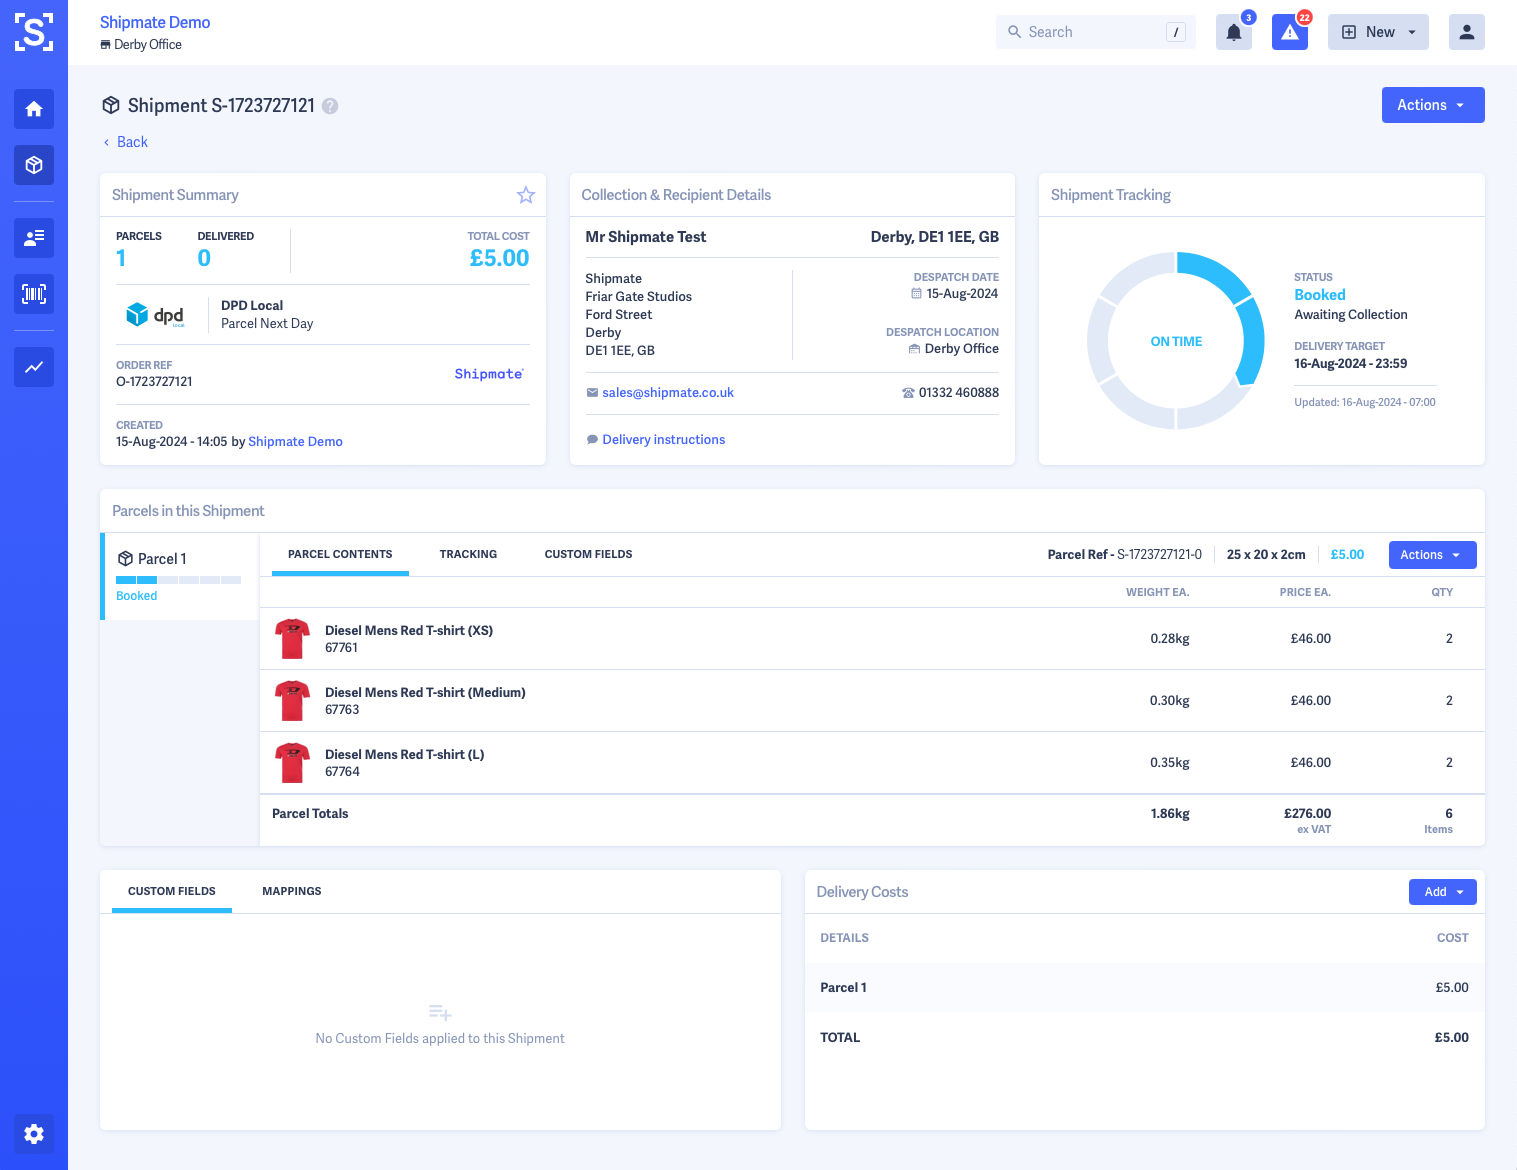
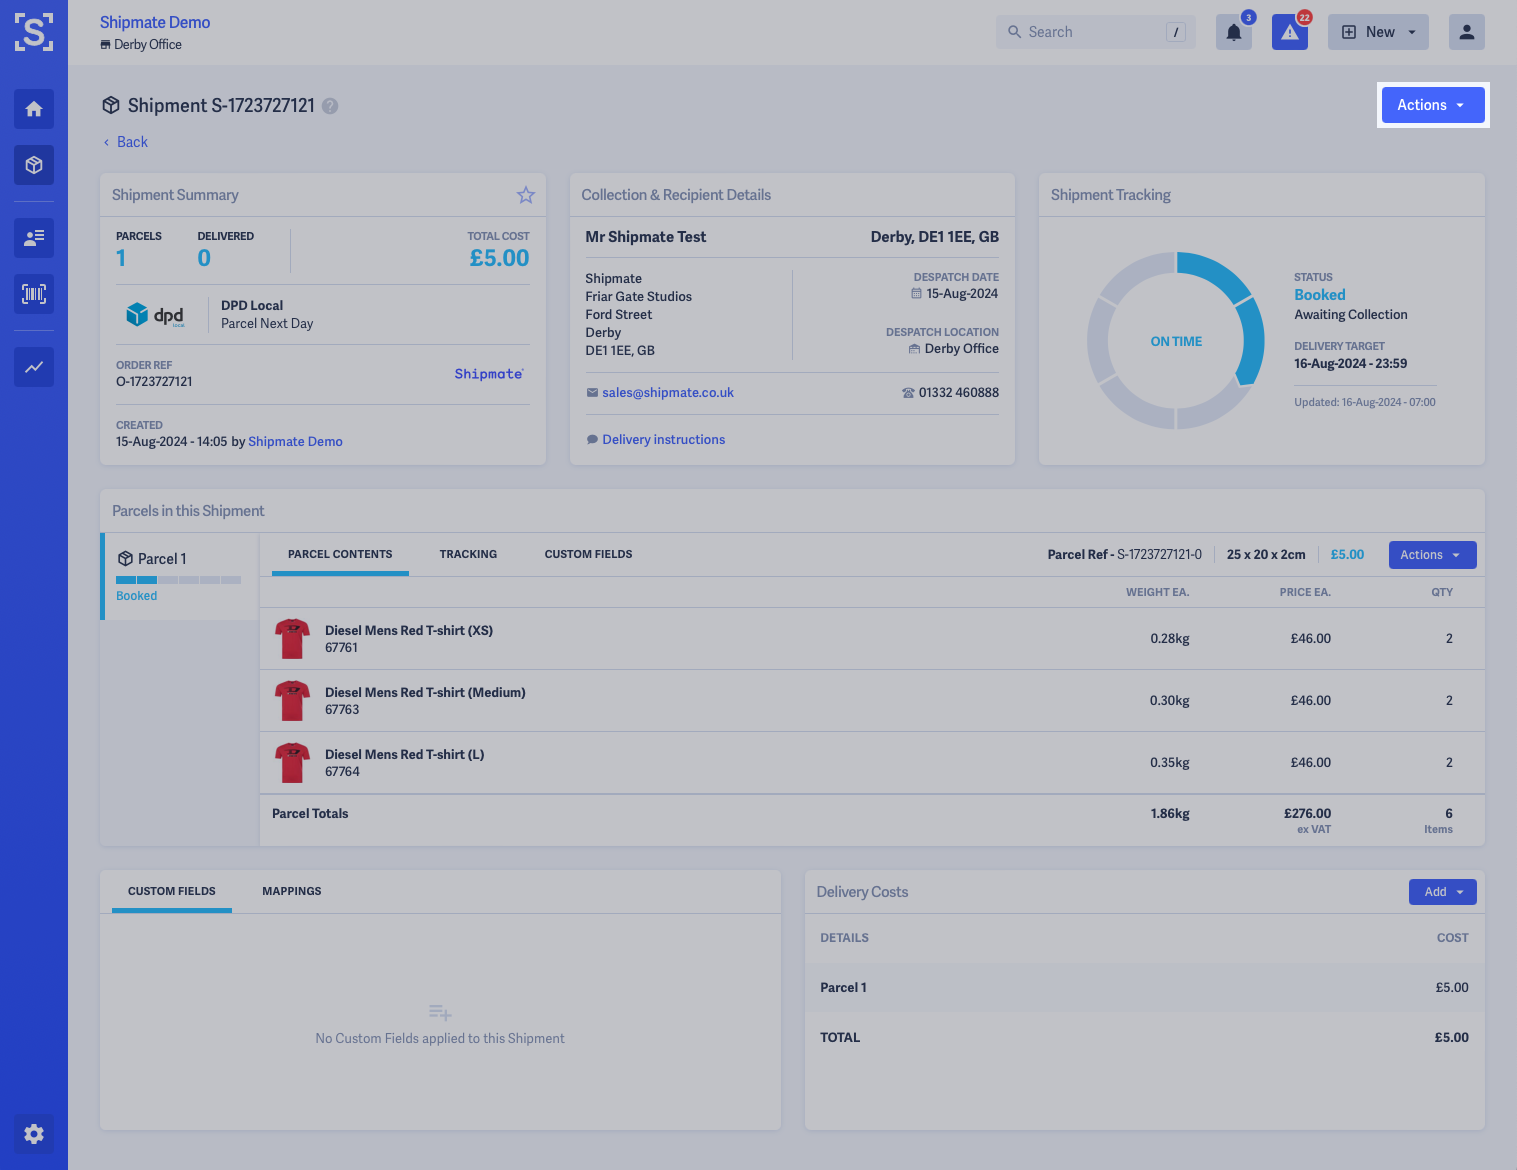
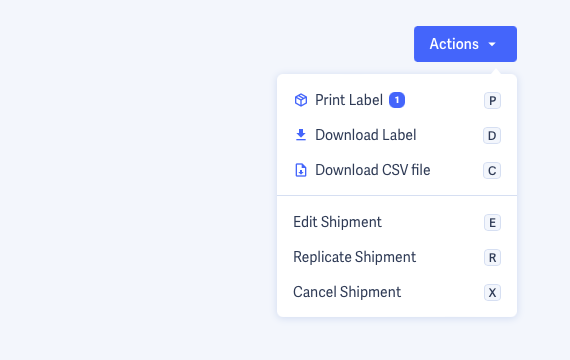
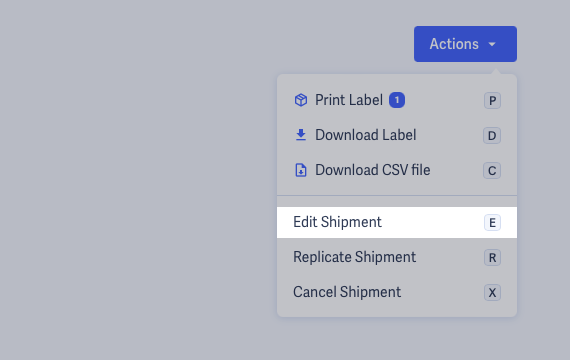
Alernatively, navigate to the individual Shipment, then select Edit Shipment from the Actions drop-down menu.
The Shipment details will be shown in the Shipment Form, regardless of how the Shipment was originally created, allowing you to correct any mistakes or make any amendments, then go through the process of choosing a Carrier and Delivery Service, before re-generating the label(s).
This will create a new Shipment with the edited details, and cancel the previous Shipment. You should therefore print the new label(s) and ensure these are applied to the parcels, covering up any original labels if previously applied.
Note also this will not update the original system with the new tracking details - you may need to communicate this directly with your customer, or update the system manually.


Cancelling Shipments
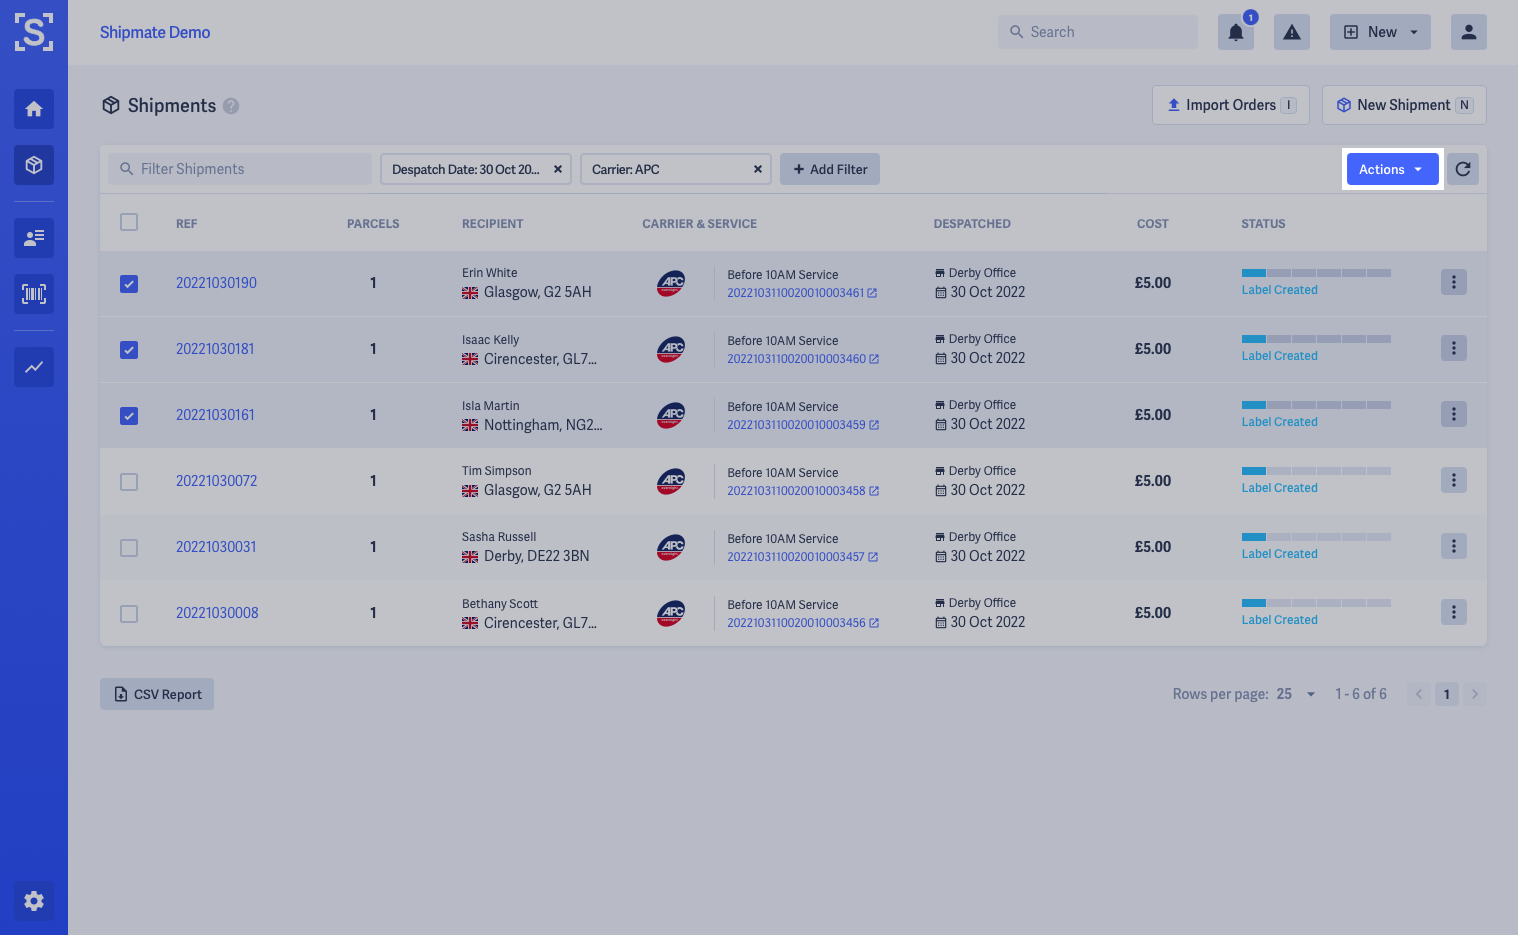
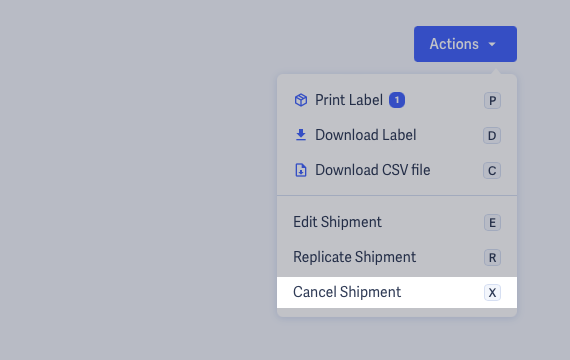
To cancel a Shipment, you can use multi-select on the Shipments List section as described above and select Cancel Shipment.
Alernatively, navigate to the individual Shipment, then select Cancel Shipment from the Actions drop-down menu.


Replicating Shipments
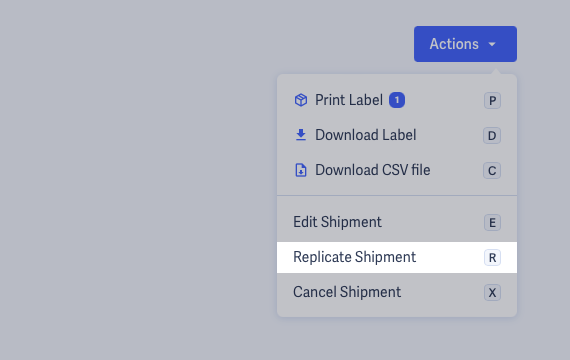
If you wish to copy all the details from a previous Shipment as a starting point for a new one, you can use the Replicate Shipment feature.
This clones all details from the original Shipment, apart from the Despatch Date and Order Reference.
Make any changes you wish to make, as you would using the New Shipment or Edit Shipment process, then generate your label(s).
This time saving feature is ideal when sending regularly to the same recipients, such as in subscription or B2B scenarios.


Manifesting Shipments
Many carriers automatically manifest Shipments as they are created, however some carriers require a manifest process to be carried out ahead of collections, or rely on a server file being transmitted to their servers in order to read the barcodes on the labels Shipmate generates.
When a carrier account requiring manifests is added to your Shipmate account, a Manifest Schedule is automatically created, running the process at 5:00pm on weekdays. You are able to change this to suit the arrangements you have with each carrier on a 7-day schedule.
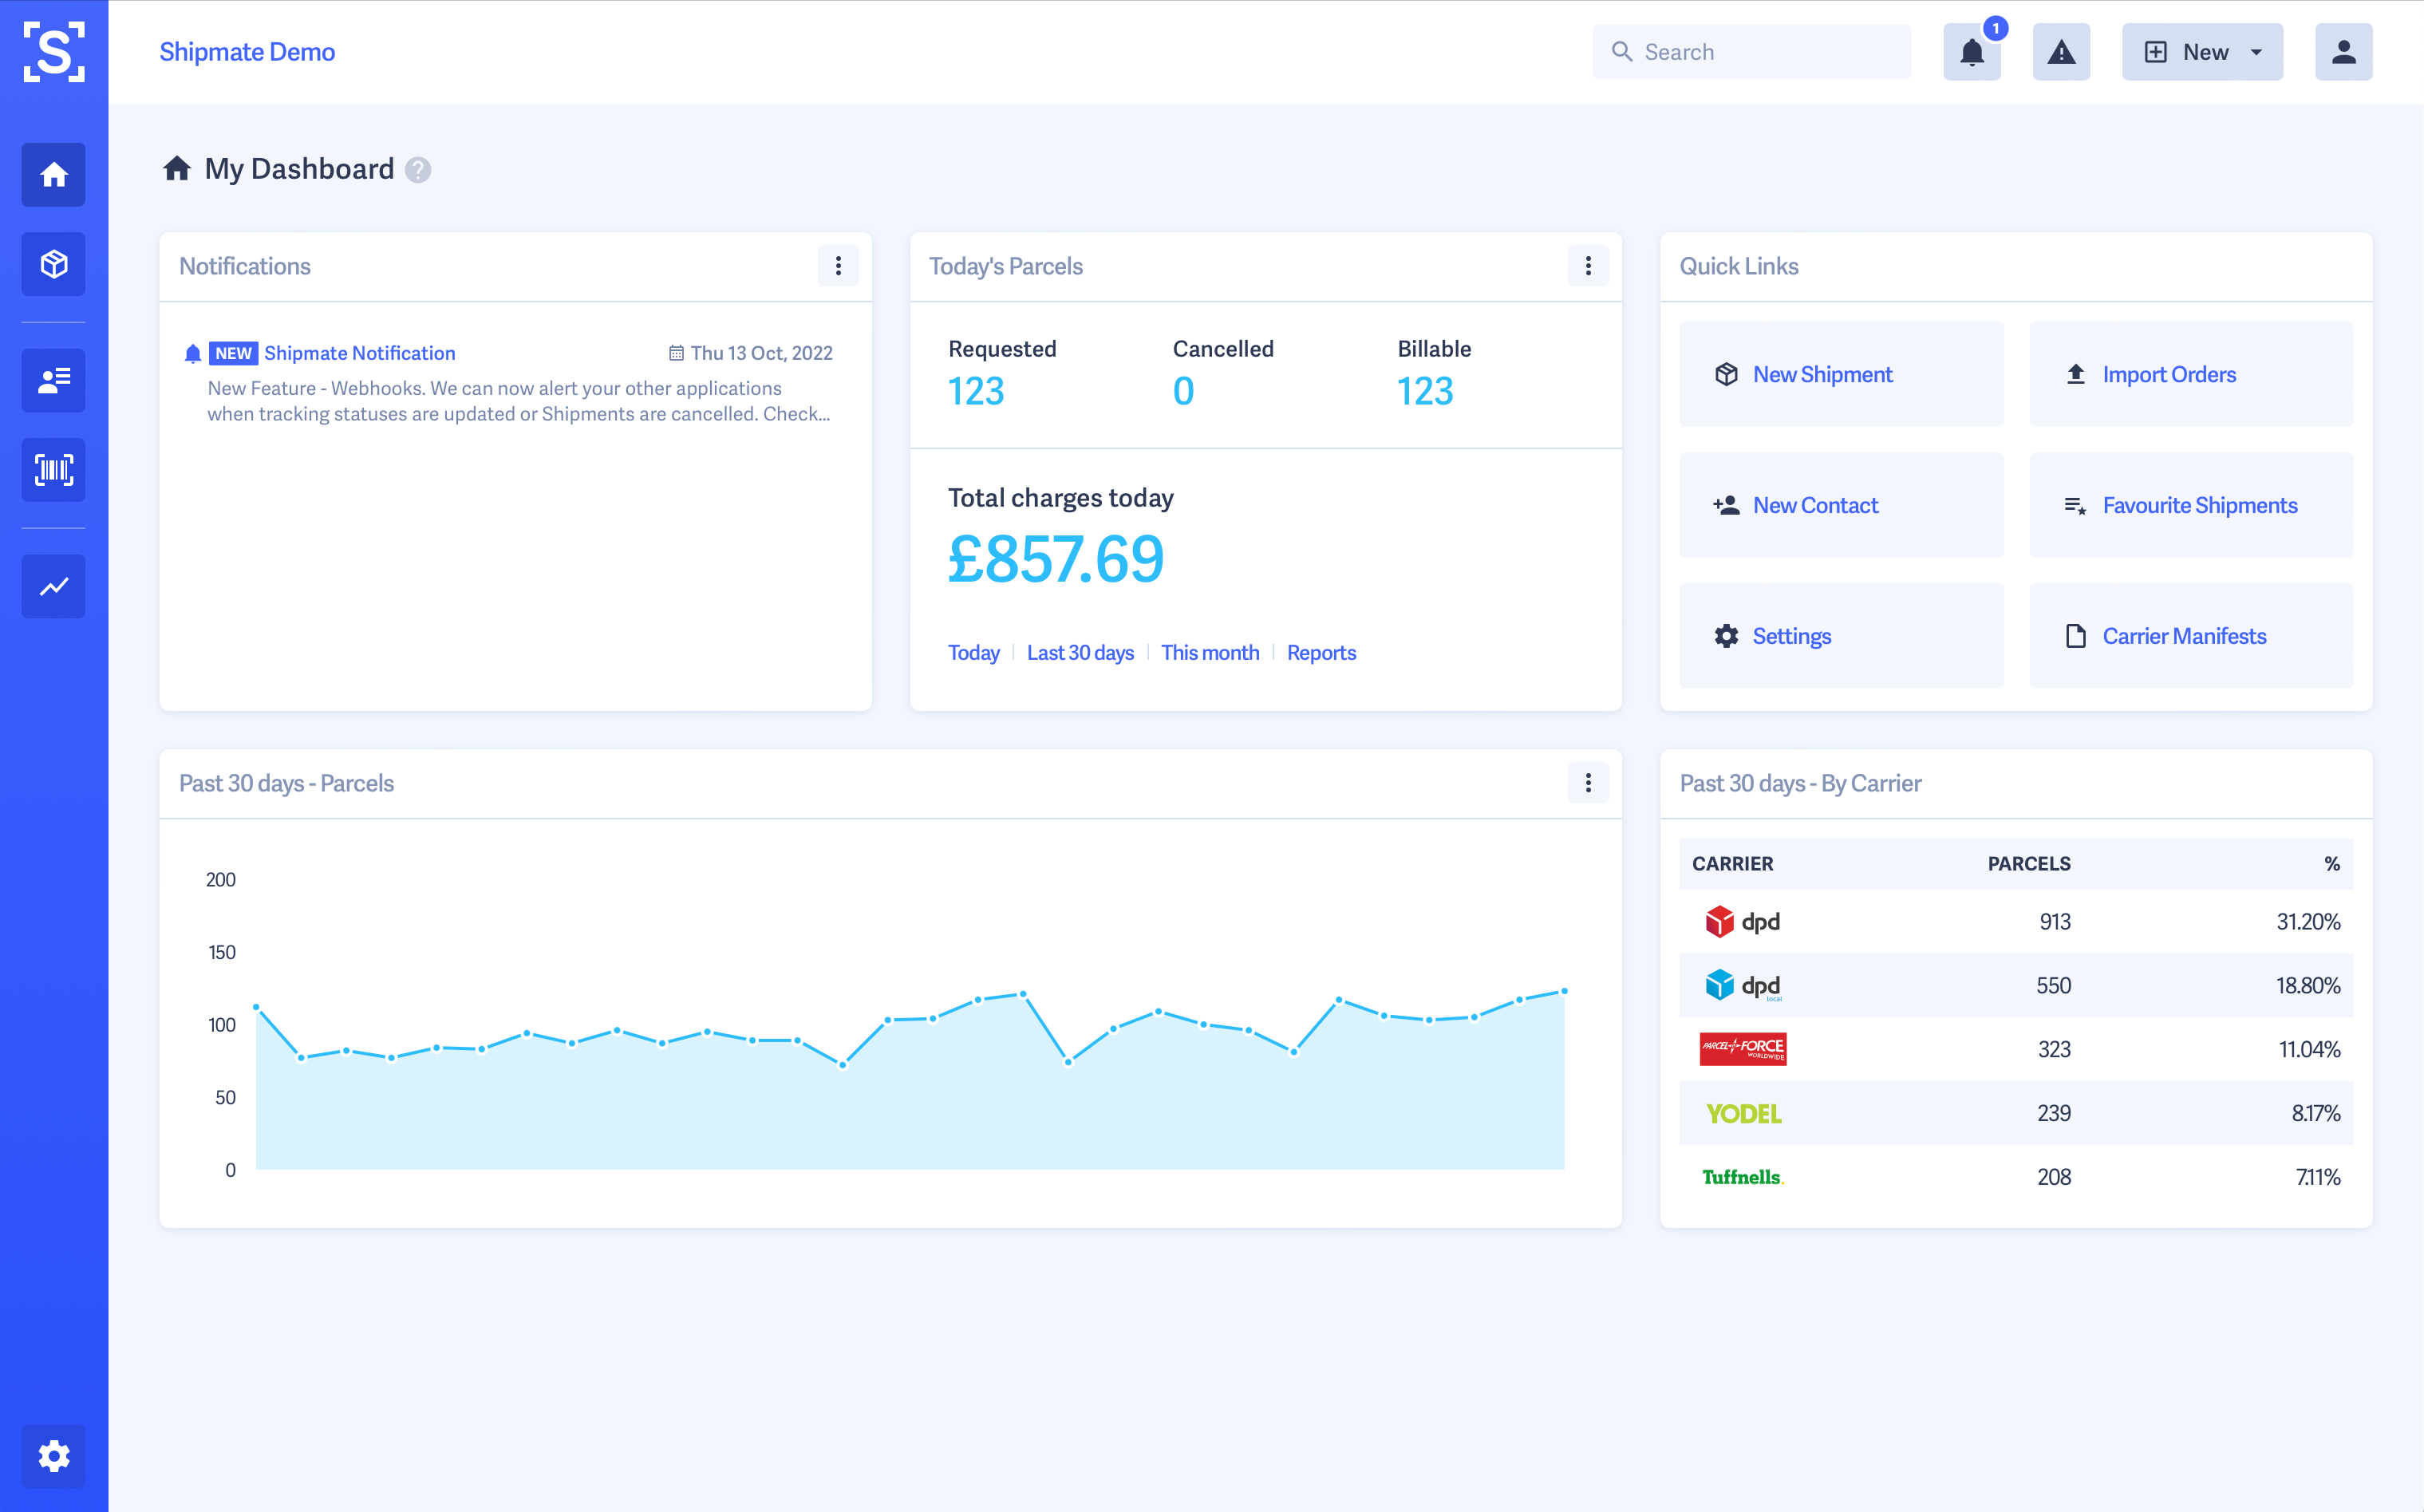
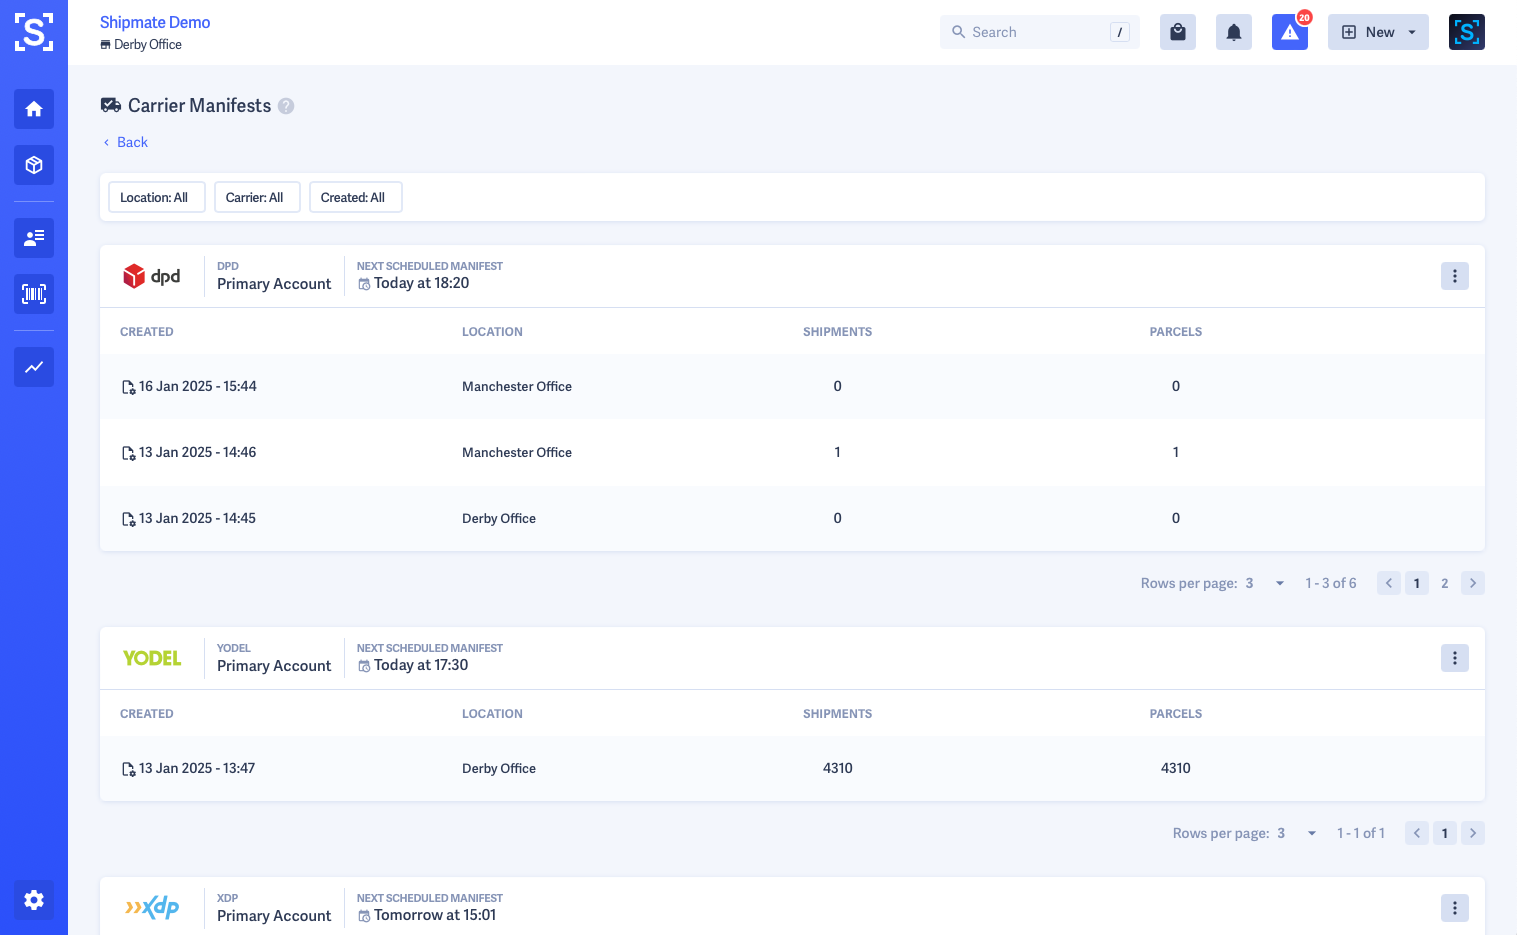
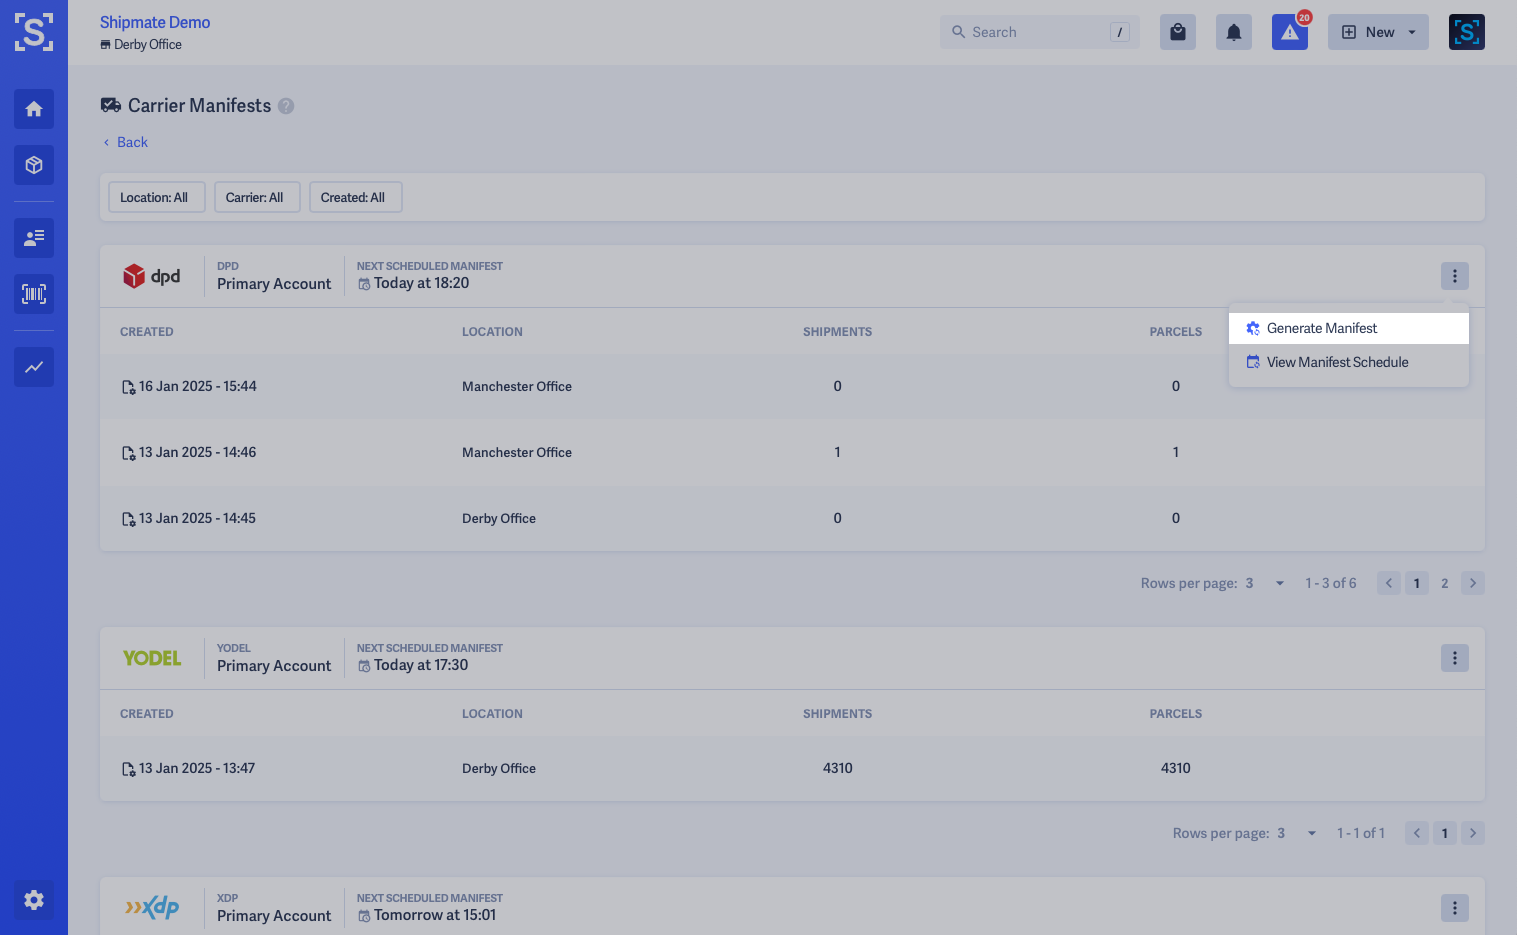
You can view details of recent manifests by clicking the Carrier Manifests Quick Link on the Shipmate Dashboard.
For each supported Carrier Account, a table containing the latest three manifests will be shown, each with the date and time it was processed, the location it was for alongside statistics on the number of Shipments and Parcels on the manifest. When supported, a Download link will be displayed allowing you to download a PDF file of the manifest.
Above the table the day and time of the next scheduled manifest is displayed alongside an Options ⋮ button.
Downloading Manifest PDFs
Shipmate automatically manifests your shipment data with carriers according to your Manifest Schedule, however some carriers require a paper manifest to be provided when they collect your parcels.
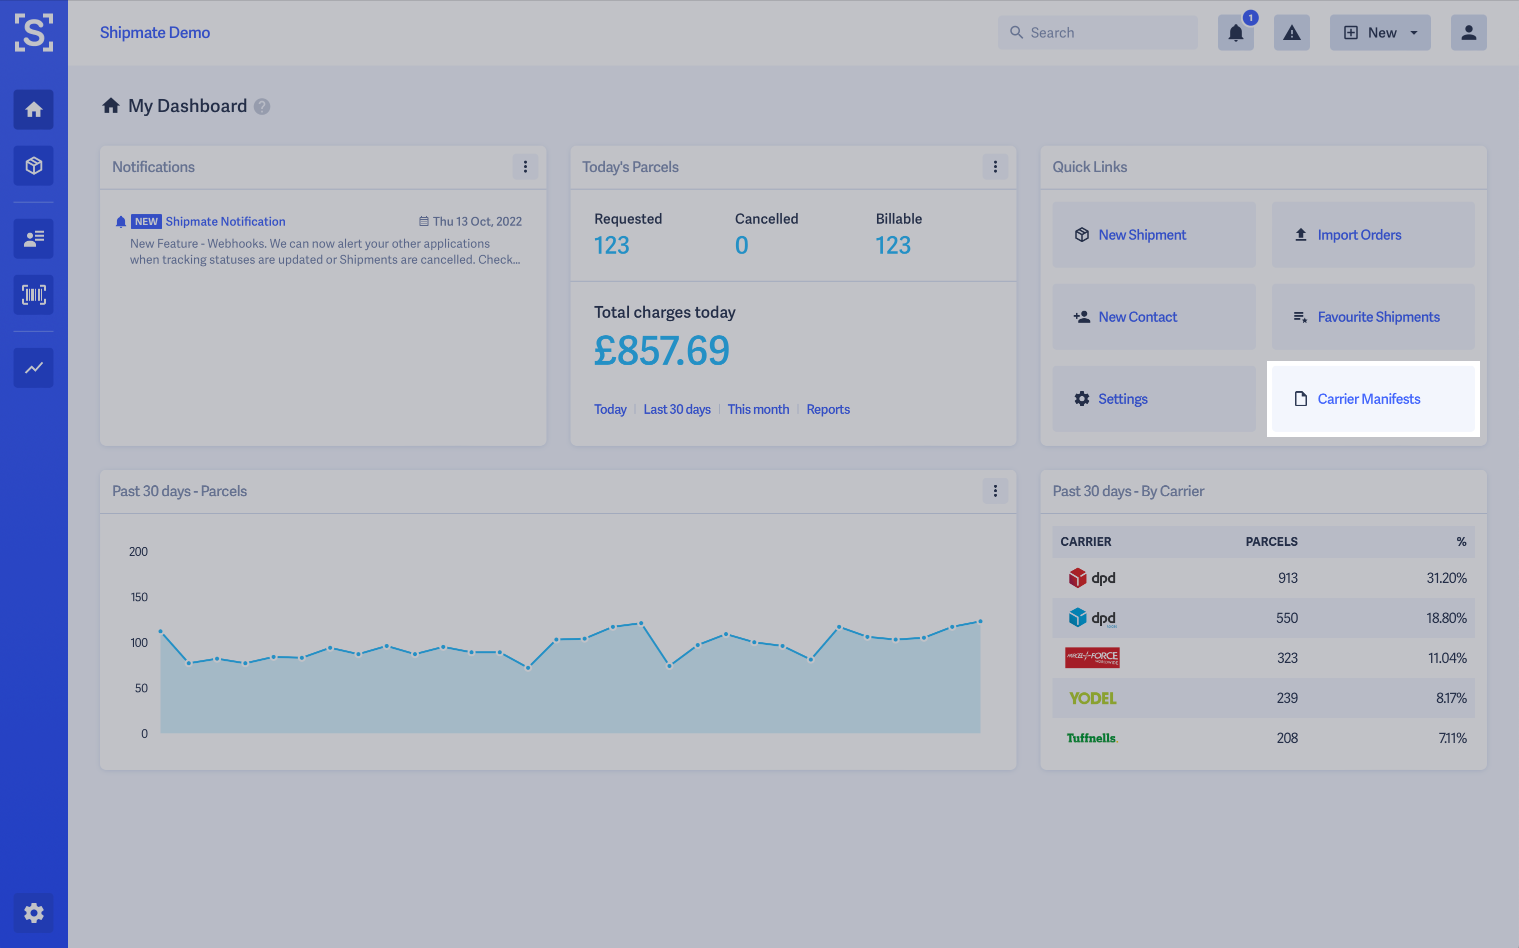
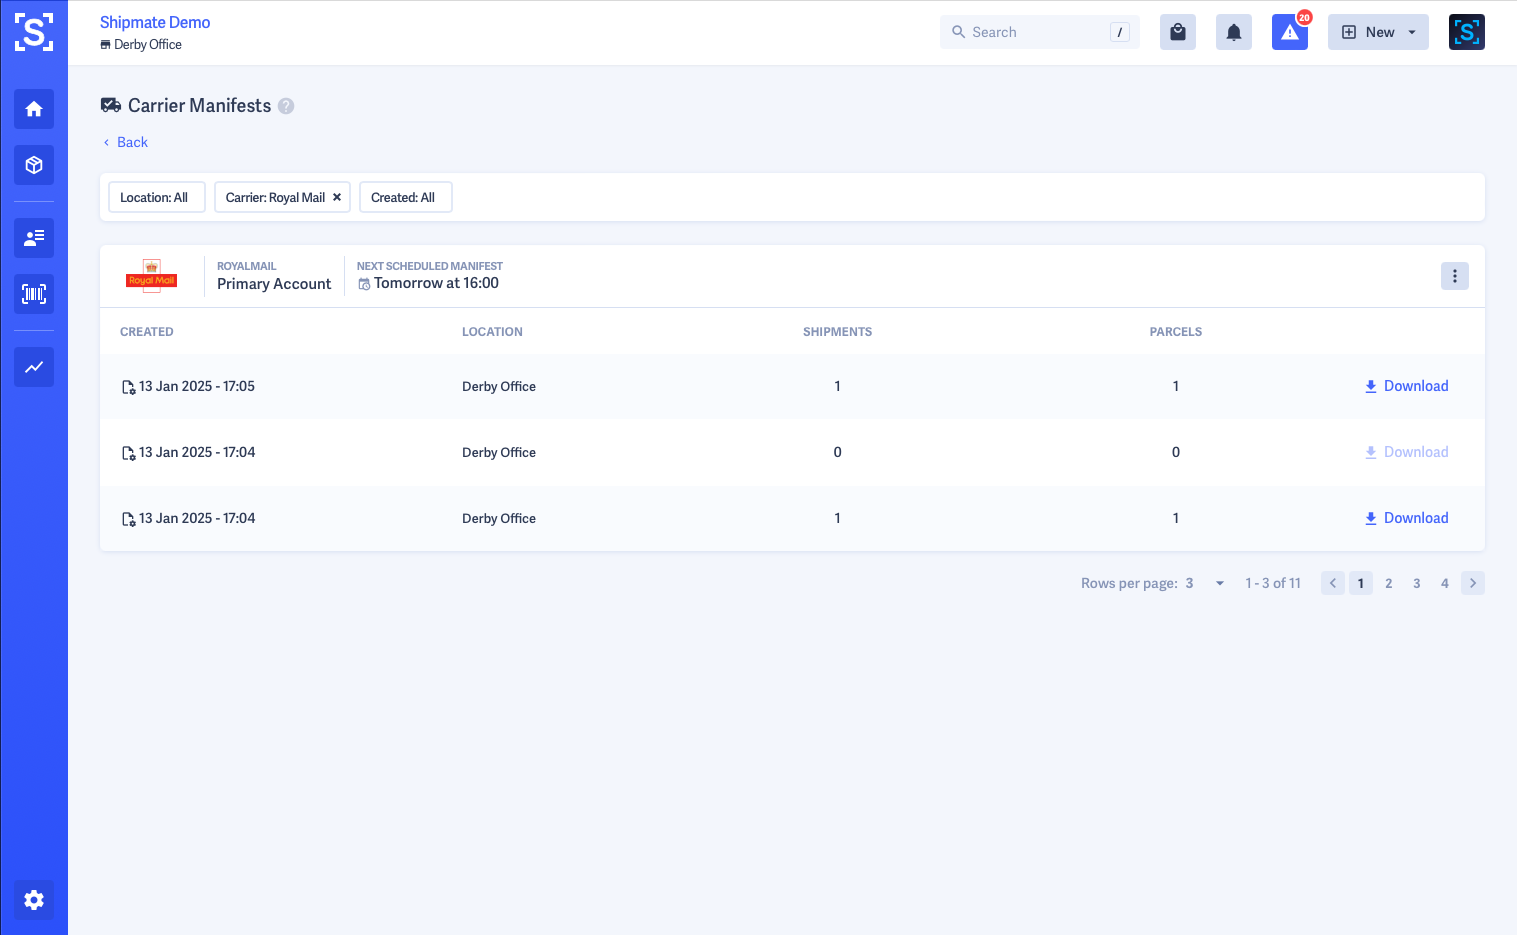
You can view details of recent manifests by clicking the Carrier Manifests Quick Link on the Shipmate Dashboard.
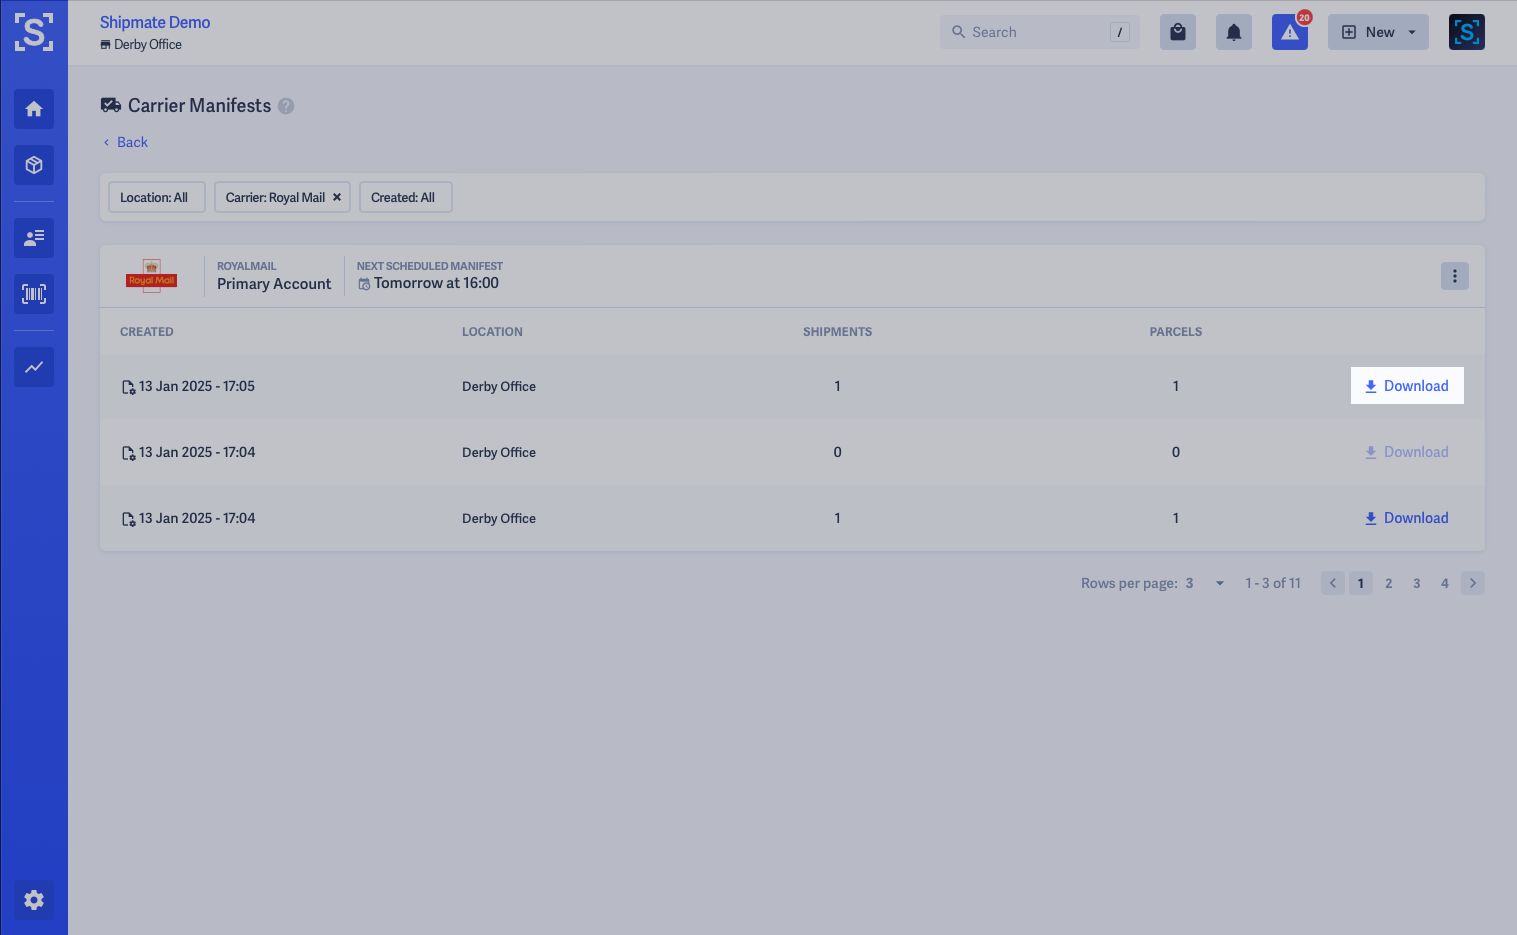
From the Carrier Manifests screen you can filter Carrier Accounts to the one you require, if needed, then click the Download button to download the manifest PDF file for printing.


Creating Ad-Hoc Manifests
In some circumstances you might need to create additional manifests during the day, perhaps in busy periods or if the carrier arrives early to collect your parcels.
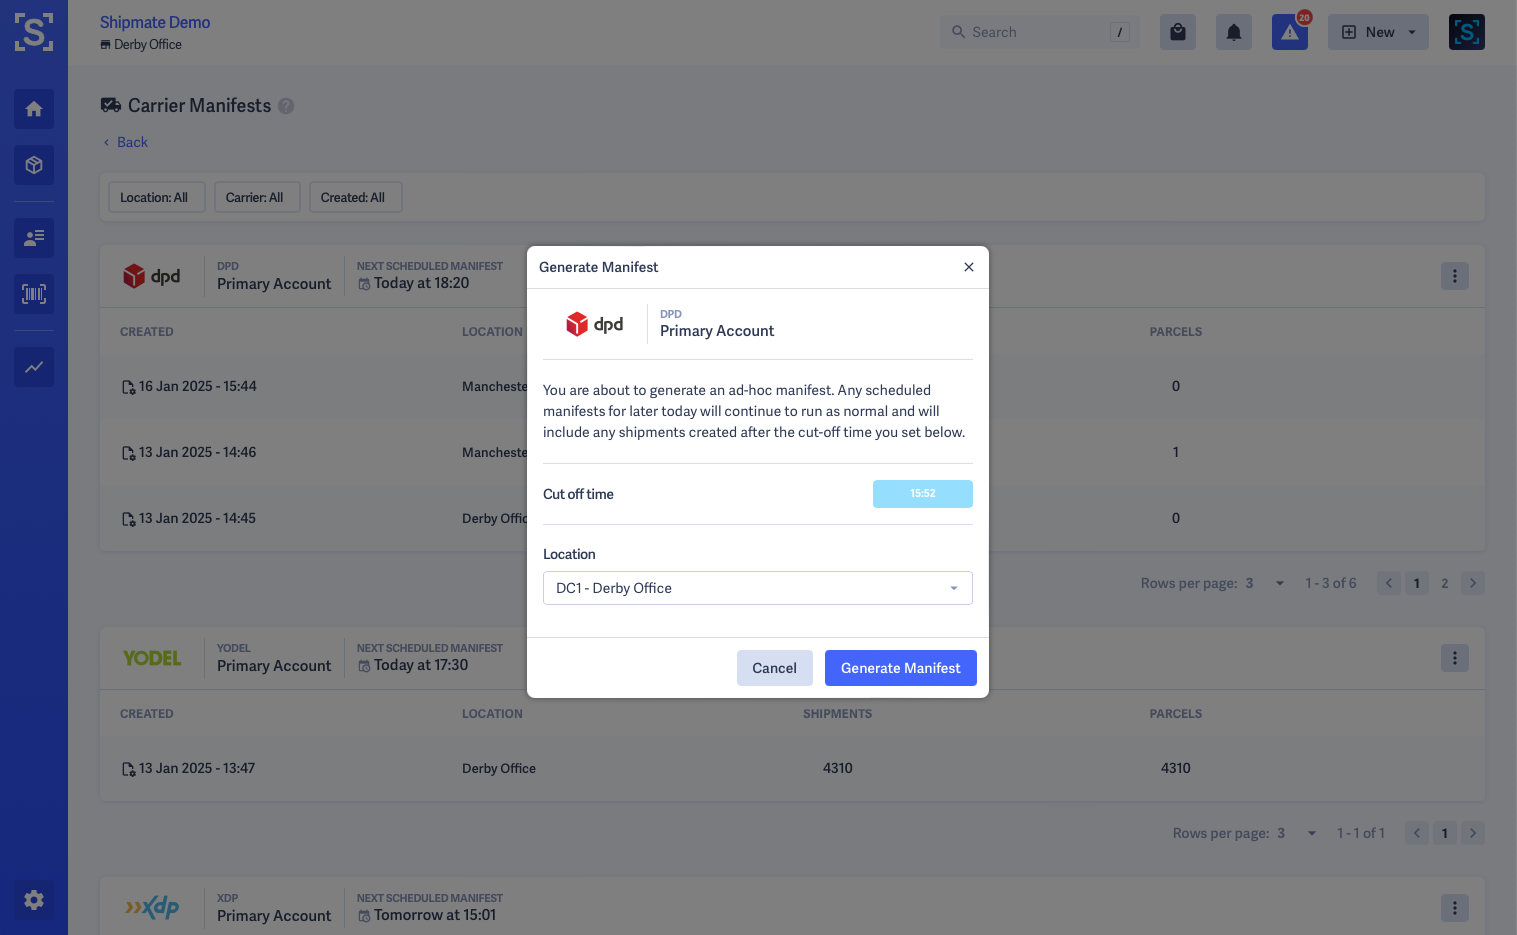
From the Carrier Manifests page you can create Ad-Hoc Manifests that are in addition to manifests generated with the Manifest Schedule.
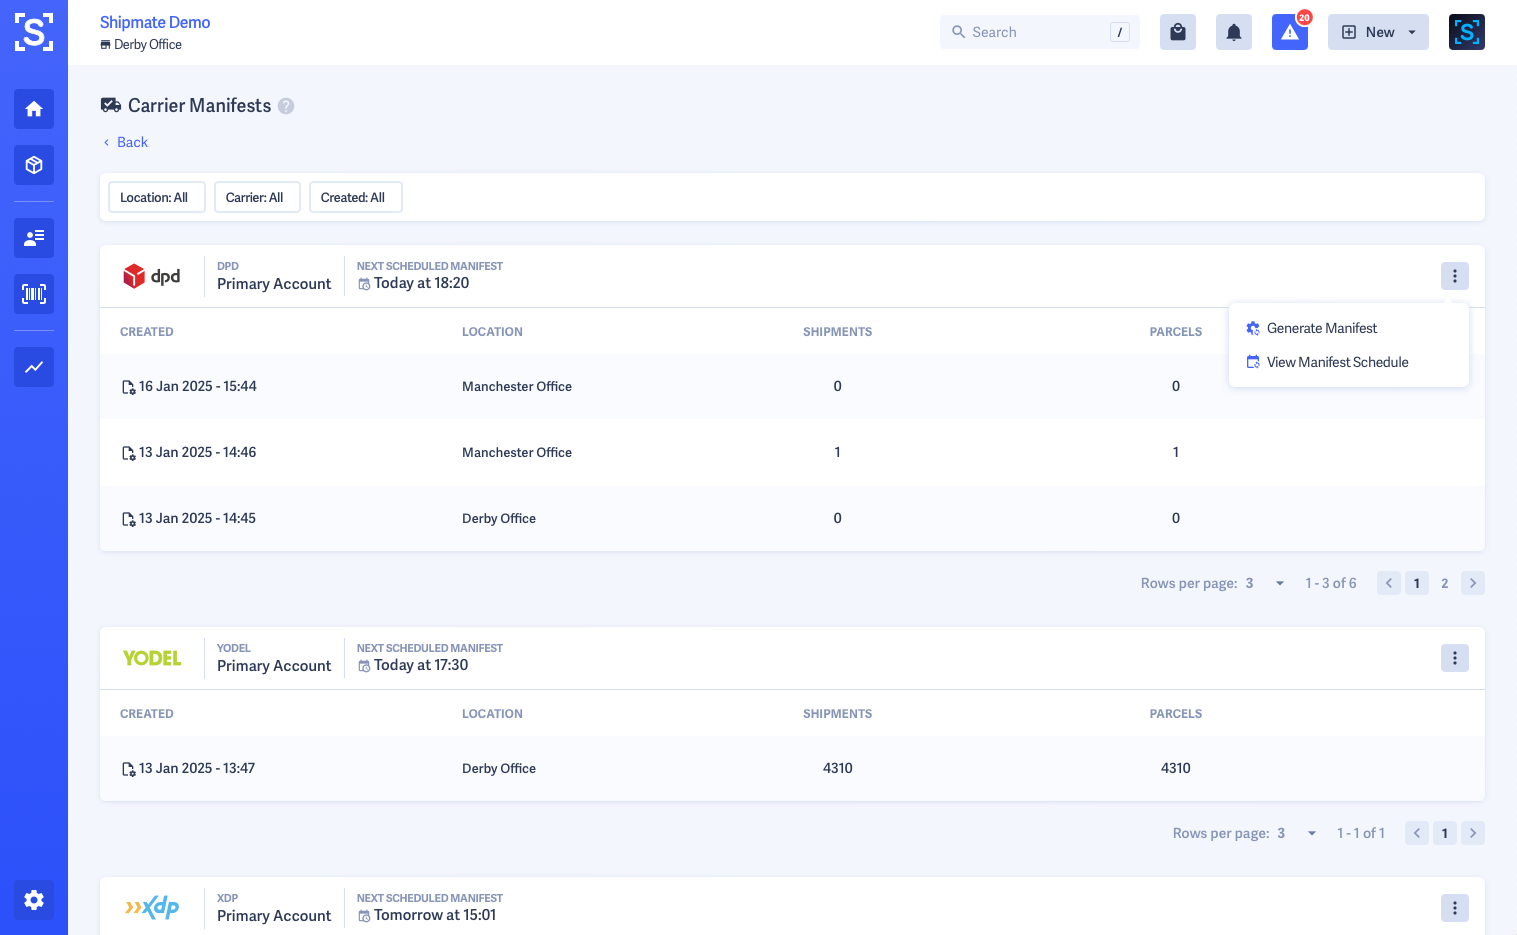
To create an Ad-Hoc Manifest, first click Carrier Manifests from the Dashboard, then filter to the Carrier Account you need to generate a manifest for. Click the Options ⋮ button and select Generate Manifest.
A pop-up is displayed allowing you to choose a cut-off time (when supported) and also a Location the manifest applies to. The cut-off time will default to the current time, manifesting all Shipments since the previous manifest. Some carriers allow a variable cut-off time, in which case you can select a time in the past to manifest until.
Once you are happy with your selections, click the Generate Manifest button to run the process. This may take a minute or two depending on the number of Shipments you have created since the previous manifest ran.
You will then be able to download the manifest file if required and supported by the carrier.


Tracking Shipments
Shipmate regularly polls carriers integrated with your account for tracking updates of your Shipments in transit.
The Shipments will automatically update their status so you can easily keep track of your parcels as they make their way to the customer.

Shipmate Tracking Stages
Shipmate shows six different tracking stages in the Shipment Details screen. You can access this by clicking on the menu to the right of the Shipment from the Shipments List and selecting View Shipment, or clicking the Reference number.
The tracking status section shows the six different tracking statuses:
- Label Created
- Booked
- Collected
- In Transit
- Out For Delivery
- Delivered (or Delivery Failed)
On the Shipment Details screen, you can see a full narrative of the tracking status, including whether the Shipment is running late, when we last received a tracking update, and when the Shipment is expected to be delivered by.
The tracking bar on the Shipments list, and the tracking wheel on the Shipment Details screen will change colour according to the state of the Shipment:
- Blue - this Shipment is happily transiting, on time
- Yellow - this Shipment is in transit, but running late
- Green - this Shipment has been delivered
- Red - there is a problem with this Shipment
Viewing Detailed Tracking Events
Detailed tracking events are available to view by clicking the Tracking tab on each individual Parcel within a Shipment.
This opens a panel showing all of the tracking events we have received from the carrier, against each of the six tracking status steps. Each has the full narrative and a time stamp.
Consolidated Shipments
Consolidated Shipments allow you to benefit from Containerised or Consolidated shipping methods such as FedEx International Priority Distribution (IPD) or DHL Breakbulk Express (BBX).
Accessing Consolidation Services using Consolidated Shipments can help save export costs and paperwork complexity when exporting large volumes of parcels.
Parcels are placed into a container, the container is shipped to an international distribution centre and the individual parcels distributed from that location locally, effectively acting as a 'Door to Multiple Door' service.
This section of the user guide is designed to act as a reminder for the day-to-day usage of this feature.

Manual vs Automatic Mode
Shipmate operates Consolidated Shipments in two modes: Manual and Automatic.
Manual mode requires Containers to be opened programatically via API and each Shipment to be added to it by reference. You are able to maintain multiple Containers simultaneously and set individual destinations for each Container according to your requirements. Manual mode requires greater development effort however gives the most granular control over Containers and maximum workflow flexibility.
Automatic mode automatically opens Containers when they are required based on the Delivery Service being requested when creating a Shipment. Only one Container can be open per location at any one time, and Shipmate will use defaults configured in the Carrier Advanced Settings to set the container destination and other values. You are able to configure a cut-off time for same-day despatch and Shipmate will automatically create the next Container for either today or the next working day based on the schedule you have configured. Shipments using a compatible Delivery Service for Consolidations will be automatically added to the Container until it is closed.
Opening a Container
Containers are opened either programatically via API, or automatically based on the chosen delivery service, despatch location and current time.
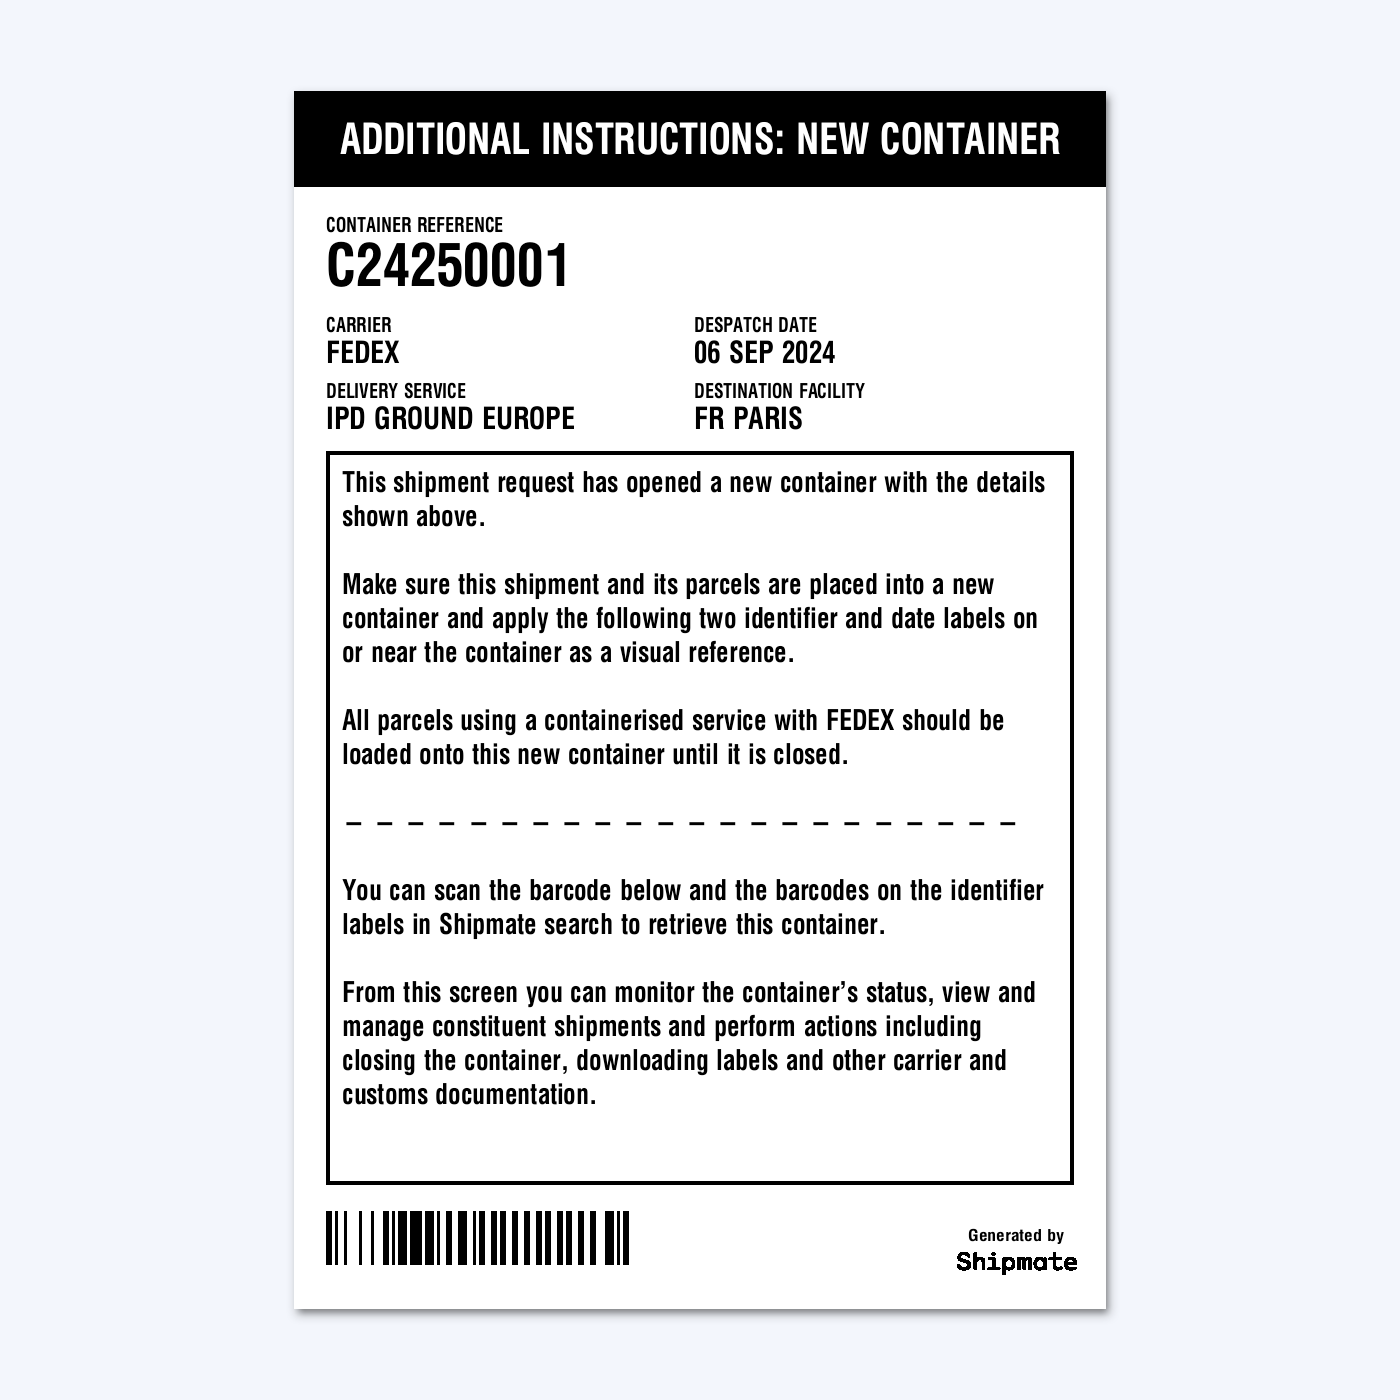
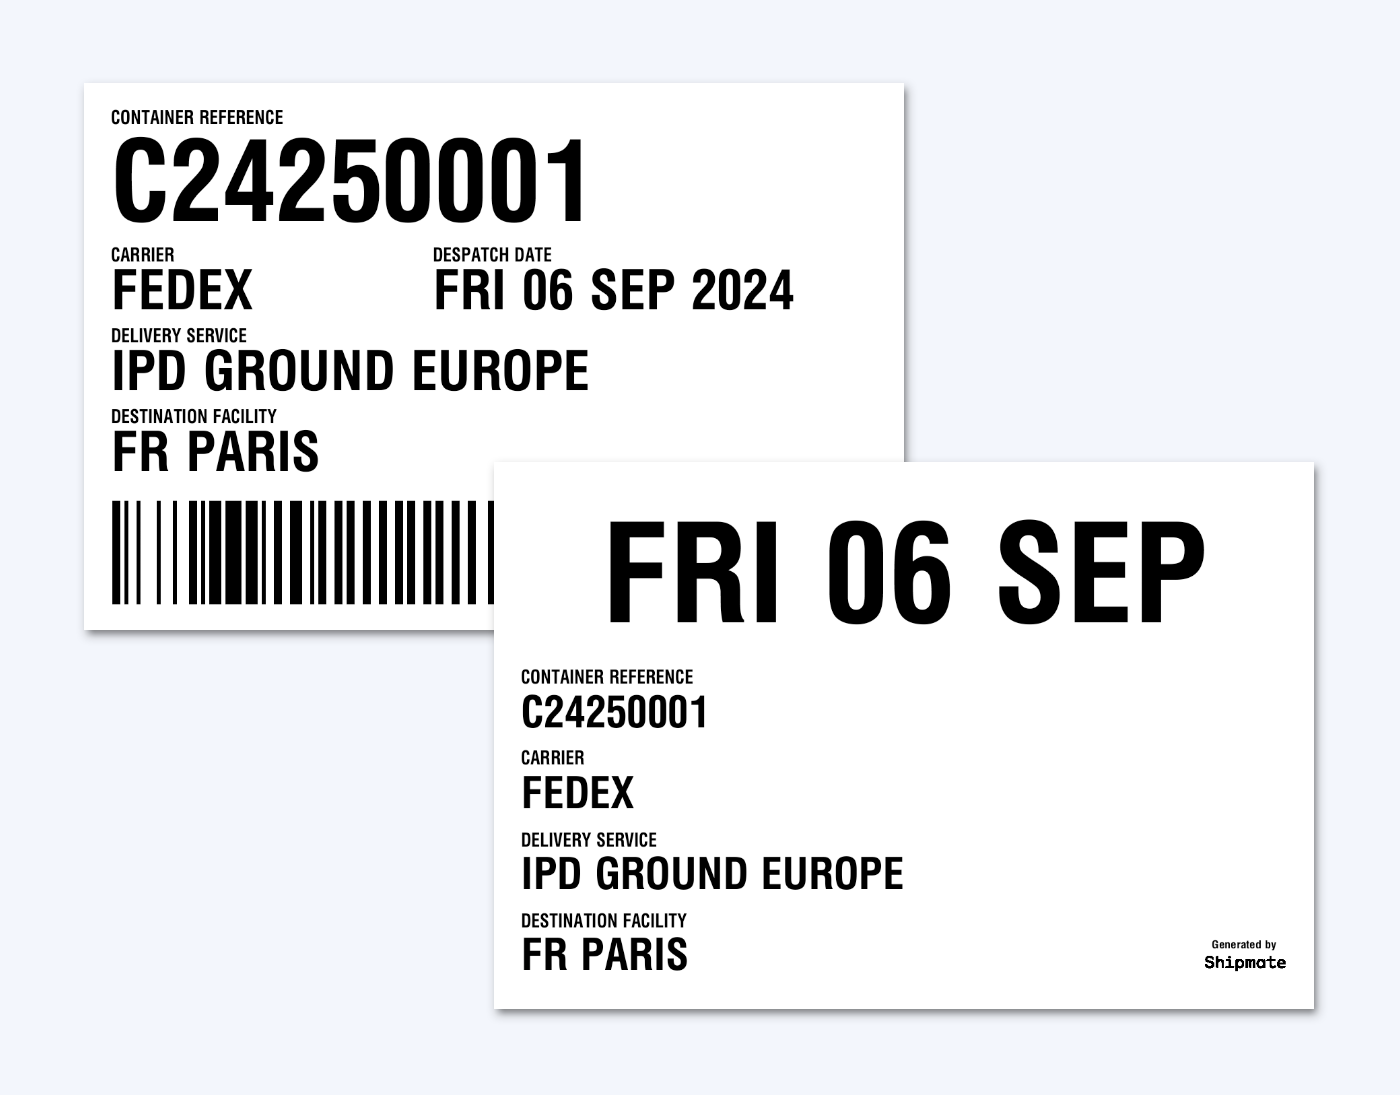
If Automatic mode is enabled, you will be alerted when a new Container is opened with an instruction label and two copies of Container identifying labels that should be placed on or near to the physical container while adding parcels to it, as a visual reference.
Viewing a Container
There are three ways to access Containers within Shipmate:
1. Search for the Container by its reference in the Search box. You can also scan the barcodes from Container Identifier labels into this search box.
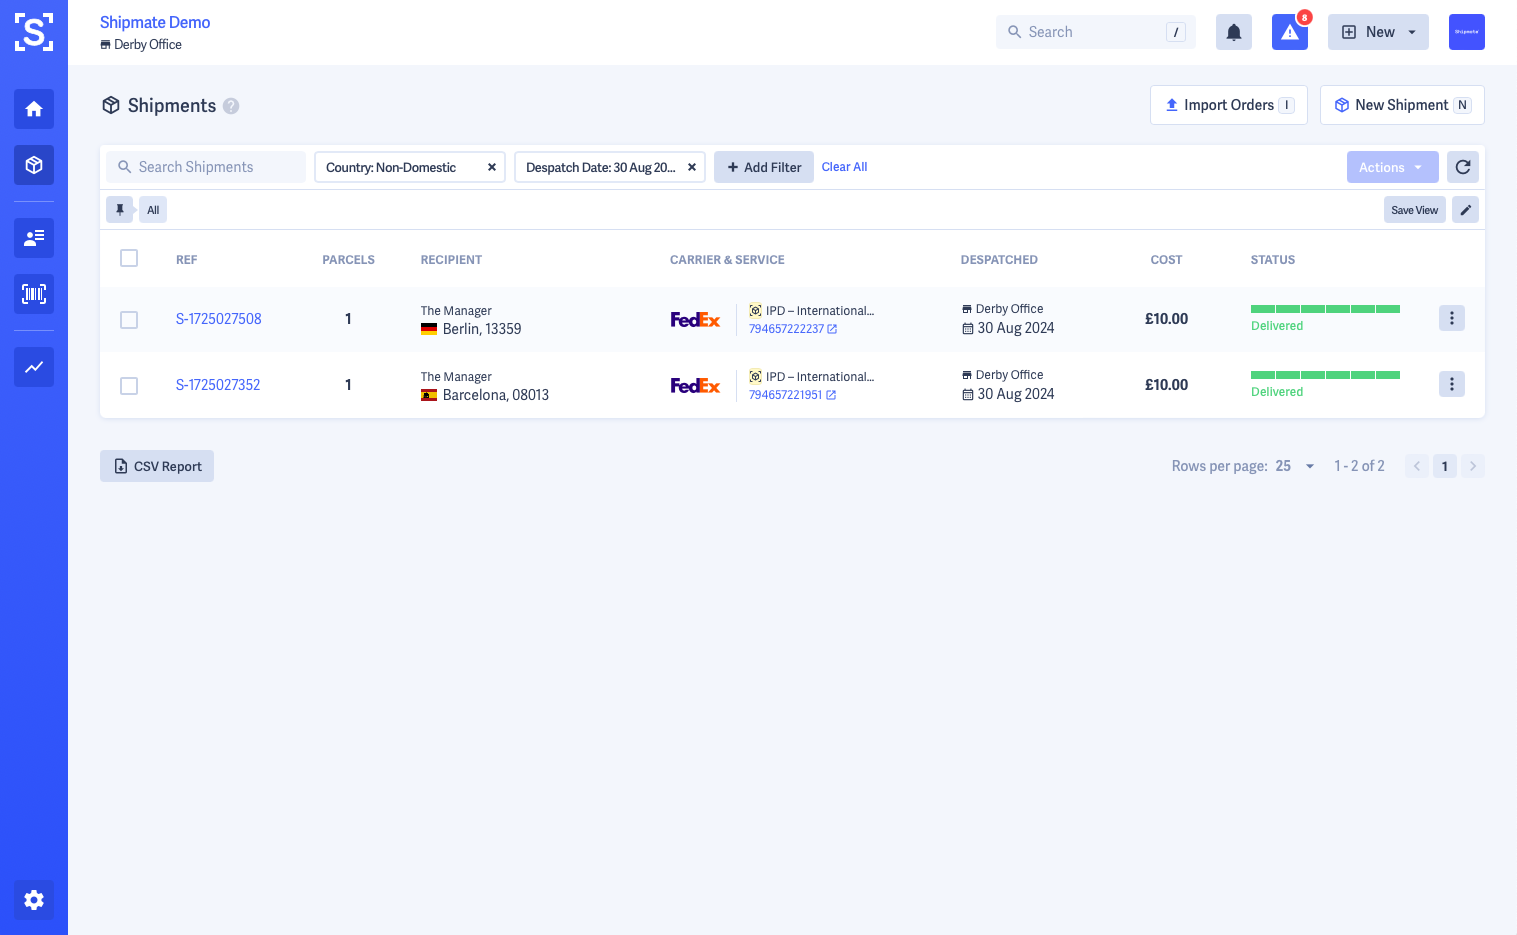
2. Shipments belonging to a Container have a small yellow Container icon next to the Delivery Service in Shipments Lists - you can click this icon to view its Container.
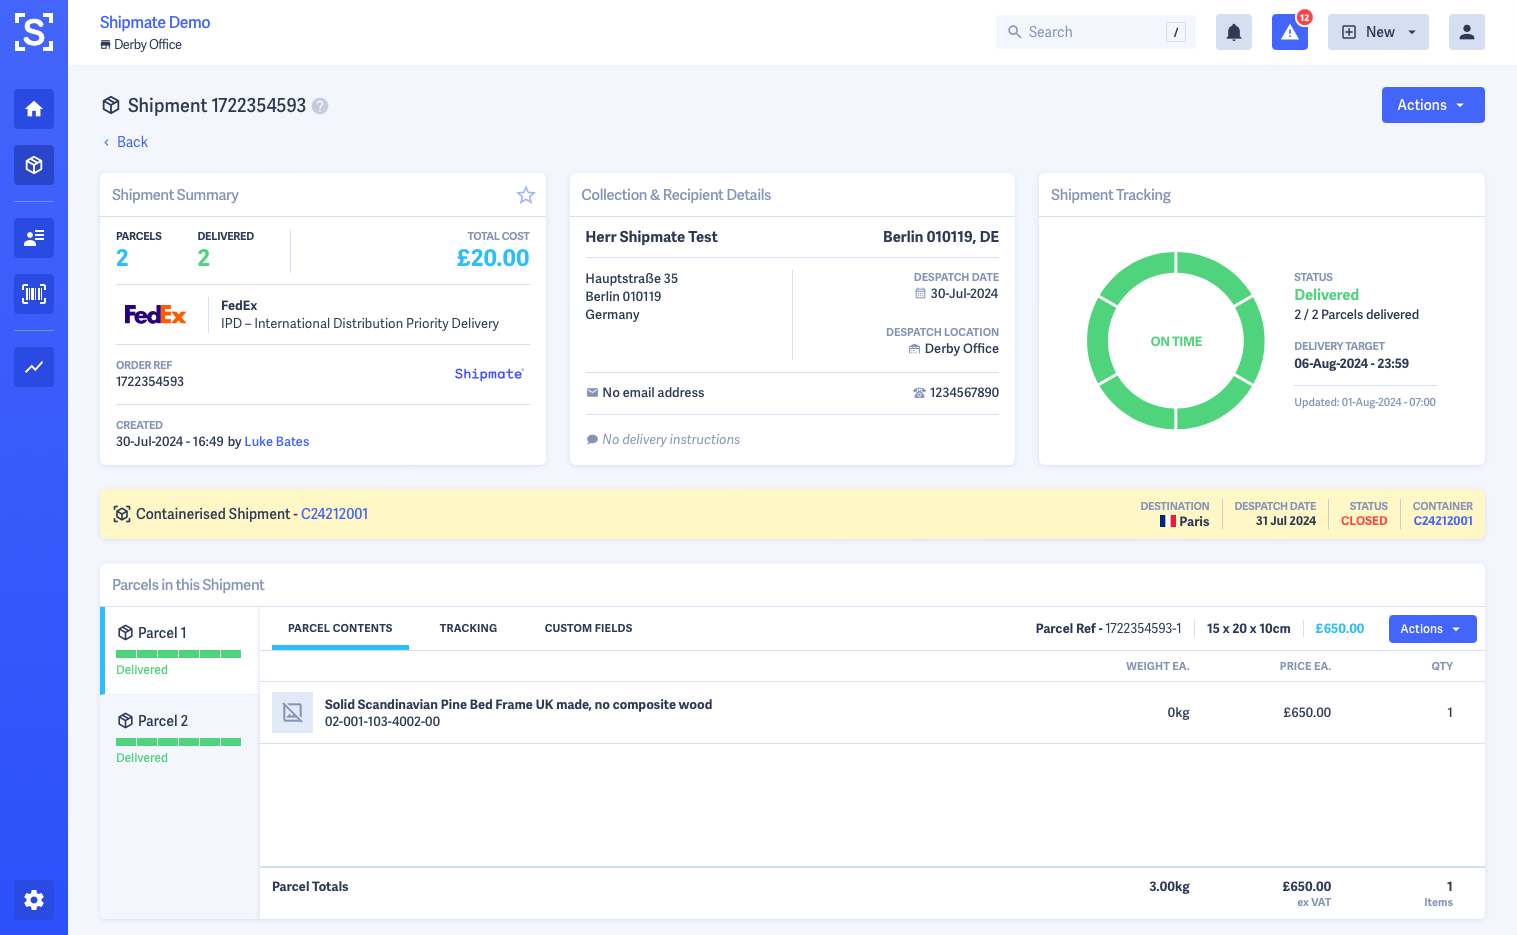
3. Shipments belonging to a Container have yellow card beneath the core Shipment details on the View Shipment screen. From here you can access the Container by clicking the reference number links.
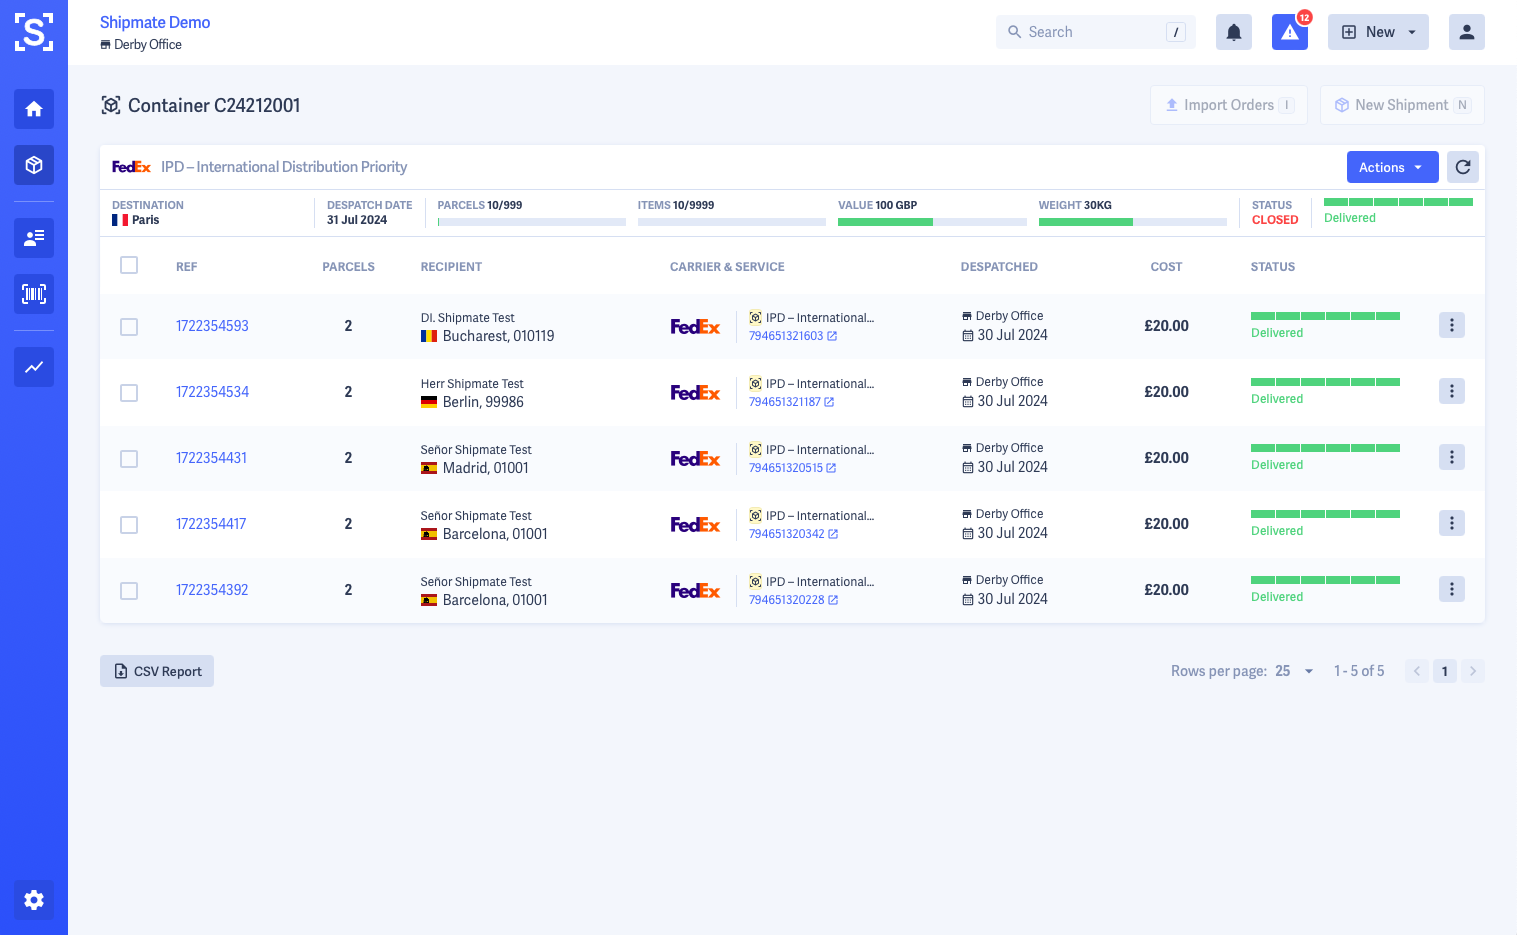
The Container screen shows a status bar of the Container alongside a list of all Shipments within the Container.
Adding Shipments to Containers
Shipments are typically added to Containers via API, or automatically based on the chosen delivery service, despatch location and current time.
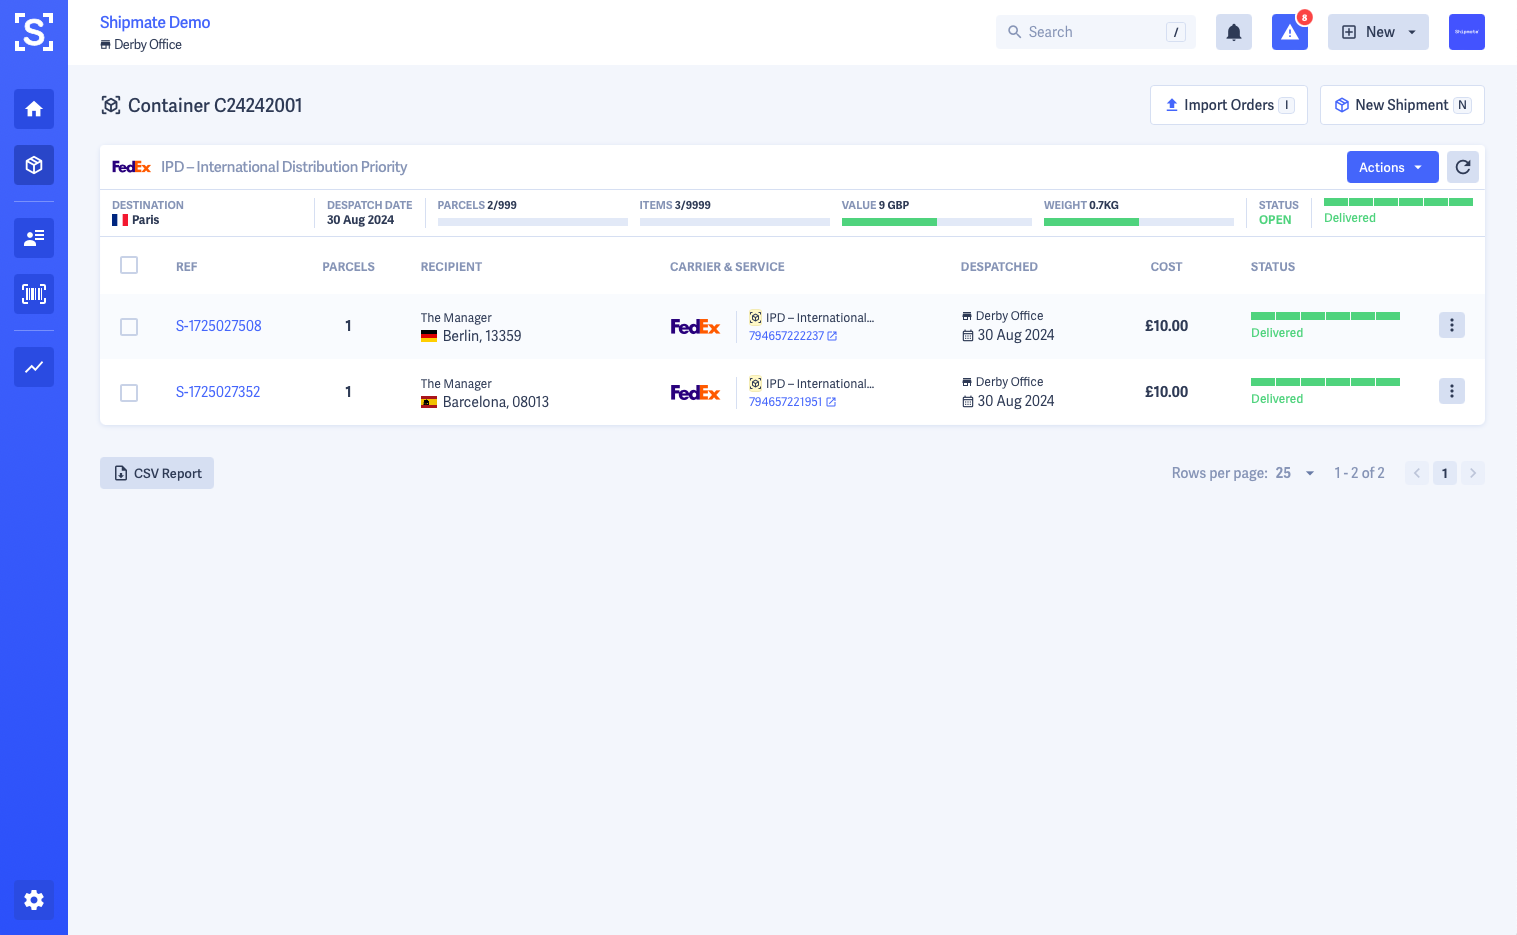
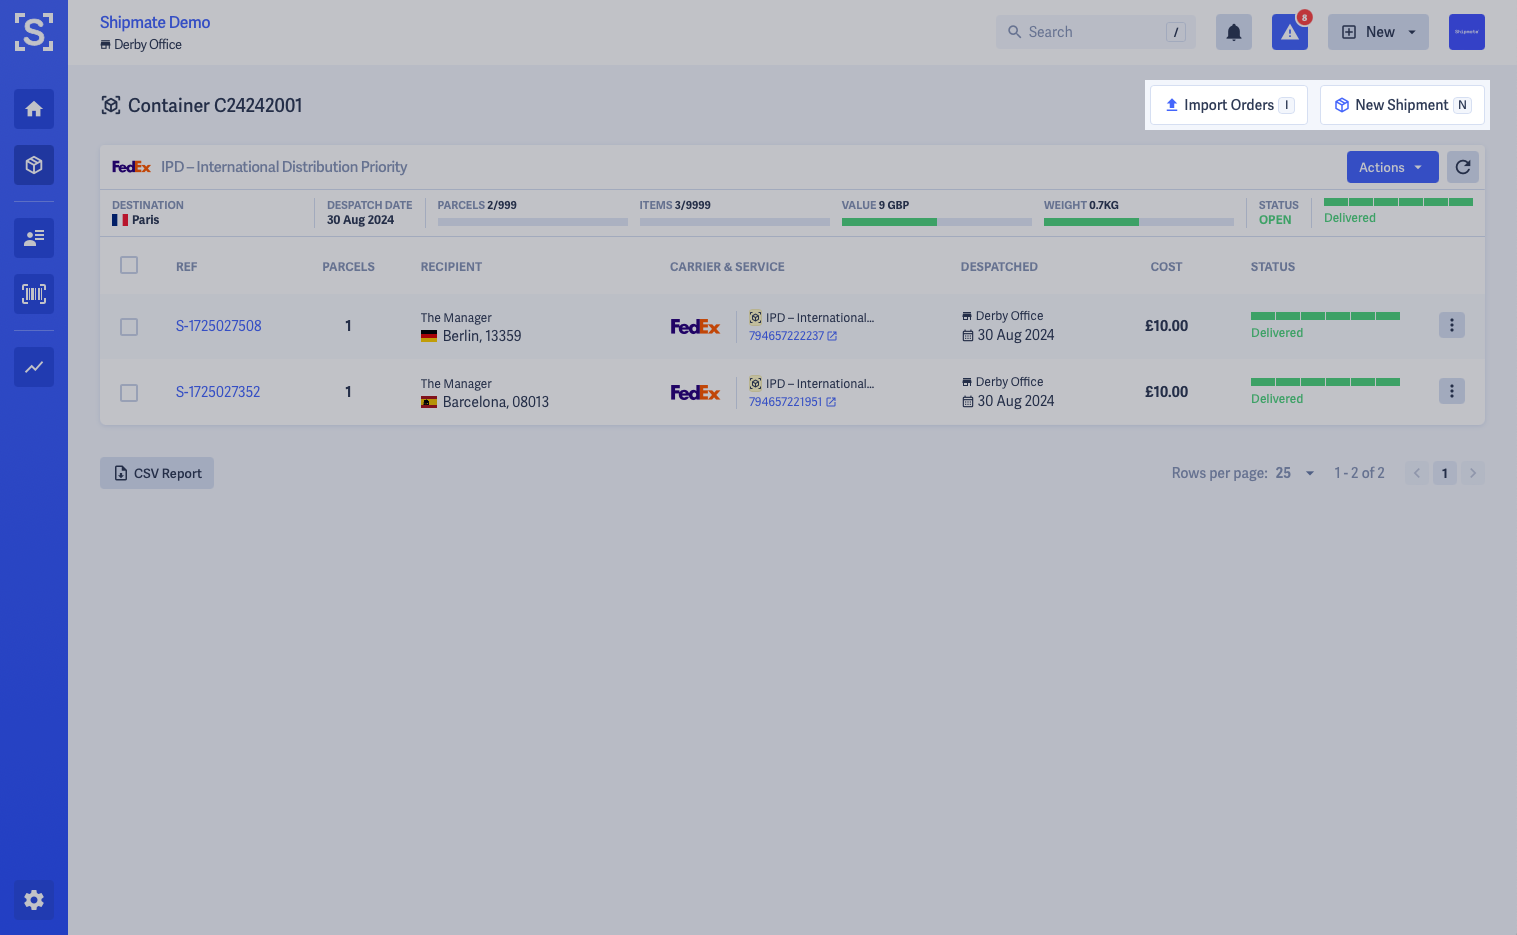
You can also add Shipments to Containers manually by first viewing the Container then clicking the Add Parcel or Import Orders button. This will pre-select the Container to the one being viewed.
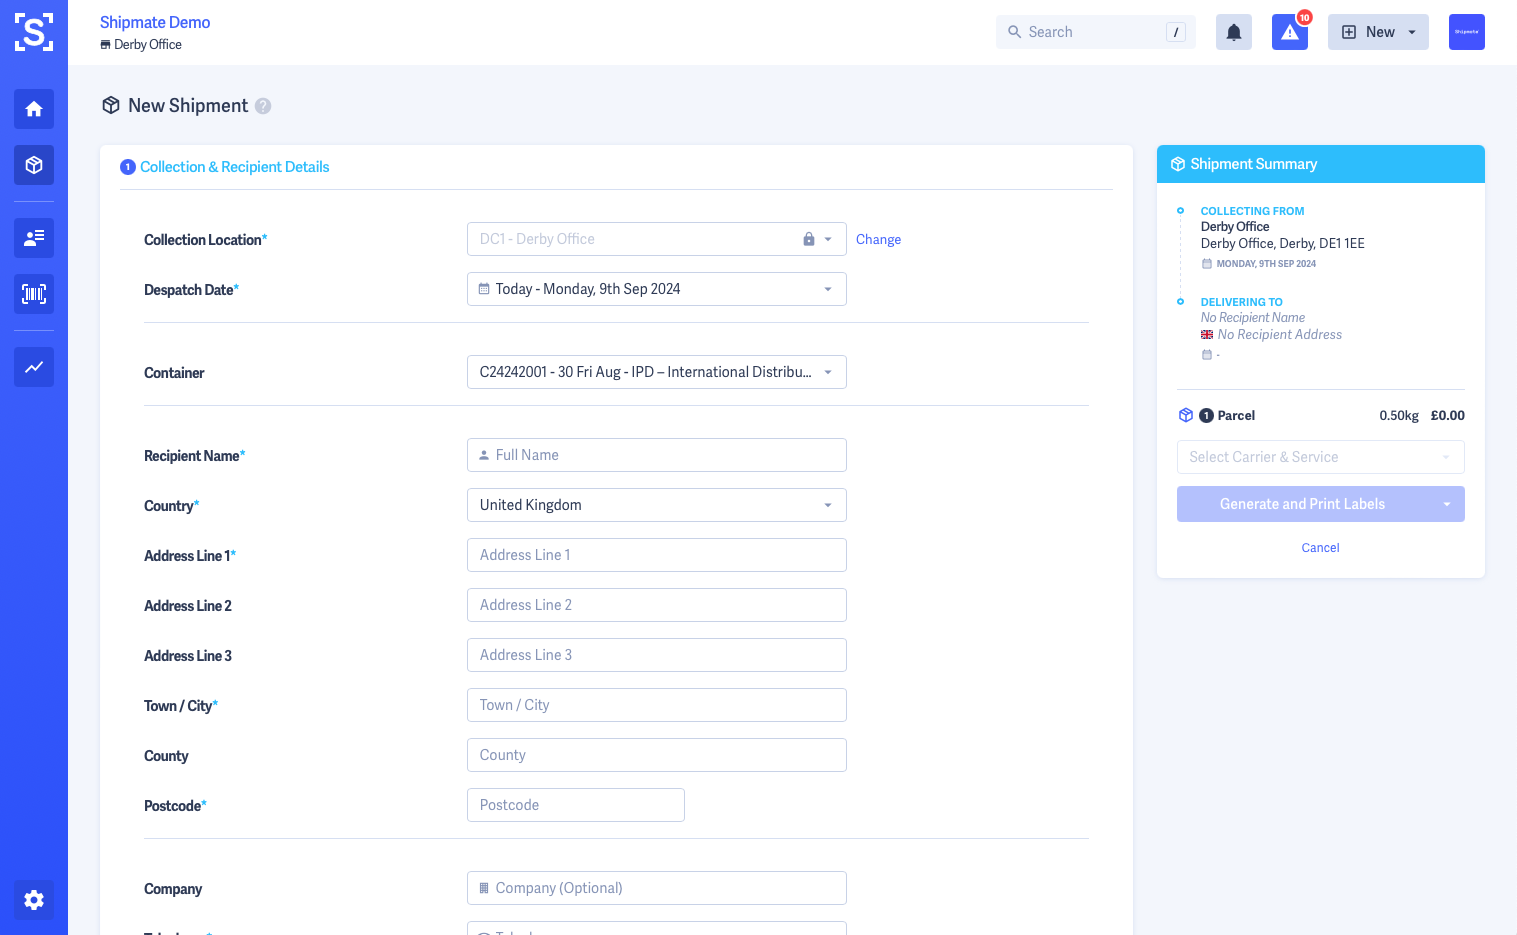
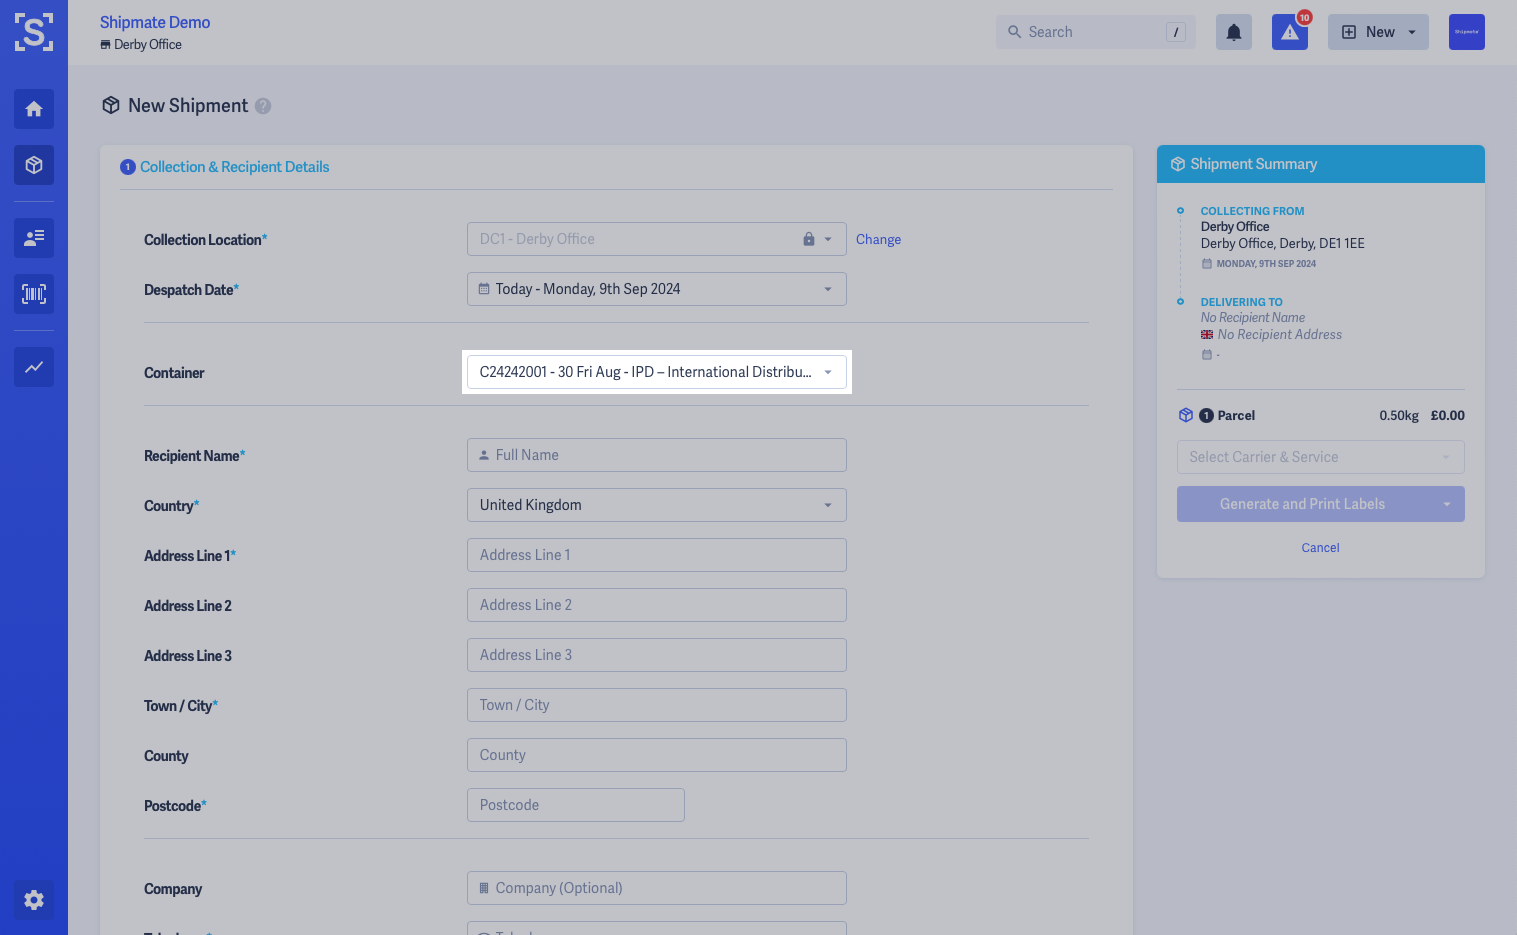
Alternatively, from the New Shipment screen, you can select the Container you wish to apply the new Shipment to.
Closing a Container
Containers must be closed to notify the Carrier the full manifest of parcels and contents so export documentation can be generated and labels produced.
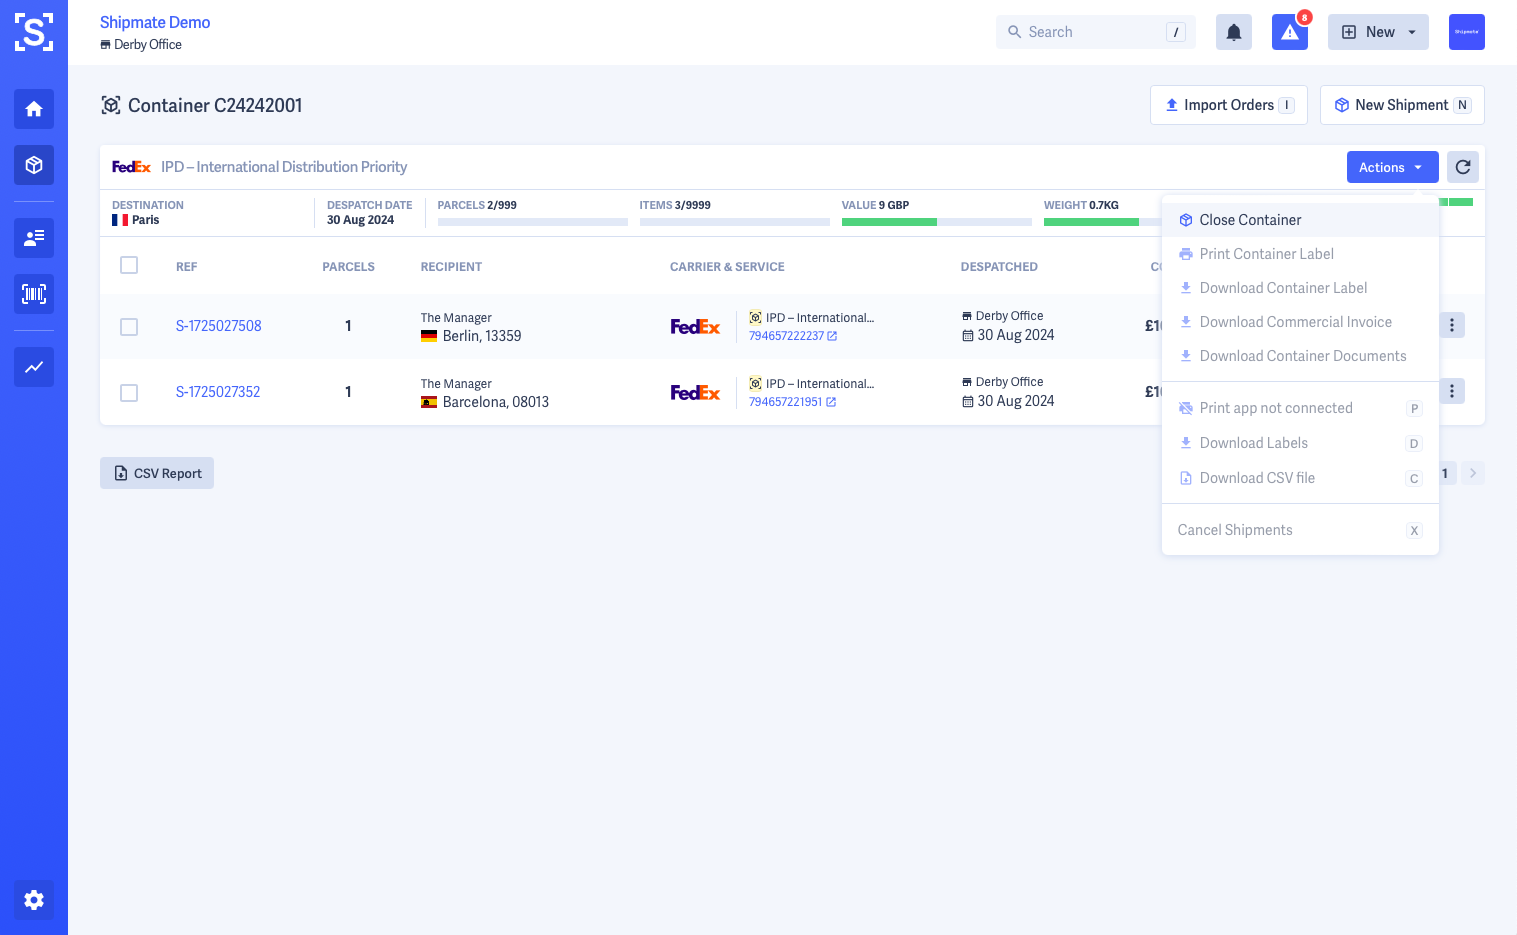
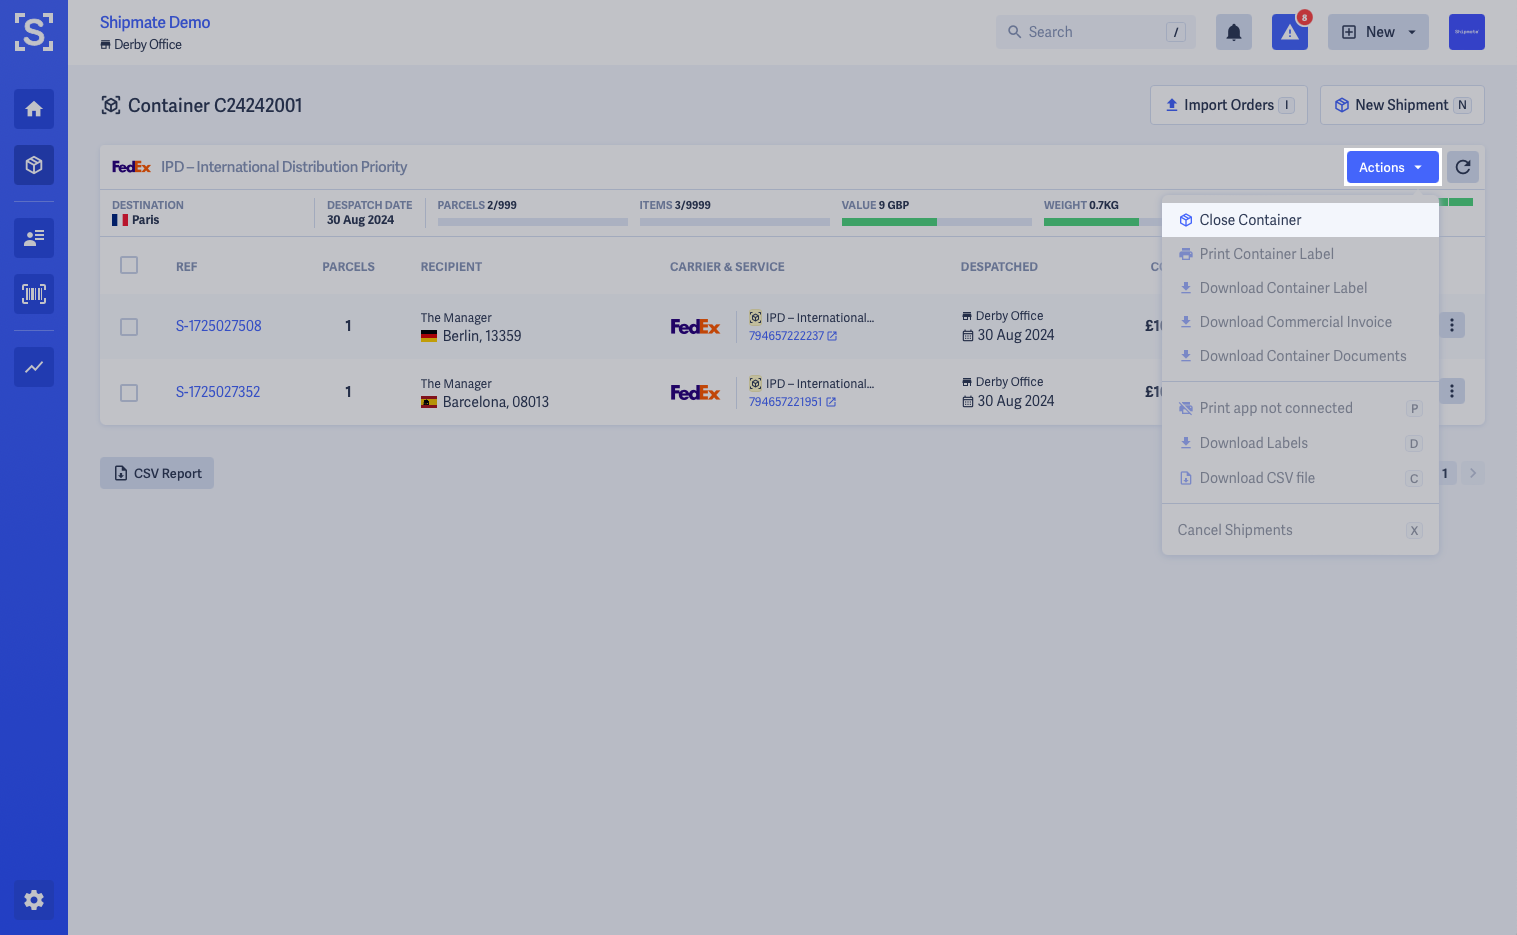
Closing Containers is always a manual process and must be done either via API or by first viewing the Container then clicking the Close Container option from the Actions drop-down menu.
Once the Container has been closed, you will be able to access other options from the Actions drop-down menu including Container Labels, Commercial Invoice and Documents.
Contacts Directory
Contacts Directory
If you send to regular recipients, the Contacts Directory can save you time by storing delivery details, including the delivery address, contact details and even delivery instructions such as a safe place to leave parcels if the recipient is not available at the time of delivery.
Sending Shipments to your Contacts can then be as simple as searching the first few letters of their name or a reference number then clicking the Send Shipment button - ideal for B2B and subscription scenarios.
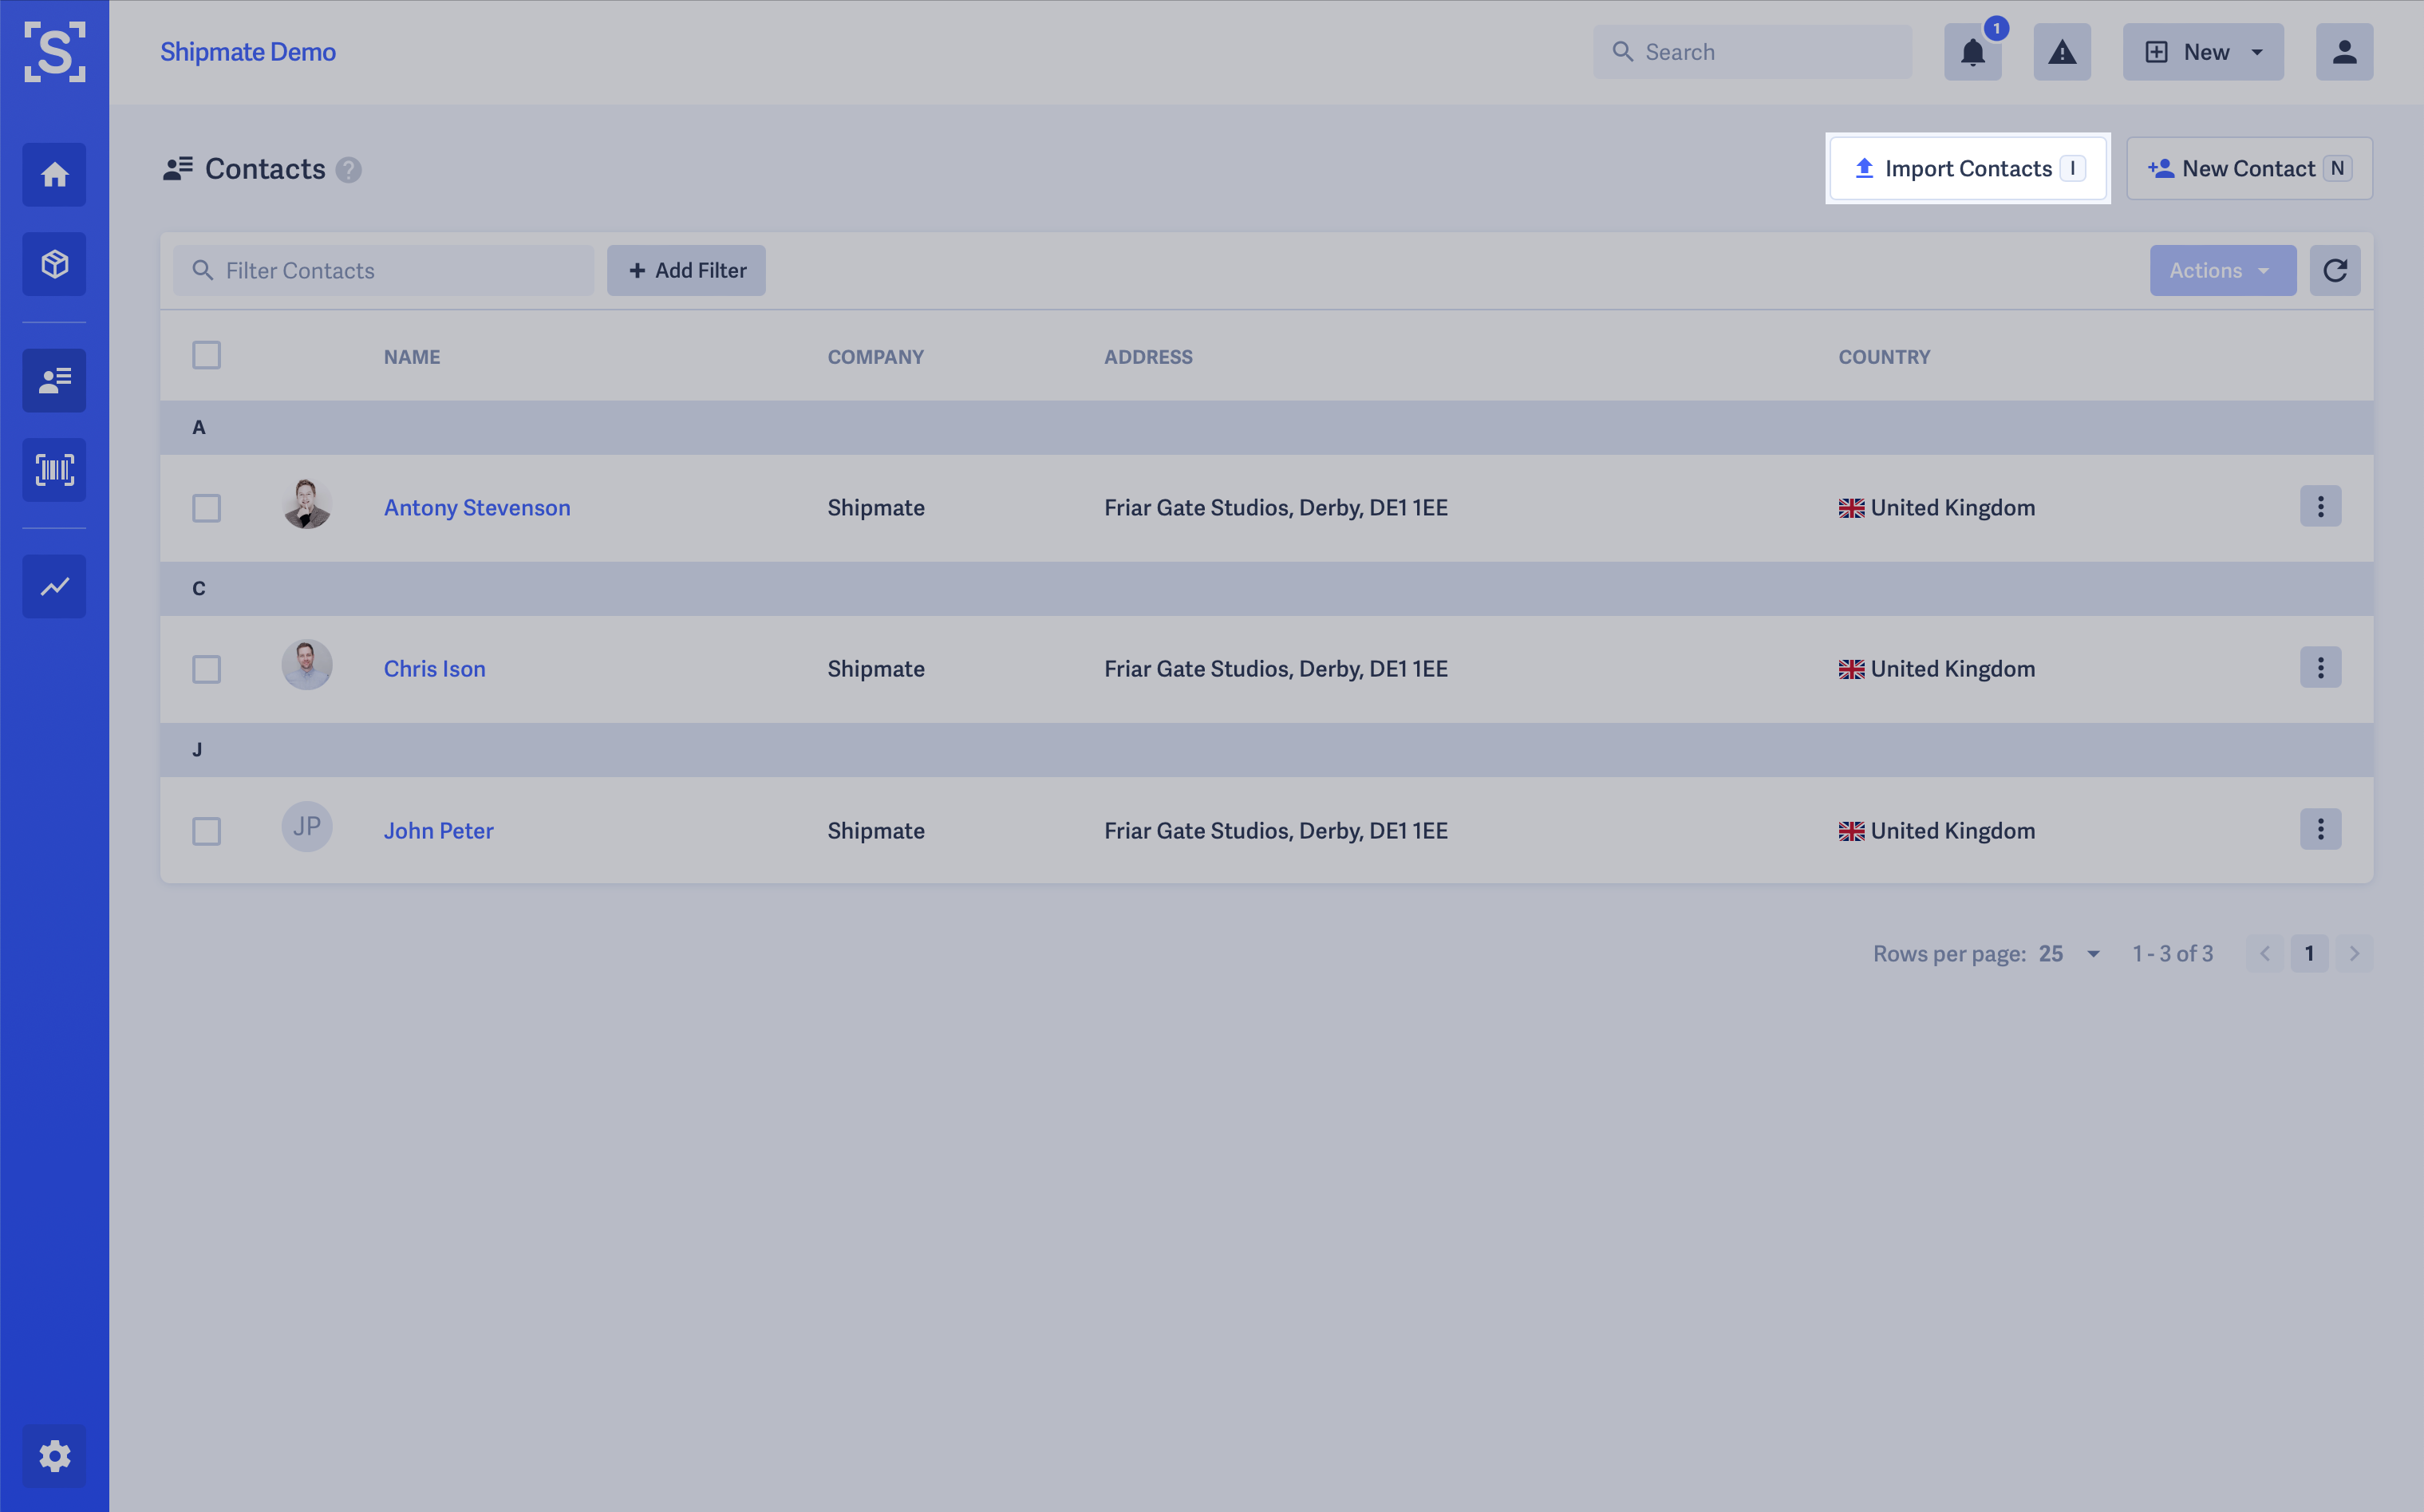
To access the Contacts Directory, click the Contacts icon from the main menu.
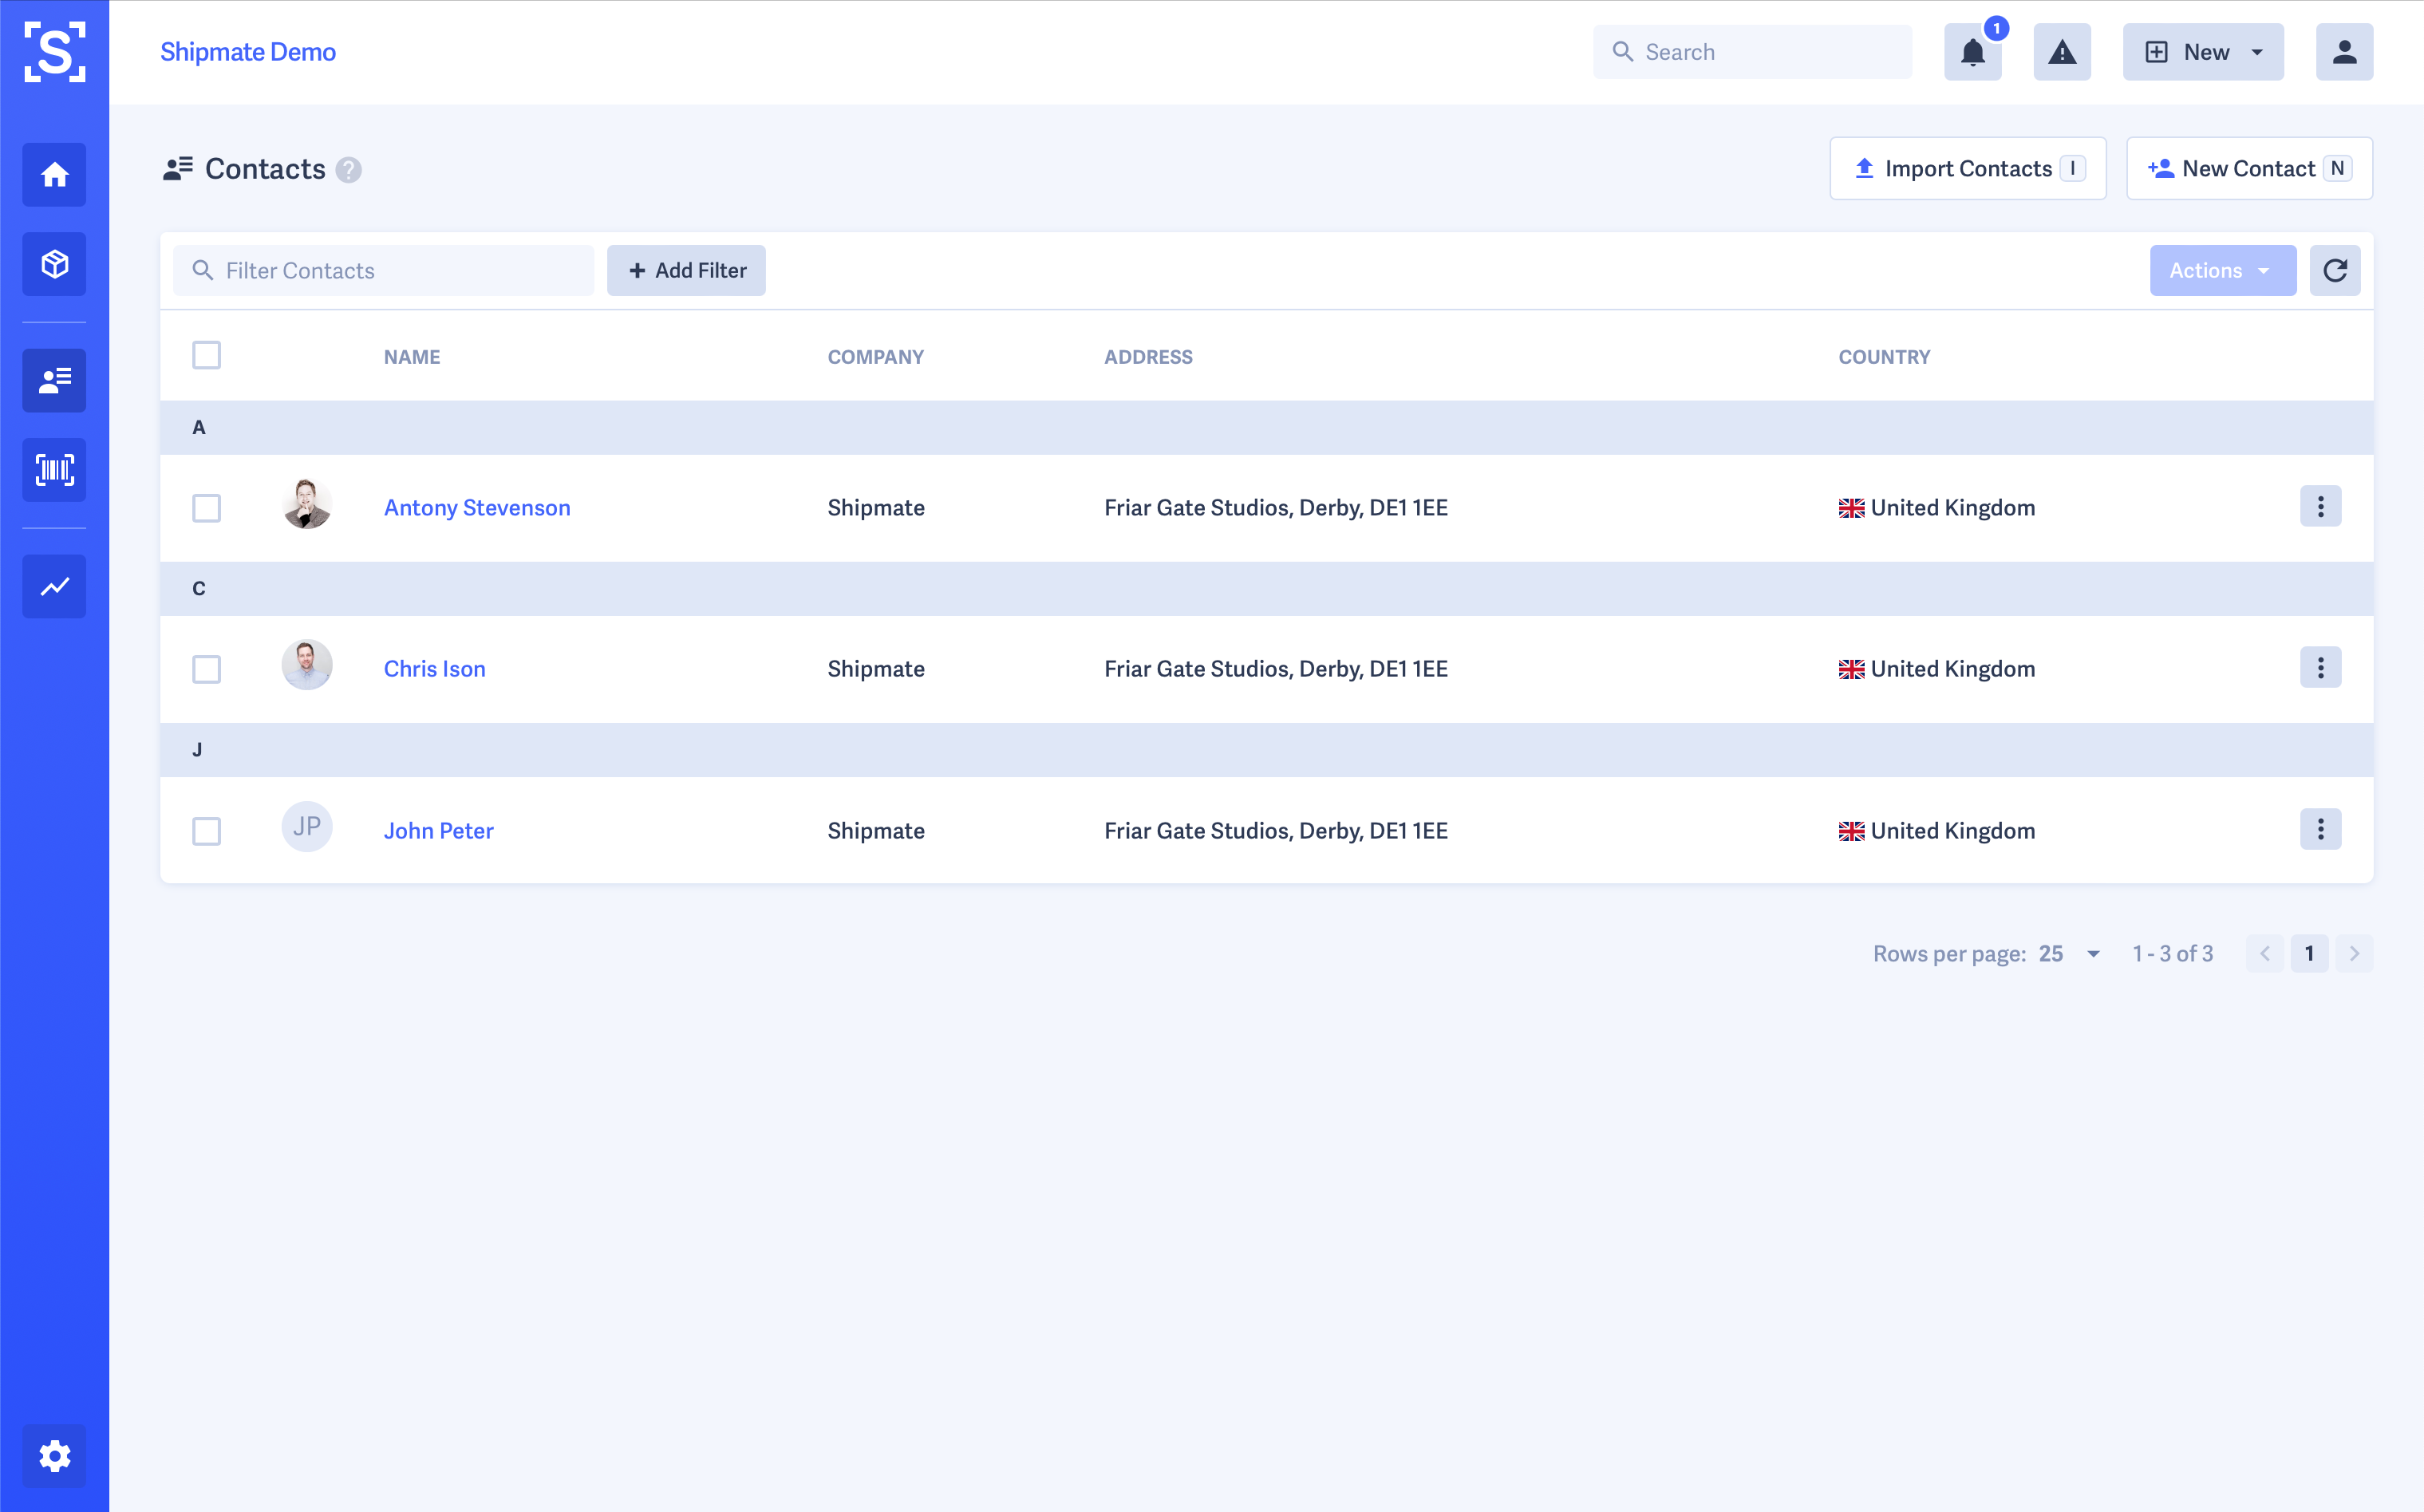
The Contacts Directory shows a list of your contacts, ordered alphabetically by first name. You can use the on-screen filter to search your contacts, then simply click on their name to view them and send a Shipment.
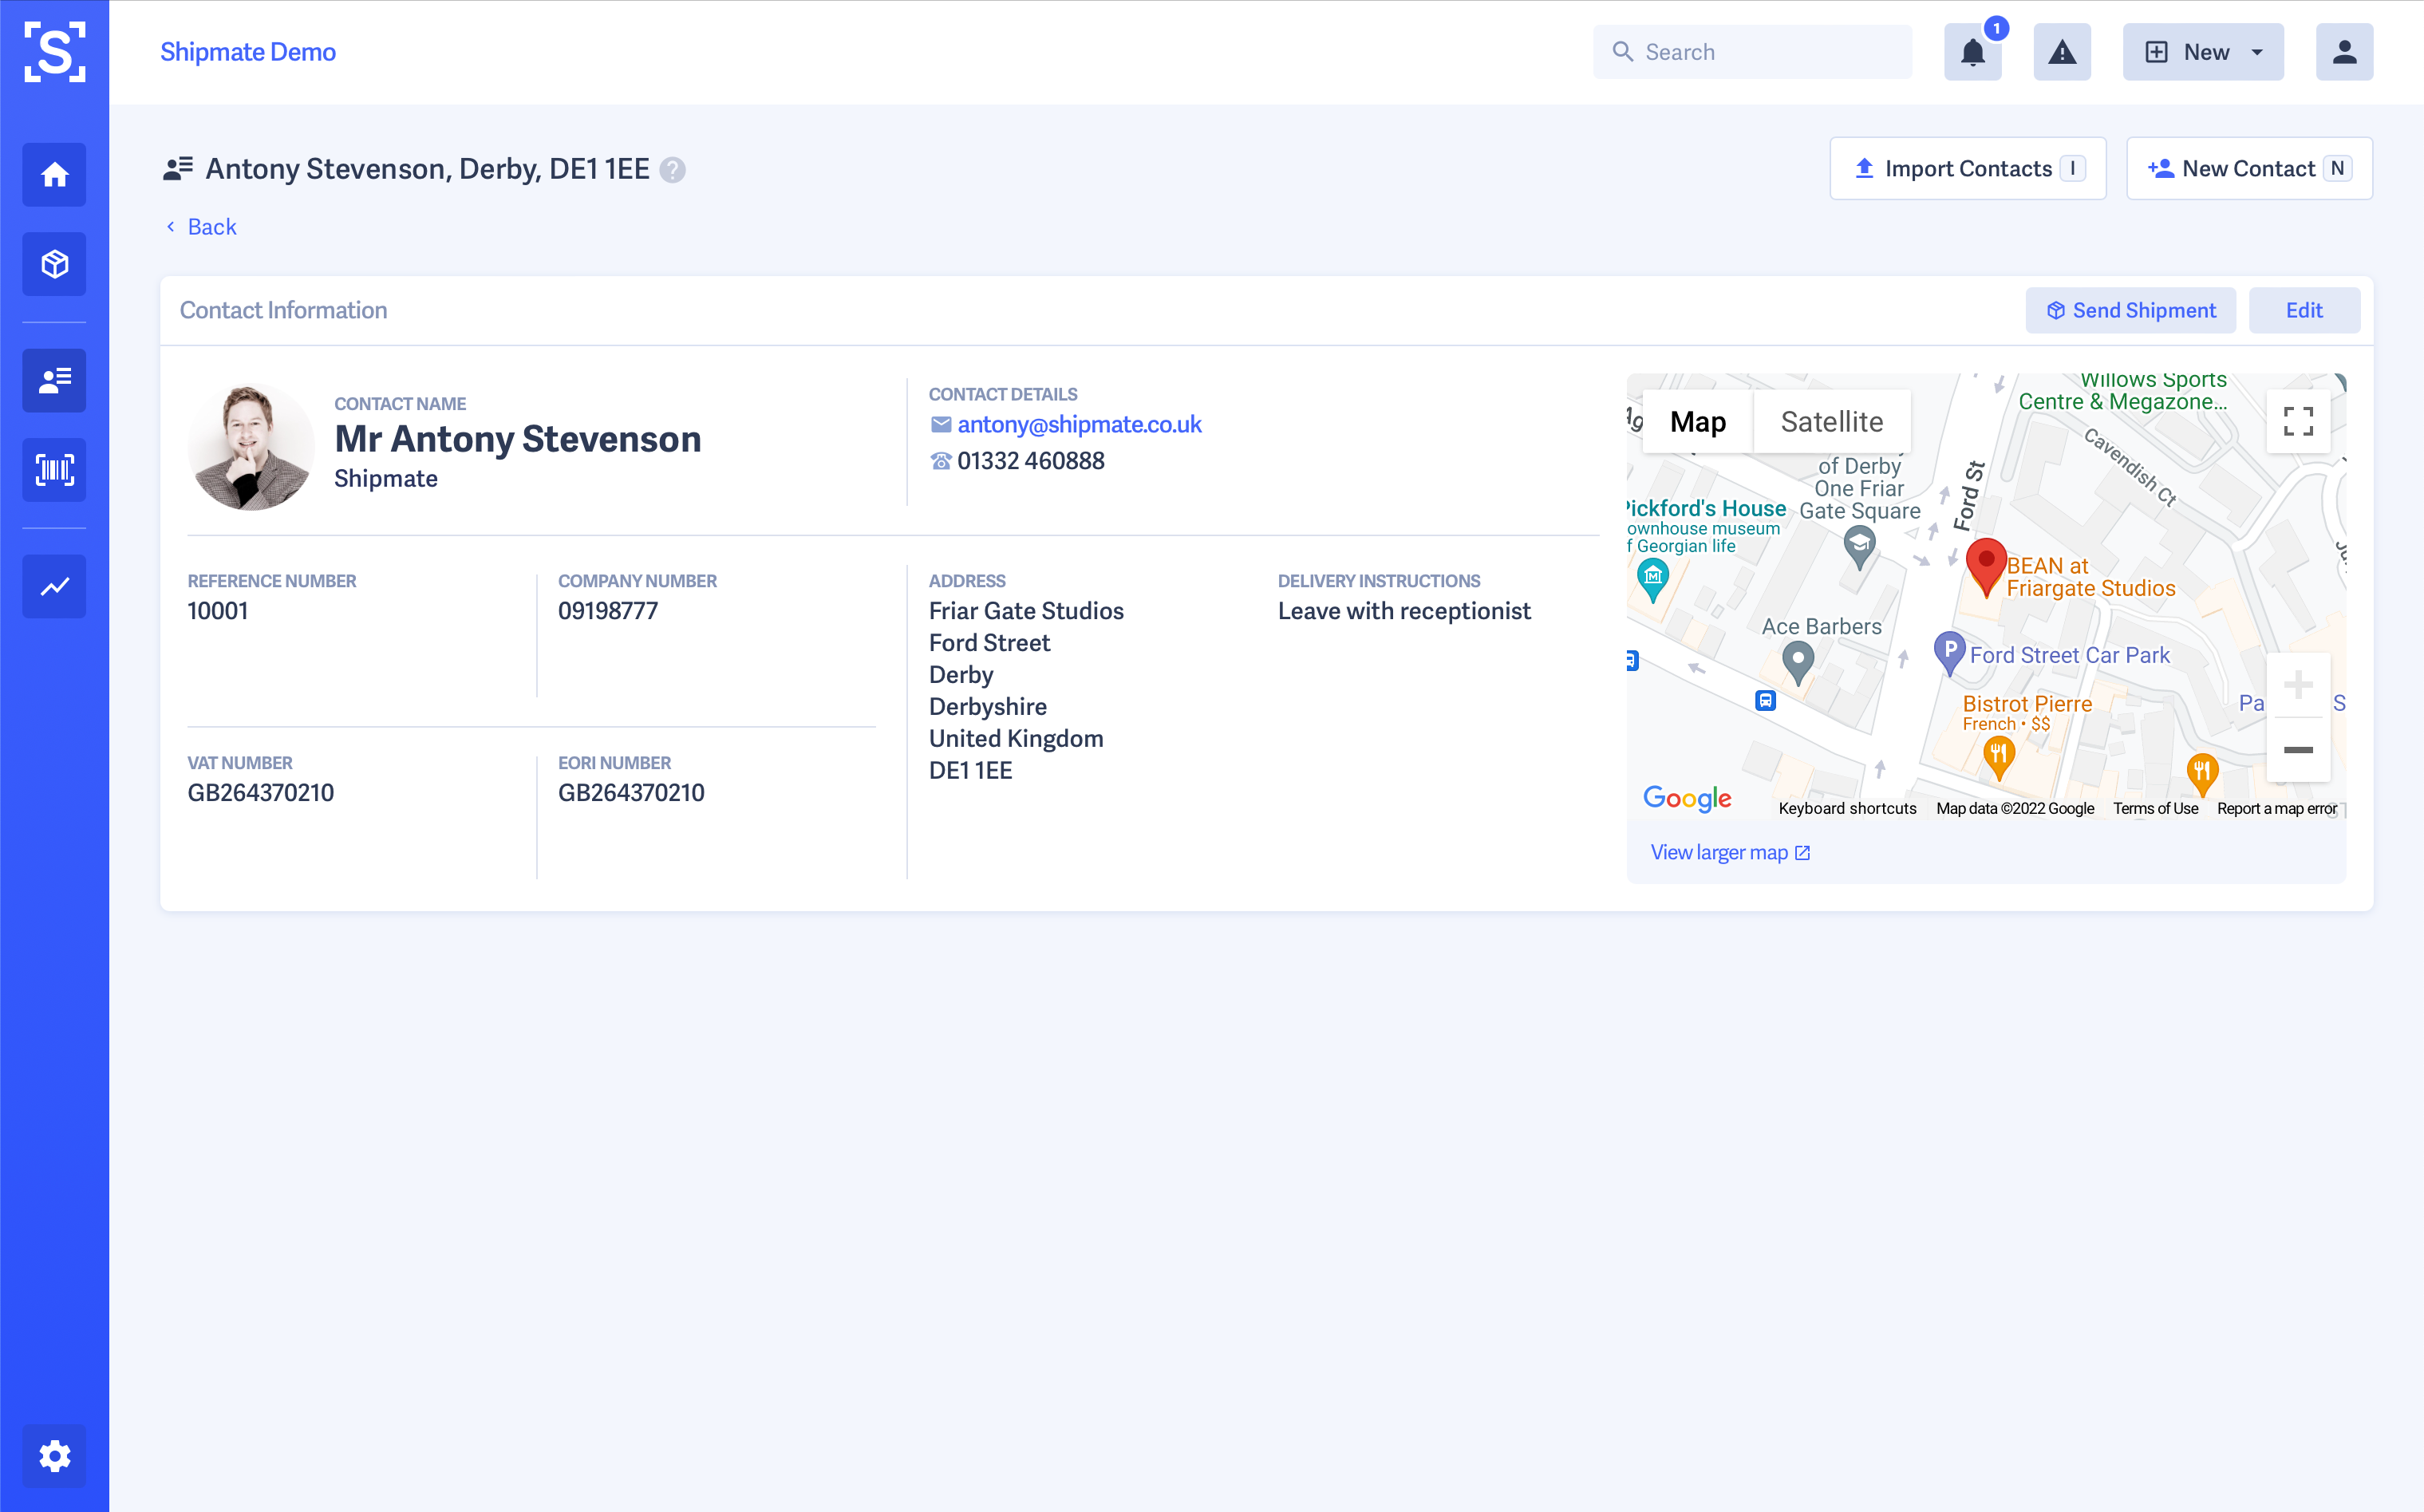
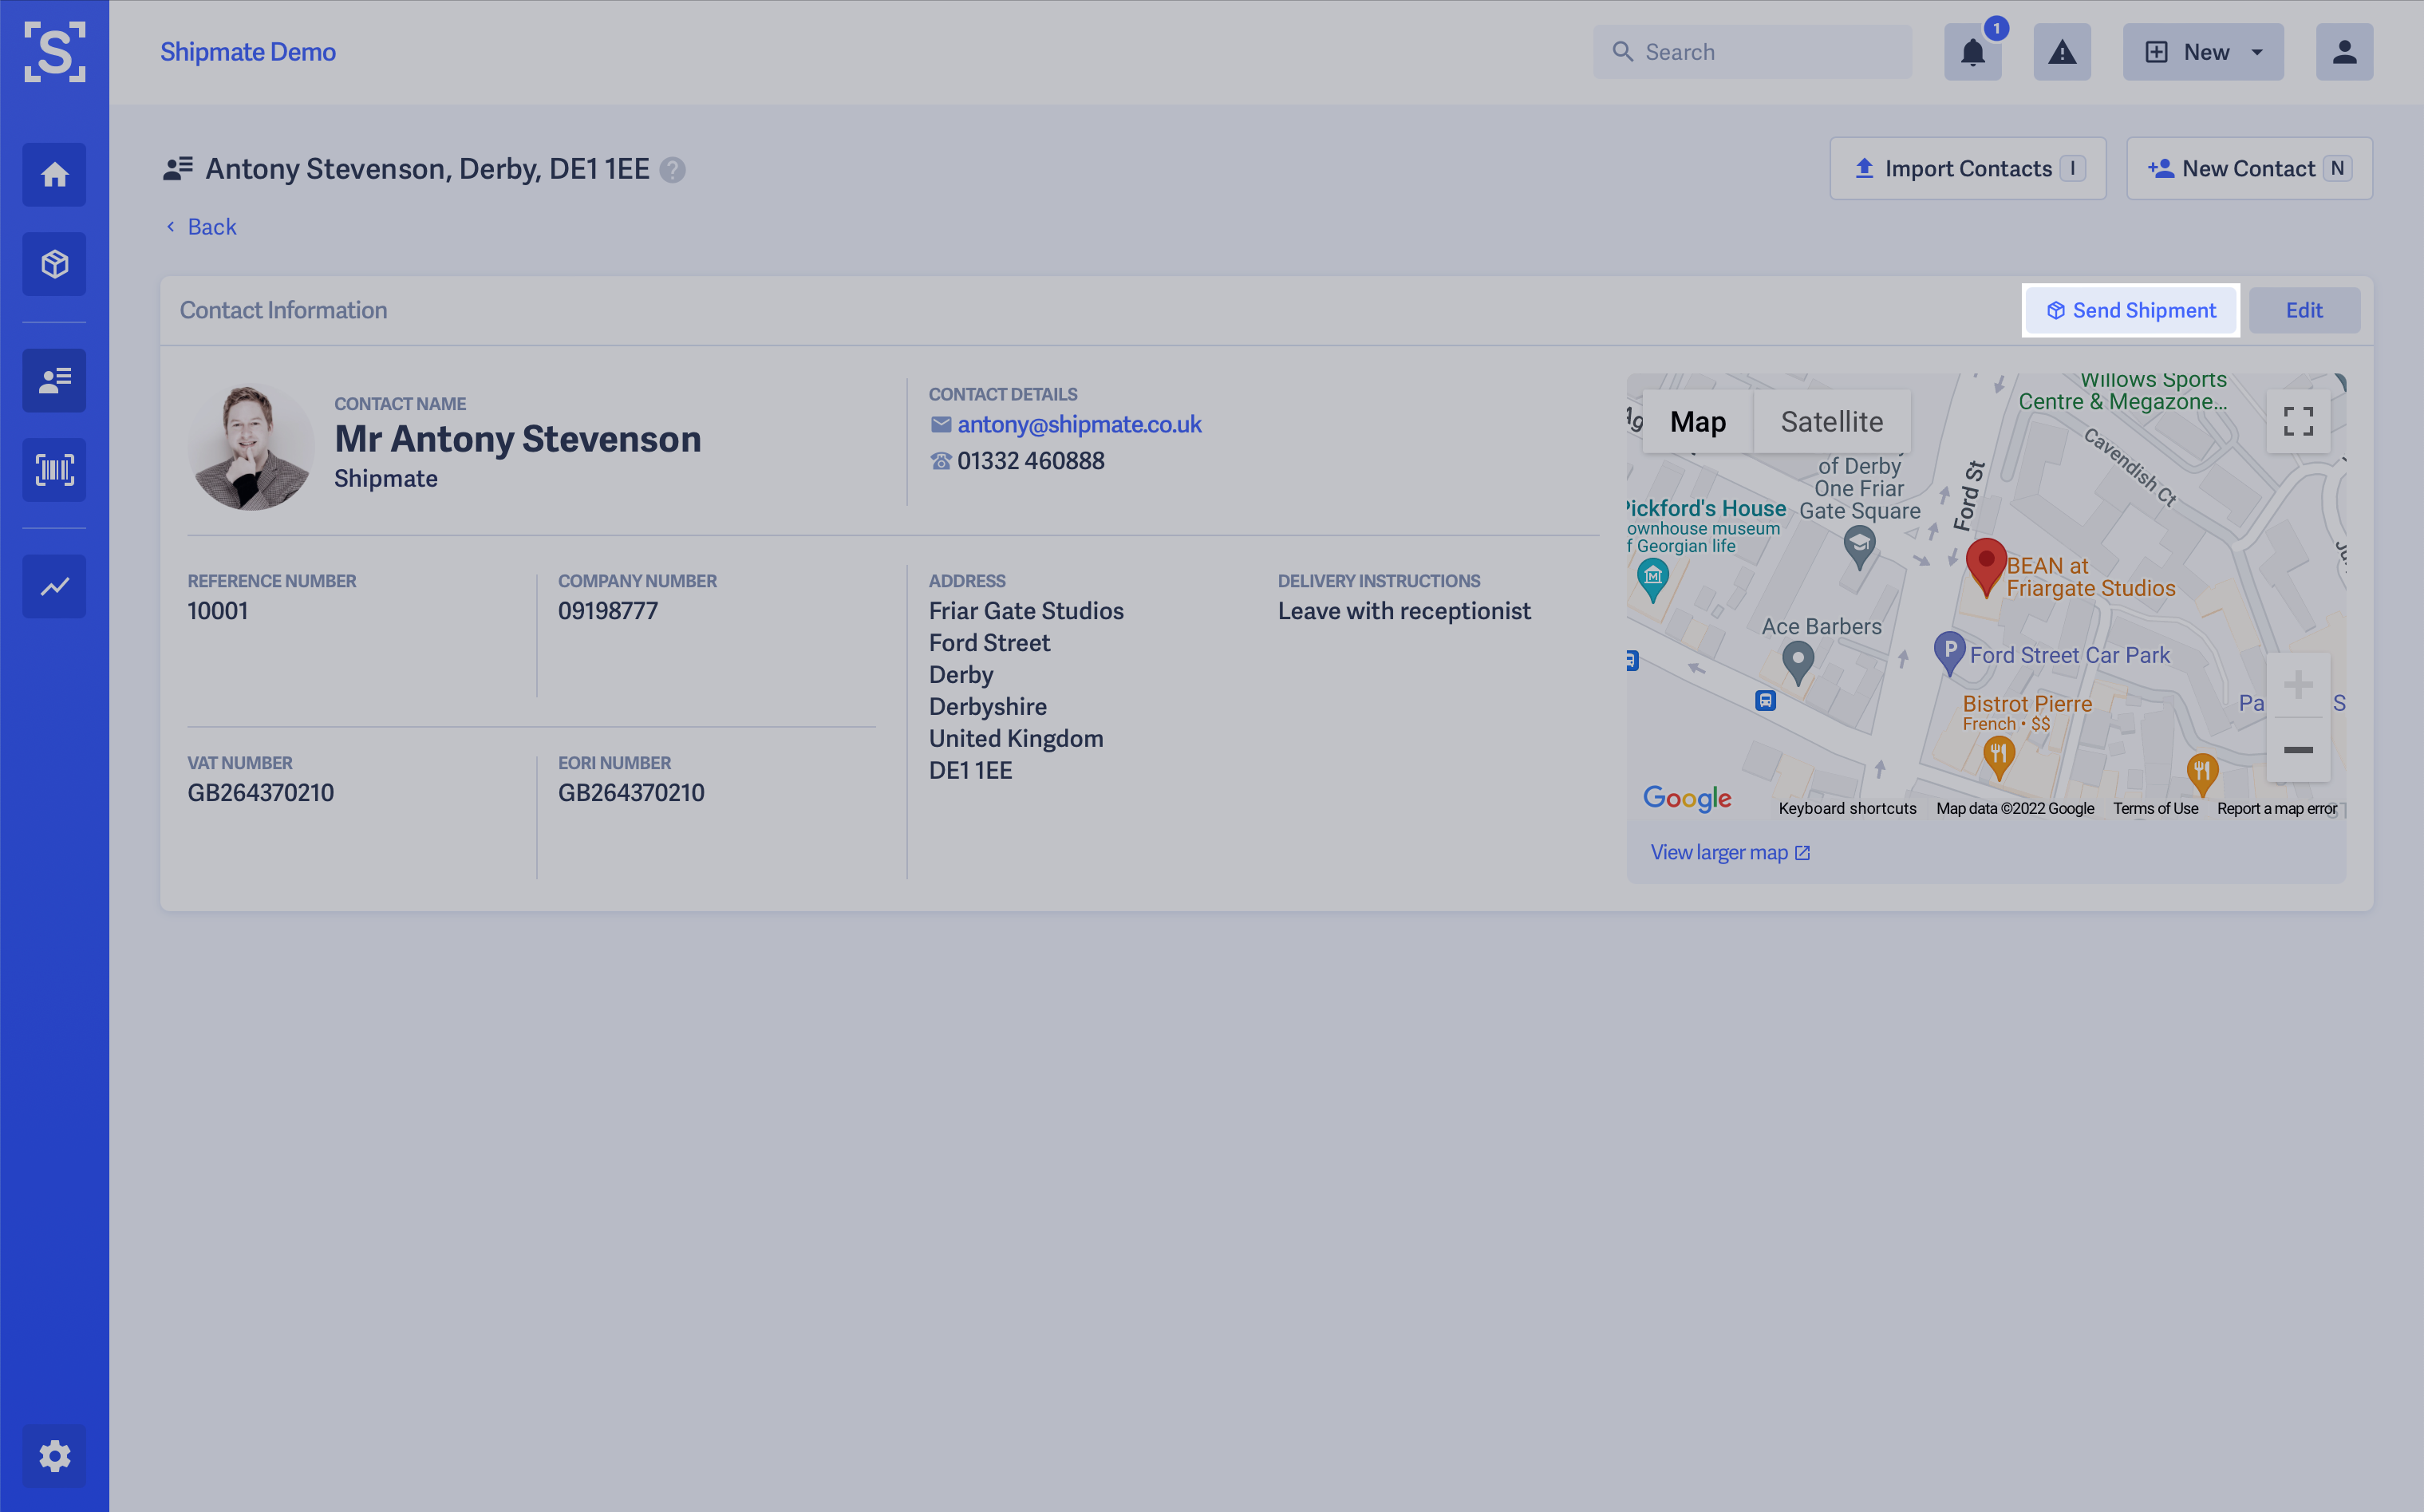
Adding a Contact
To add a new Contact, from the Contacts list, click the New Contact button, or press the N key on your keyboard.
This will load the New Contact form, where you can enter your recipient's details. There's a UK postcode and address lookup on the Address Line 1 input box, and you can enter additional contact details such as their email address, telephone number and even delivery instructions that will be given for each shipment you send.
You can also add statutory details including the company's registered number, VAT number and EORI number, together with your own reference number - perhaps a customer account number, to assist search and provide details to carriers where necessary.
Once you are happy with the details you have entered, click the Save button. Shipmate will attempt to look up a profile picture online using the email address you supplied - if one is found this will be automatically assigned to the contact, however feel free to change this or add your own from the individual Contact screen by clicking the profile image.

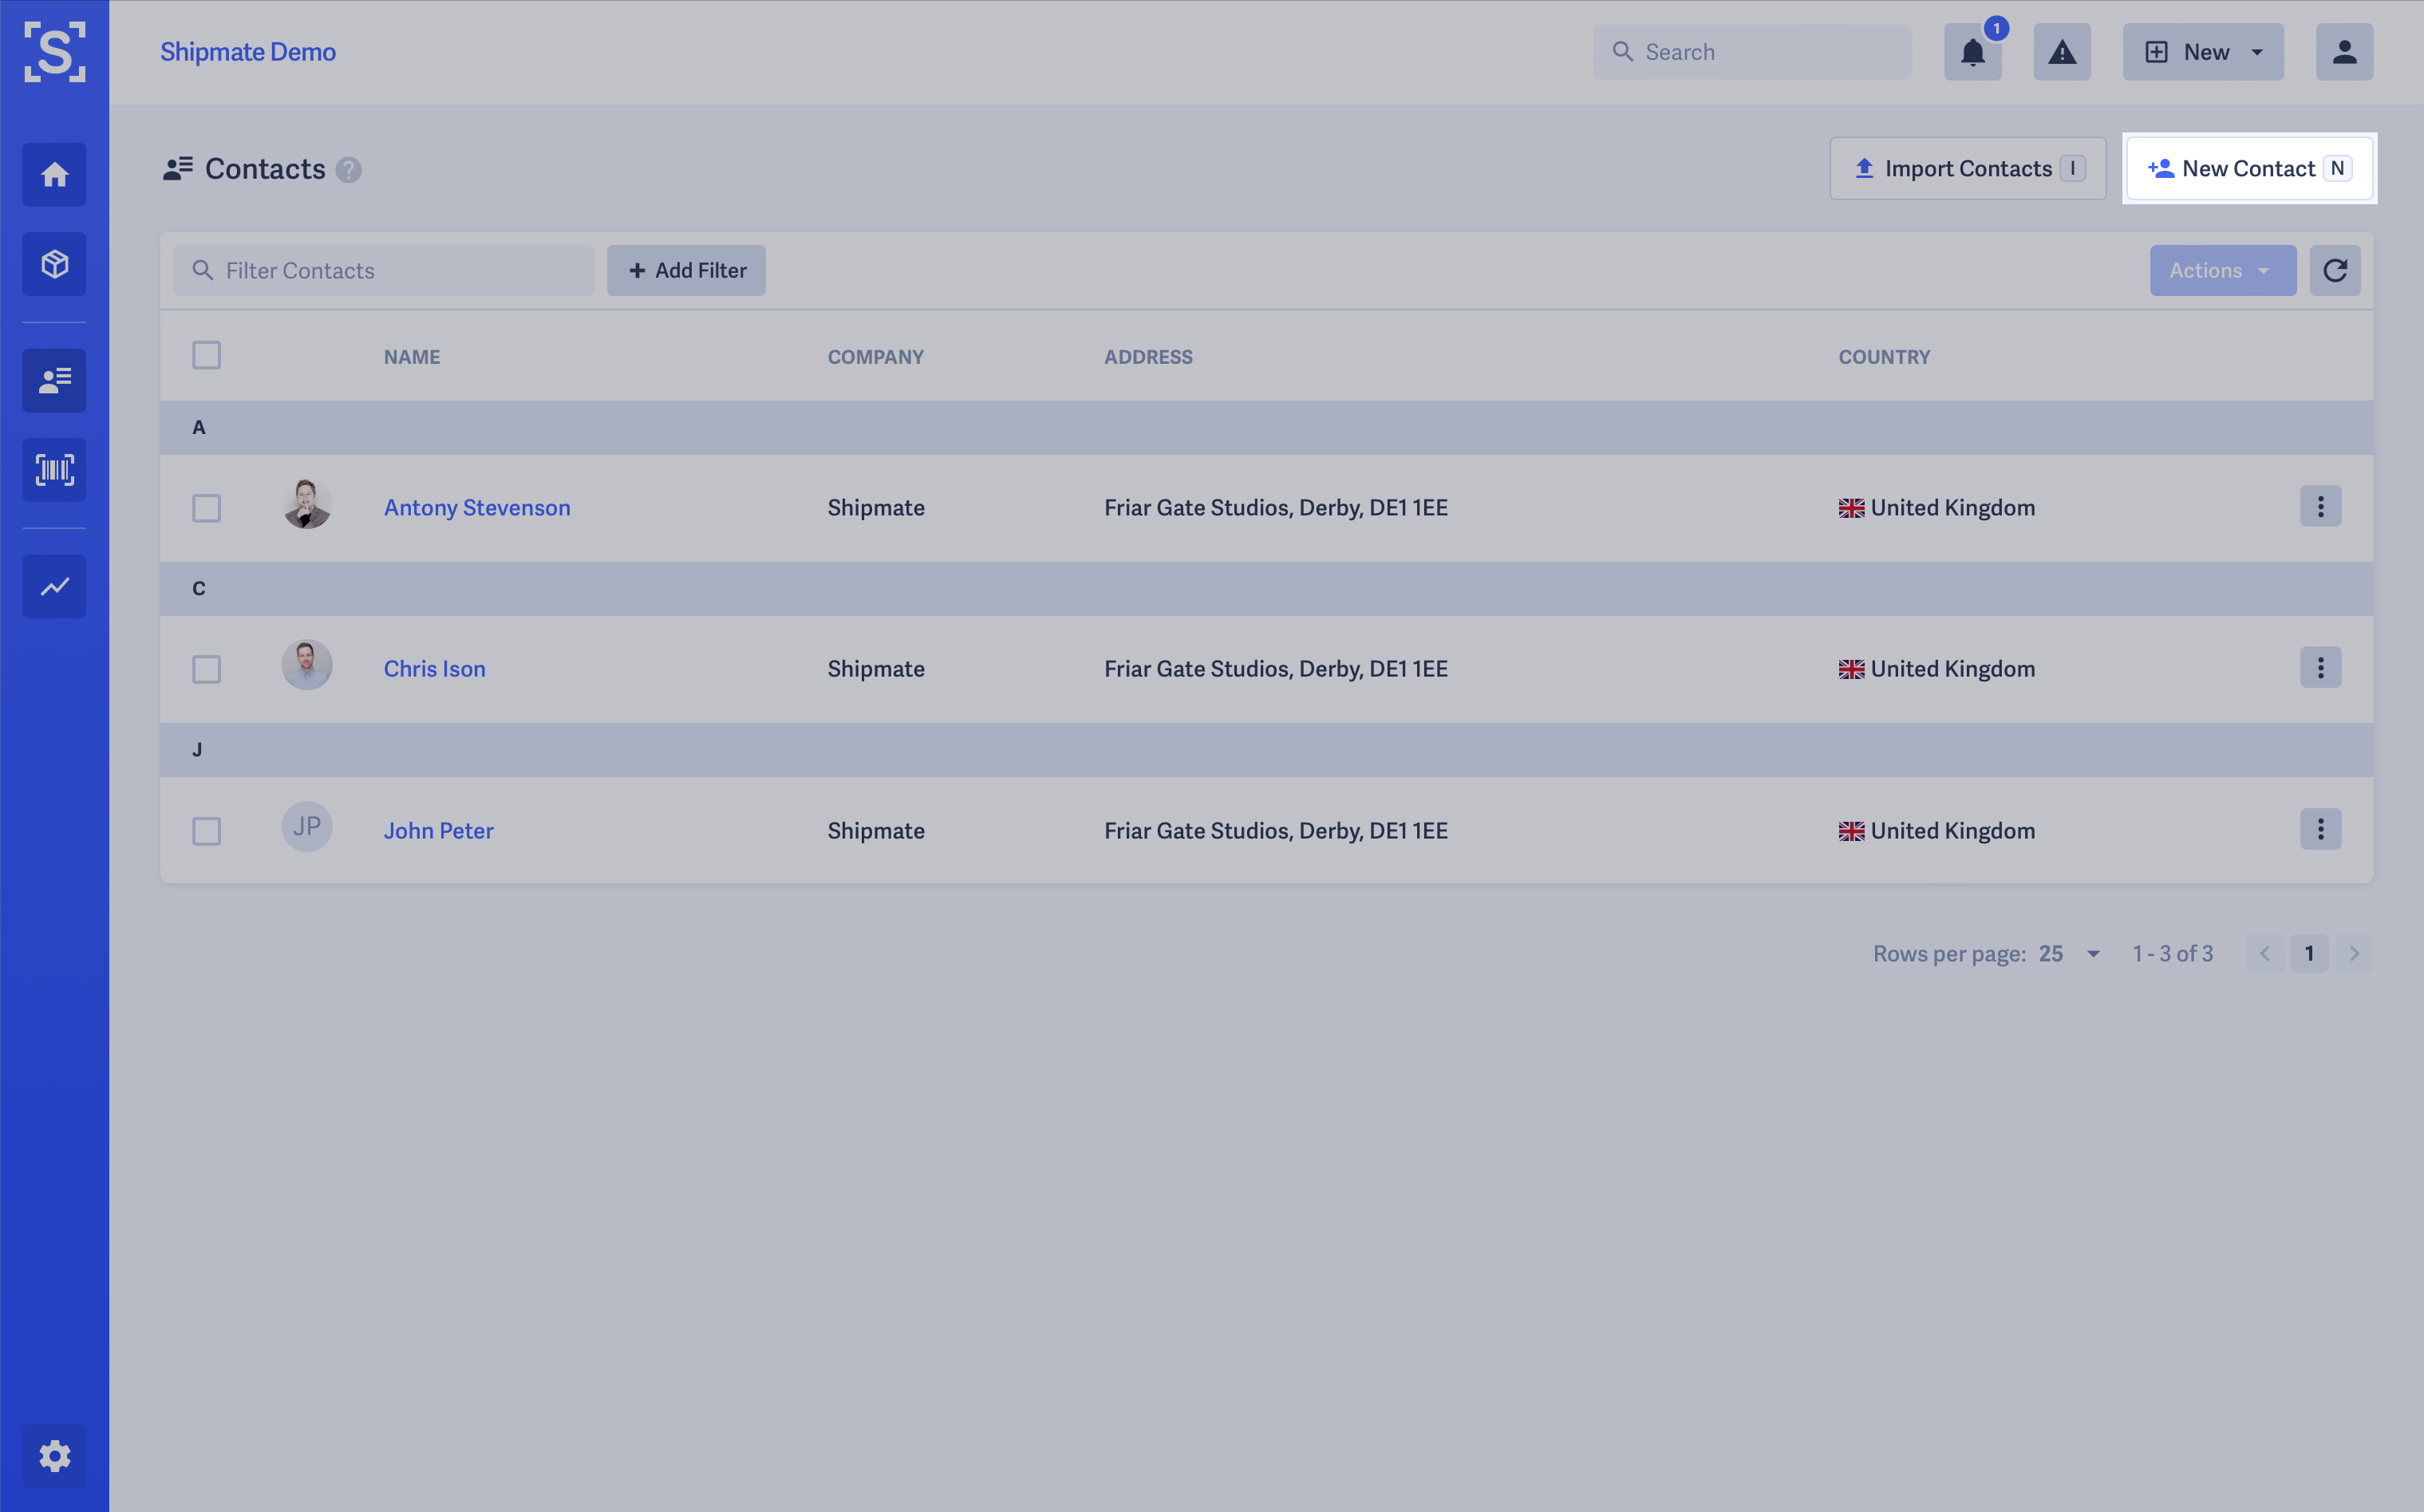
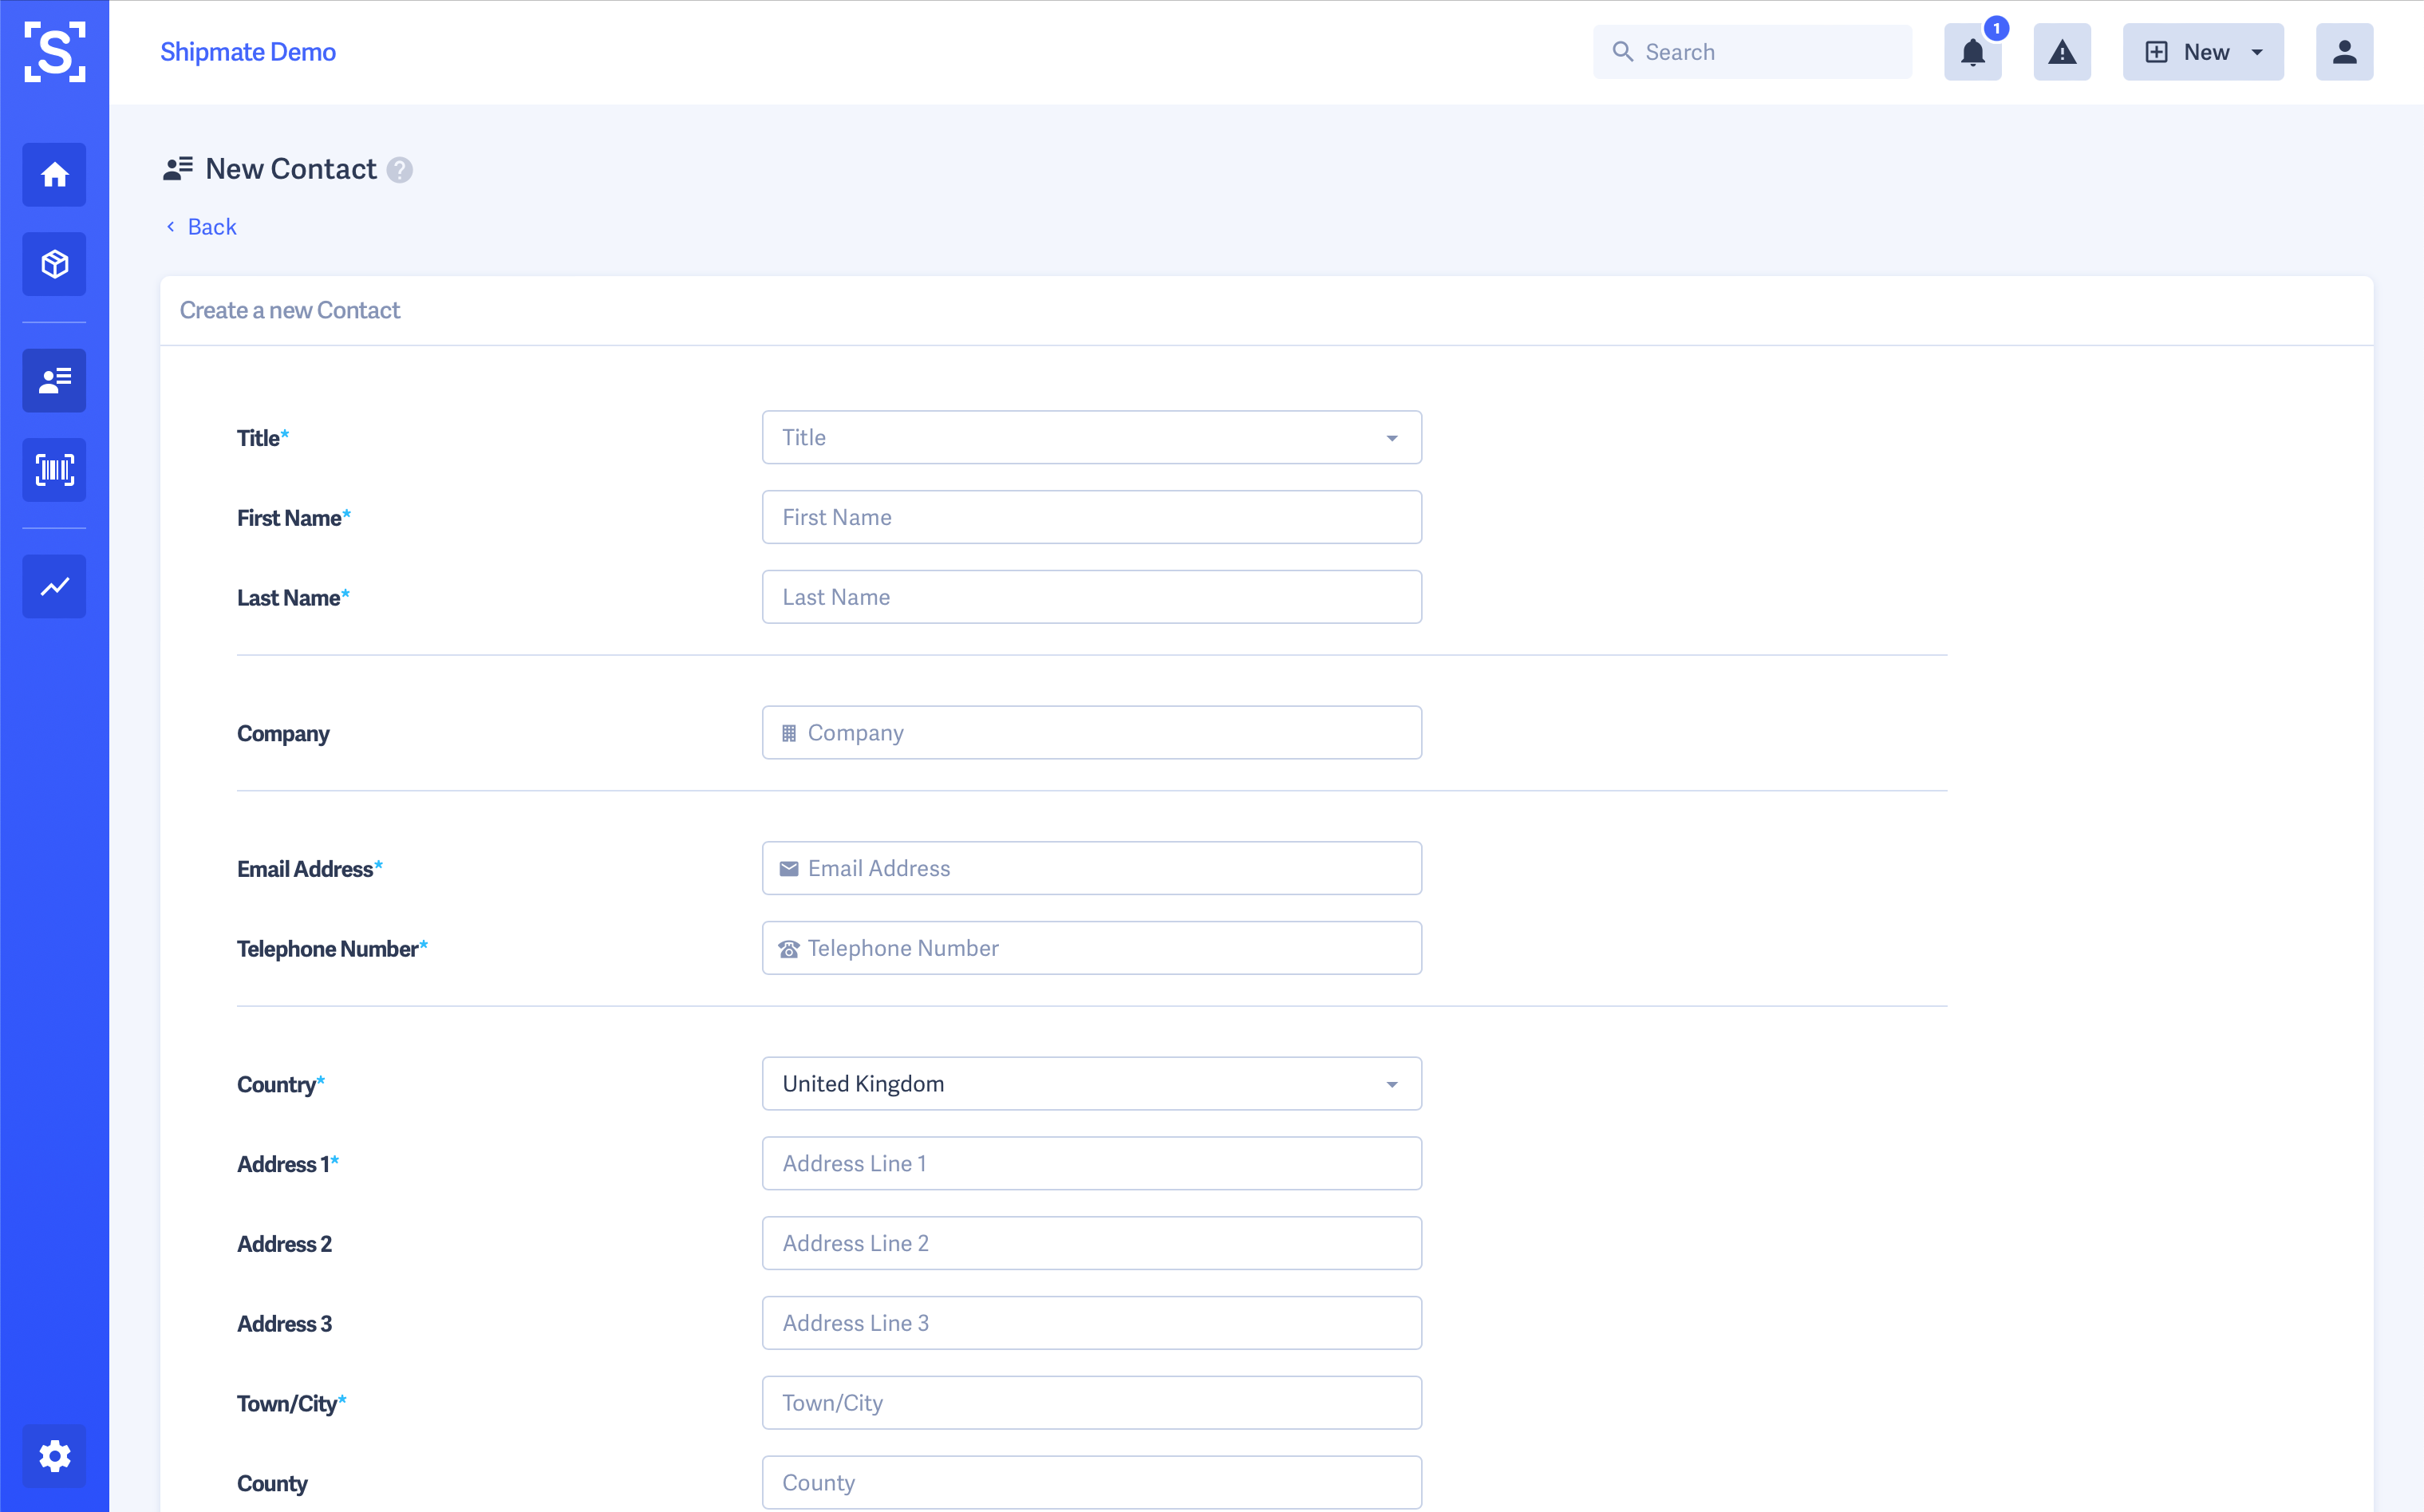
Importing Contacts
If you have a large number of Contacts to add to Shipmate, we offer a time-saving Import feature. This allows you to create a CSV file of all the Contacts you wish to add, then import them in one batch rather than having to key in the details of each Contact.
This is ideal if you already have your Contacts in another system and can export them, reformat them to the structure Shipmate requires using a spreadsheet application such as MS Excel, then import them into Shipmate.
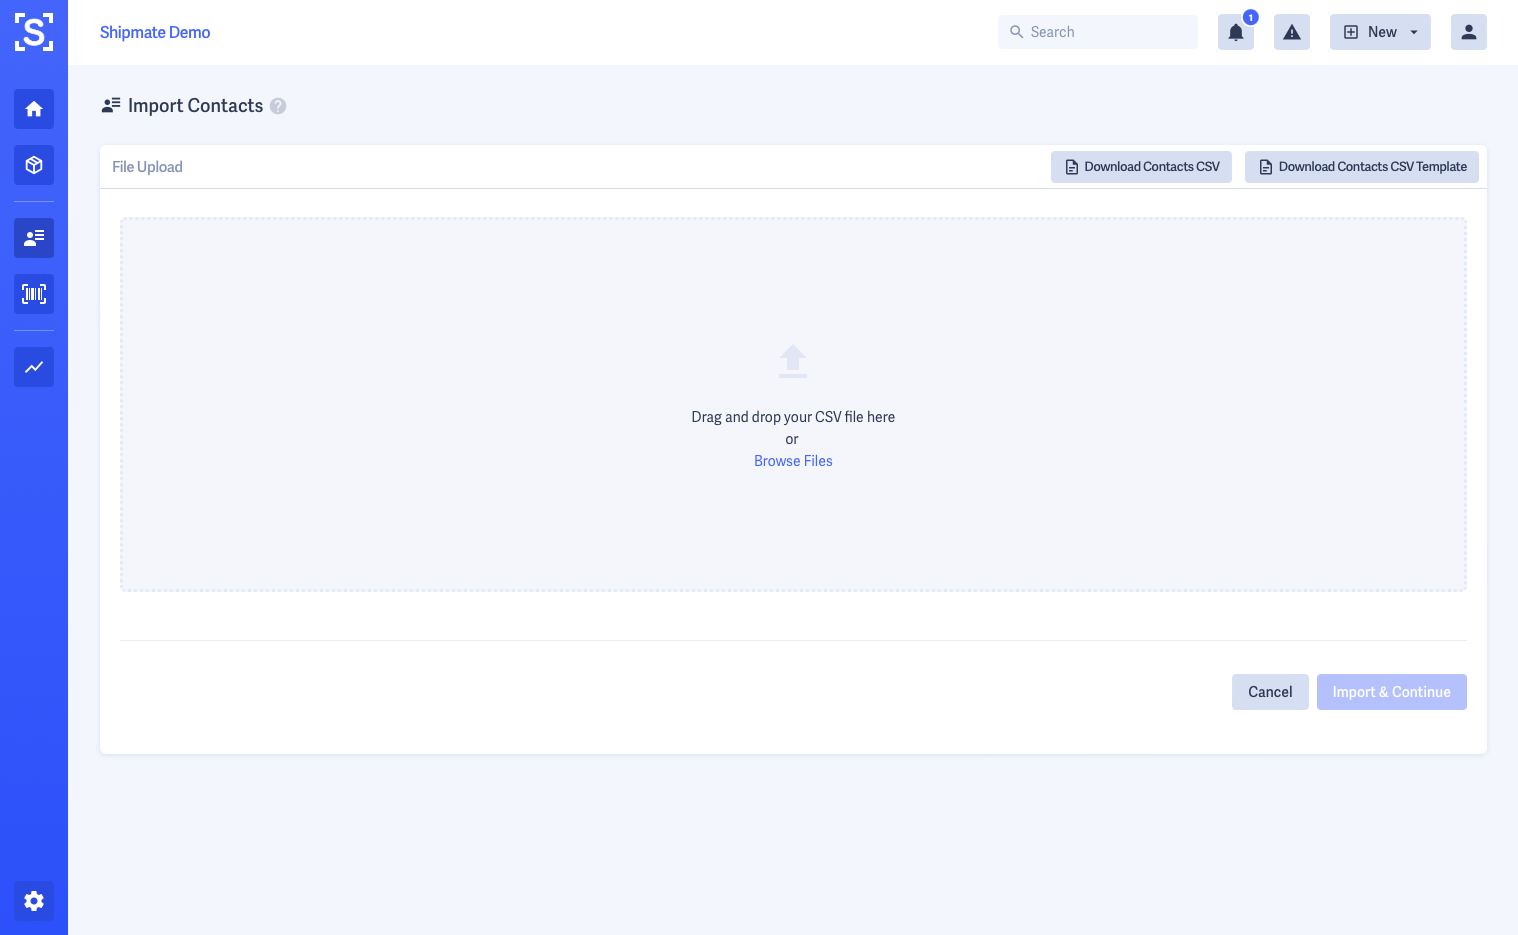
Shipmate has a fixed CSV format for importing Contacts - a template can be downloaded from the Import Contacts screen, which can either be blank, or contain all existing Contacts in case you wish to update them.
To import Contacts, click the Import Contacts button on the Contacts page, or press the I key on your keyboard, then either drag and drop a CSV file onto the upload area, or click to find the CSV file on your computer.
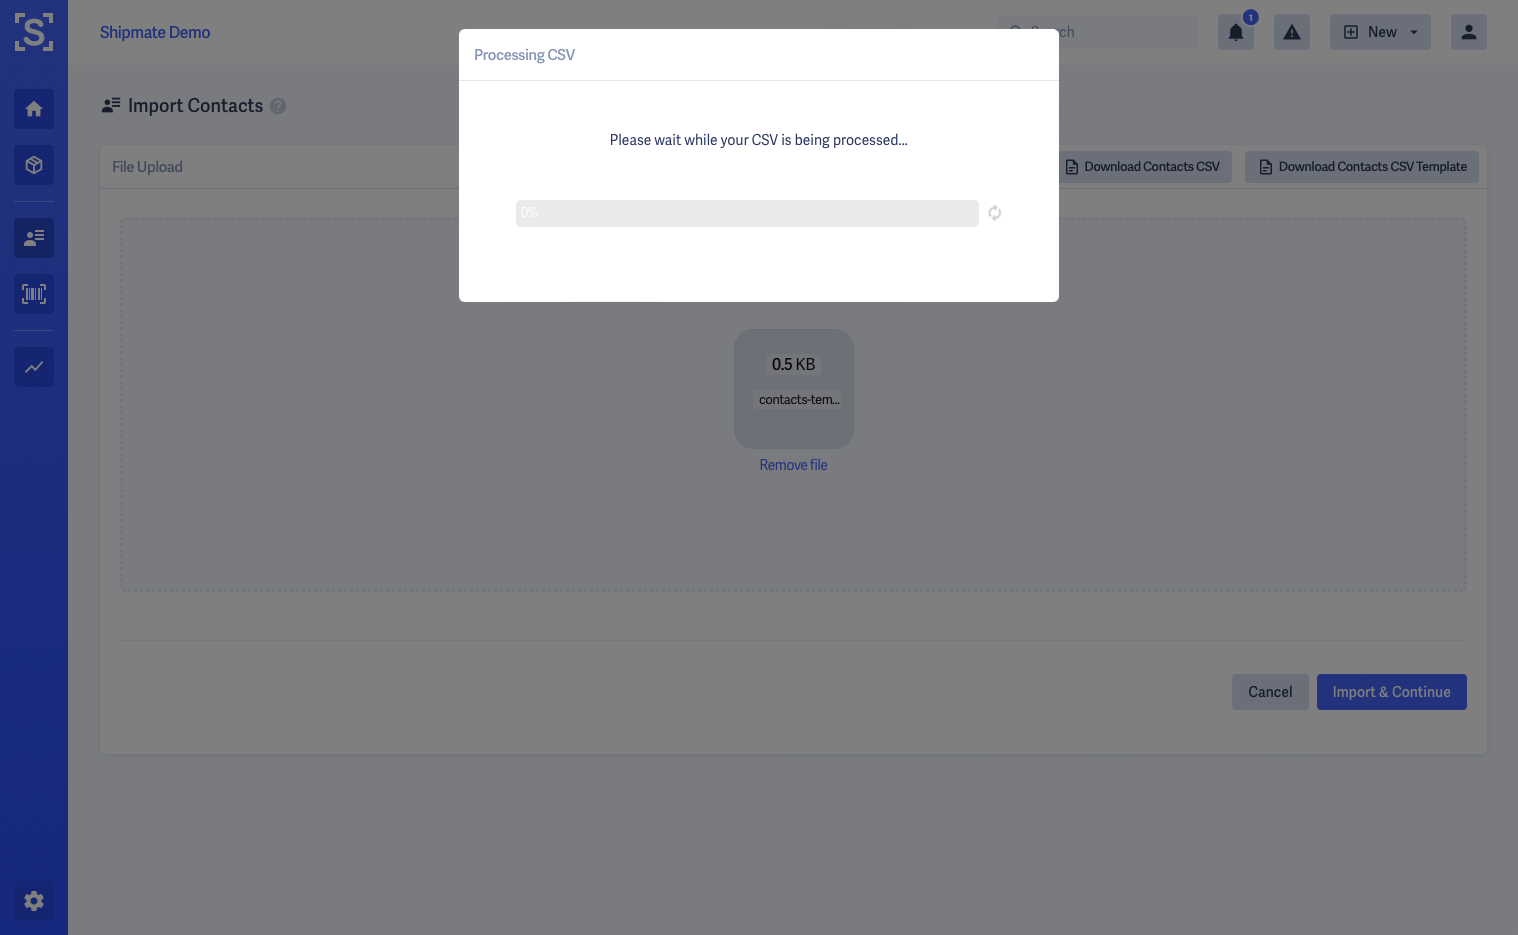
Shipmate will then screen the file to make sure it is in the correct format, then allow you to process the import.
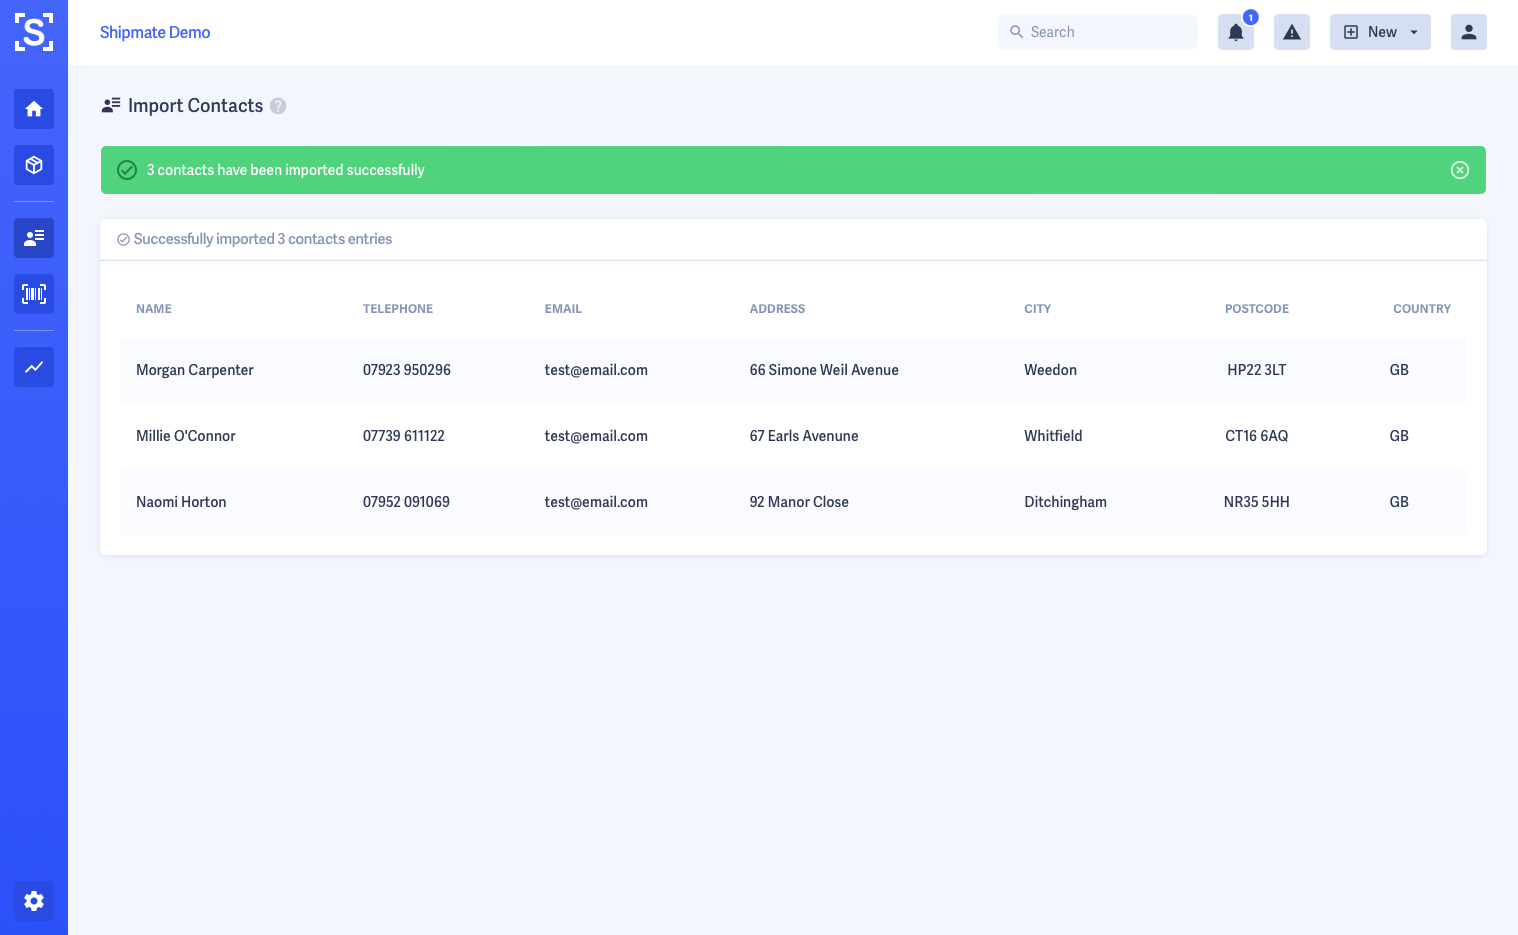
The Contacts will then be imported and a list shown of all the newly added Contacts. They are then available immediately for use across the platform.

Using Contacts
There are three ways you can access your Contacts:
- Contacts Directory
- Quick Search
- New Shipment Form
In addition to using the Contacts Directory as outlined in this section, it is also possible to search for Contacts using Quick Search, or when creating new Shipments.
Using Quick Search, simply click into the Quick Search box then start typing the Contact's name. Recent Shipments will be displayed first, then matching Contacts. Either click the Contact, or use the arrow up and down keys on your keyboard to navigate to the Contact you wish to view or send a Shipment to, then press enter.
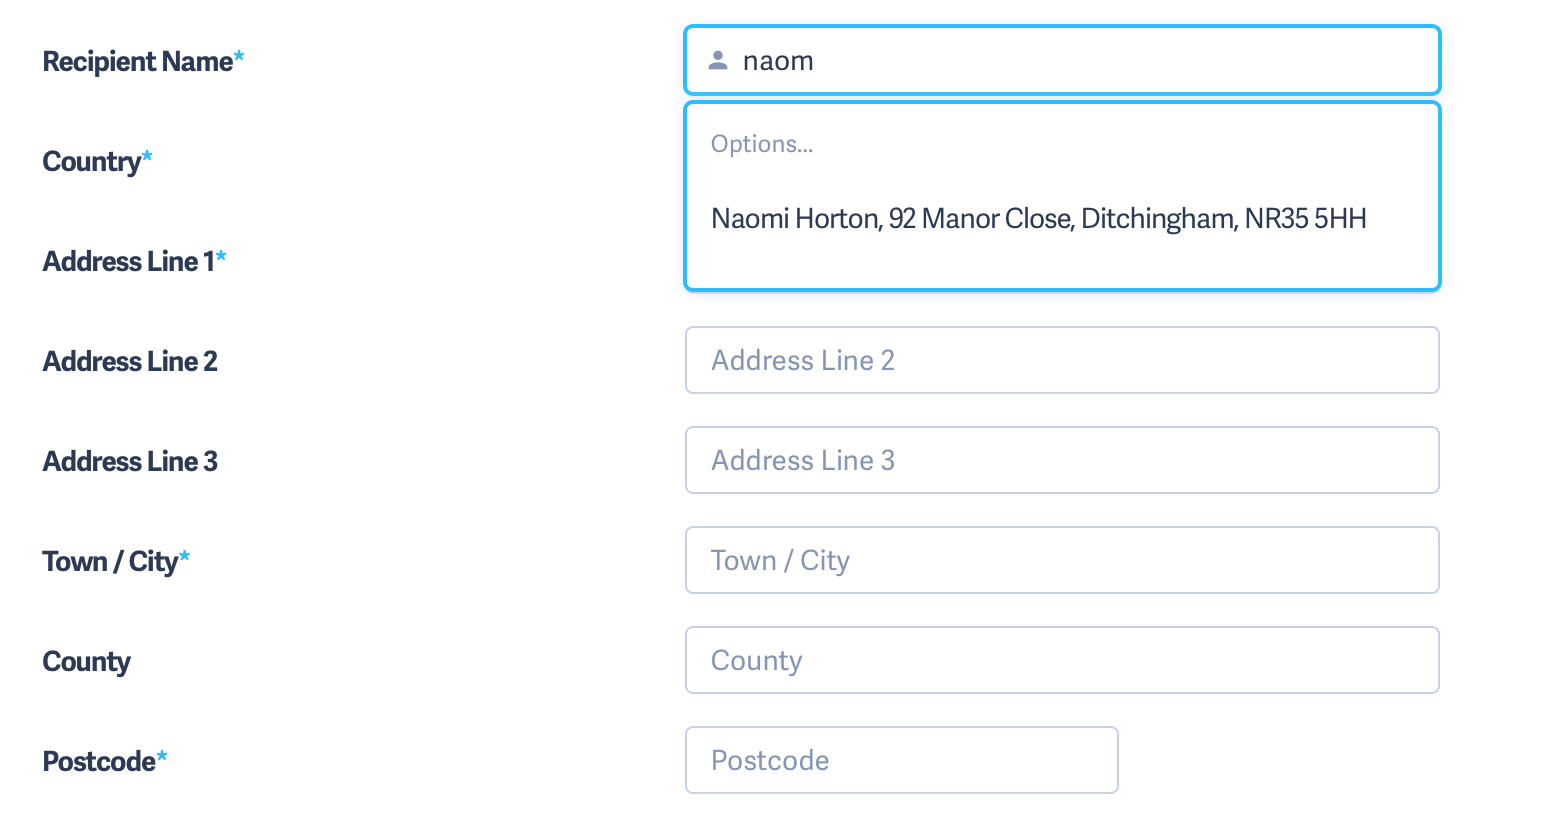
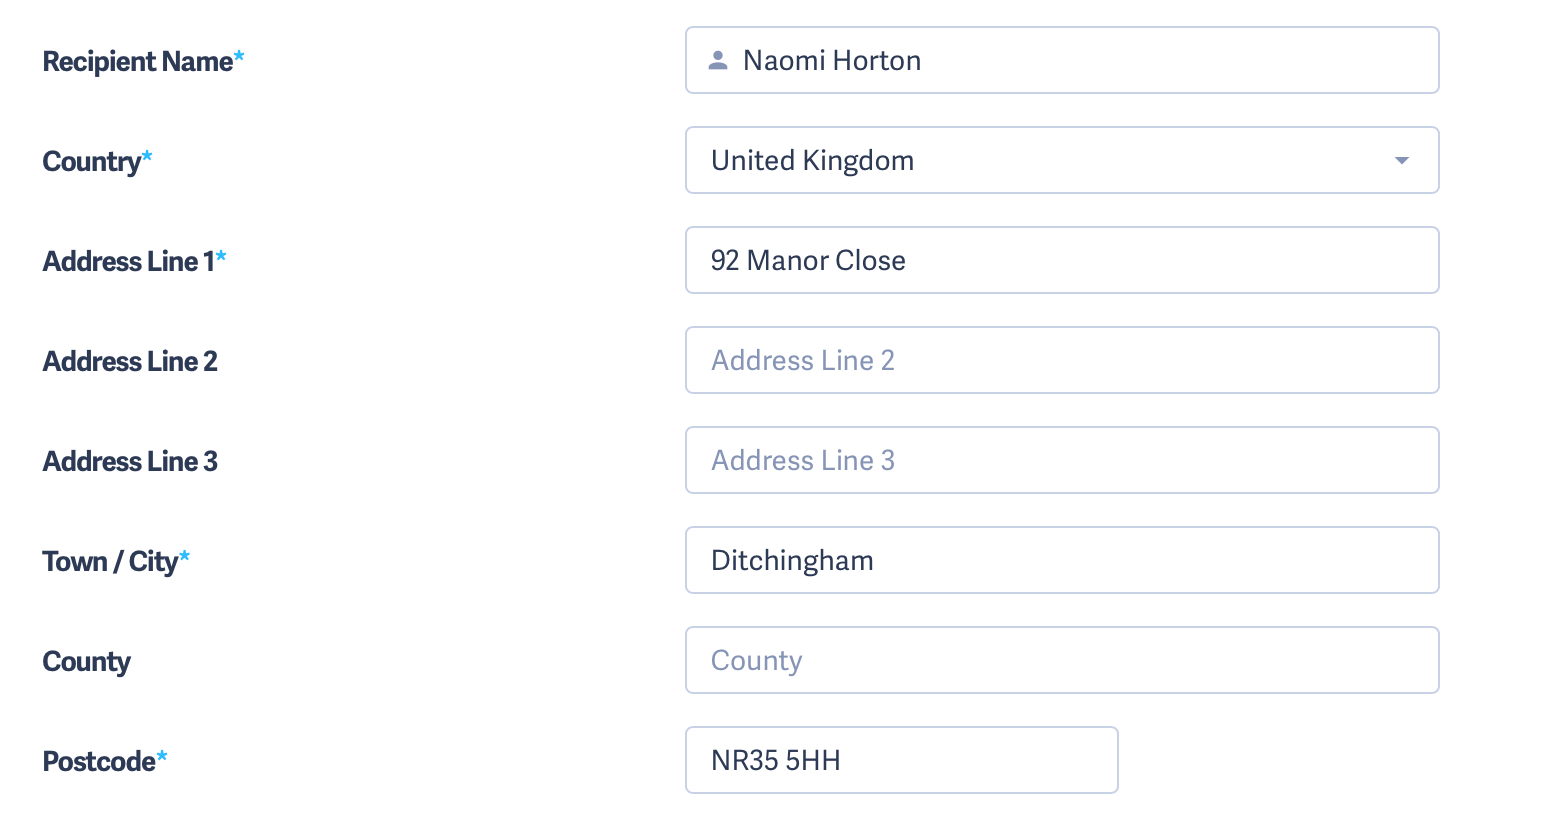
You can also search for Contacts when creating New Shipments. In the Recipient Name input box, start typing the Contact's name and matching results will start to show. Simply click the Contact's name to populate all details into the New Shipment form.

SKU Inventory
SKU Inventory
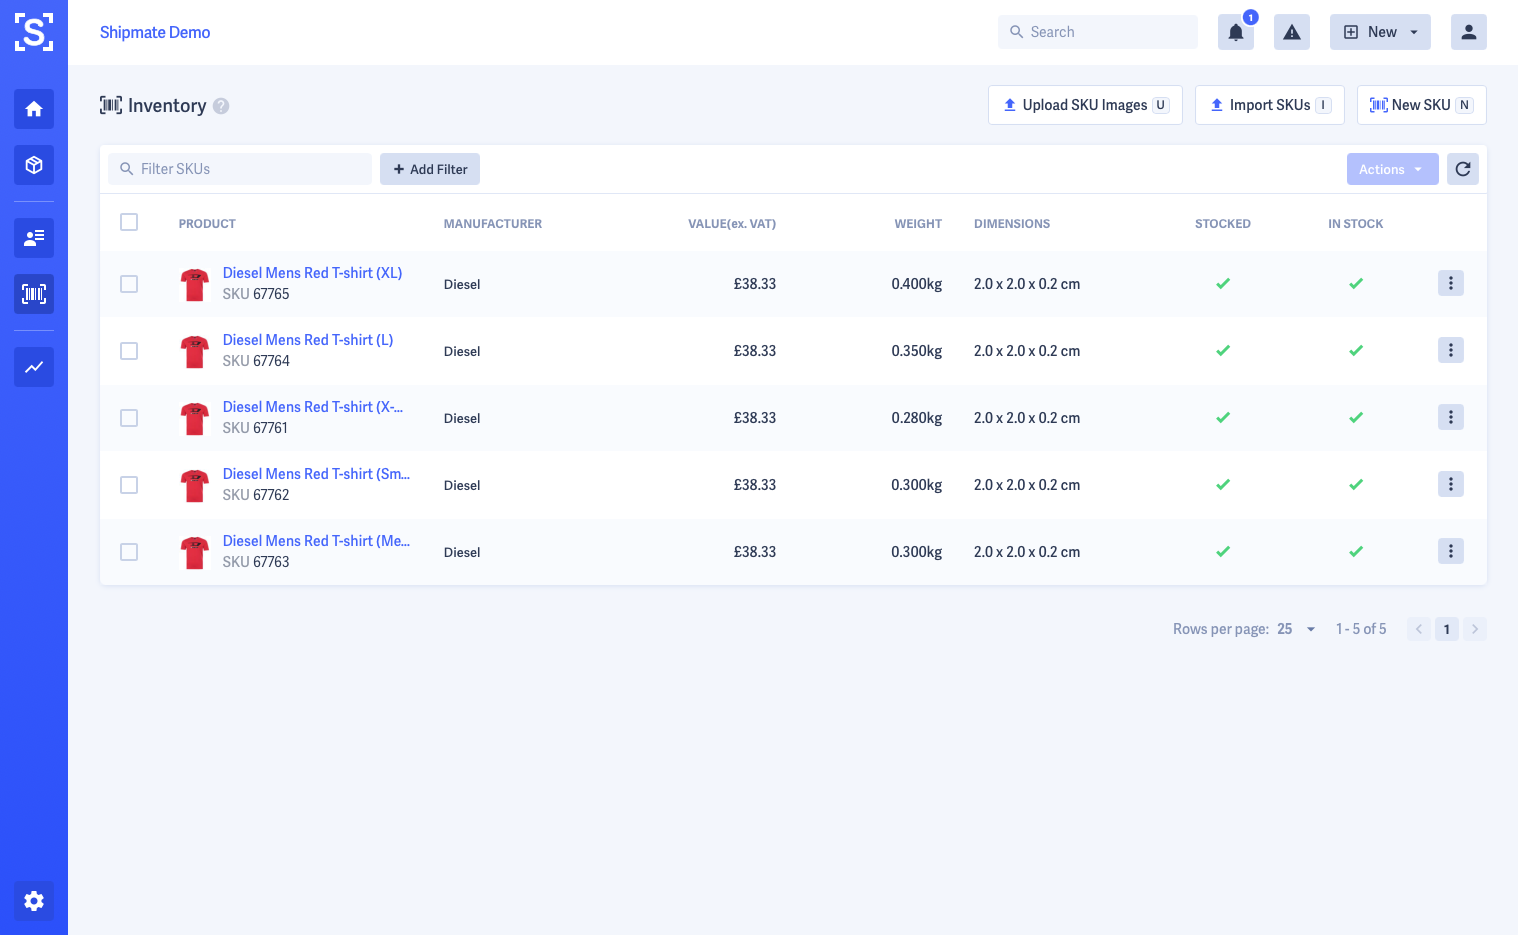
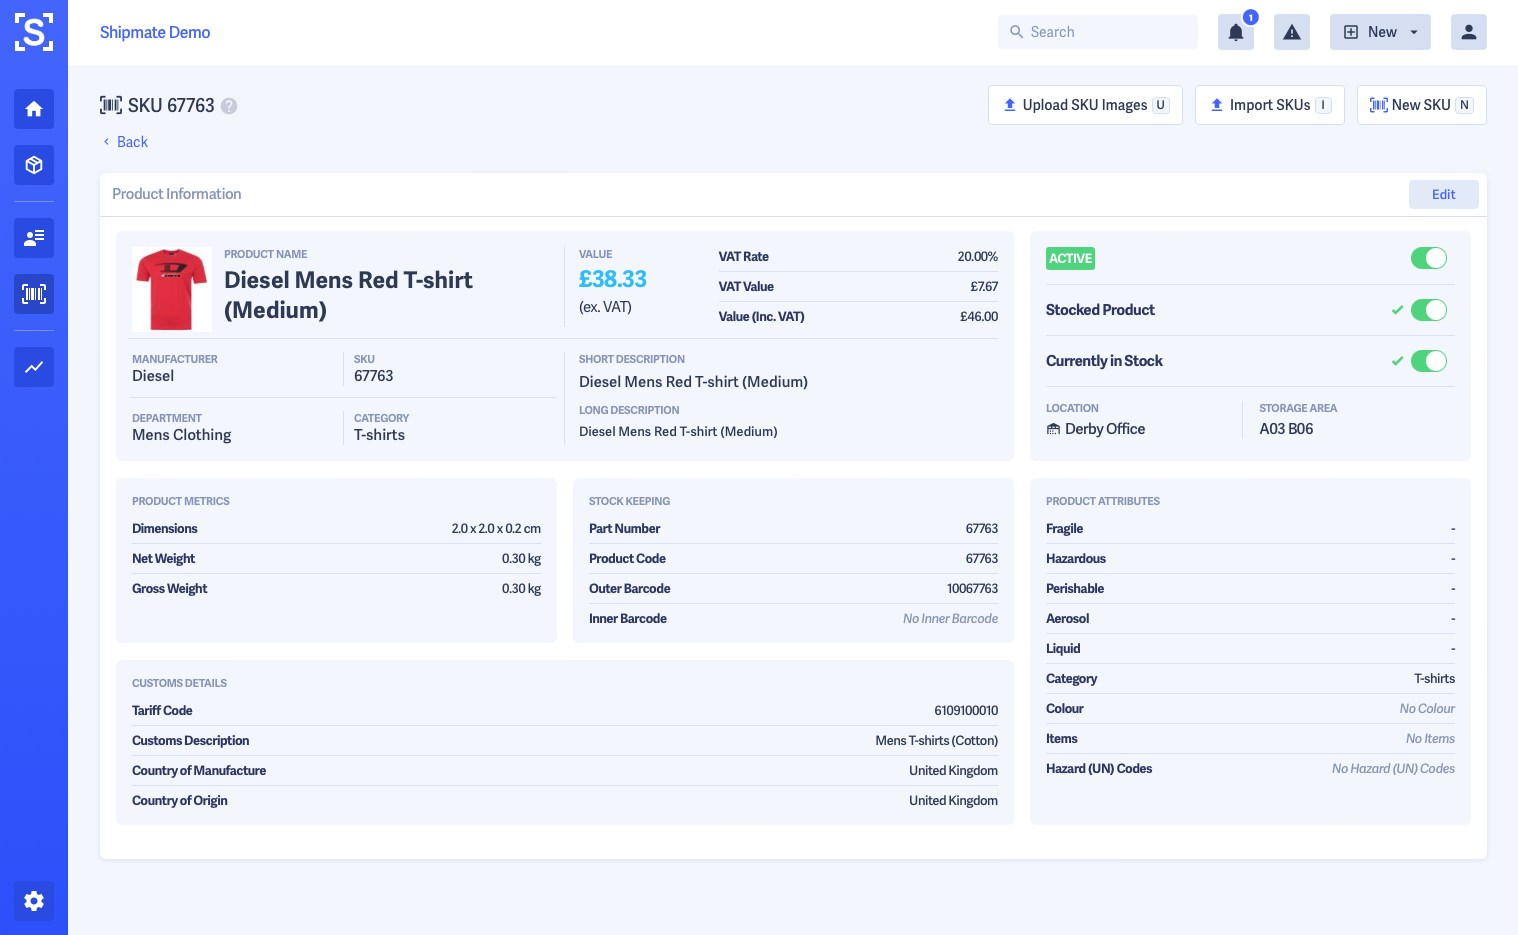
The SKU Inventory allows you to keep an accurate record of the products you sell, from a shipping perspective. This is particularly helpful when sending internationally, when you have to supply customs declaration details such as accurate values, weights, tariff codes and country of origin.
Once SKUs are added to your Inventory, you can then easily search for them by code or name, and Shipmate will automatically populate the relevant details for your Shipment.
The SKU Inventory can also be used by the API and CSV uploader, enriching details from other applications by matching the SKU number. Any missing details from your API request or CSV file are then populated from the details held on the Inventory, meaning Shipmate can act as your source of truth when shipping your orders.
This is especially beneficial if the eCommerce platform or Order Management System you use cannot hold customs declaration details, as Shipmate can simply add these details from the Inventory on the fly.
Details from the SKU Inventory can also be used to generate Despatch Notes and Picking Lists, with the ability to store picking locations and print integrated shipping labels using the companion Desktop Printer App.
Adding a SKU
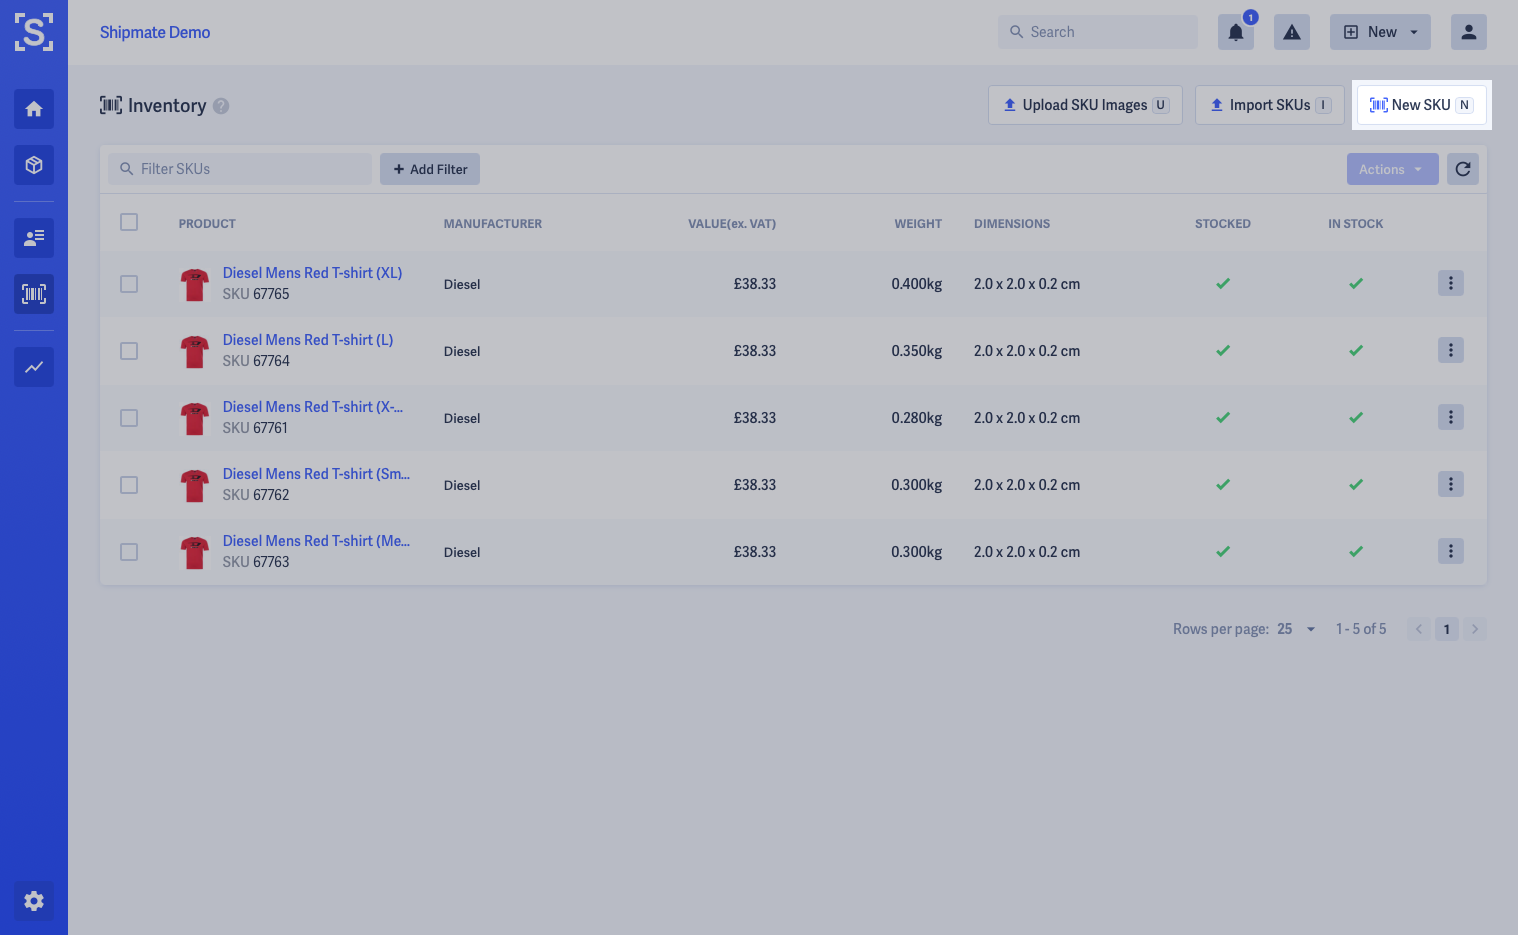
To add a new SKU, from the SKU Inventory list, click the New SKU button, or press the N key on your keyboard.
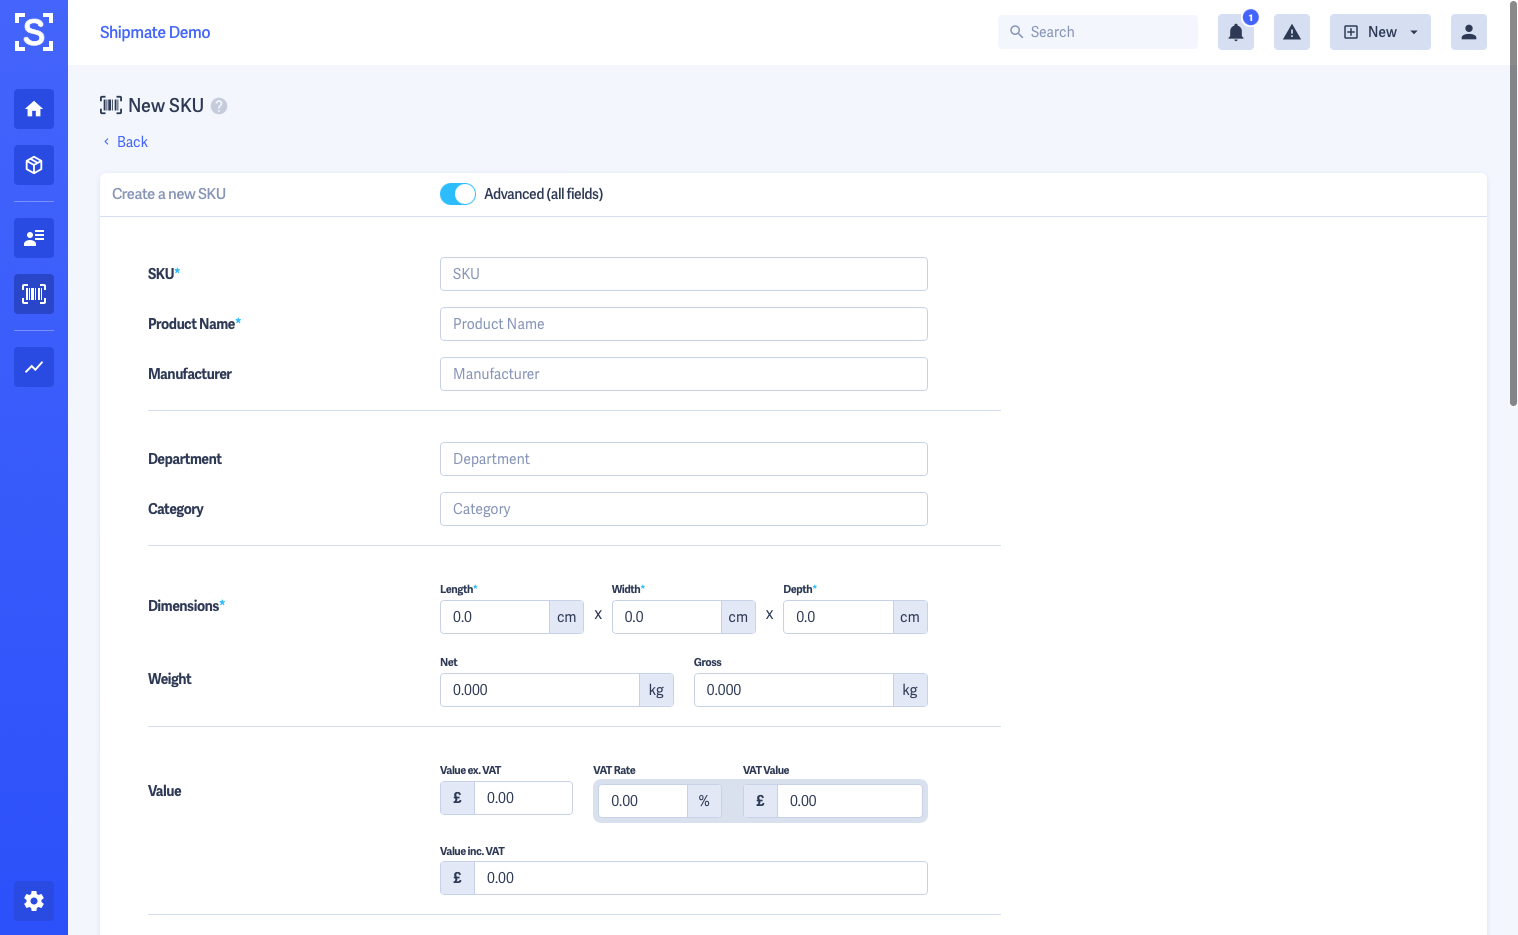
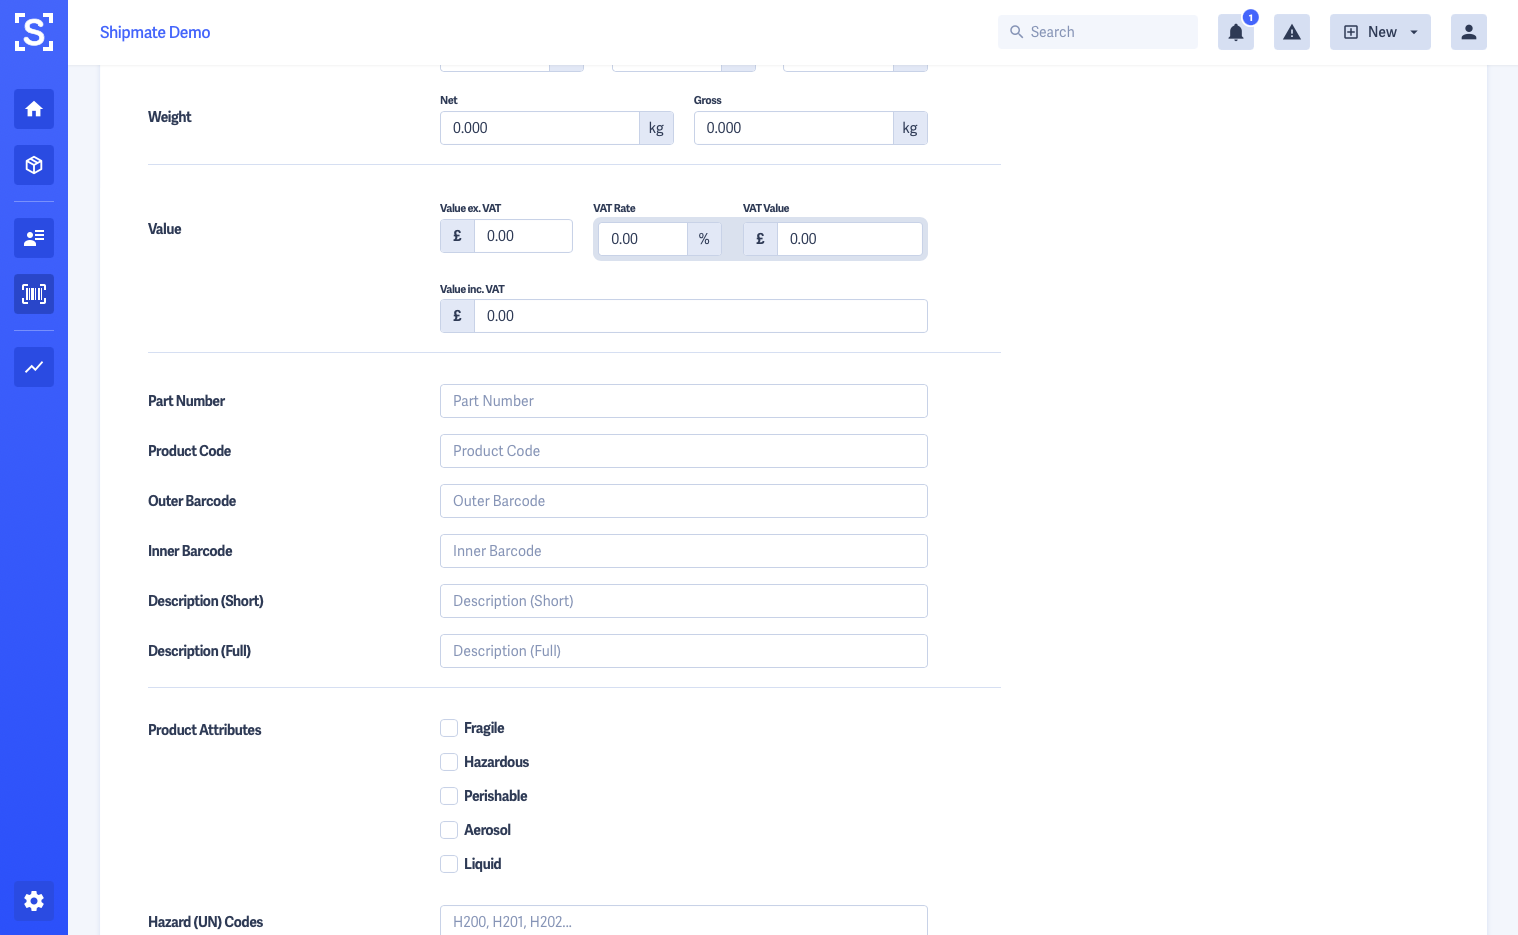
This will load the New SKU form, where you can enter the product details. It is possible to switch between basic and advanced modes, allowing you to enter essential or all details respectively.
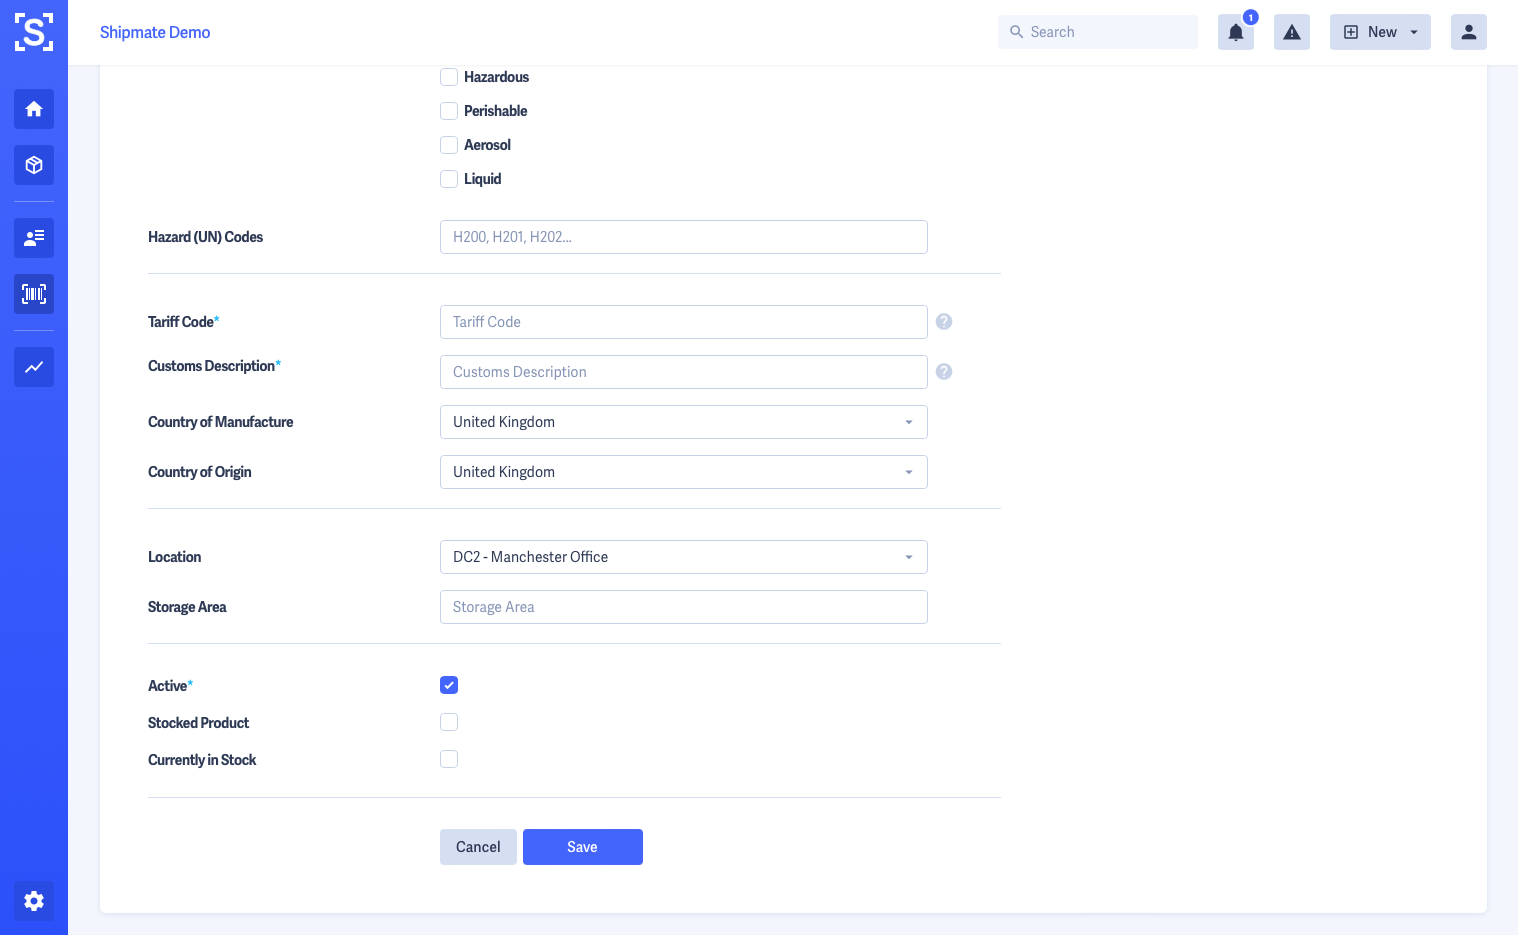
Once you are happy with the details you have entered, click the Save button. The SKU will then be available immediately across the platform, and you will be taken to the SKU page, where you can upload an image of the product if you wish.

Importing SKUs
If you have a large number of SKUs to add to Shipmate, we offer a time-saving Import feature. This allows you to create a CSV file of all the SKUs you wish to add, then import them in one batch rather than having to key in the details of each Contact.
This is ideal if you already have your SKUs in another system and can export them, reformat them to the structure Shipmate requires using a spreadsheet application such as MS Excel, then import them into Shipmate.
Shipmate has a fixed CSV format for importing SKUs - a template can be downloaded from the Import SKUs screen, which can either be blank, or contain all existing SKUs in case you wish to update them.
To import SKUs, click the Import SKUs button on the SKU Inventory page, or press the I key on your keyboard, then either drag and drop a CSV file onto the upload area, or click to find the CSV file on your computer.
Shipmate will then screen the file to make sure it is in the correct format, then allow you to process the import.
The SKUs will then be imported and a list shown of all the newly added SKUs. They are then available immediately for use across the platform.
Uploading SKU Images
Images help identify your SKUs, and with forthcoming updates to Shipmate, we will be making greater use of SKUs across the platform. You can upload your SKU images in bulk using the SKU Image Uploader.
First of all, prepare a Zip file containing each of your SKU images, either in JPEG or PNG format, each with the file name being the SKU number. For example, if you have a SKU number of 12345, the image should be called 12345.jpg or 12345.png. The Zip file can be called anything you like.
The Zip file may be up to 200MB in size, and contain as many images as possible within that file size limitation. Images are best if they have a white background and in a square format, but Shipmate will automatically process and optimise the images for display in the platform during the upload process.
Using SKUs
There are several ways you can populate Shipments with details from your SKUs:
- New Shipment Form
- Shipment CSV Importer
- API
- Shopify & WooCommerce plugins
When adding Parcel Contents details to your Shipments, you can search by SKU number or name and a list will pop up showing matching products to select from. Clicking the SKU will populate the form with the SKU details, including the Item Description, HS Code or Tariff Code, Country of Origin and Value. The SKU's dimensions will also be compared to the parcel dimensions and a warning shown if the item is too large to fit the packaging.
Using the Shipment CSV Importer, you may map one of the CSV columns to a SKU List. This can be a comma-separated list of SKU numbers to enrich the CSV data with when producing the Shipment. Each SKU is treated as having a quantity of one, so for multiple items of the same SKU, simply supply the SKU number the amount of times it is required for the parcel.
Using the Shipmate API, Item details can be enriched with details held on the SKU Inventory, removing the need for the integrating system to carry full product and customs details. Full details of how SKUs are treated in API requests can be found in the Shipmate API Guide.
Additionally, the WooCommerce and Shopify plugins can work by solely providing the SKU numbers if other details are not present on the products on those platforms. Shipmate will add the relevant details to the Shipment as it is being processed.

Settings
Settings
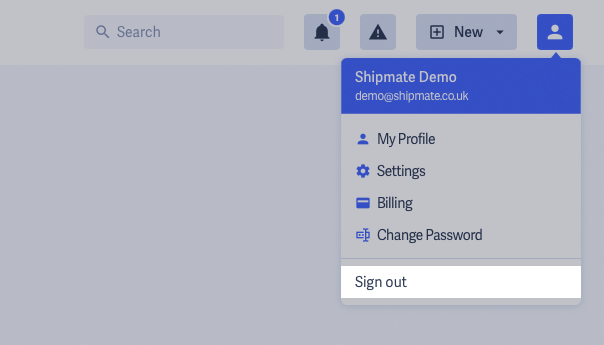
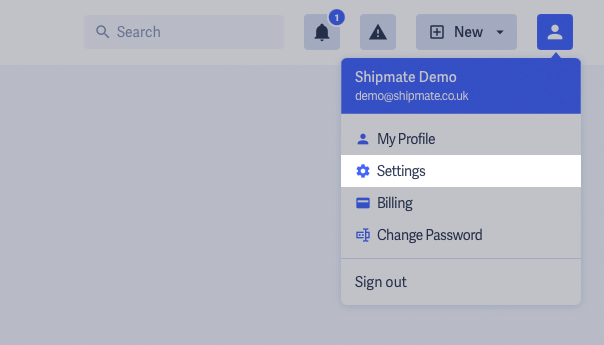
To access your account's Settings, click on the Profile Menu in the right hand side of the Top Menu and selecting Settings.
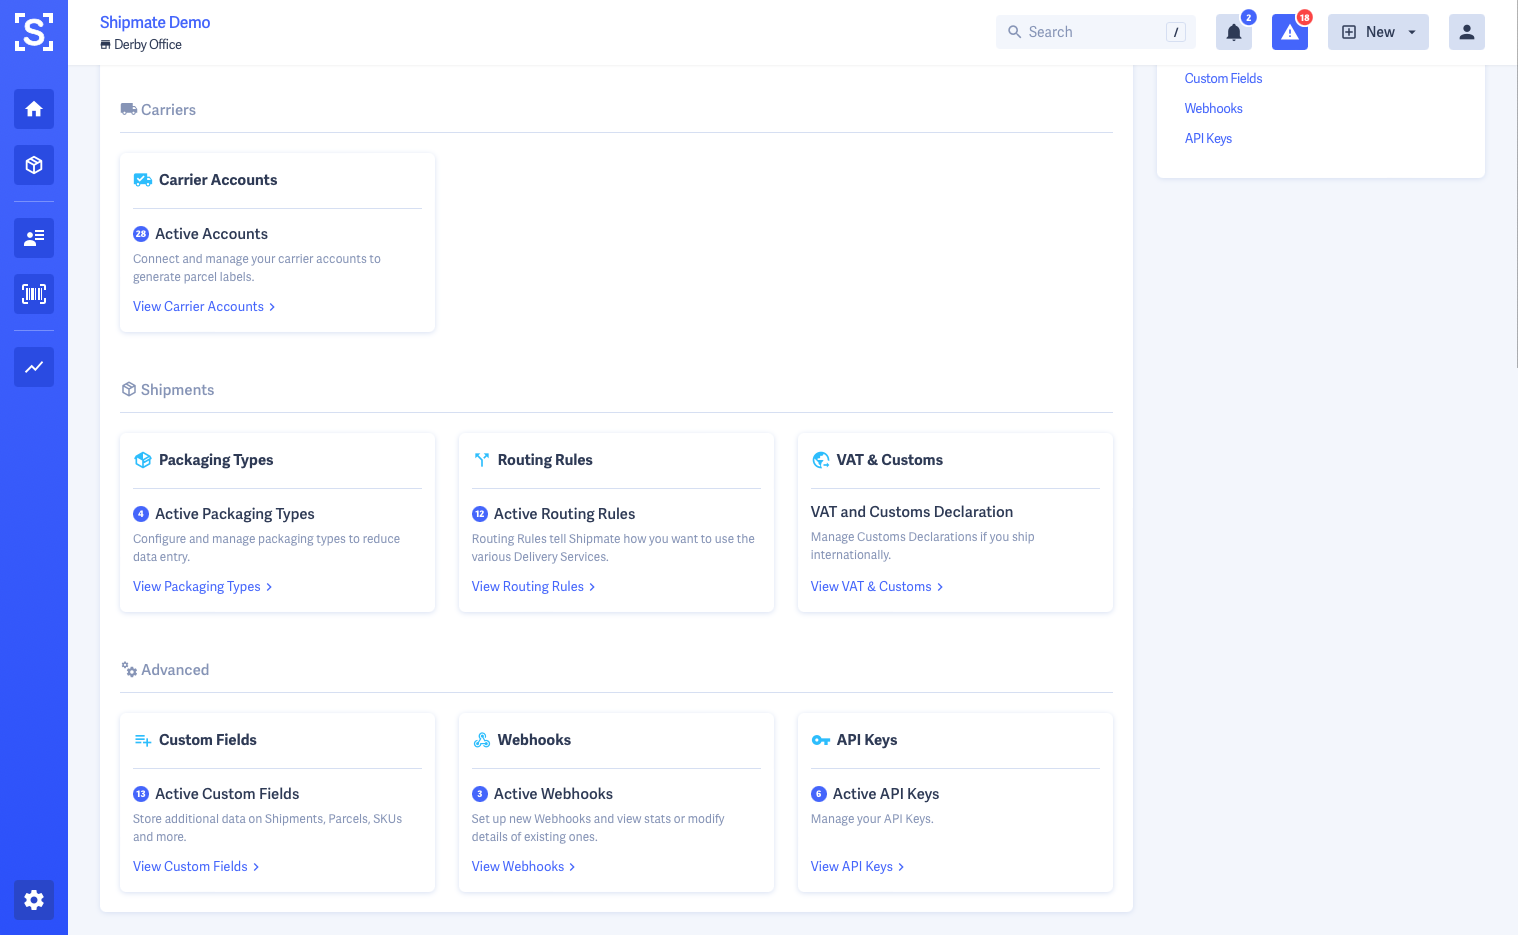
Alternatively, click the Settings Cog icon in the lower-left of the screen, at the bottom of the Main Menu.
The Settings screen is organised into five sections, as follows:
- General
- Orders
- Carriers
- Shipments
- Advanced


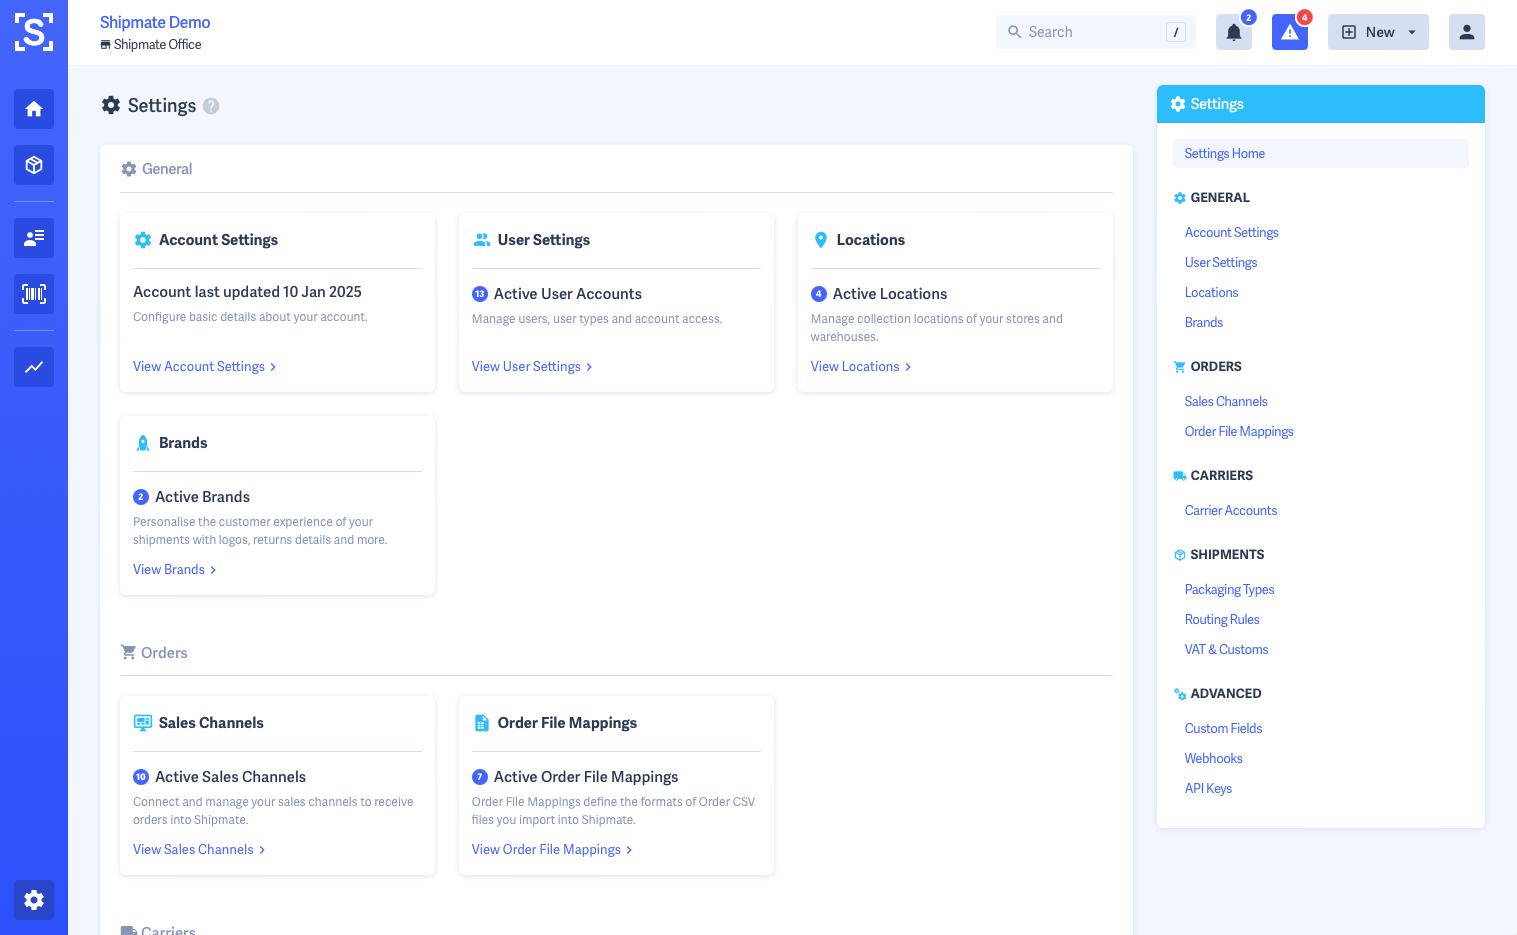
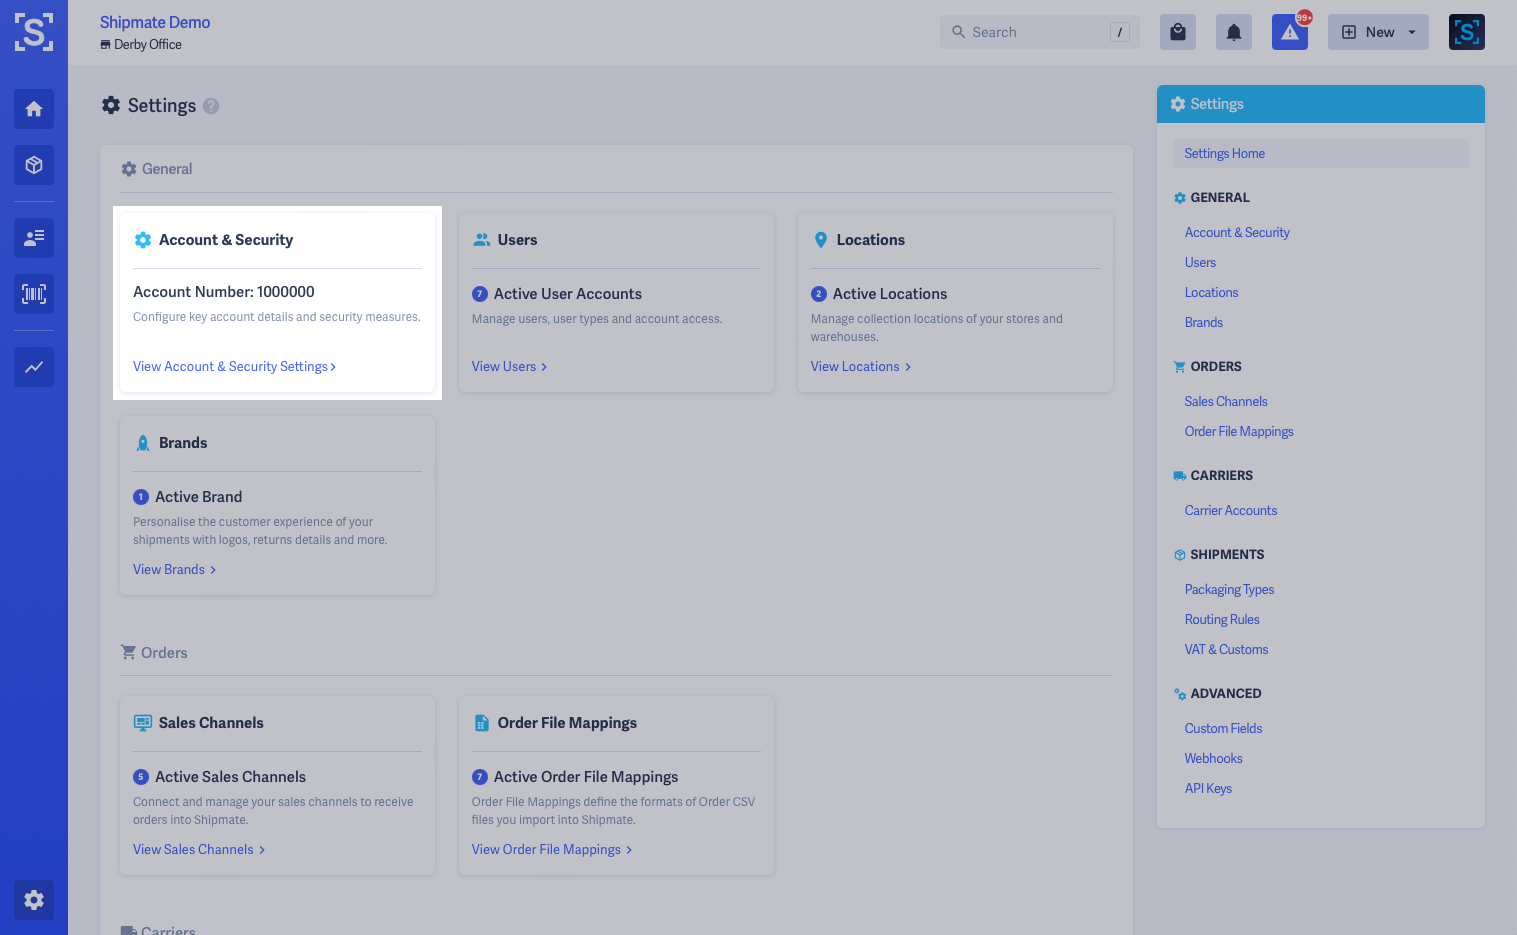
Account & Security Settings
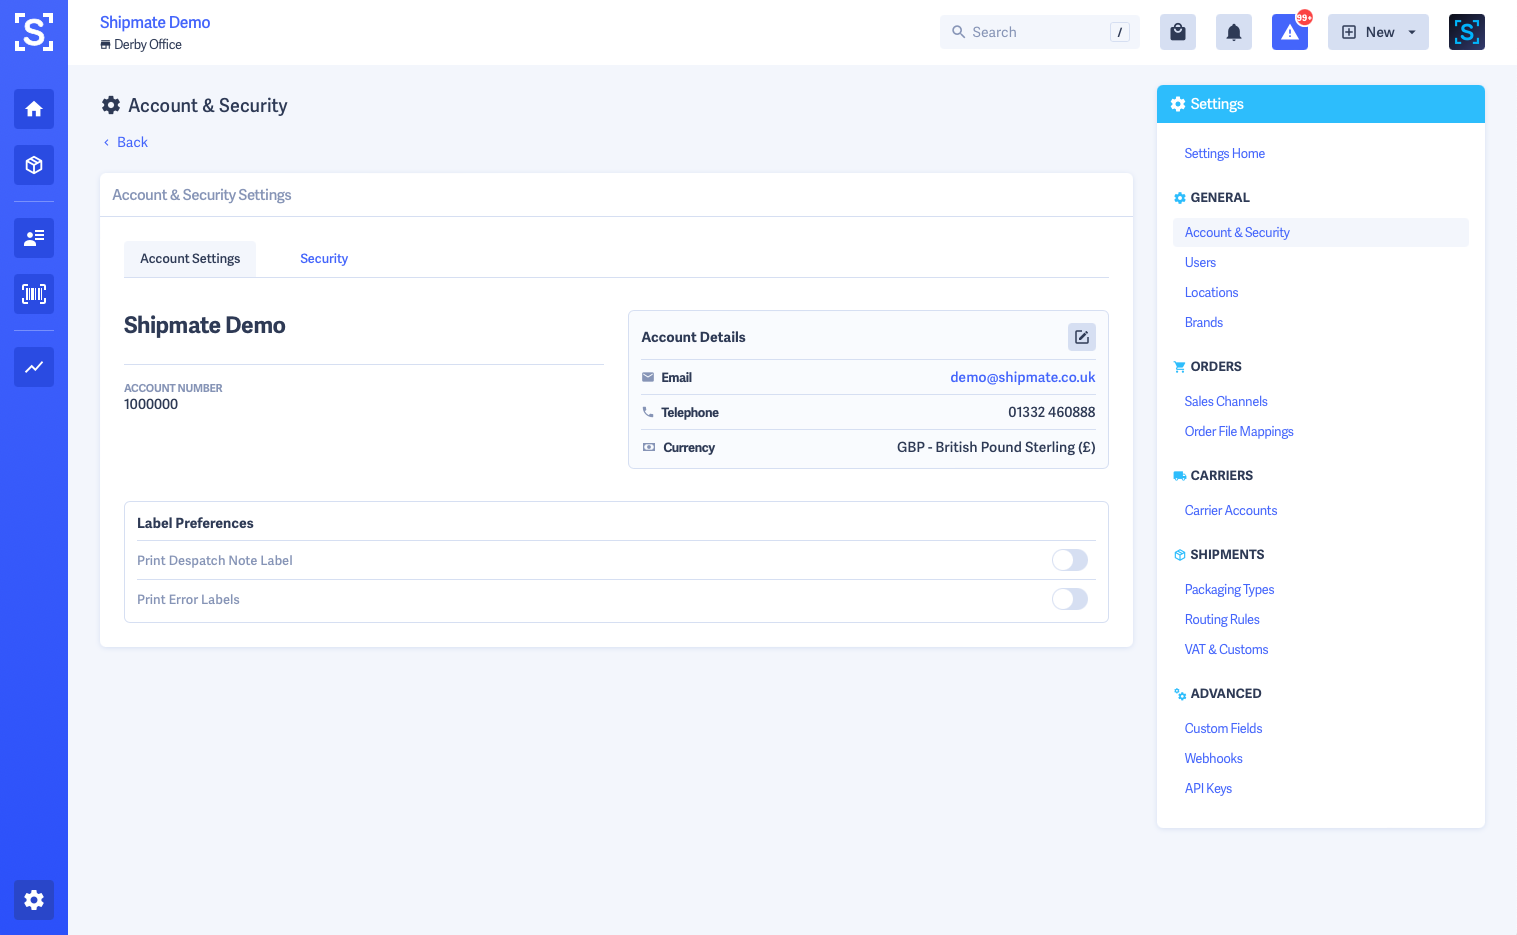
In Account & Security Settings, you are able to amend key details about your Shipmate account, such as your company name, contact details and the currency used across the platform. You are also able to modify some account-wide printing options, such as outputting in-line Despatch Notes or Error Labels, and also configure account-wide security options, such as requiring two-factor authentication (2FA).
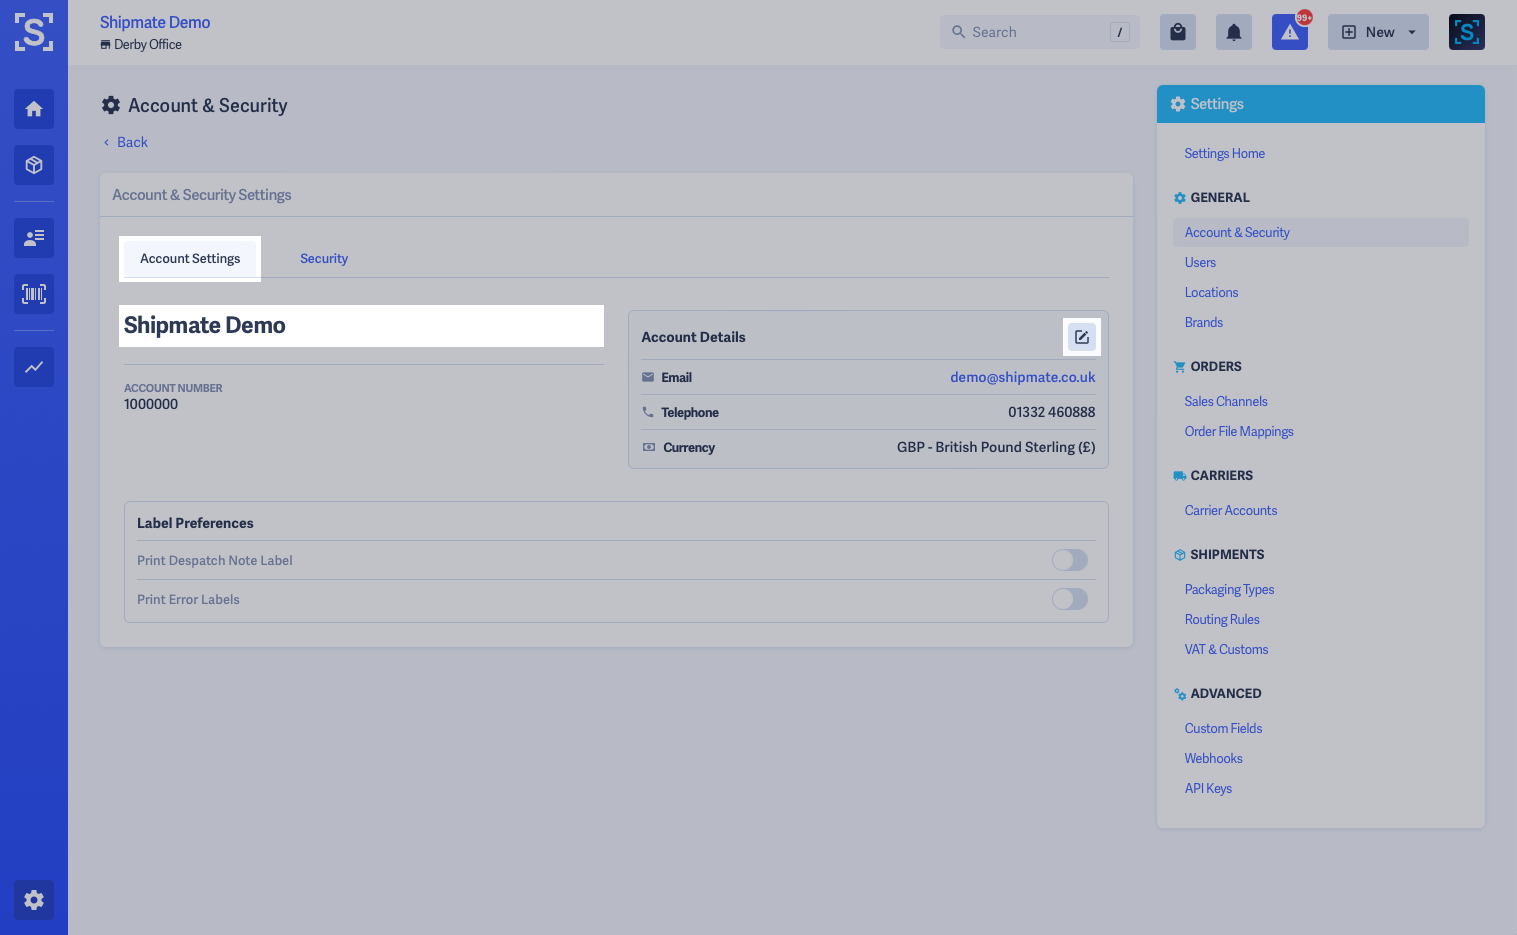
To access your Account Settings, from the Settings screen, select the Account & Security option. This screen opens on the Account Settings tab by default, where you can modify:
- Account Name – simply click the account name to change this
- Account Email – used with carrier accounts and displayed as the returns / customer support contact when multiple Brands are not supported by the carrier
- Account Telephone – used with carrier accounts and displayed as the returns / customer support contact when multiple Brands are not supported by the carrier
- Account Currency – the currency used for Shipments, SKUs and Delivery Charges across your account
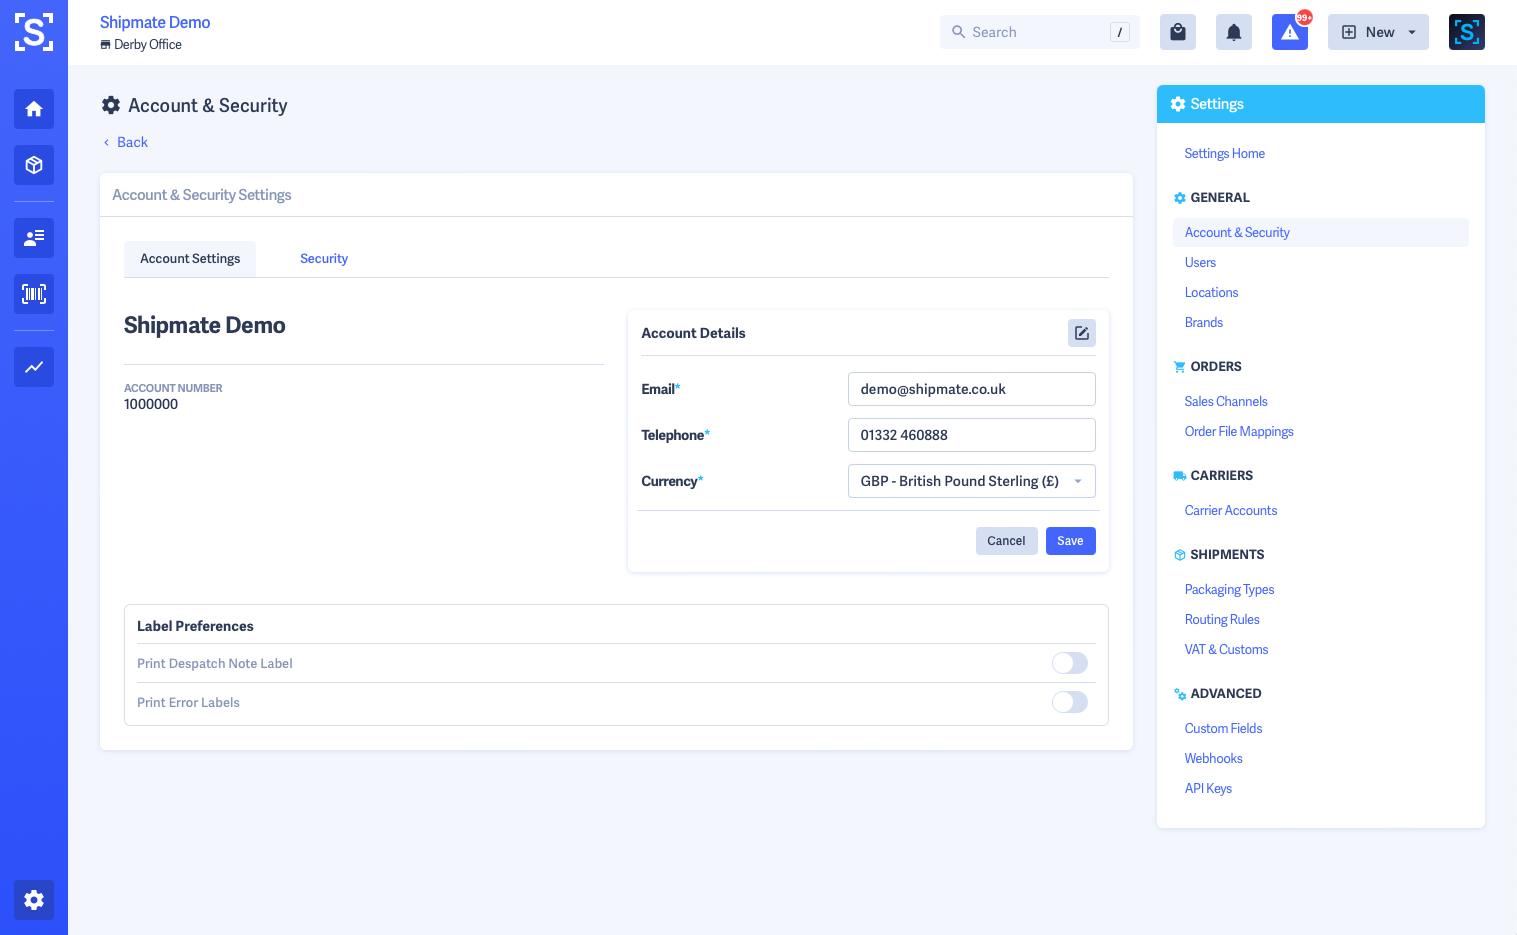
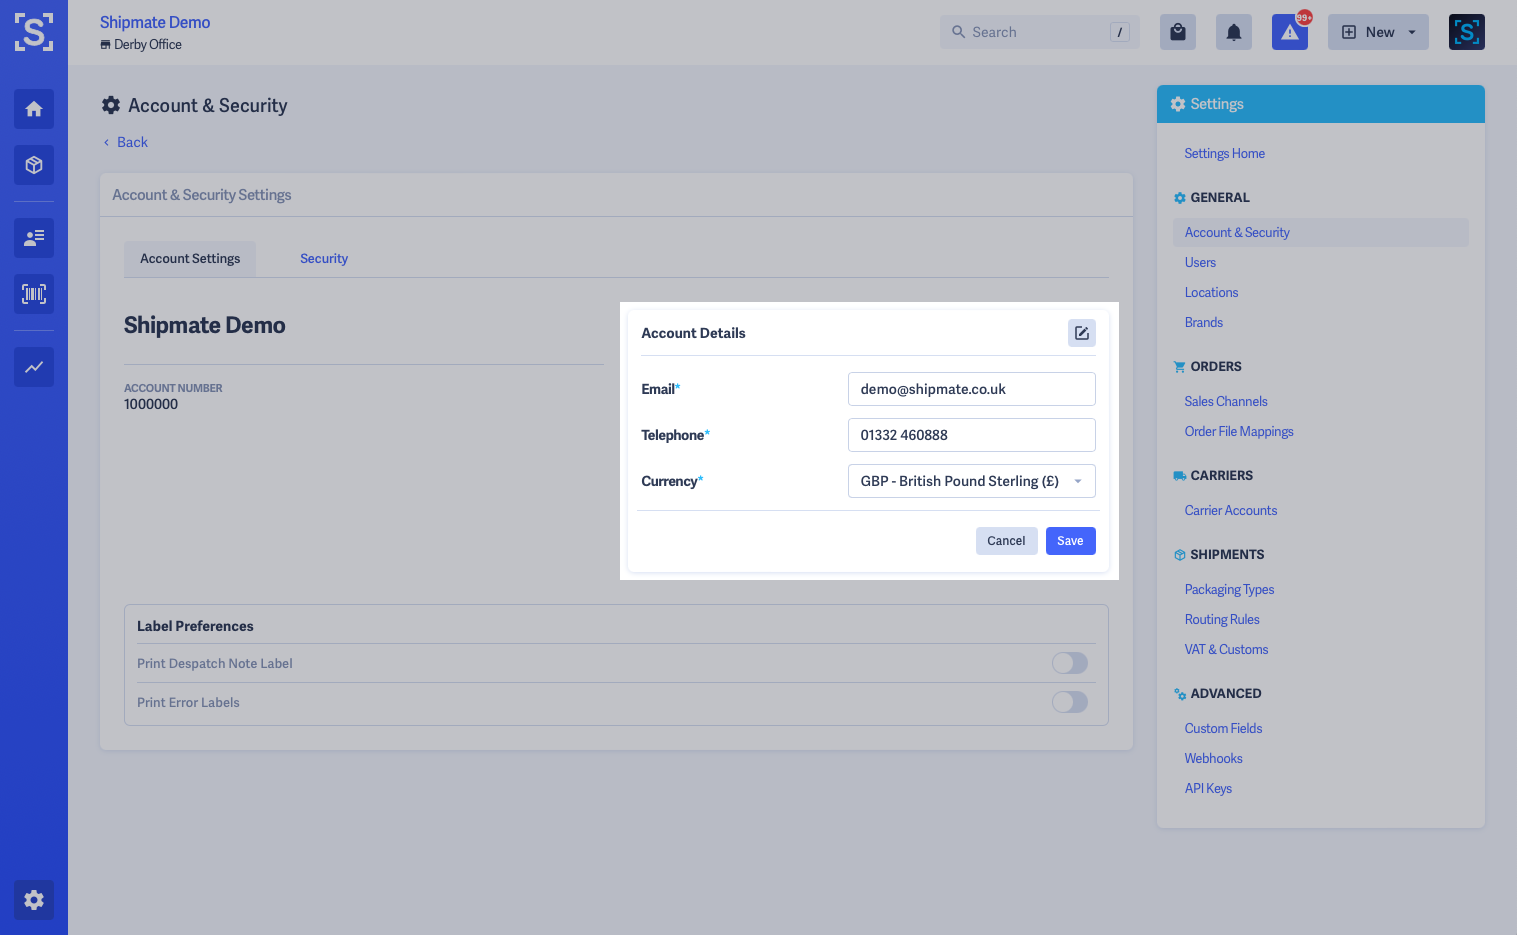
To modify the account contact details or currency, click the Edit pencil icon in the Account Details area, make the required changes then click the Save button. The changes you make will be applied immediately on your account.
In-Line Despatch Notes
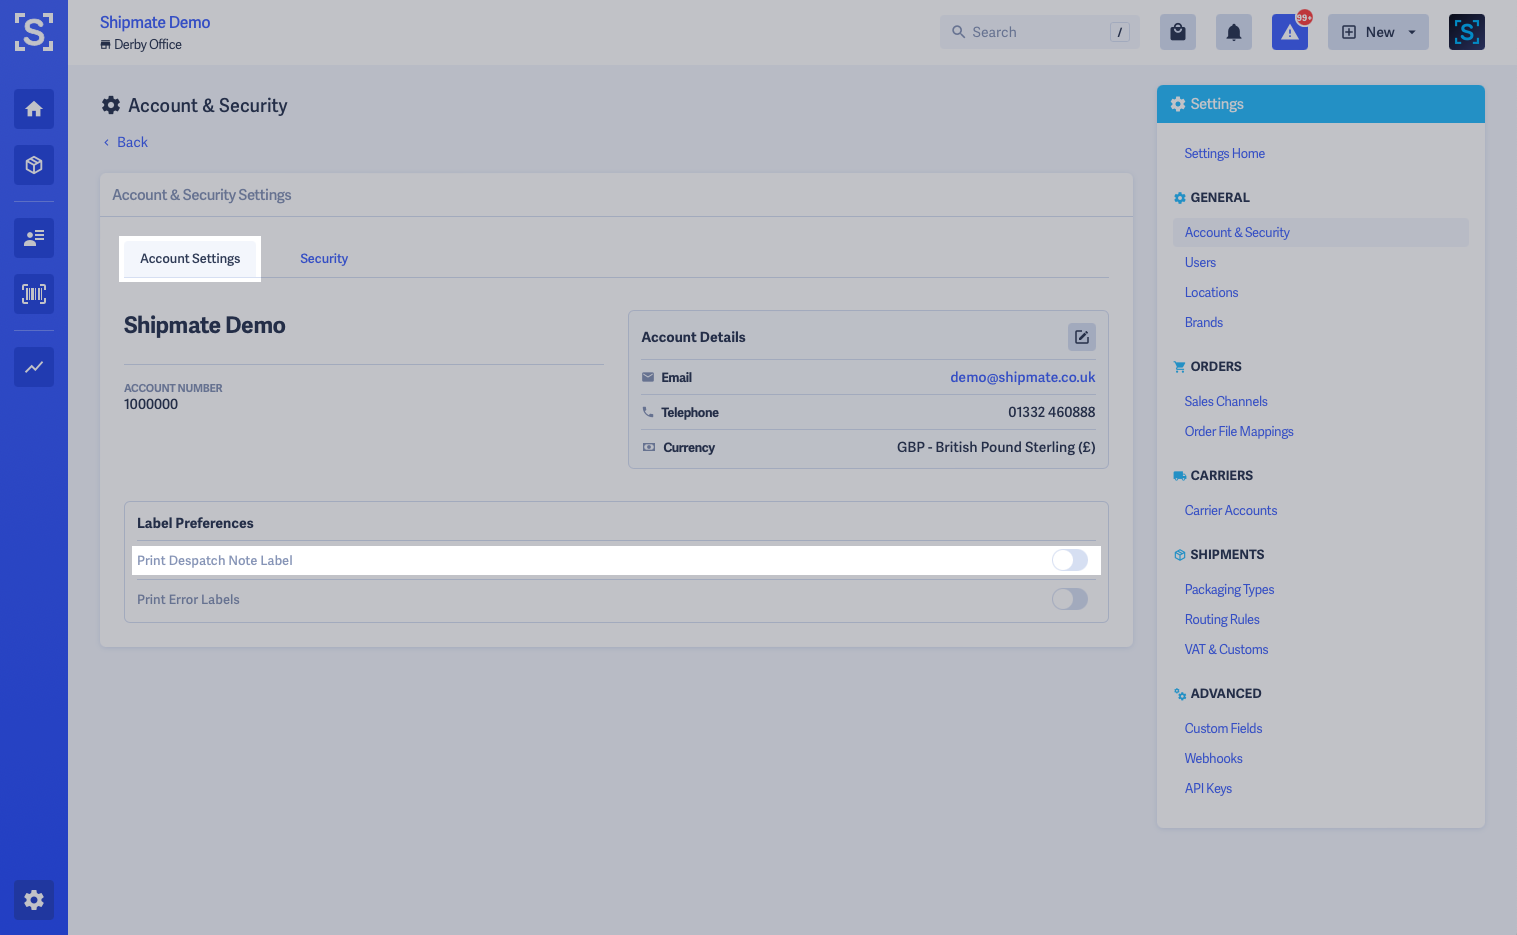
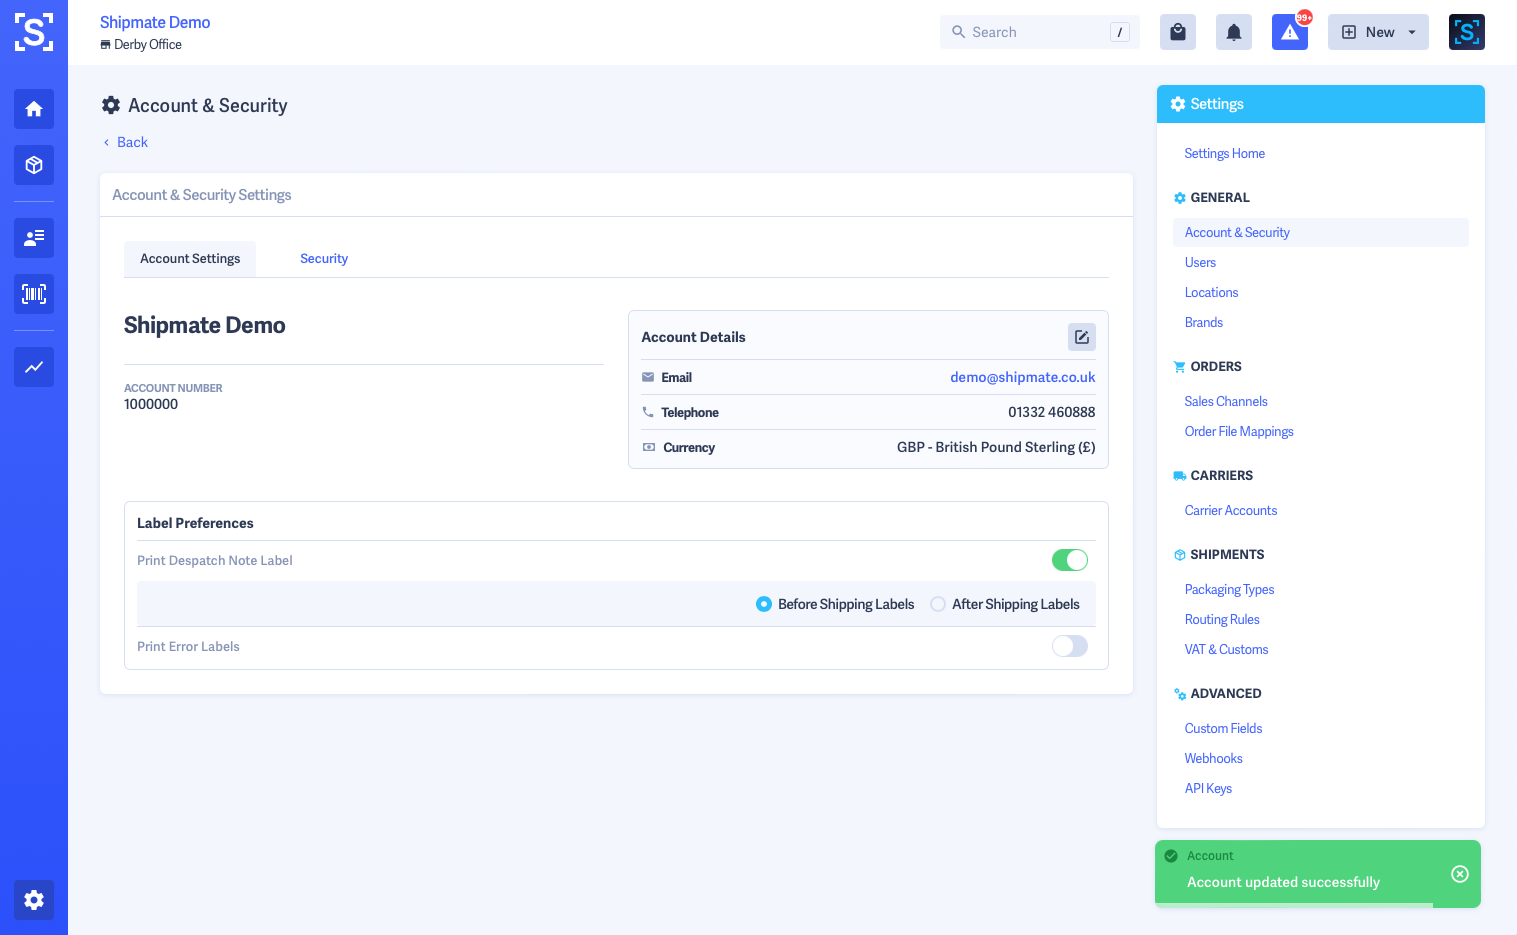
If you would like Shipmate to print out a Despatch Note with your Shipping labels, you can switch this on from Settings > Account Settings > Edit using the Print Despatch Note Label toggle.
You can choose whether the Despatch Note label is printed before or after your Shipping labels, according to your operational requirements.
With this feature toggled on, Shipmate prints a separate 4 x 6" Despatch Note label that you can use to help fulfil your orders and also place inside the parcel for your customer.
This setting will be applied globally across all of your user accounts, and will also add the Despatch Note to label downloads as well as when printing.
You can upload your logo and configure the free text notes that will be applied to the bottom of the Despatch Note label such as returns information, contact details or other customer-facing messages in Brands.


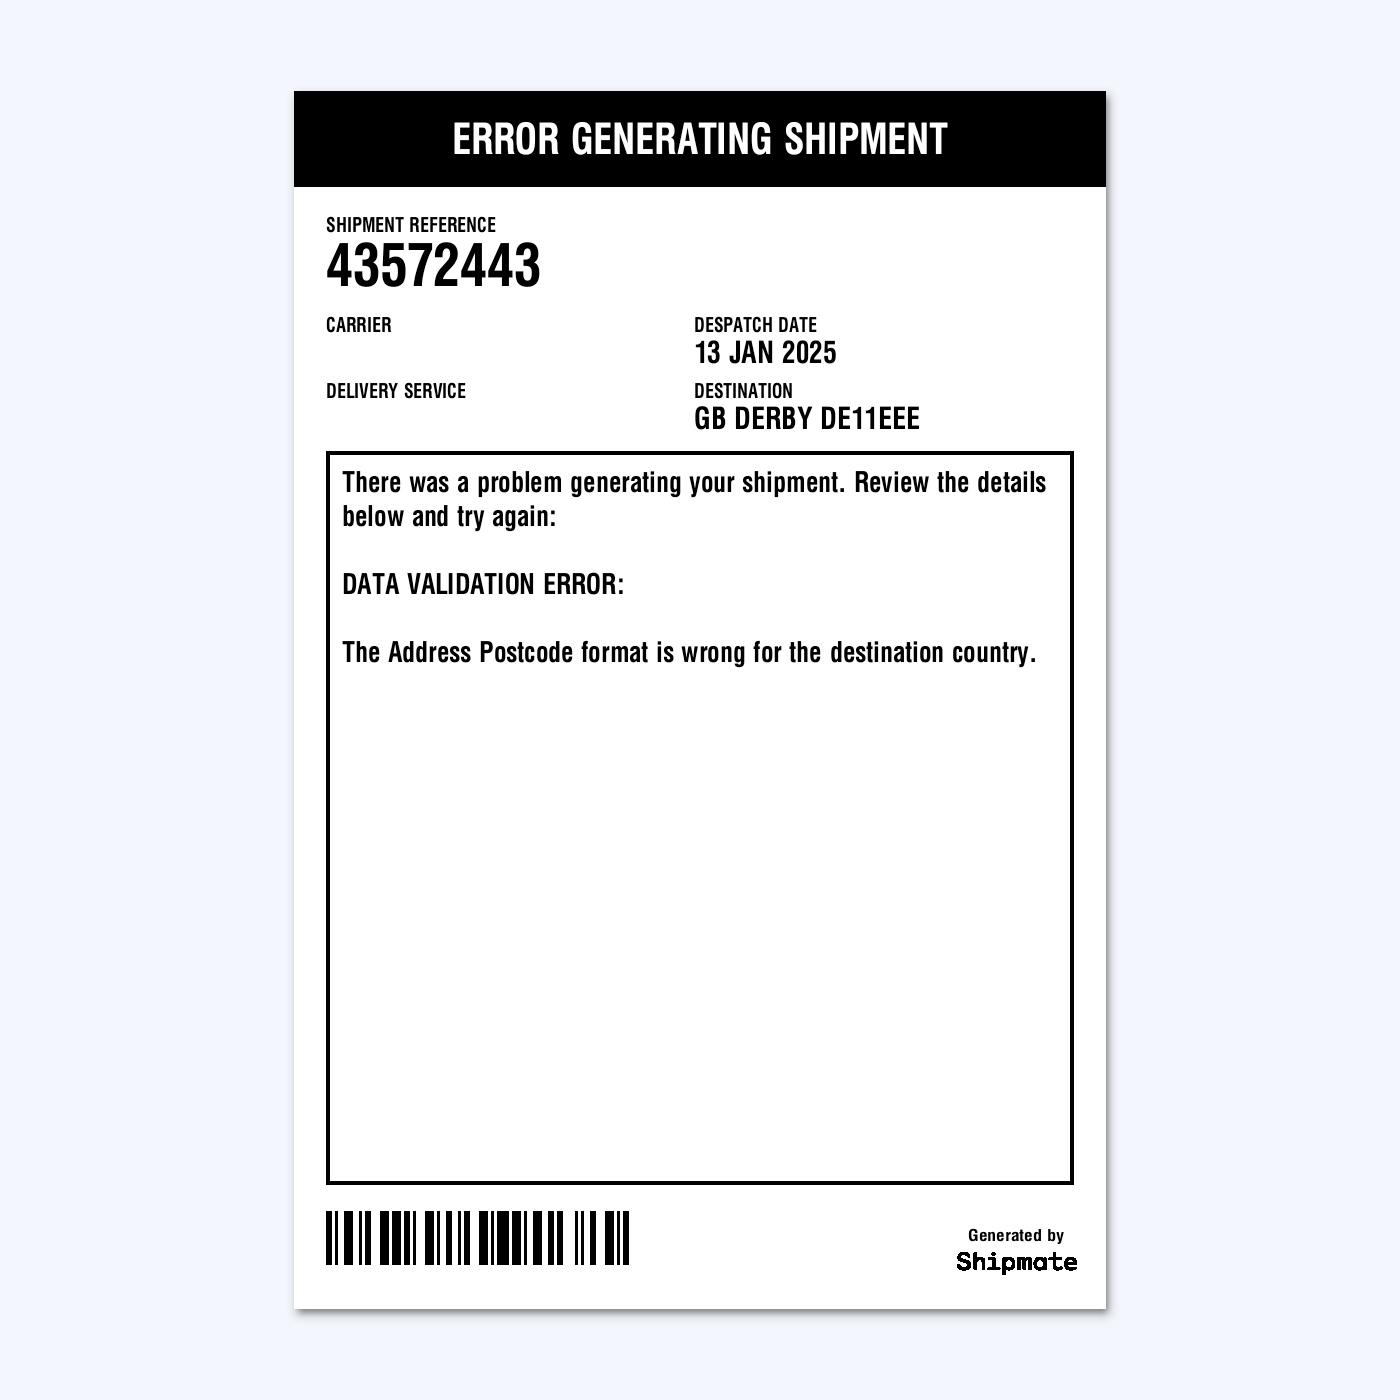
Error Labels
Error Labels provide real-time alerts when there has been a problem generating a shipment. This is ideal when you are using Shipmate in a headless operation whereby an on-screen error message cannot be displayed or is unlikely to be seen by the user.
Each Error label includes information about the problem that has been encountered and the possible cause, facilitating remedial action for a retry attempt.
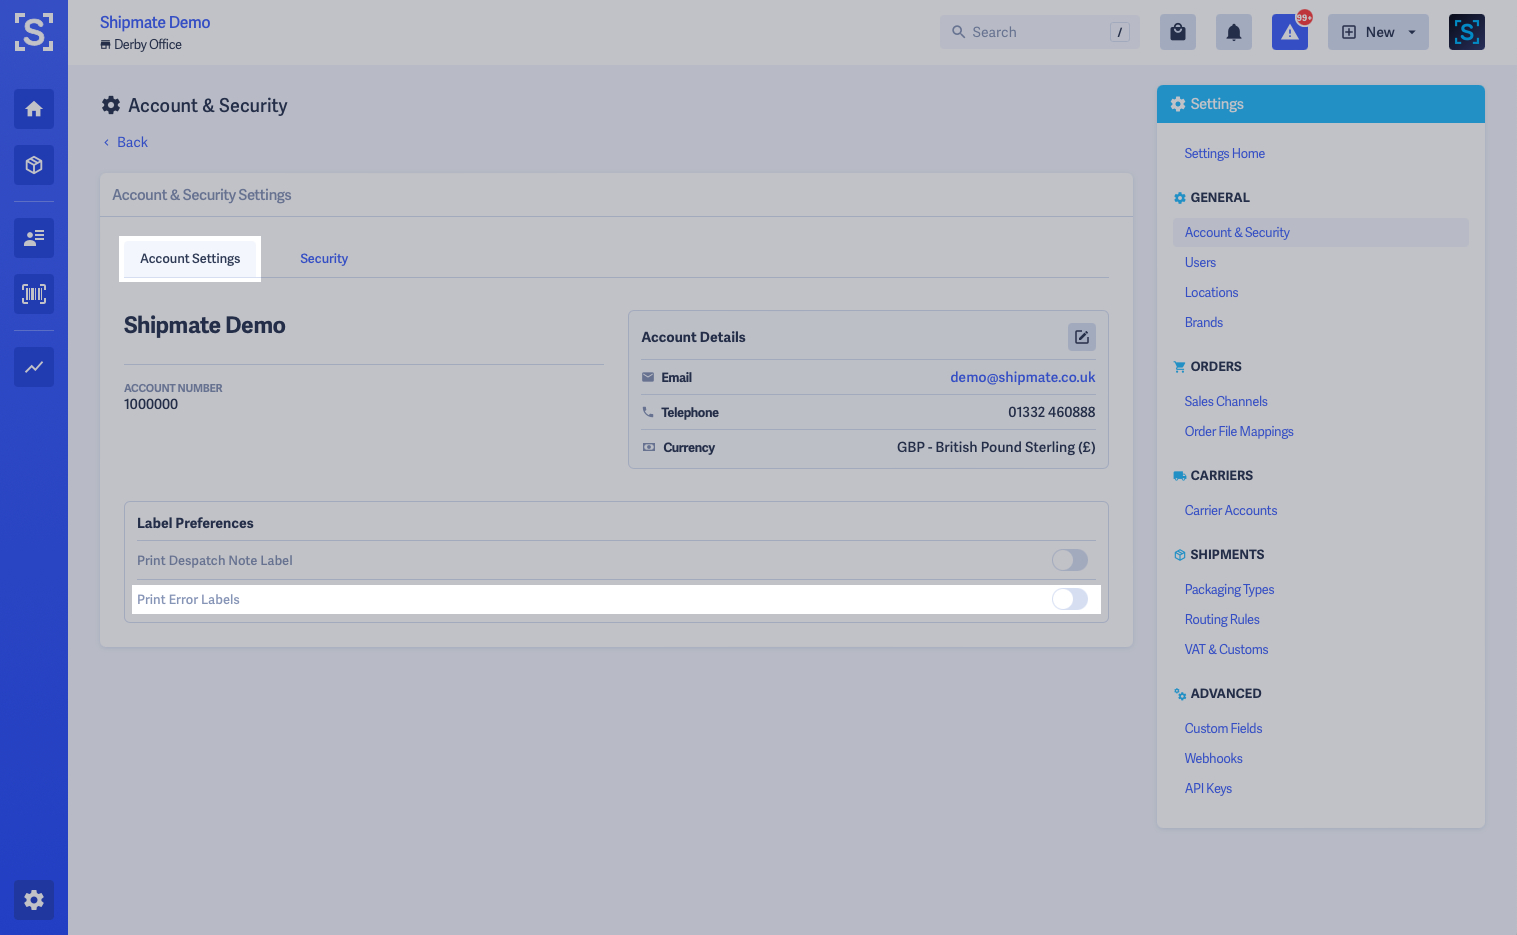
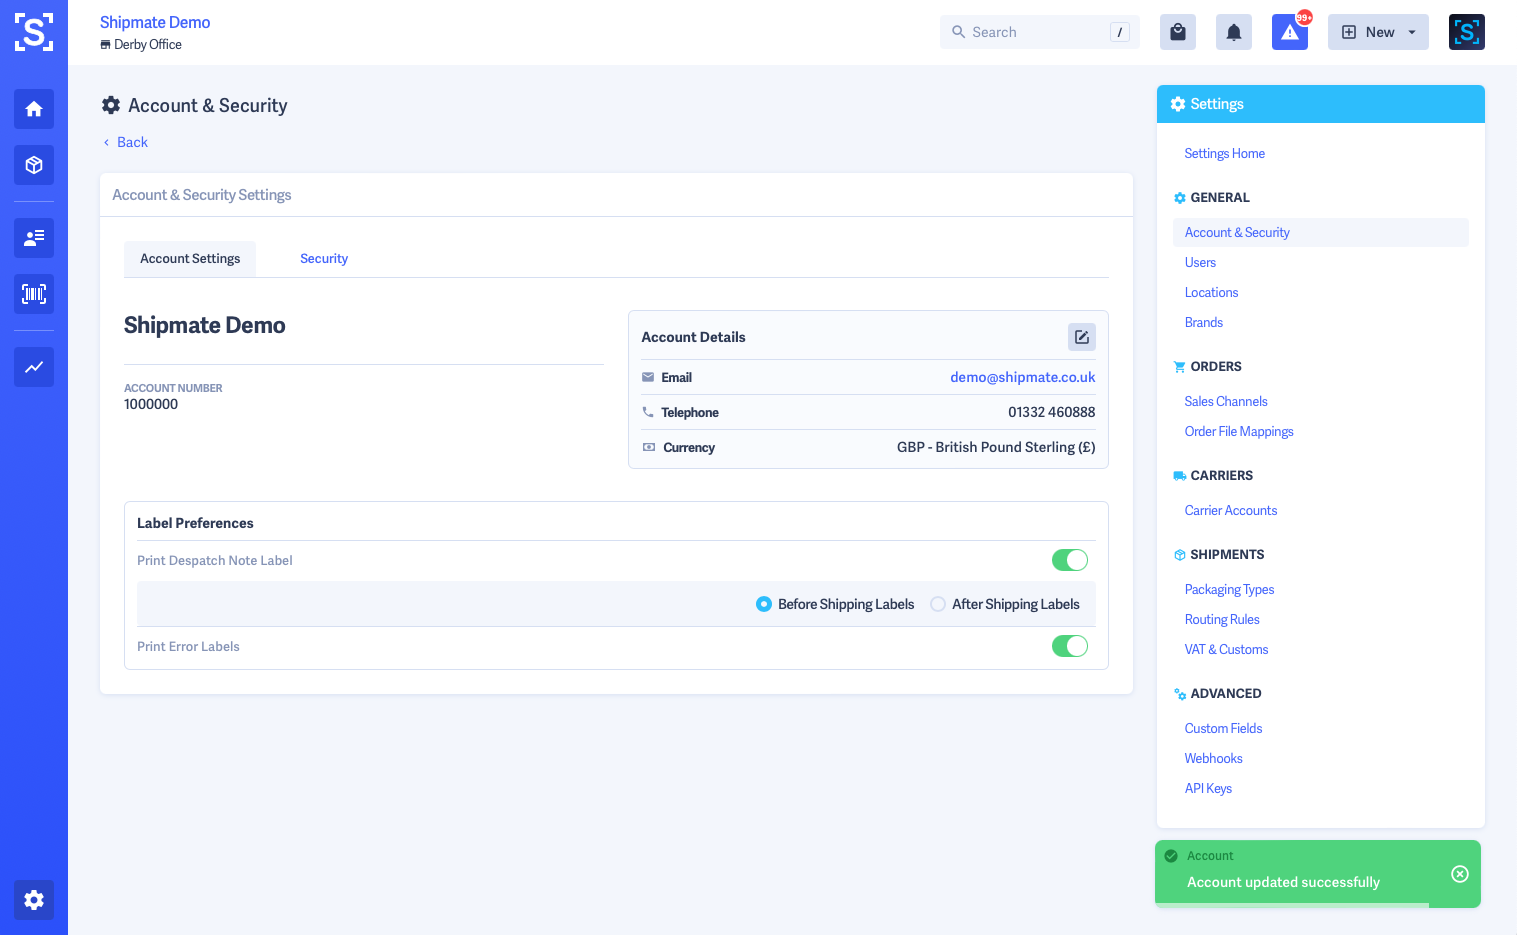
If you would like Shipmate to print out Error Labels when there is a problem generating your Shipping labels, you can switch this on from Settings > Account Settings > Edit using the Print Error Labels toggle.

2-Factor Authentication (2FA)
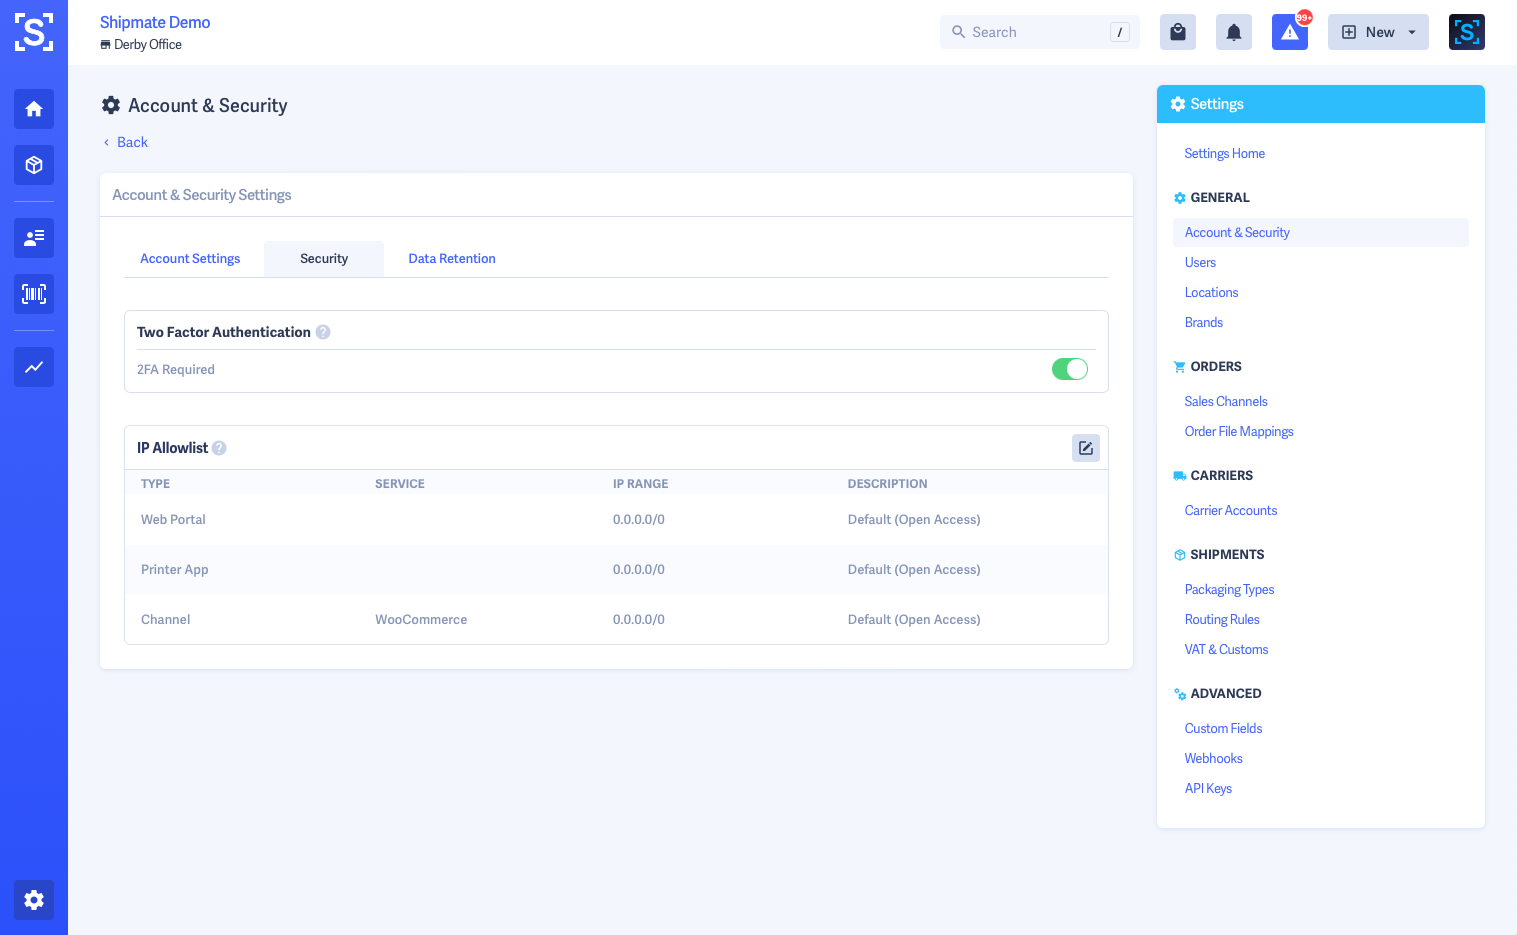
When signing in to the Shipmate web portal from unrecognised devices, or after a period of time, you will be required to enter a six-digit code that will be sent to your email address when you sign in.
This secures your account by requiring you to both know your login credentials and have active access to your email account.
2-Factor Authentication (2FA) is required on your account by default, however if you wish to switch this off, you can do so from the Security tab in Account & Security Settings.
When 2FA Required is toggled off, each user may toggle this feature on or off individually from their My Profile page. When 2FA Required is toggled on, all users must use 2FA and are unable to toggle the feature off from their account.
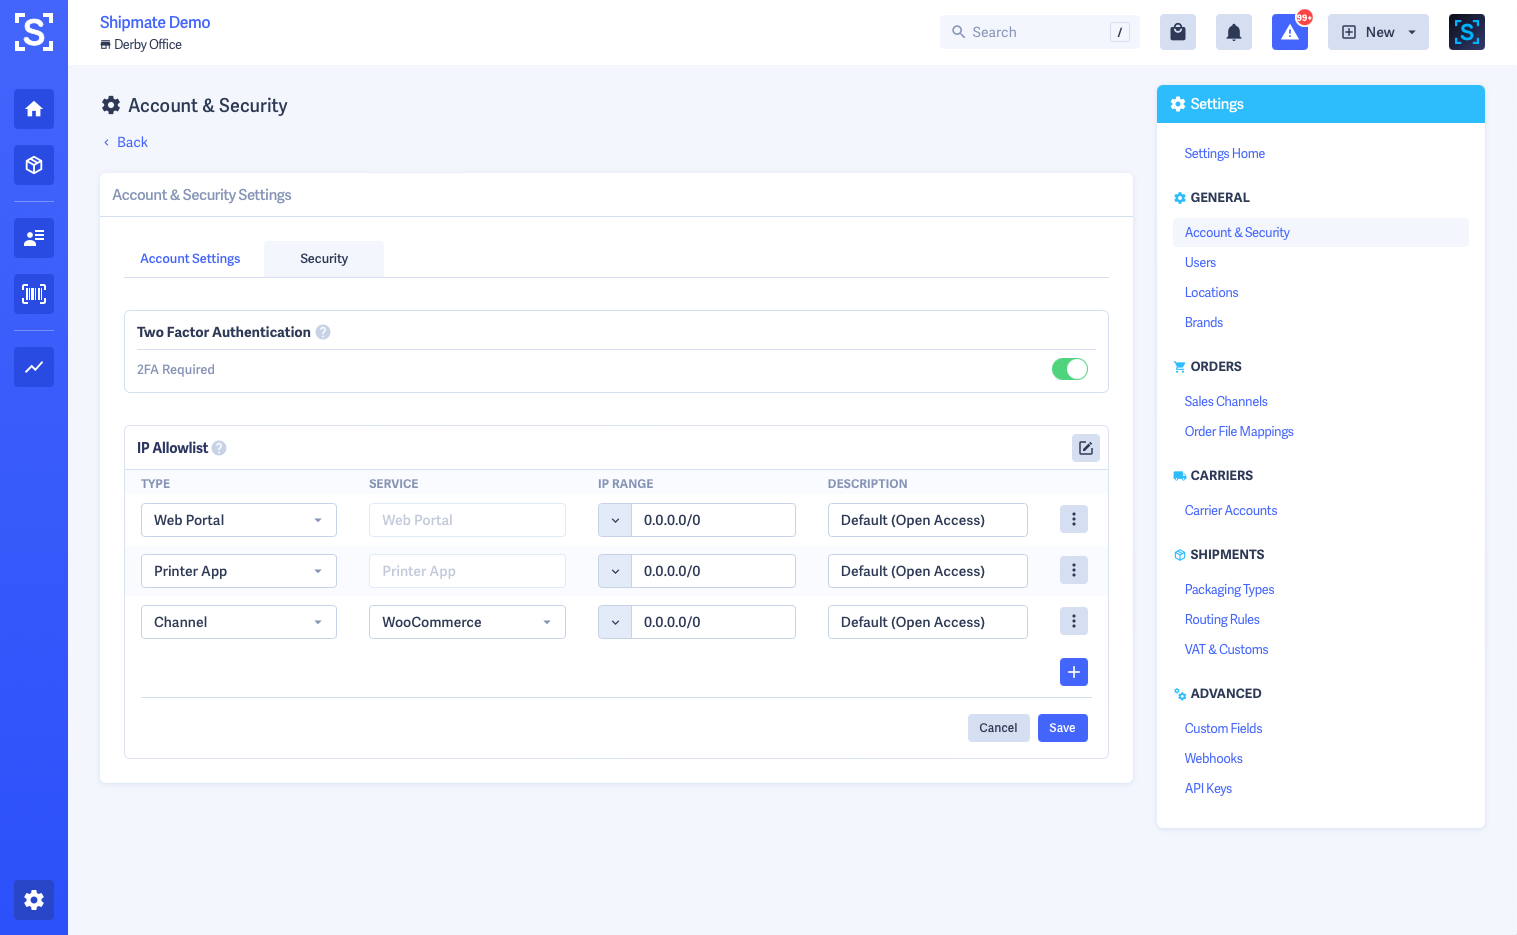
IP Allowlist
The IP Allowlist lets you grant access to your Shipmate account on a permissive basis to trusted networks and providers.
This secures your account by requiring users and applications to access your account from known network locations, such as an on-premise network, VPN, web server or cloud provider.
By default your account is Open Access, however you can lock each aspect of your Shipmate account down to trusted IP addresses, including connections to Channels and API Applications.
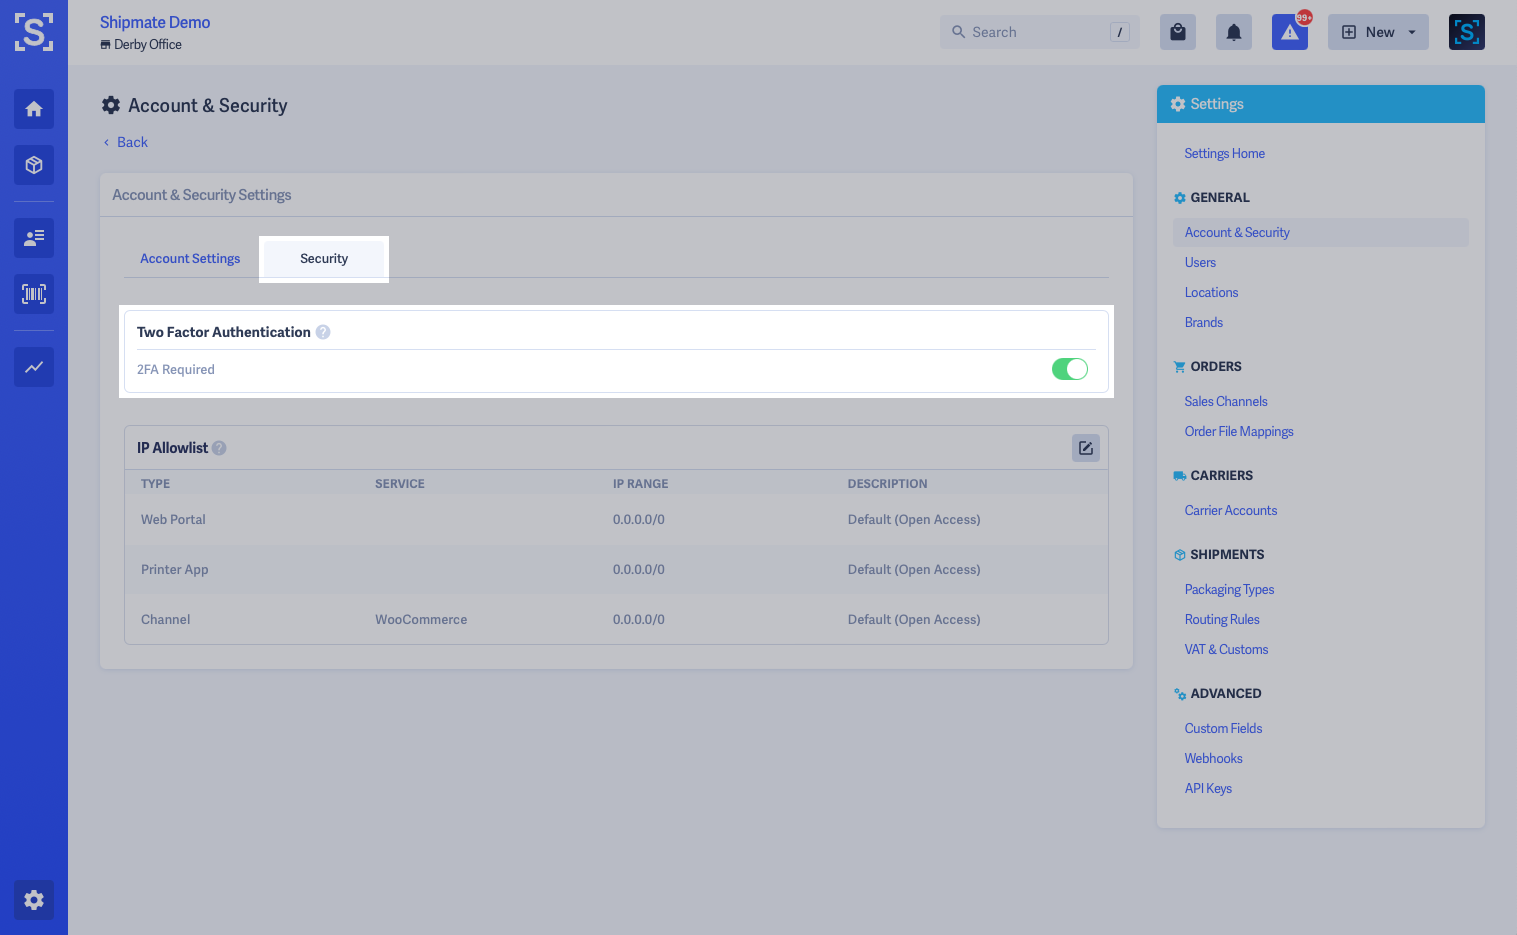
To access the IP Allowlist, navigate to Settings > Account & Security then click the Security tab. Here you will see a list of pre-configured IP Allowlist rules by type and service.
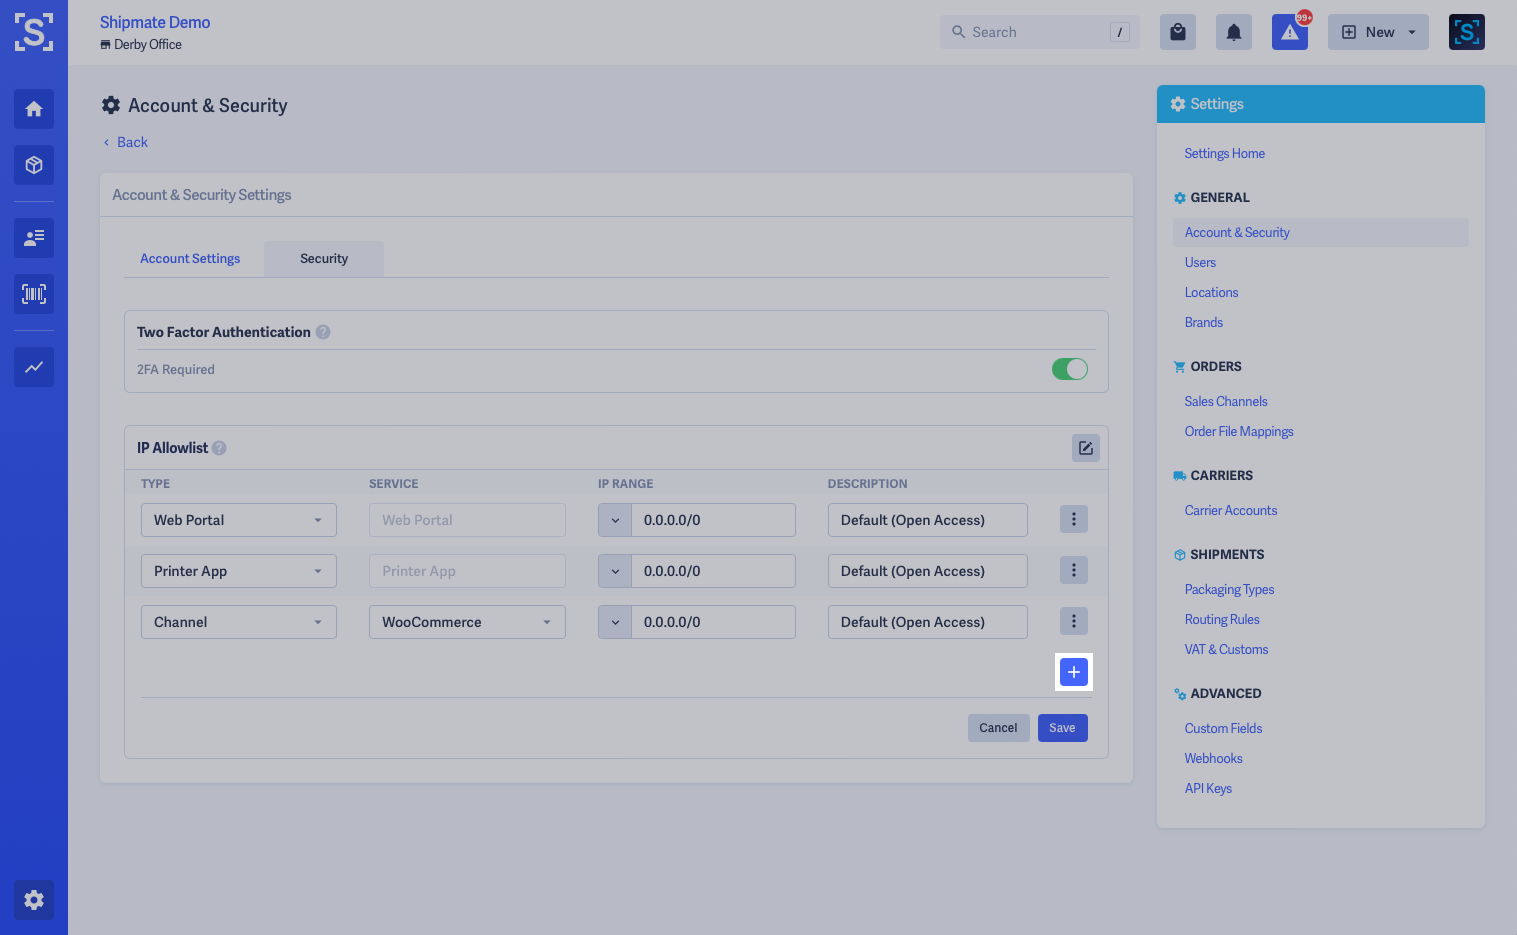
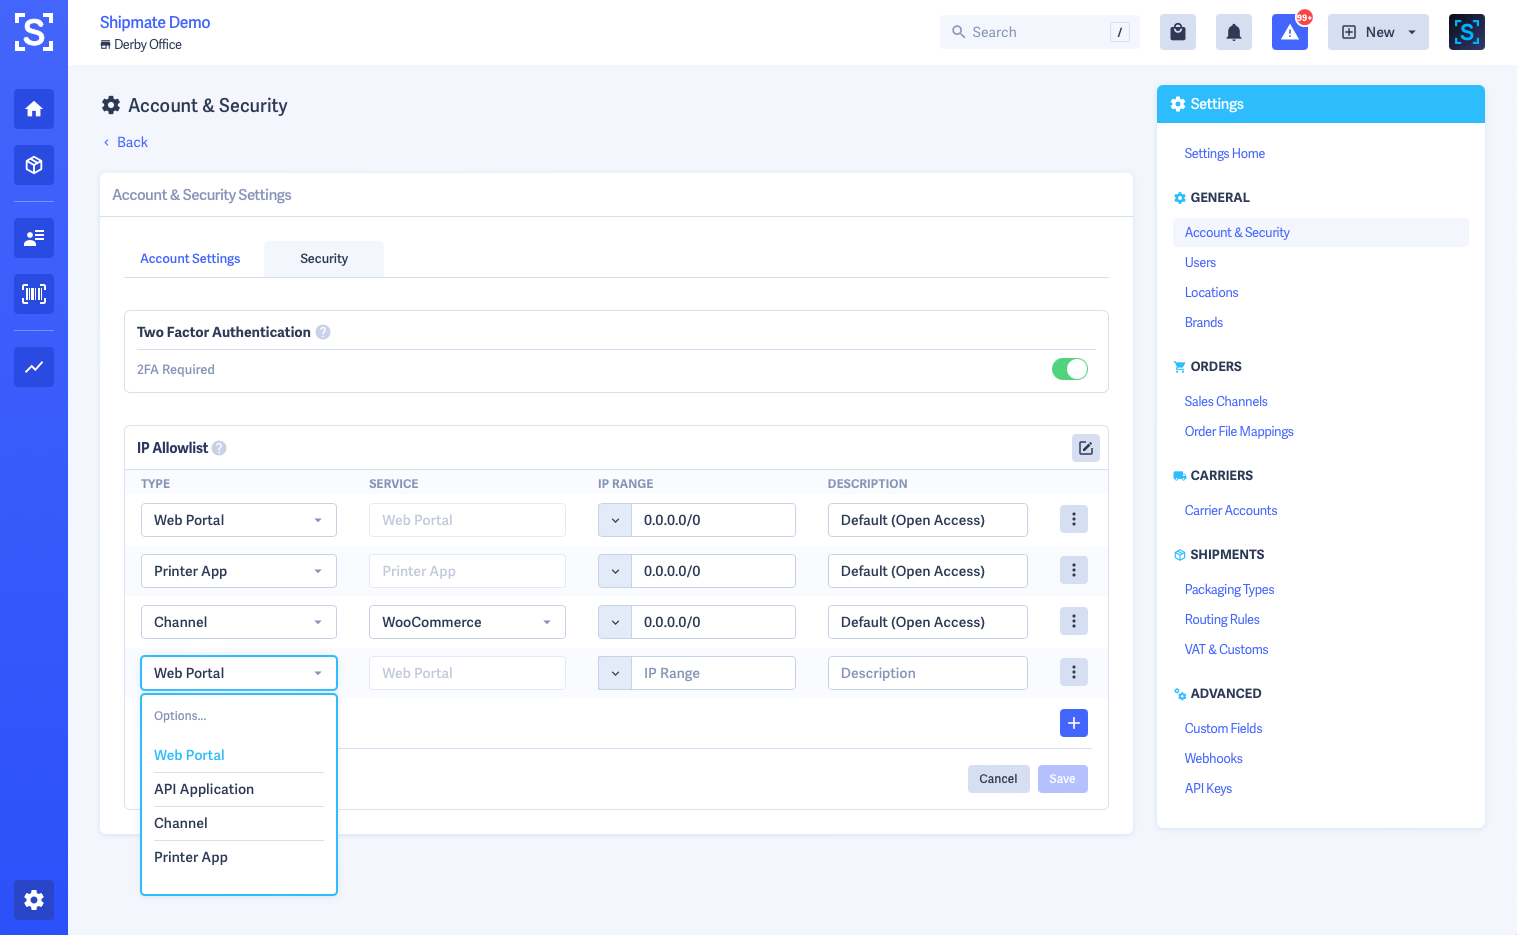
To modify the IP Allowlist, click the Edit button in the top-right of the IP Allowlist rule table. This will unlock the table and allow you to modify or remove each rule, add new ones.
Each IP Allowlist rule consists of the following four items:
- Type - the aspect of your Shipmate account that will be secured by this rule, for example the Web Portal, Printer App, a Channel connection or API Application.
- Service - the specific service, for example a particular Channel integration or API Application.
- IP Range - the IPv4 range or IPv6 address you wish to grant access to this service
- Description - a note to help you identify the IP address or range, for example 'Web Server', 'VPN Gateway' etc.
You may add multiple IP Allowlist rules for each service on your account - so if traffic may hit a particular service from multiple addresses, this is supported. Simply create a rule for each individual IP address or range that is needed.
The IP Range allows direct entry of an IPv4 or IPv6 address, and also has a menu to select helpful addresses such as Open Access (0.0.0.0/0), your current IP address, or a default for the given service. The default will be the selected application's default IP address if we know it, otherwise will be open access.
Be careful not to lock yourself out of your account - make sure you have at least one IP Allowlist rule for the Web Portal for the current IP address you are on, which should ideally be a static IP address you can rely on not changing.
The IP Allowlist is consulted on each API request and each page load of the Web Portal. If you switch to an unknown network between page loads, or attempt to log in to your Shipmate account from an unknown network, you will see an Access Blocked notice.

Users
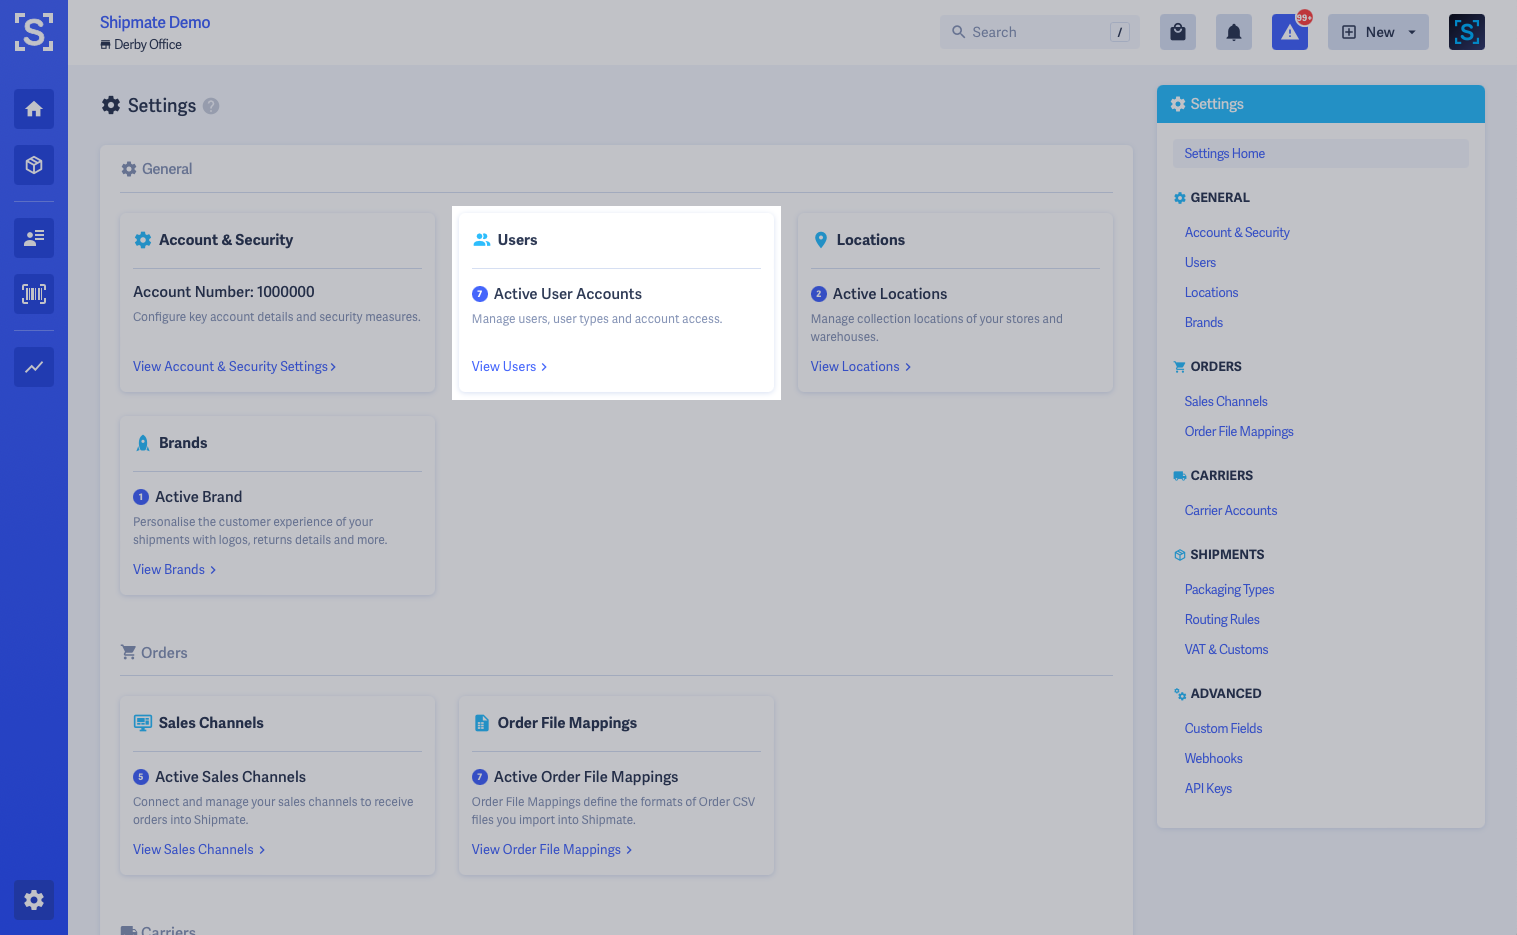
Shipmate is a multi-user platform. You are able to grant access to each of your team members, and they can generate and print labels to their own workstation and printer using our Desktop Printer App.
You can access User Settings from the General section of the Settings page.

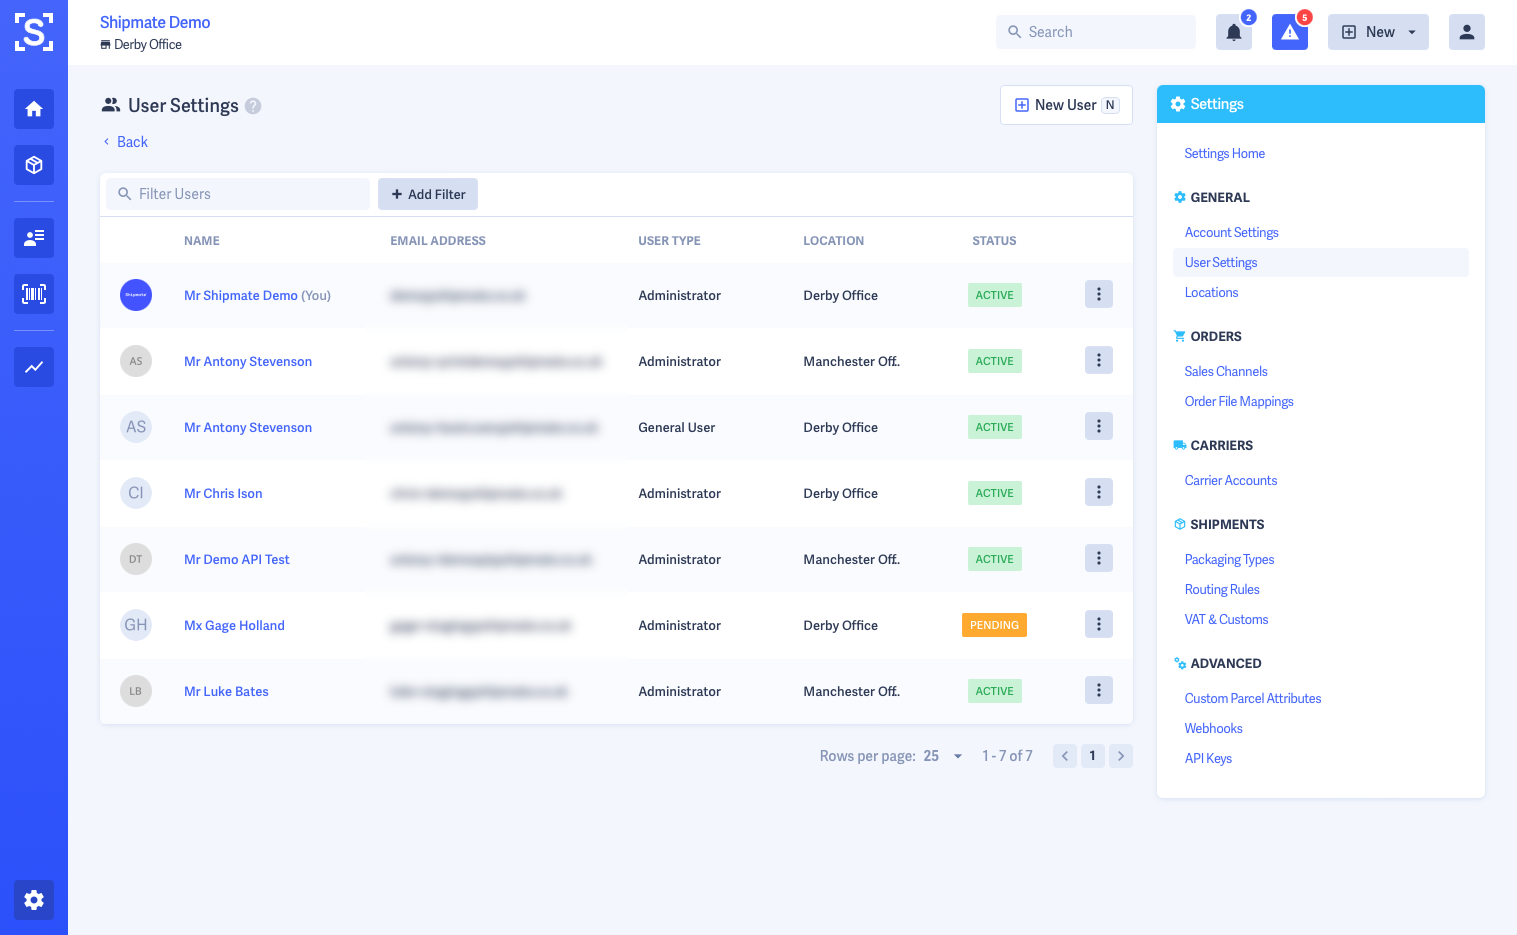
Adding Users
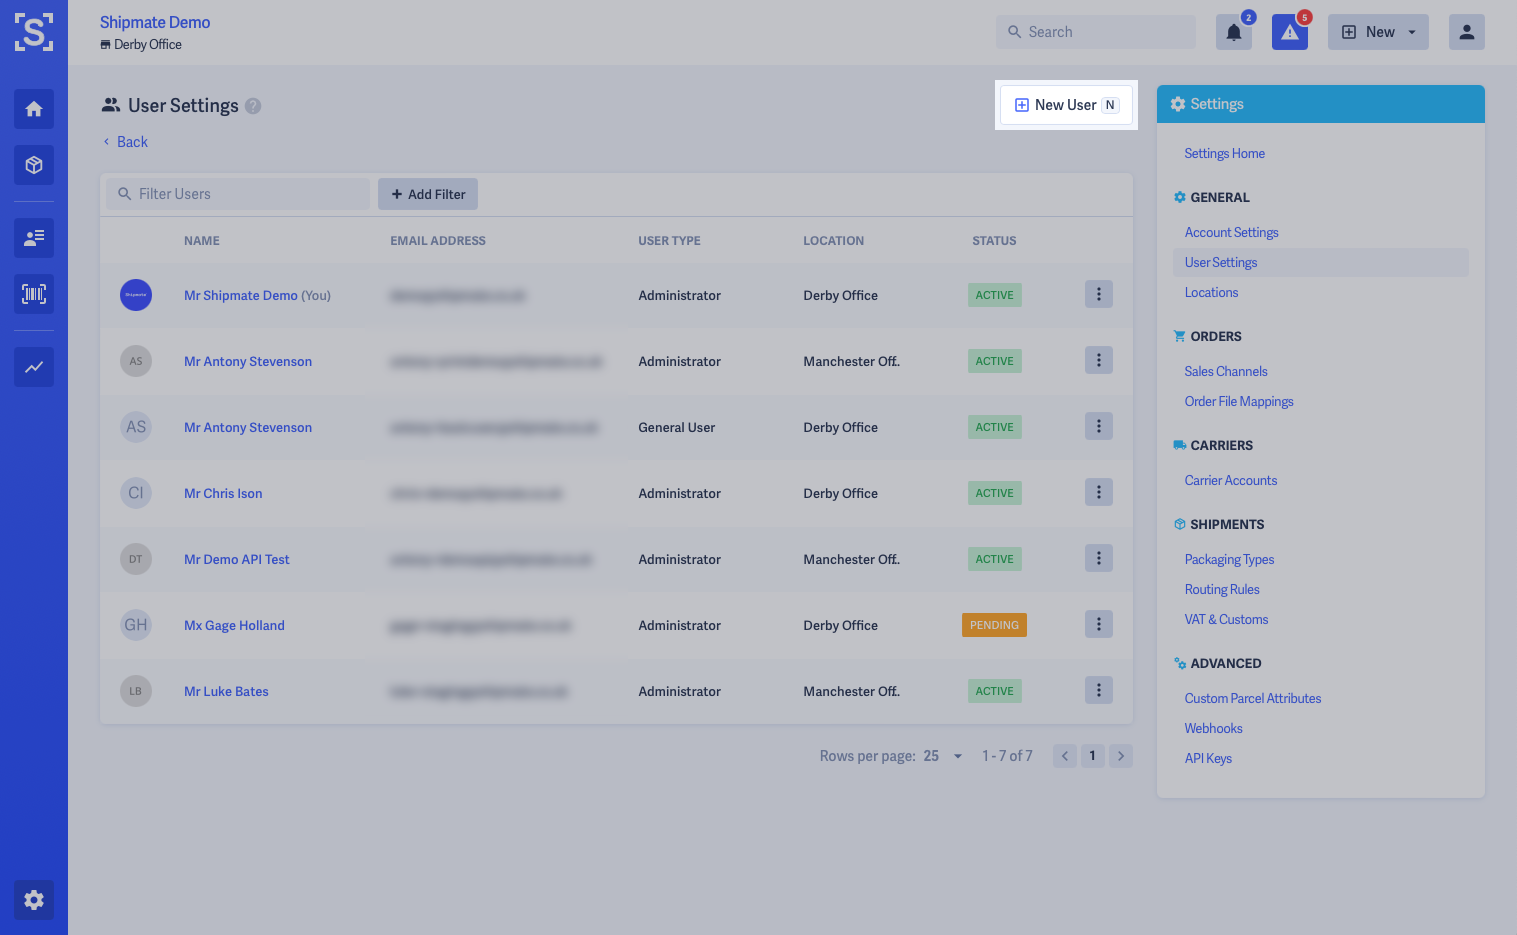
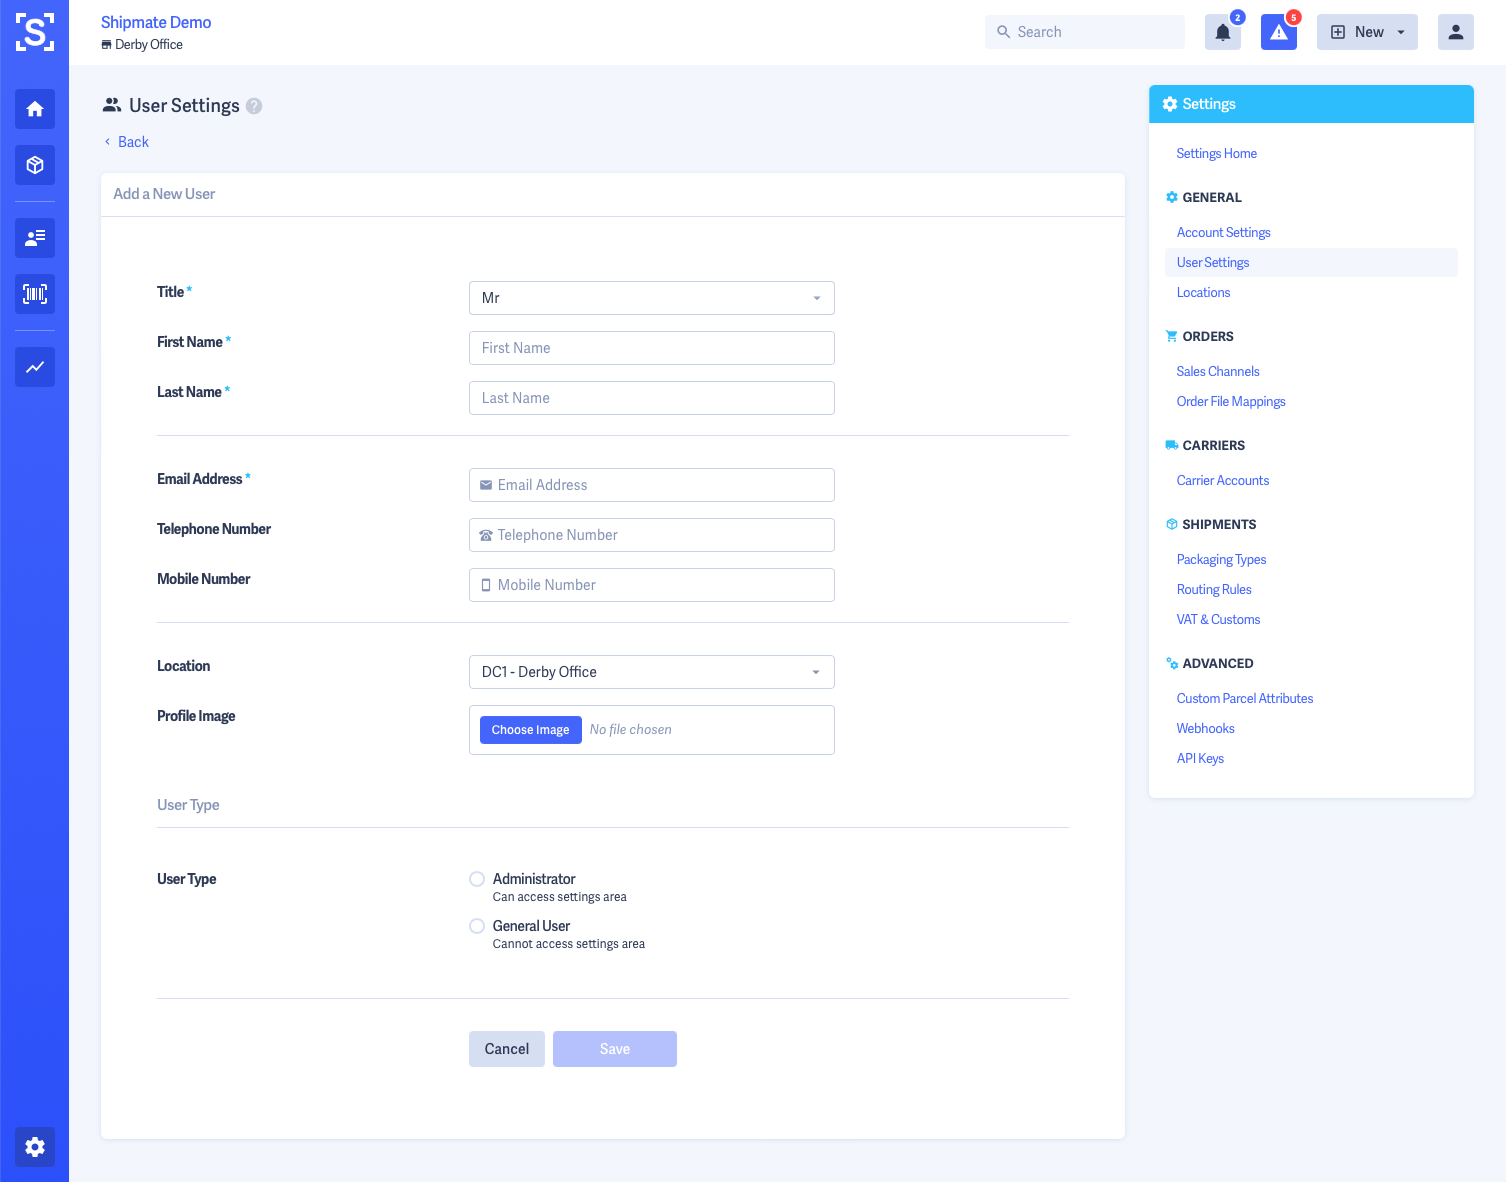
To add a new User, click the New User button on the User Settings page.
Fill out the New User form, and choose which Location the User will be working from. You should also decide whether this user will require full Administrator access to the platform, or act as a General User.
Administrators have access to the Settings area, while General Users may access the platform to perform operational tasks such as generating shipments and printing labels.
Once added, the new User will receive an invitation by email to set their password and access their account.

Editing Users
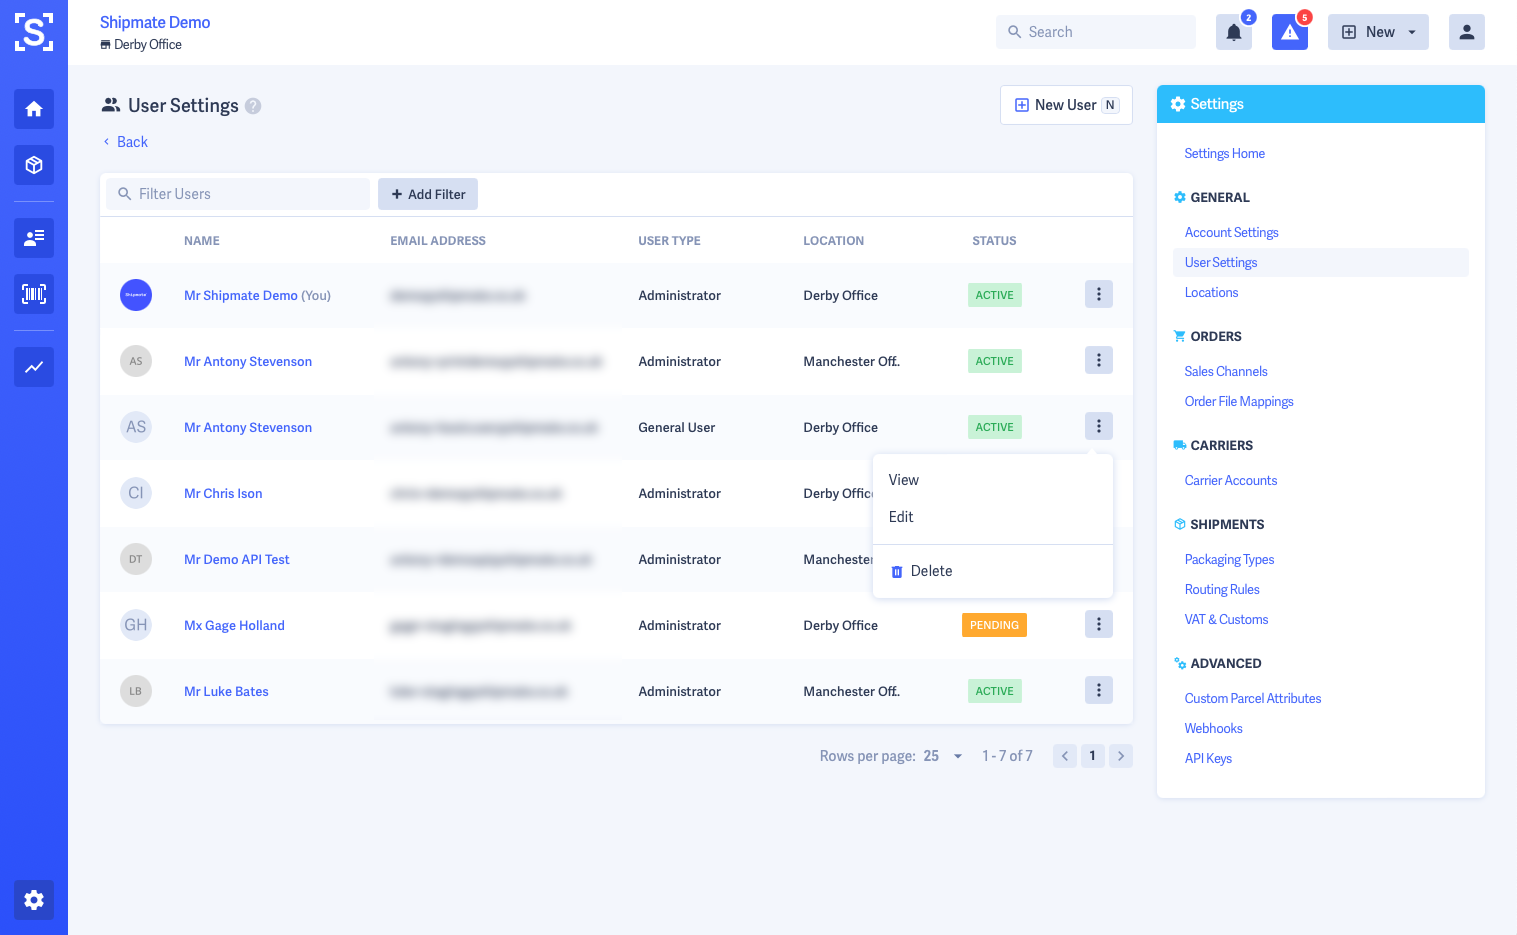
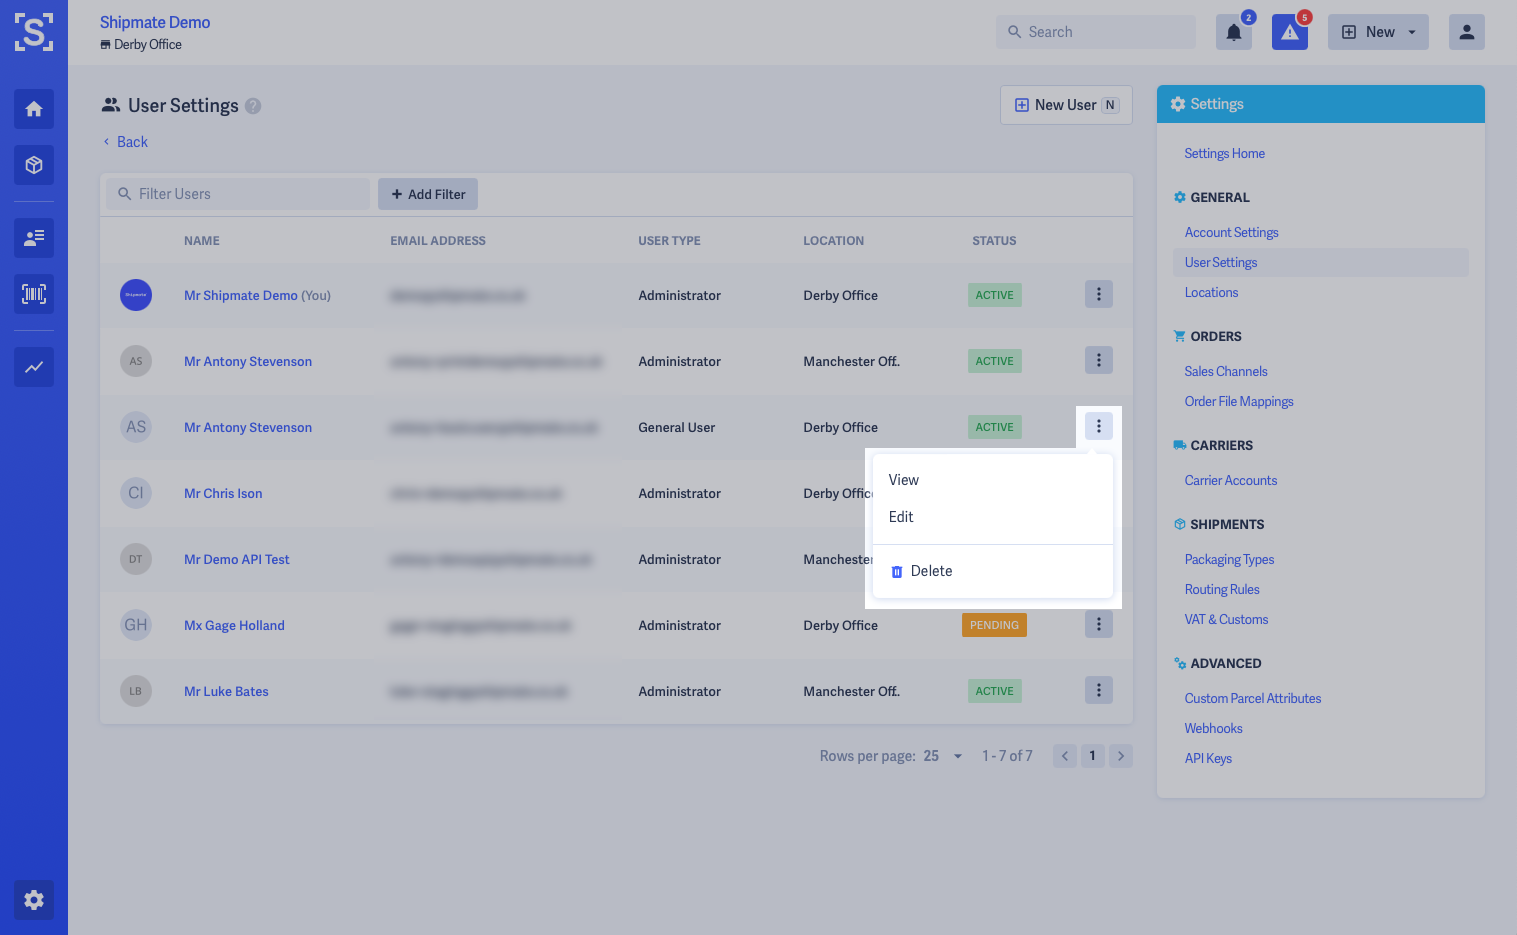
To edit a User, click the Edit option from the pop-up menu accessed from the User Settings page.
The User's current details will be displayed in the Edit form, which is the same as the form used to originally create them. Simply make the amendments you wish to carry out, then click the Save button.
Deleting Users
To delete a User, click the Delete option from the pop-up menu accessed from the User Settings page.
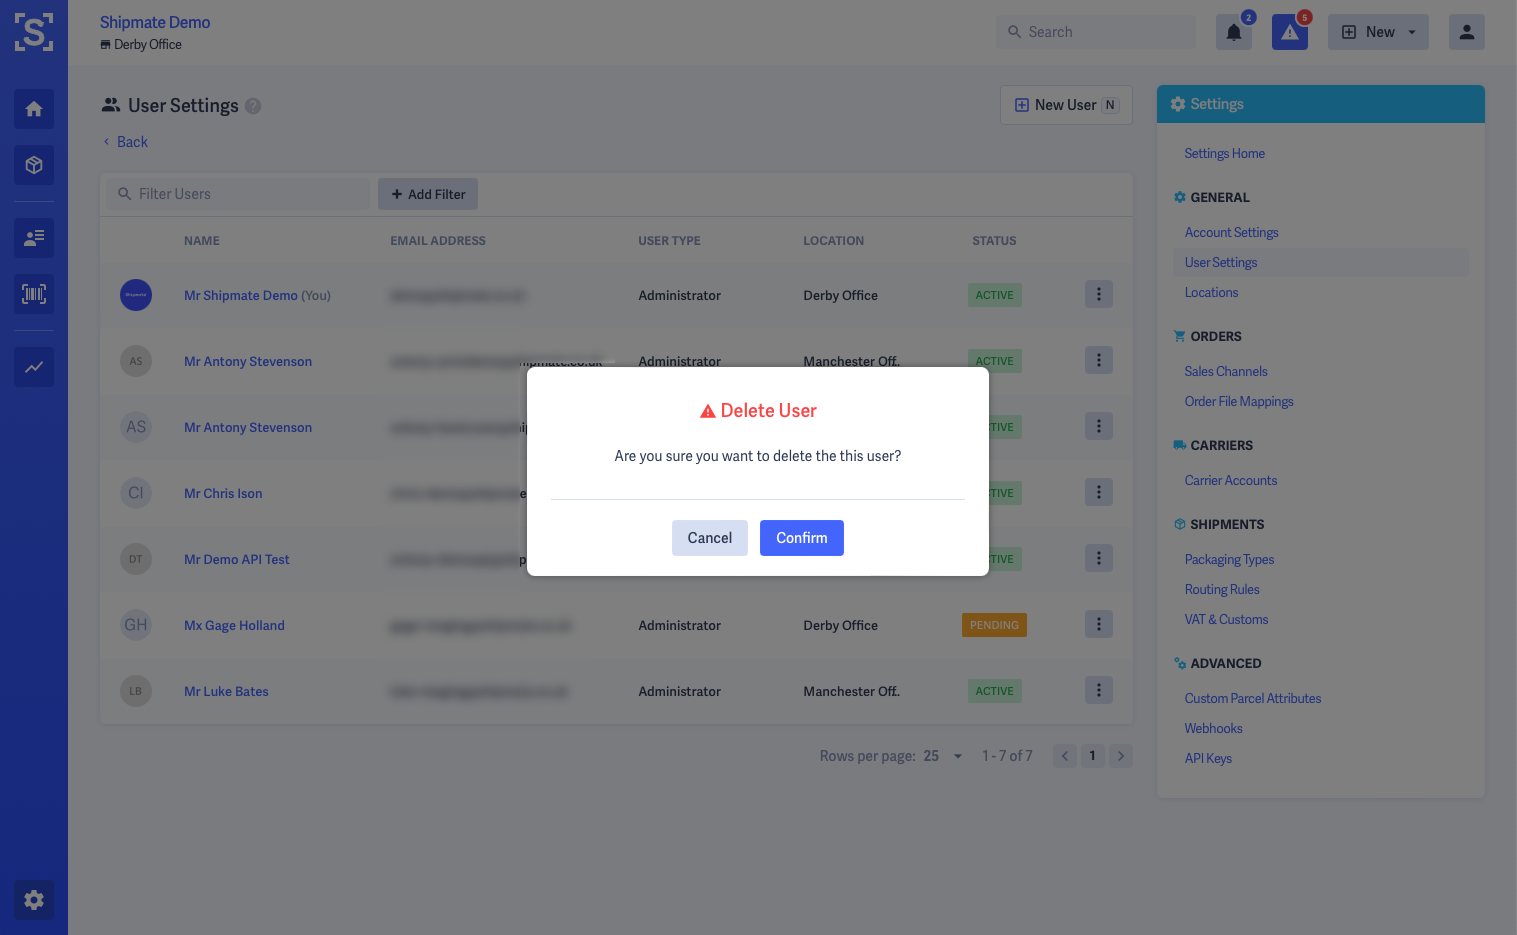
A confirmation box will be displayed asking you to confirm you wish to delete the User. Click Confirm to delete the User.
Access to the platform will be revoked and the User will no longer be able to log in.
Note that the User is not notified - you will need to inform them that their access has been revoked.


Restoring Users
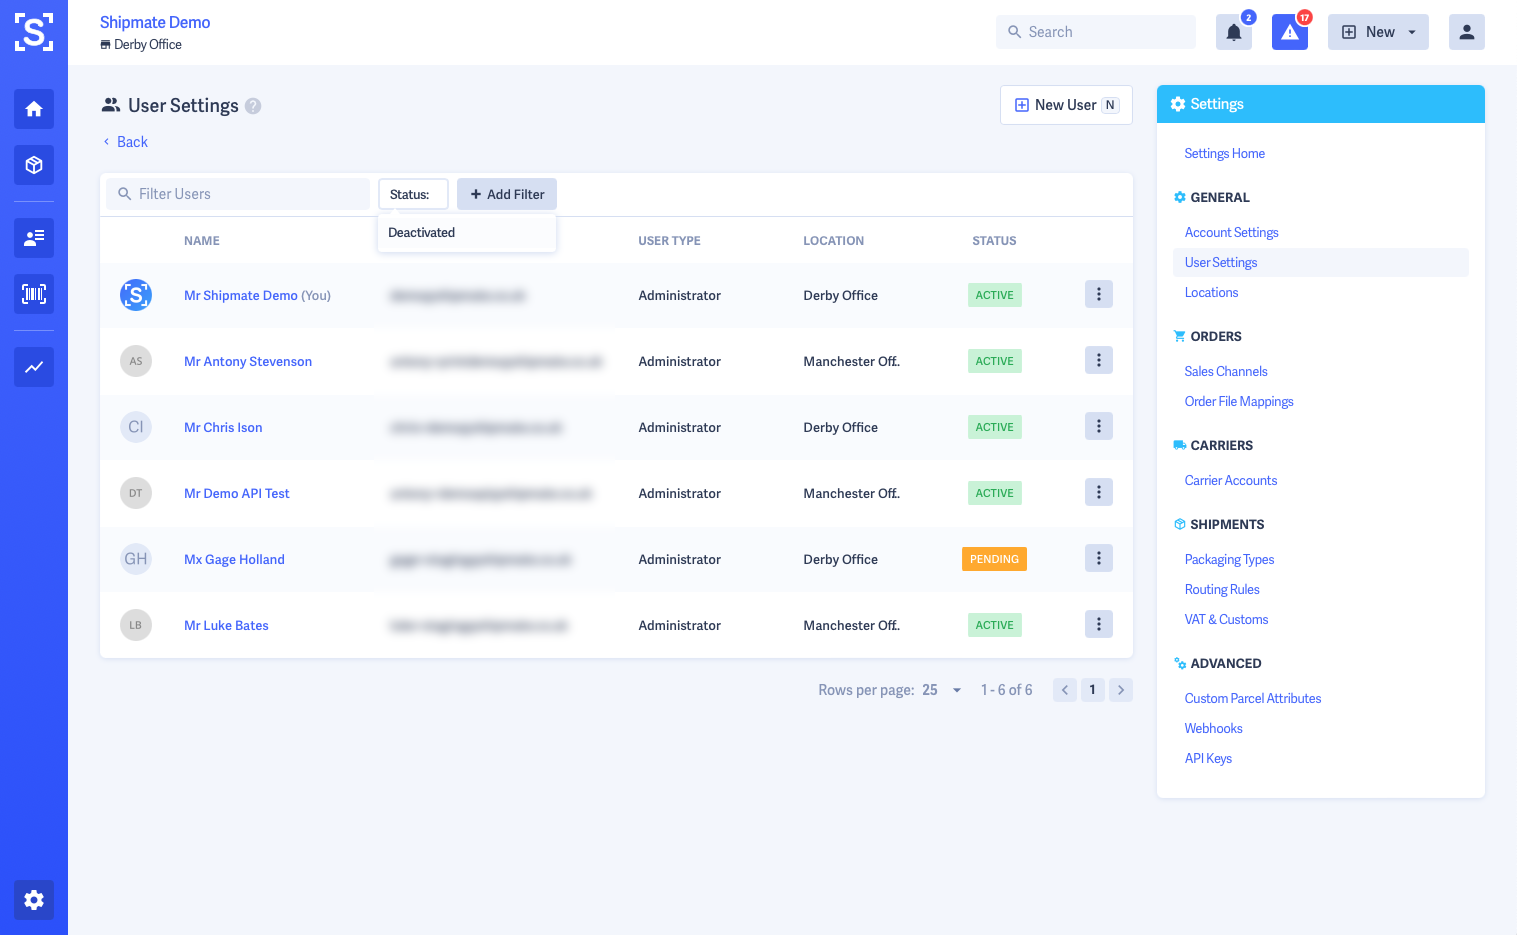
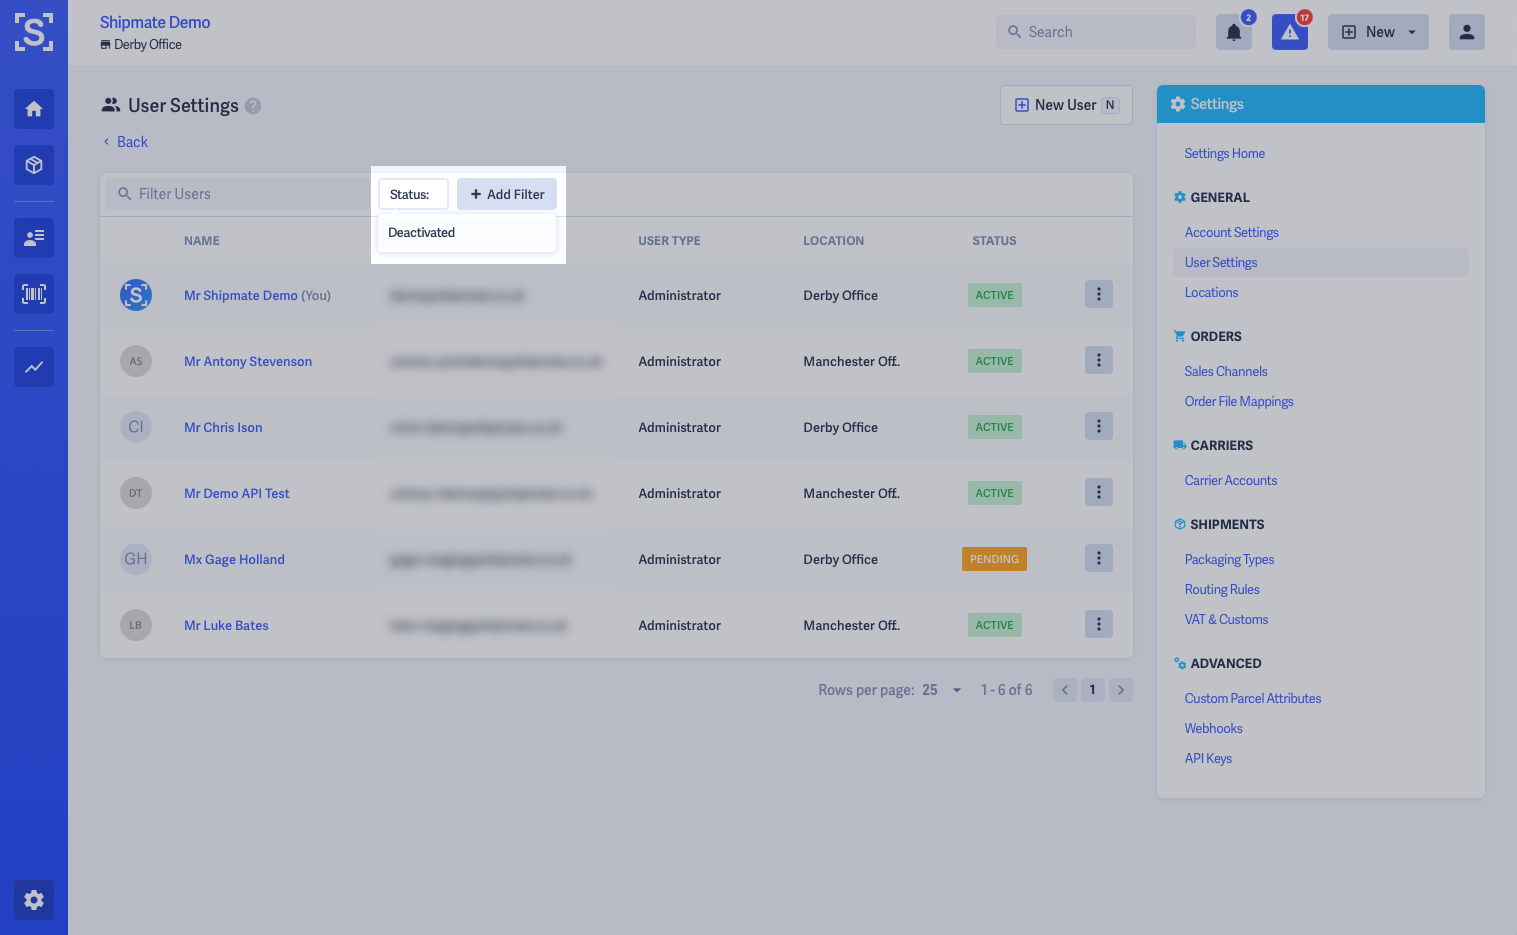
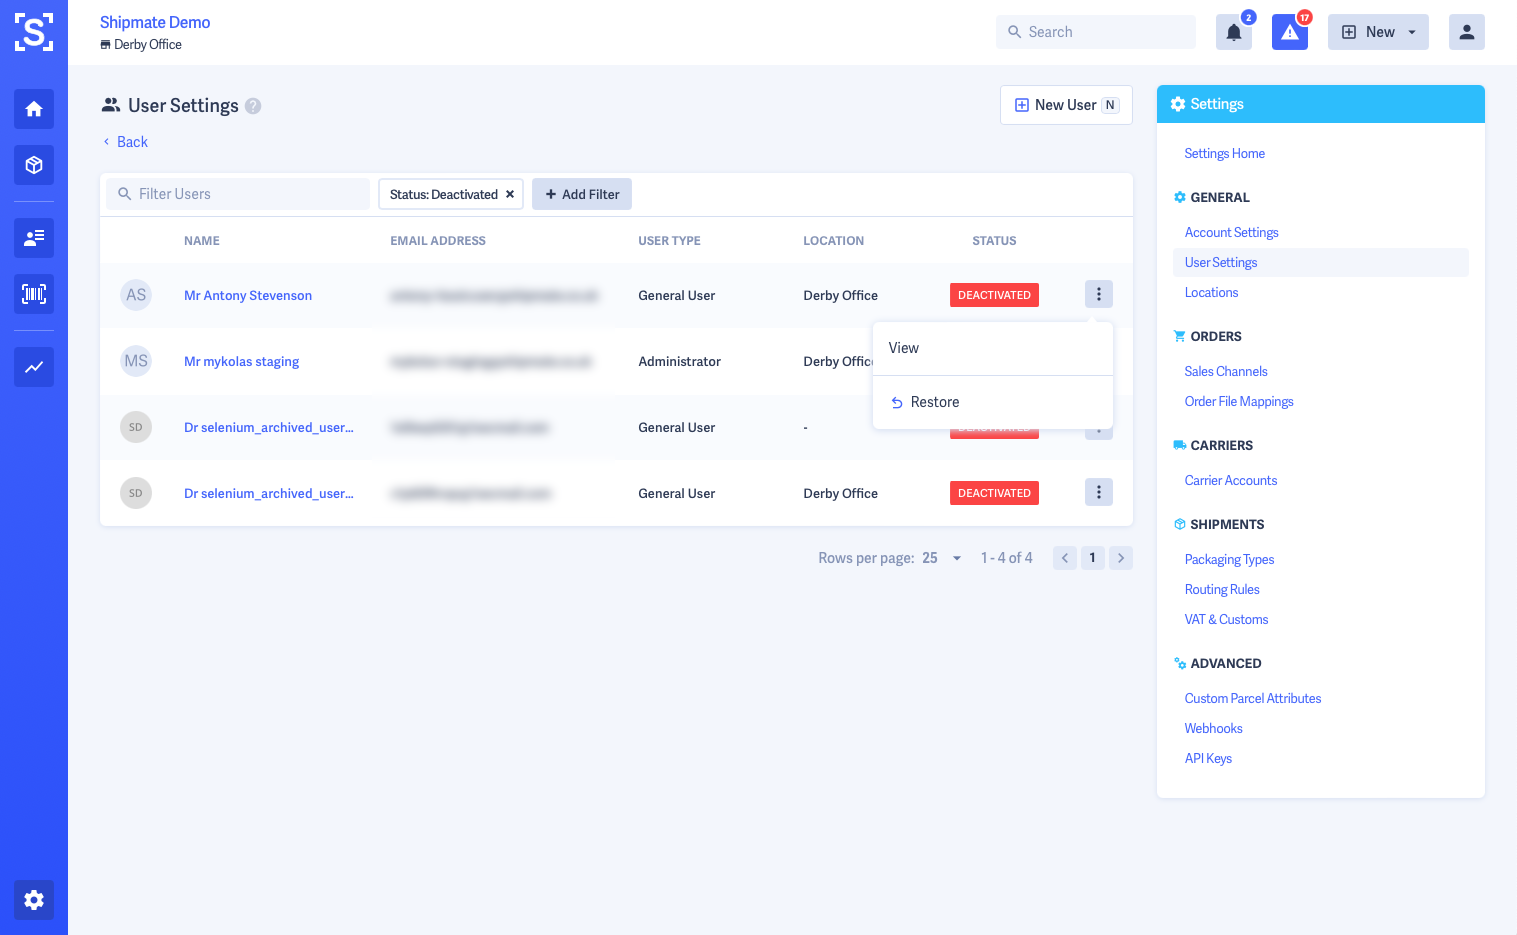
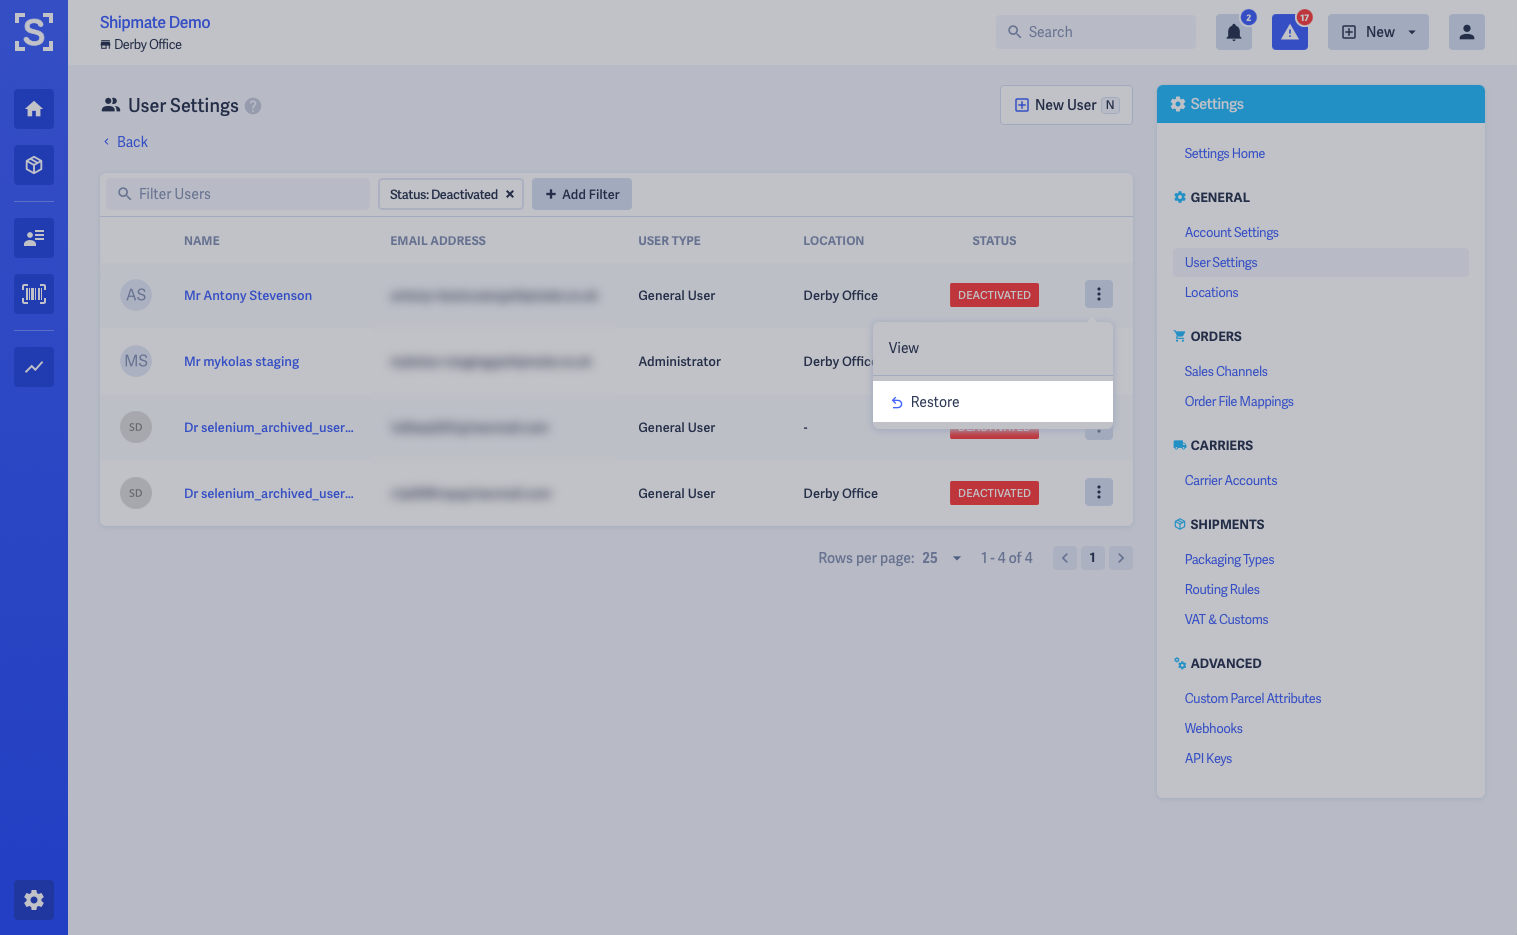
If you need to restore a previously deleted User, this can be done by first applying a Deactivated Users filter, then selecting the Restore button from the pop-up menu on the User you wish to restore.
Note that the User is not notified - you will need to inform them that their access has been restored.
Locations
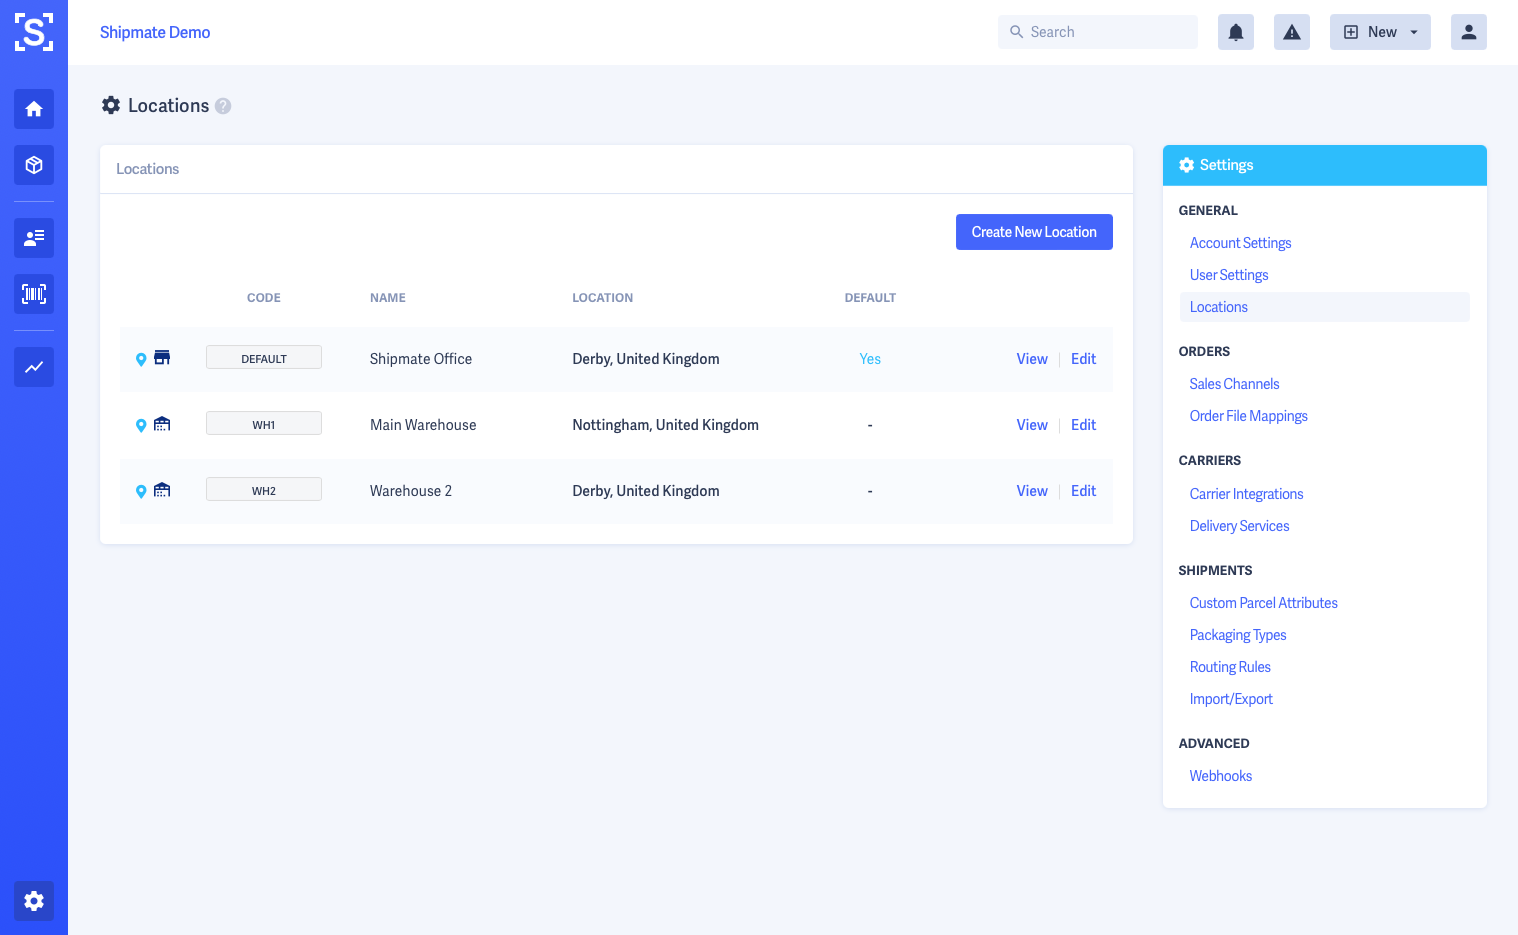
Shipmate supports multi-location despatch with Locations.
You can configure multiple locations on your account, for instance if you have several warehouses, or a network of store outlets you send orders from.
Your account must have at least one Location, with your main despatch location set as the account's Default Location.
Each user may be assigned to their own Location, ensuring the collection address is set correctly and applying any Routing Rules you have configured, such as the Carrier account being used.
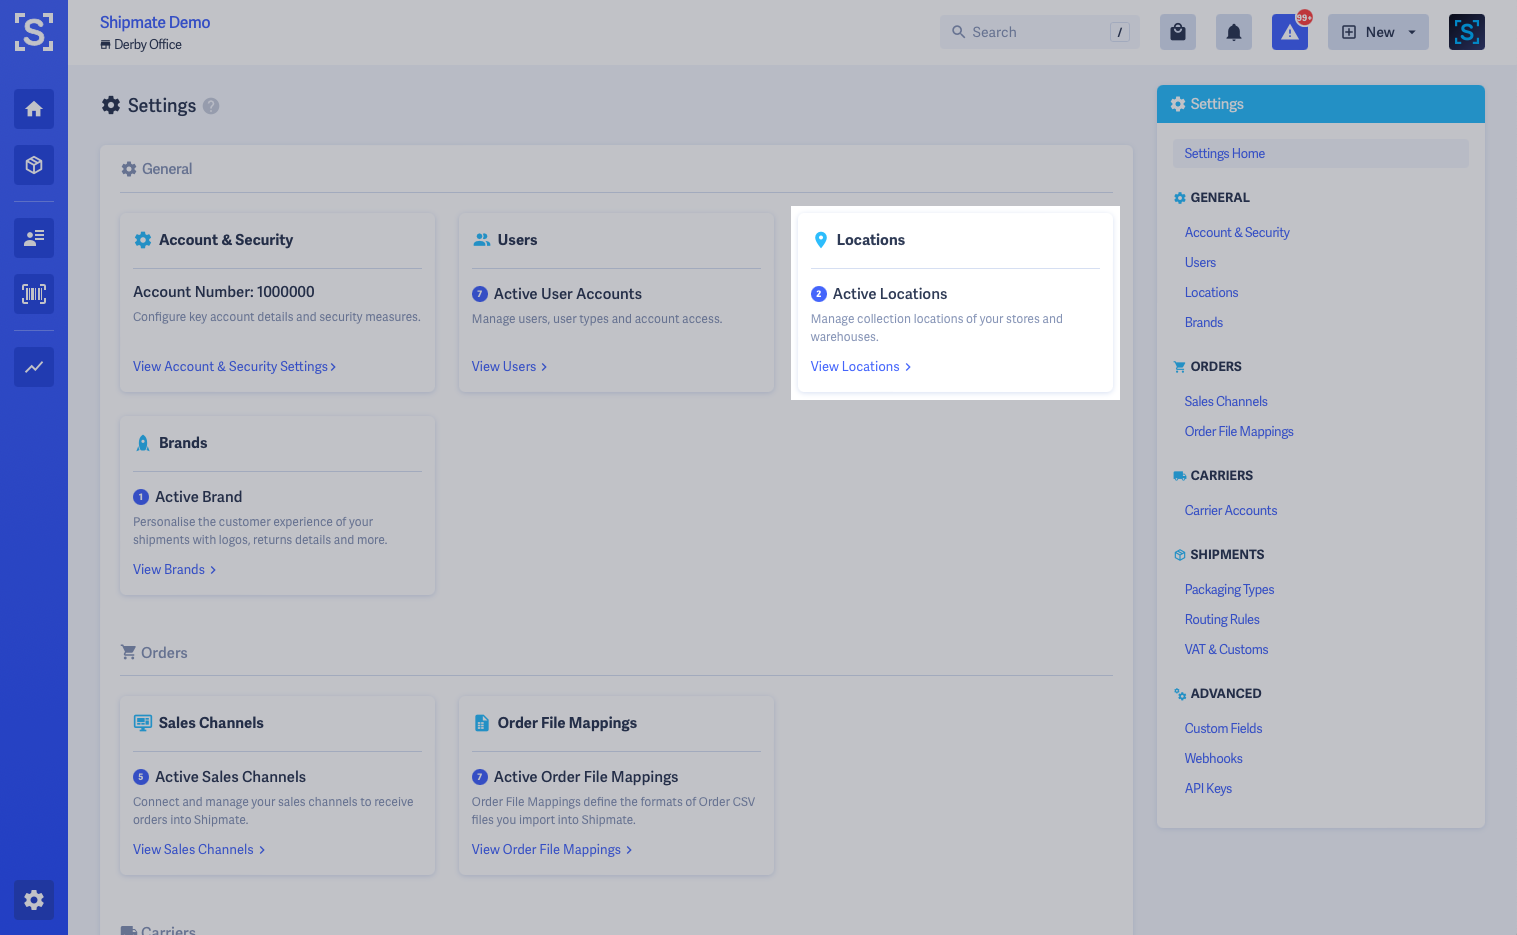
You can access Locations from the General section of the Settings page.

Adding a Location
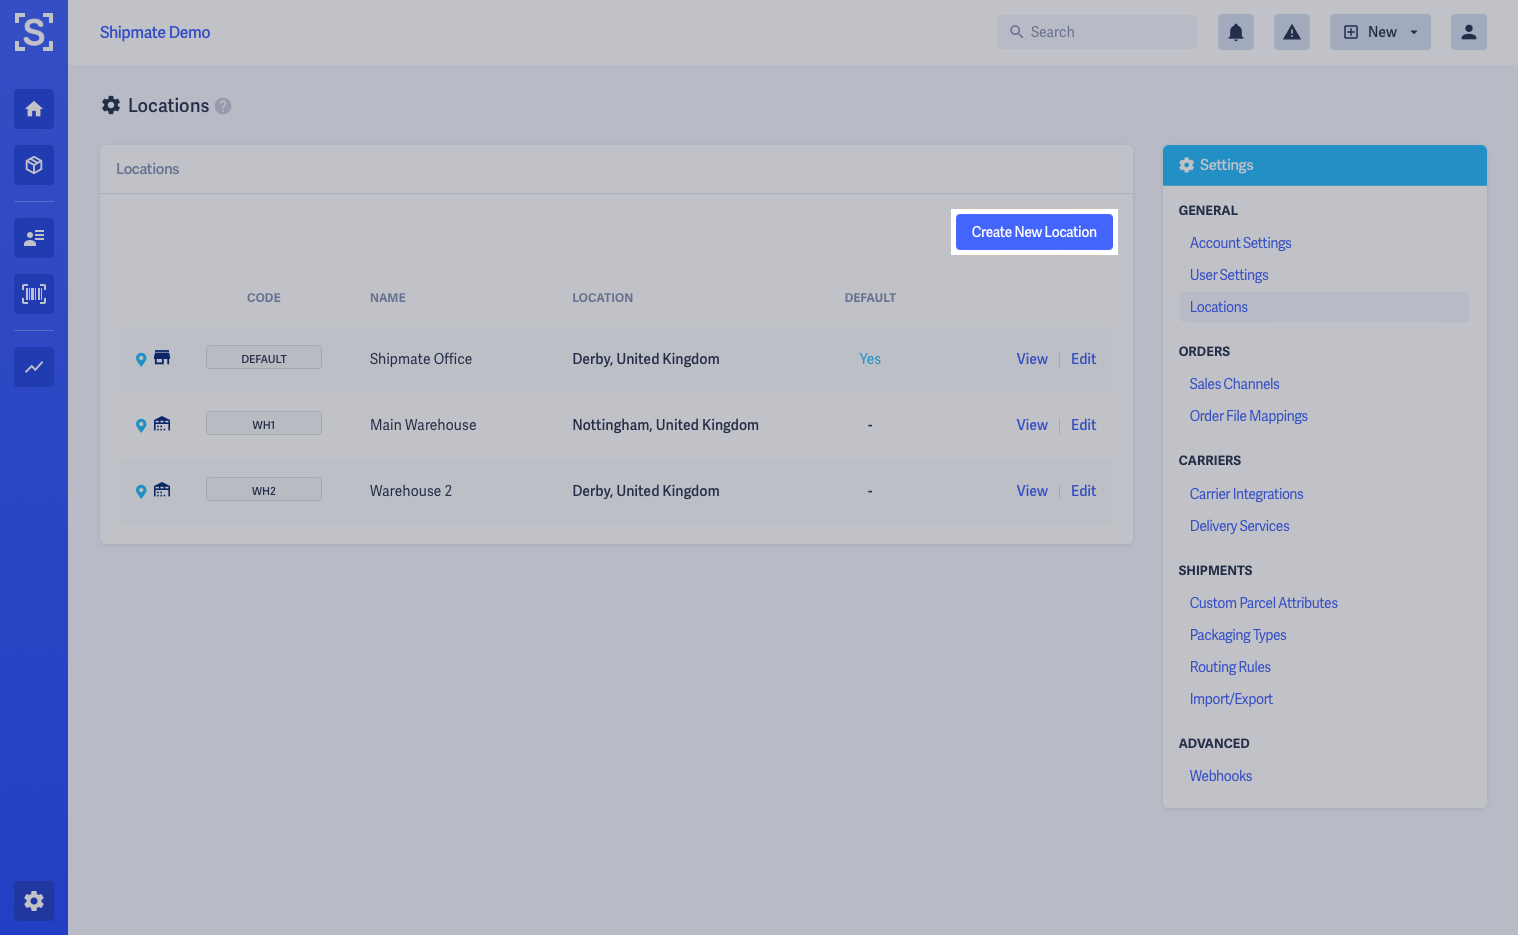
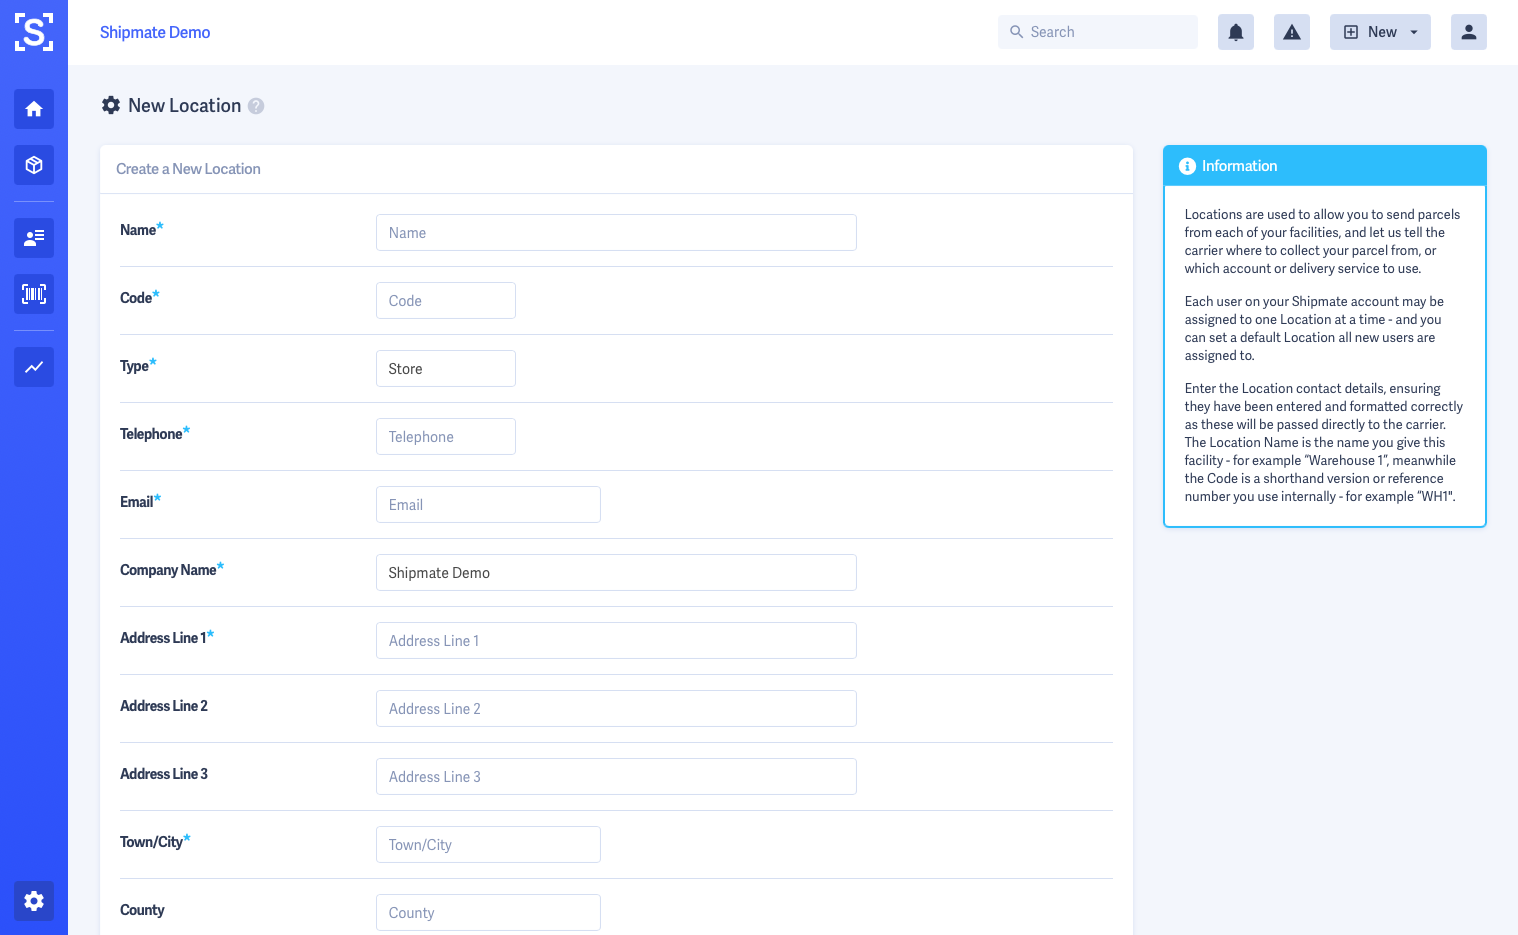
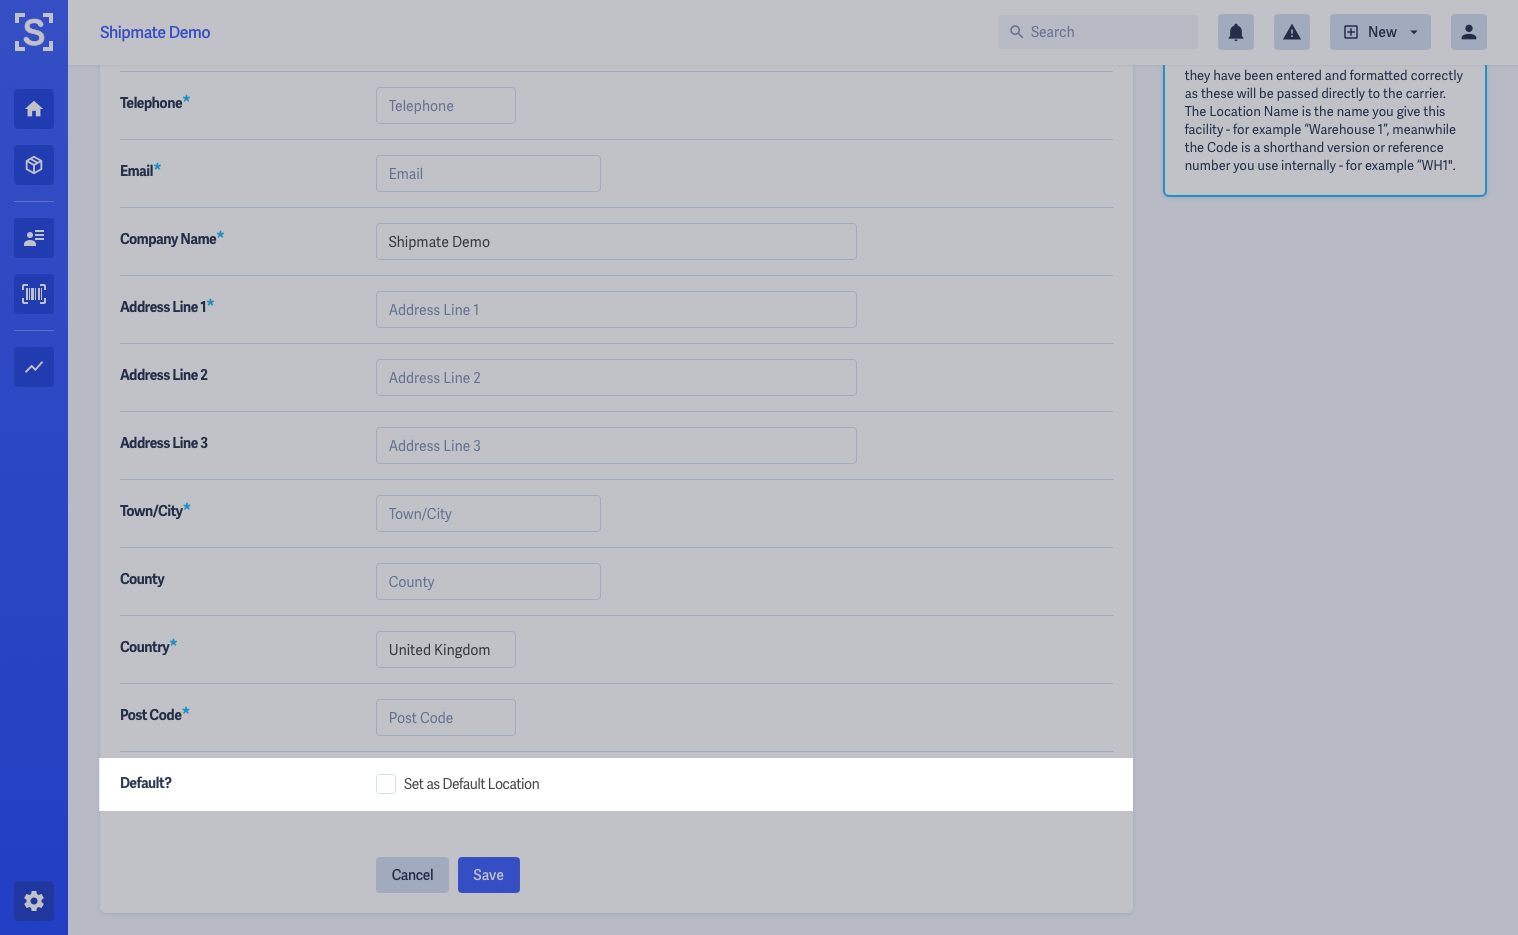
From the Locations list, click the Create New Location button. This will open the New Location form on which you can supply details of the location you wish to add.
You may give the Location both a Name and a Code. The Name may be the full name of the Location e.g., Distribution Centre A, with the Code perhaps being a shorthand version, e.g., DC-A, or the store number.
You may then select the type of Location this is - this will simply show the relevant icon, but may be used for future routing capabilities.
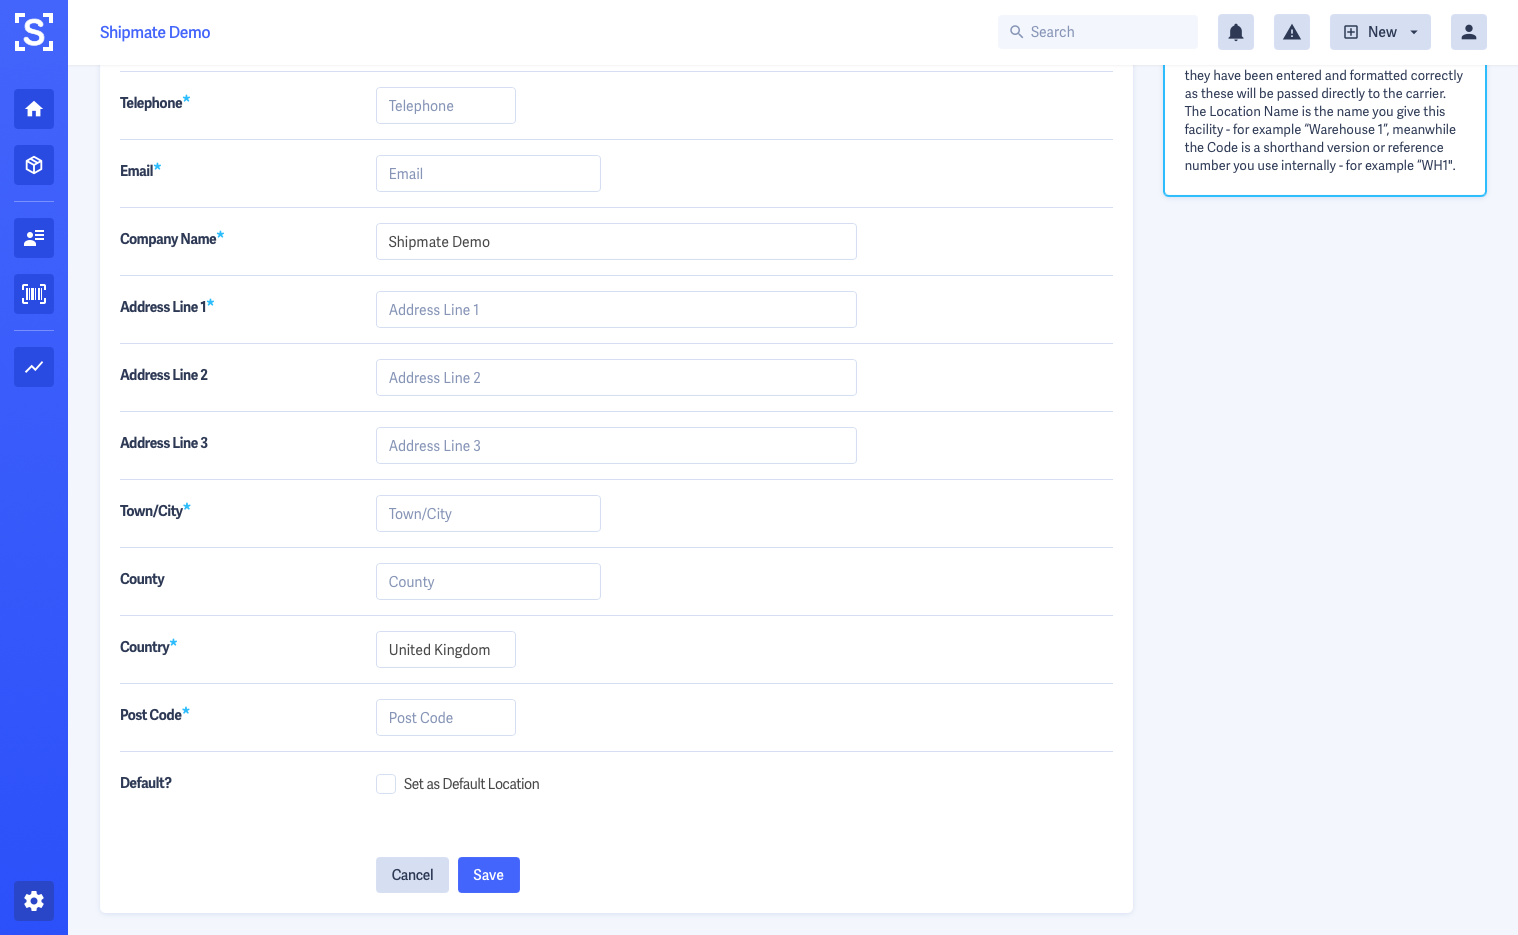
The Location's contact details and address may then be provided. These will be applied as the returns address and contact details on the shipping label.
Finally, you can choose if this Location will become the account's Default Location by selecting the checkbox at the bottom of the form.
Once you are happy with the details you have entered, click the Save button. The newly created Location will be available immediately across your account.

Editing a Location
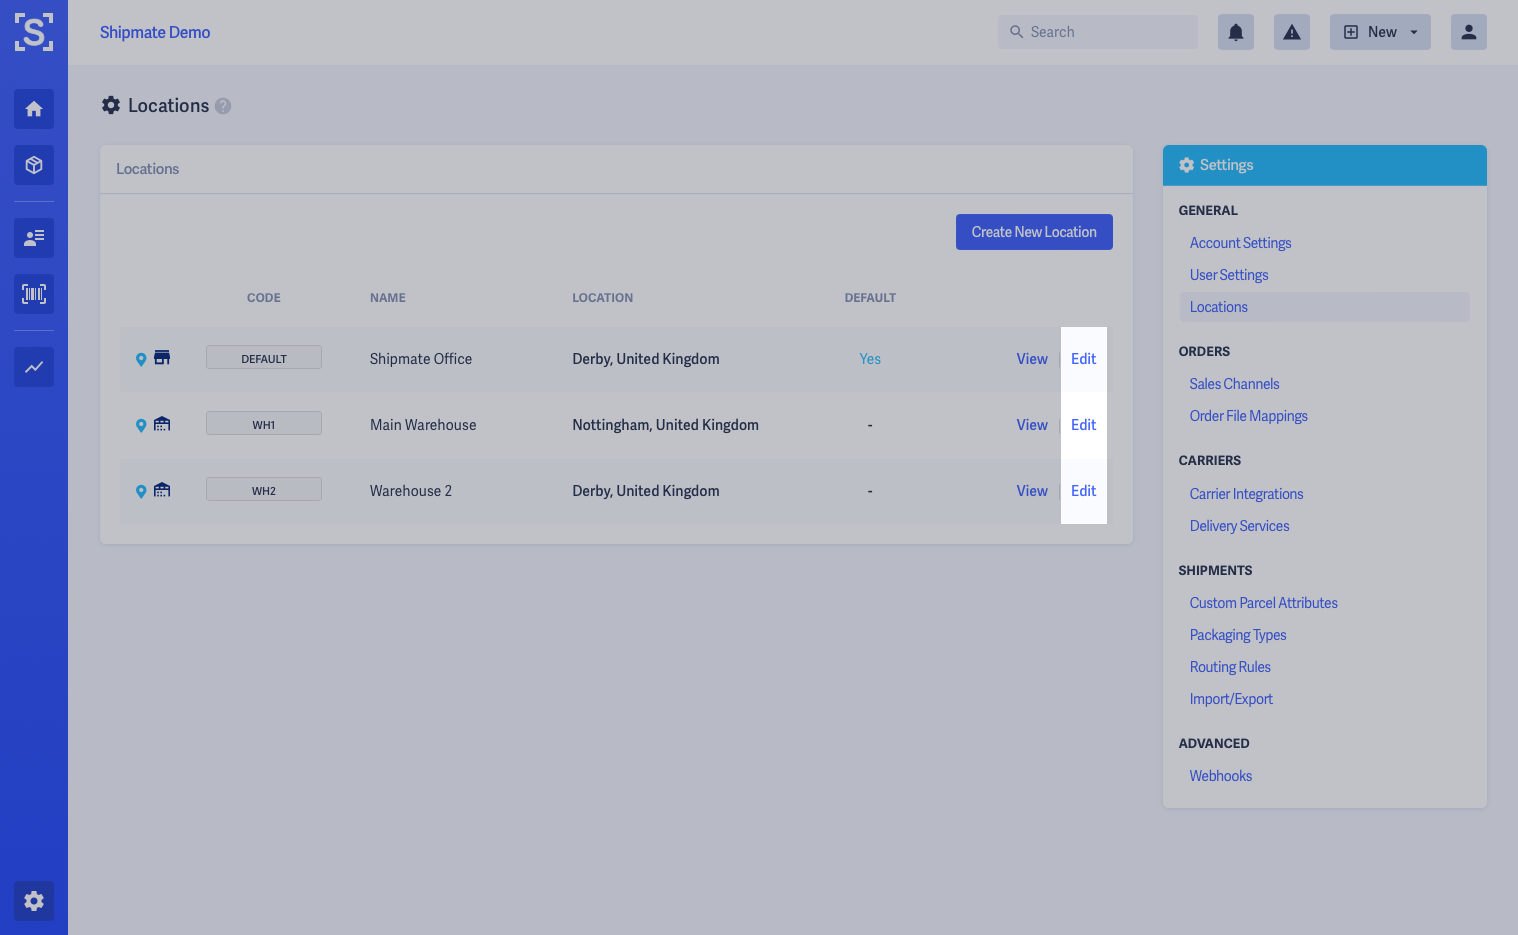
From the Locations list, click the Edit button for the Location you wish to edit.
This will open the Location form, populated with all the details of the Location, as per adding a new Location, ready for editing.
Once you are happy with the details you have entered, click the Save button. The updated Location will be available immediately across your account.

Setting the Default Location
From the Locations list, click the Edit button for the Location you wish to set as the account's Default Location.
This will open the Location form, populated with all the details of the Location, as per adding a new Location. Scroll down to the bottom of the page and check the Set as Default Location option.
Click the Save button. This Location will now be applied as the default across the account. Note that any users with their own Location saved will not have their Location updated - this will need to be done separately.

Updating your own Location
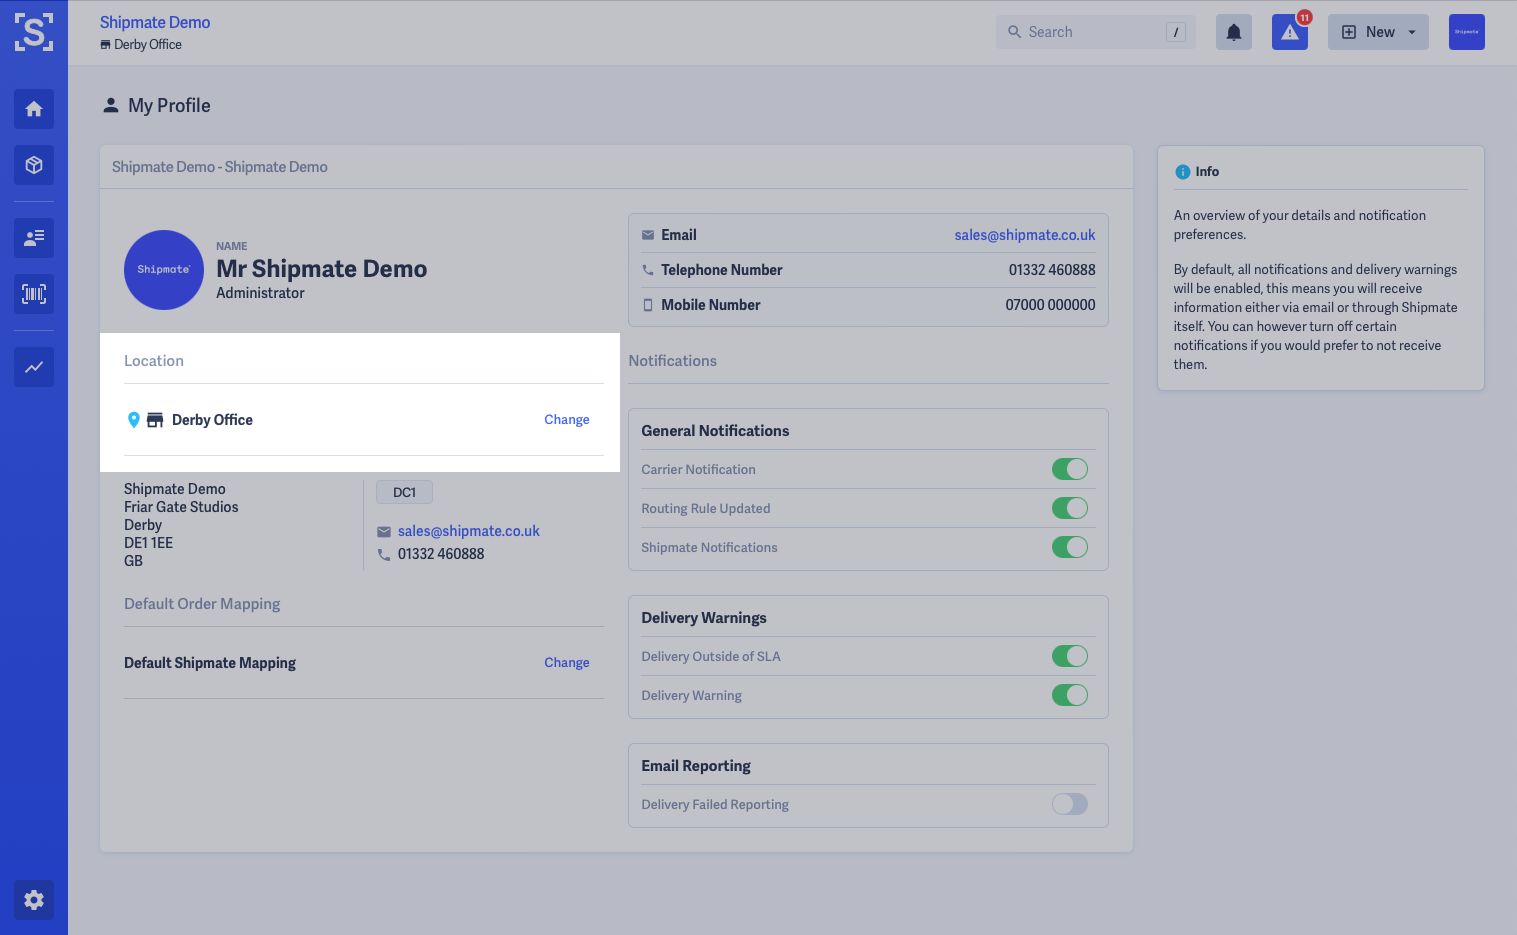
There are two ways to update your Location on Shipmate:
- Using My Profile
- Using the Desktop Printer App
From the My Profile page, accessed by clicking the Profile menu in the top-right of the Shipmate web portal then selecting My Profile, you can choose from all the available Locations on your account, then click Update Location. Shipments will then be created from your newly selected Location.
Using the Desktop Printer App click the Shipmate icon to open the main app panel, click the Profile menu then select Preferences.... You can then choose from all the available Locations on your account, then click OK on Windows, or Save on macOS. Shipments will then be created from your newly selected Location.


Updating Another User's Location
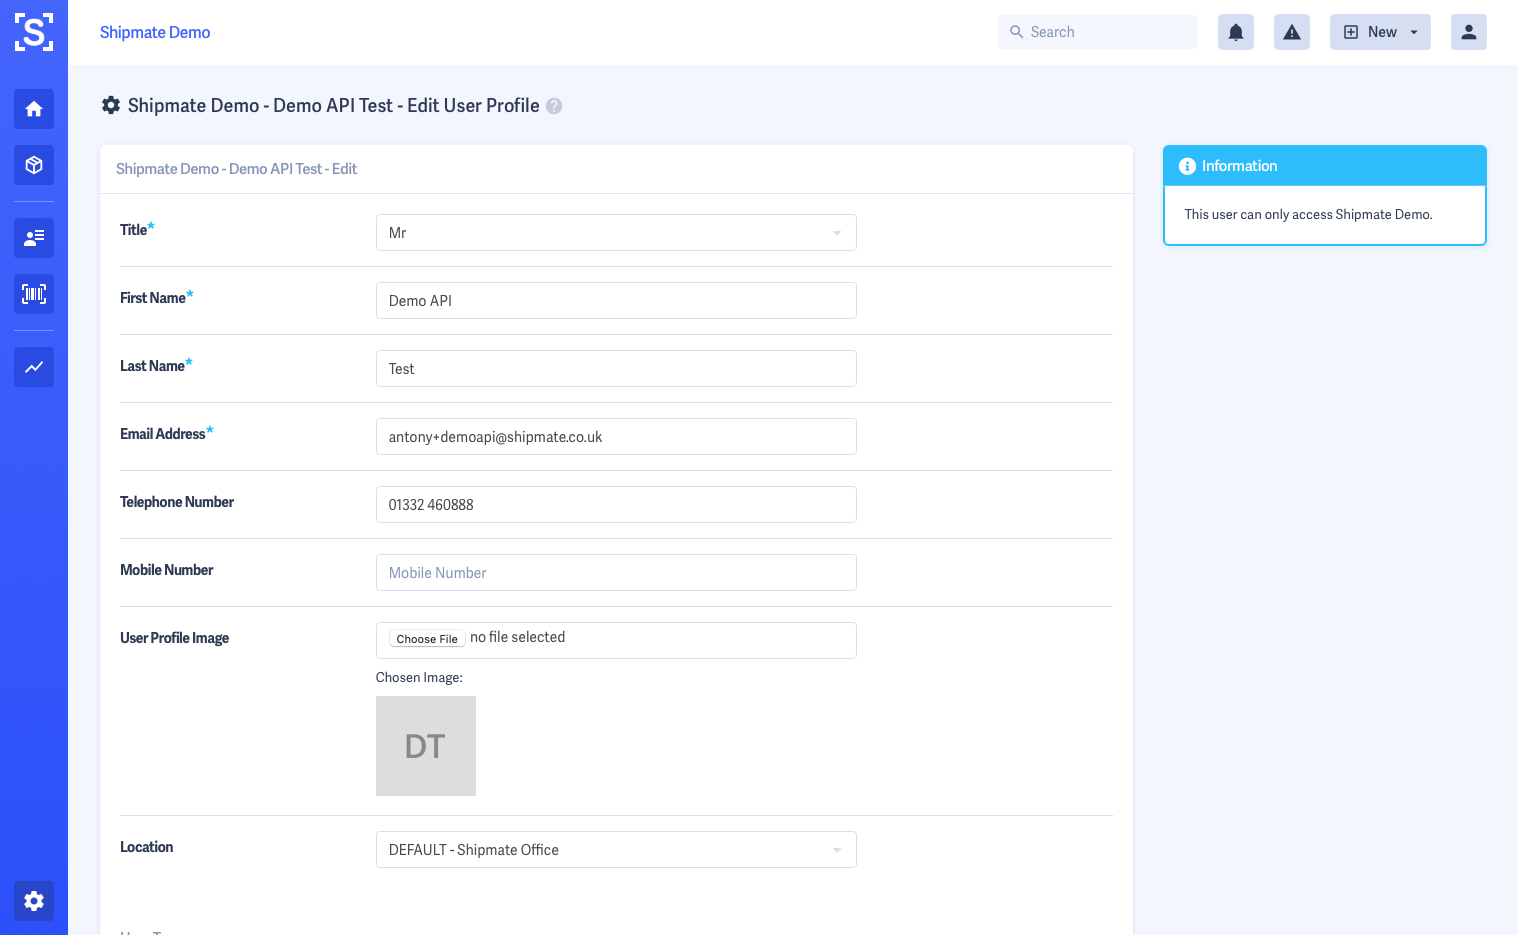
To update another user's Location, first navigate to the Users list from Settings > Users.
On the row of the User you wish to change, click the user's name or the View button.
From the User's Profile page, click the Edit button.
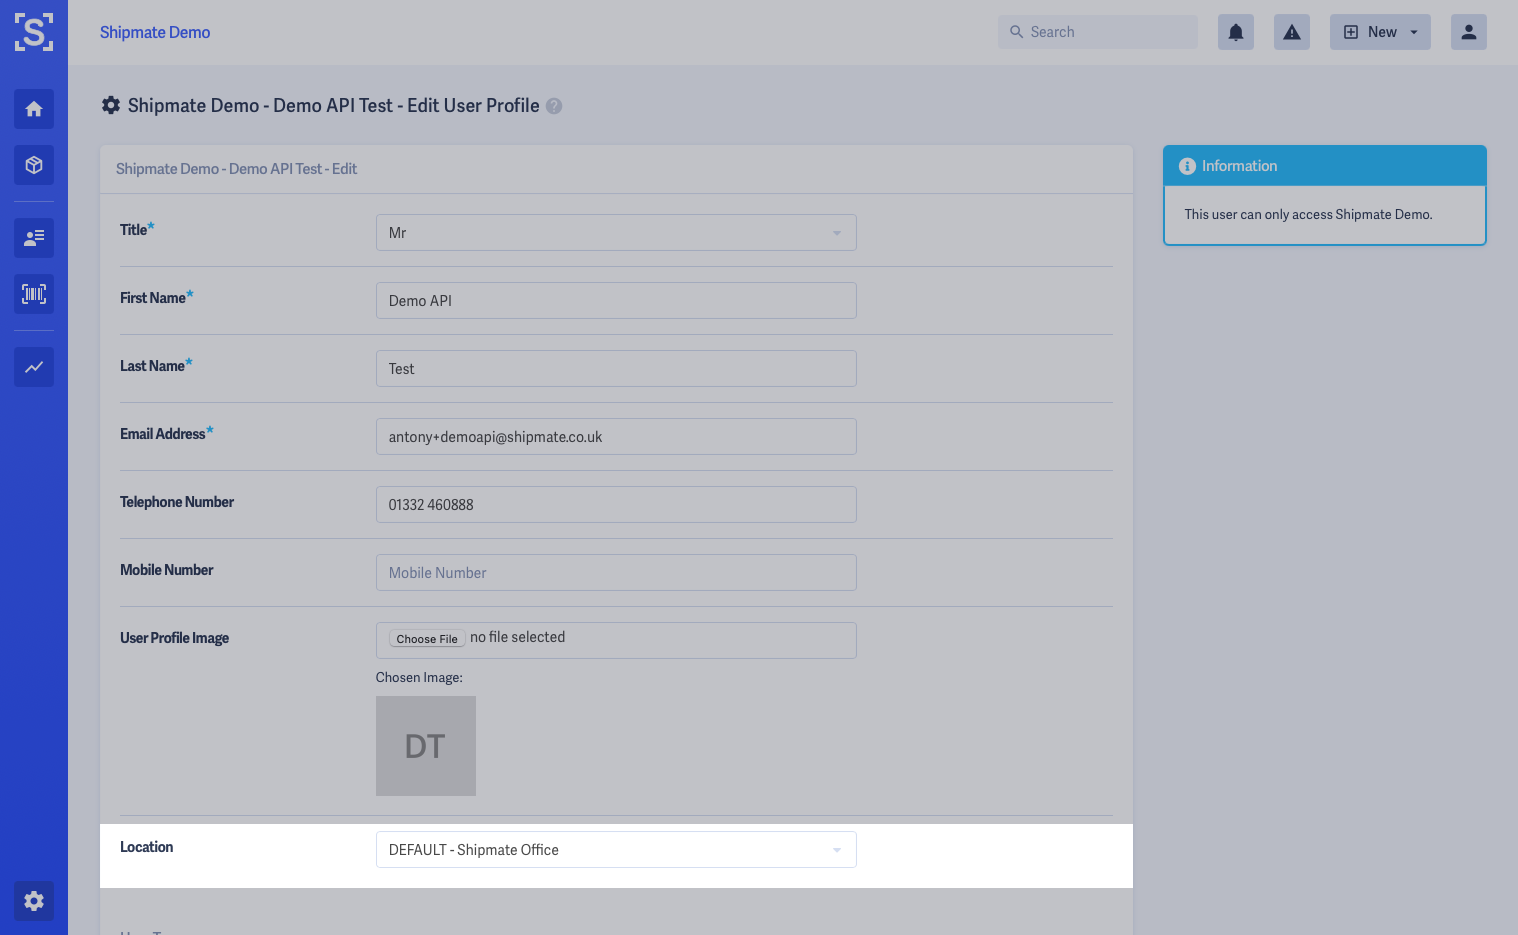
Scroll down to the Location option and choose the new Location you wish to apply.
Once you are happy with your selection, click the Save button. The user will now be allocated to the selected Location immediately.
Brands
Brands allow you to apply your branding to personalise the customer experience of each Shipment you send.
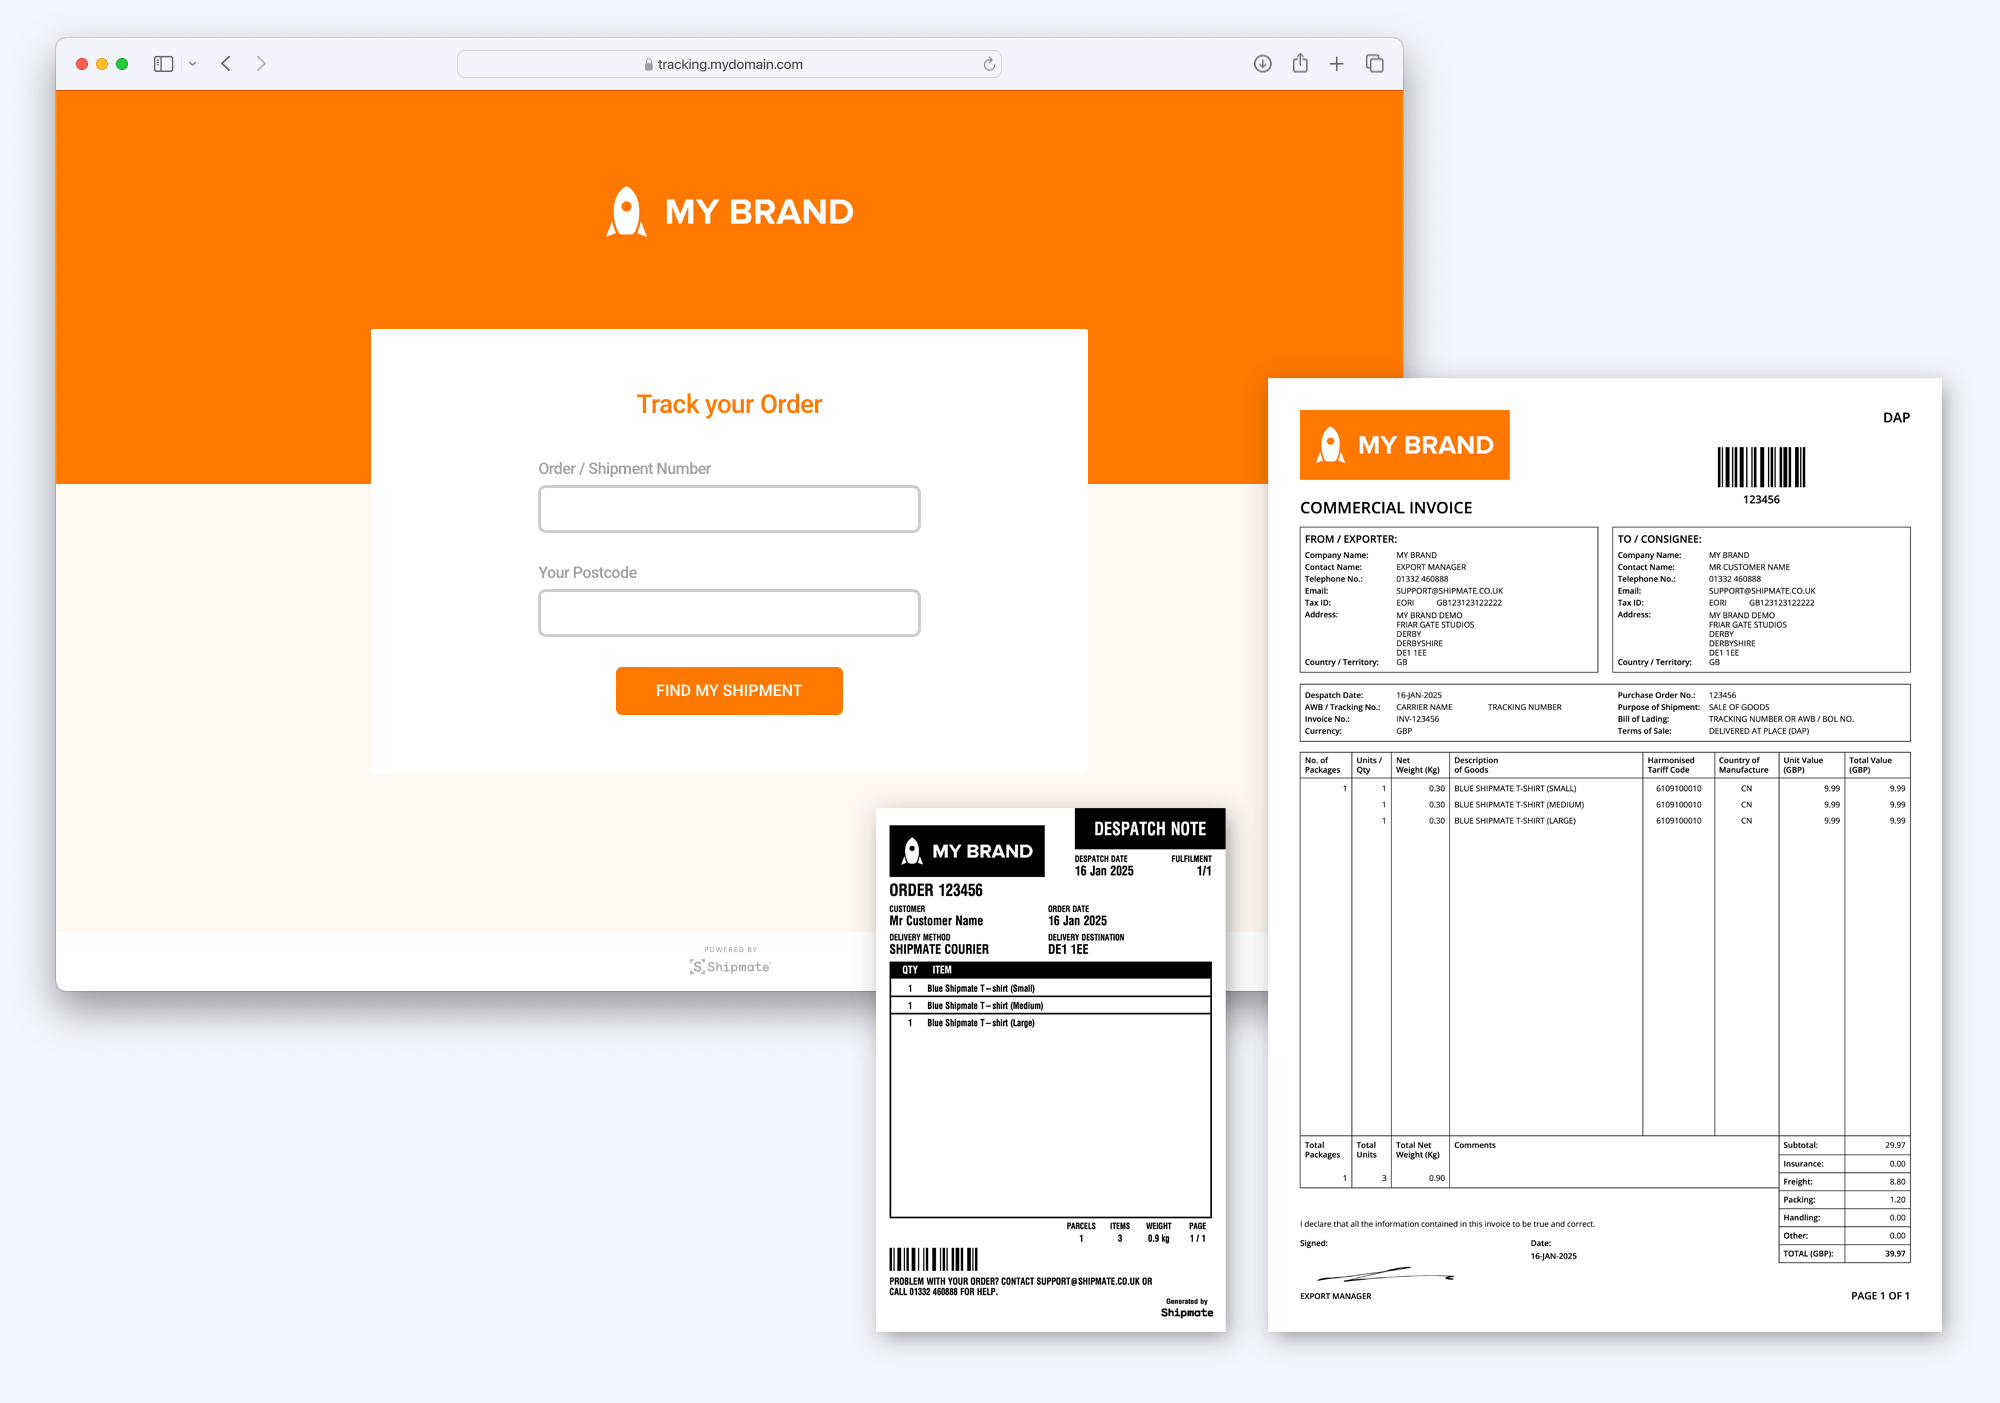
Your brand is applied across various aspects of Shipmate and your Shipments, including:
- Tracking portal URLs and their appearance
- Despatch note logos and customer service notes
- Return address and contact details on carrier labels (when supported)
- Logos on other documents including Commercial Invoices and Picking Lists
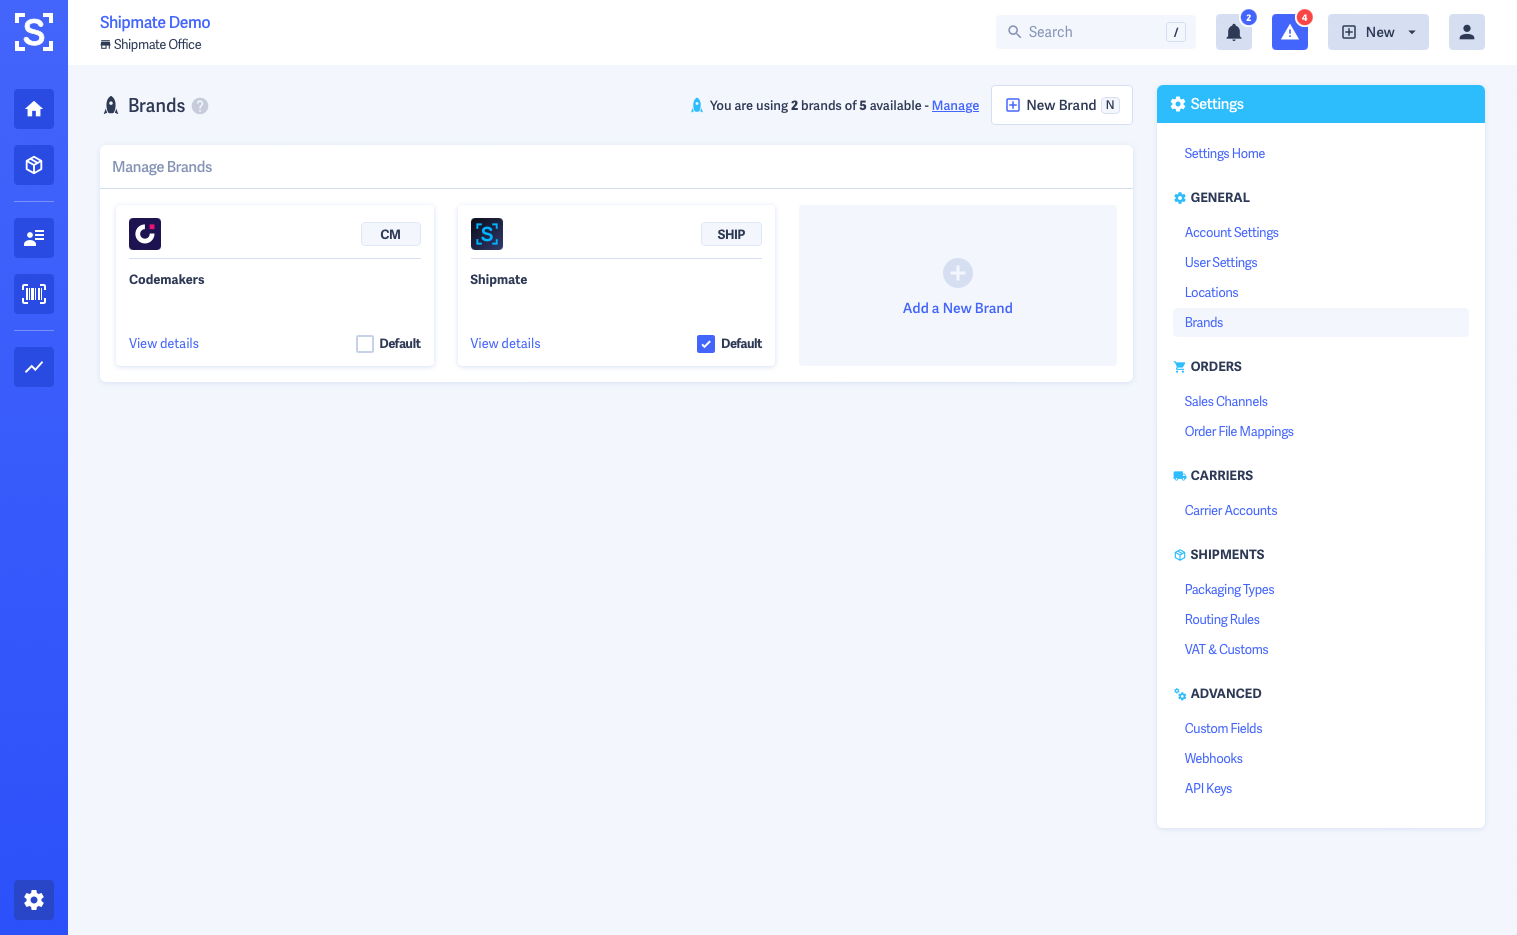
Each Shipmate account includes one Brand as standard, but you can add more for an additional monthly fee. This is ideal if you operate multiple customer-facing brands or stores, and want to run a centralised despatch operation from one account.
With multiple Brands on your Shipmate account, you can also visually differentiate between Shipments belonging to each Brand within the Shipmate web portal, use search filters to easily find Shipments for any particular Brand and also configure Routing Rules to use certain Delivery Services when sending on behalf of a particular Brand.
Each Channel can be linked to a specific Brand, or you can apply them interactively via API or CSV upload, or manually when creating Shipments using the New Shipment form.
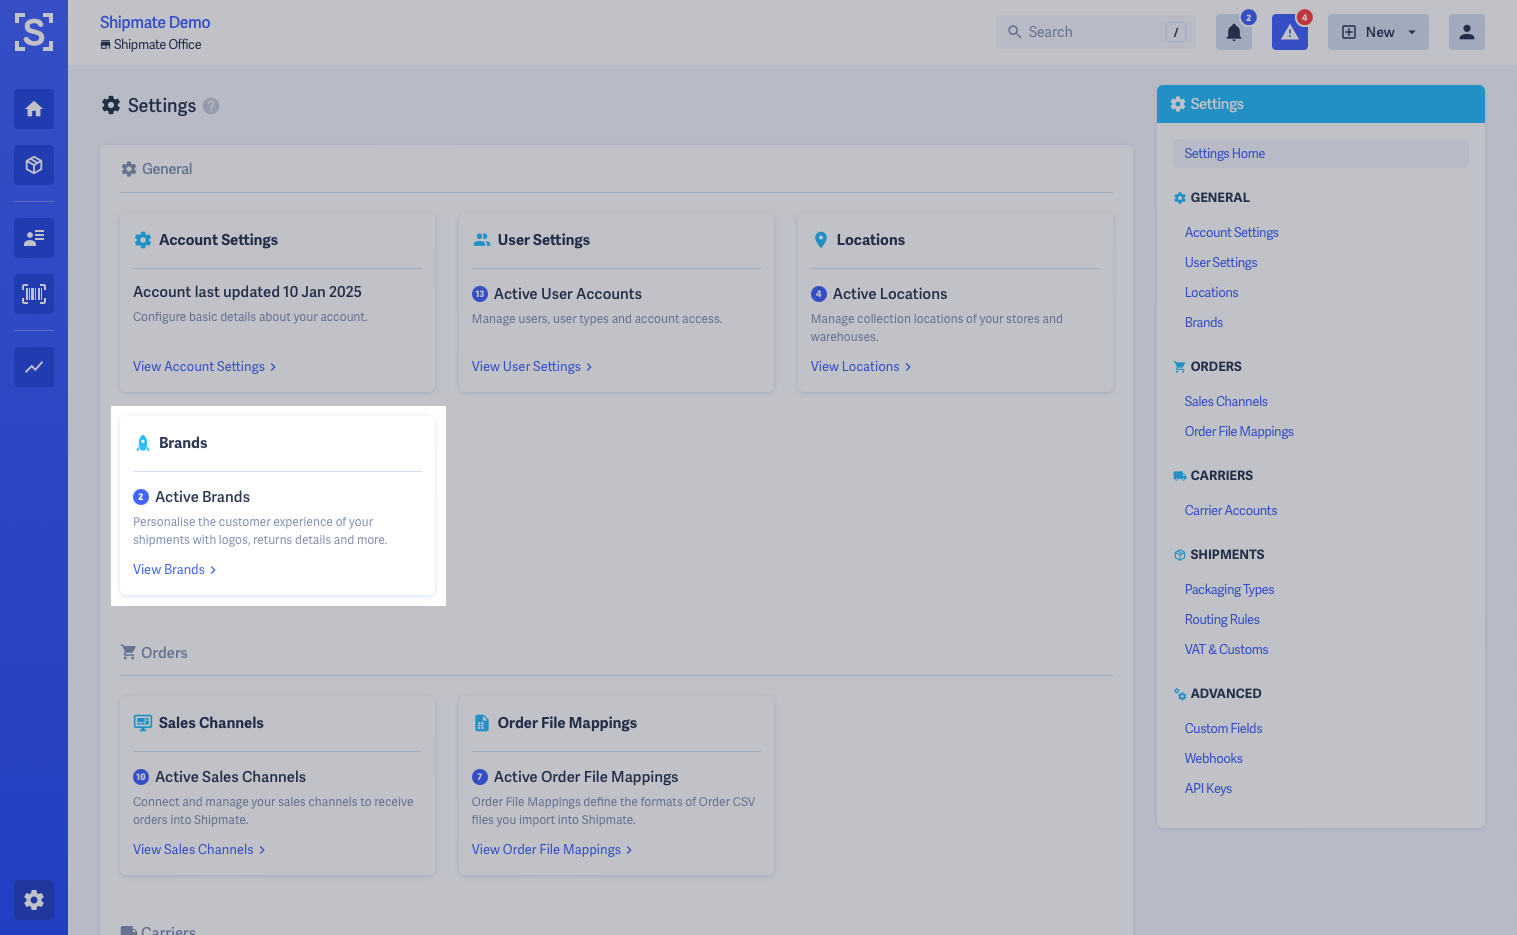
You can access Brands settings from the General section of the Settings page.

Setting up your Brand
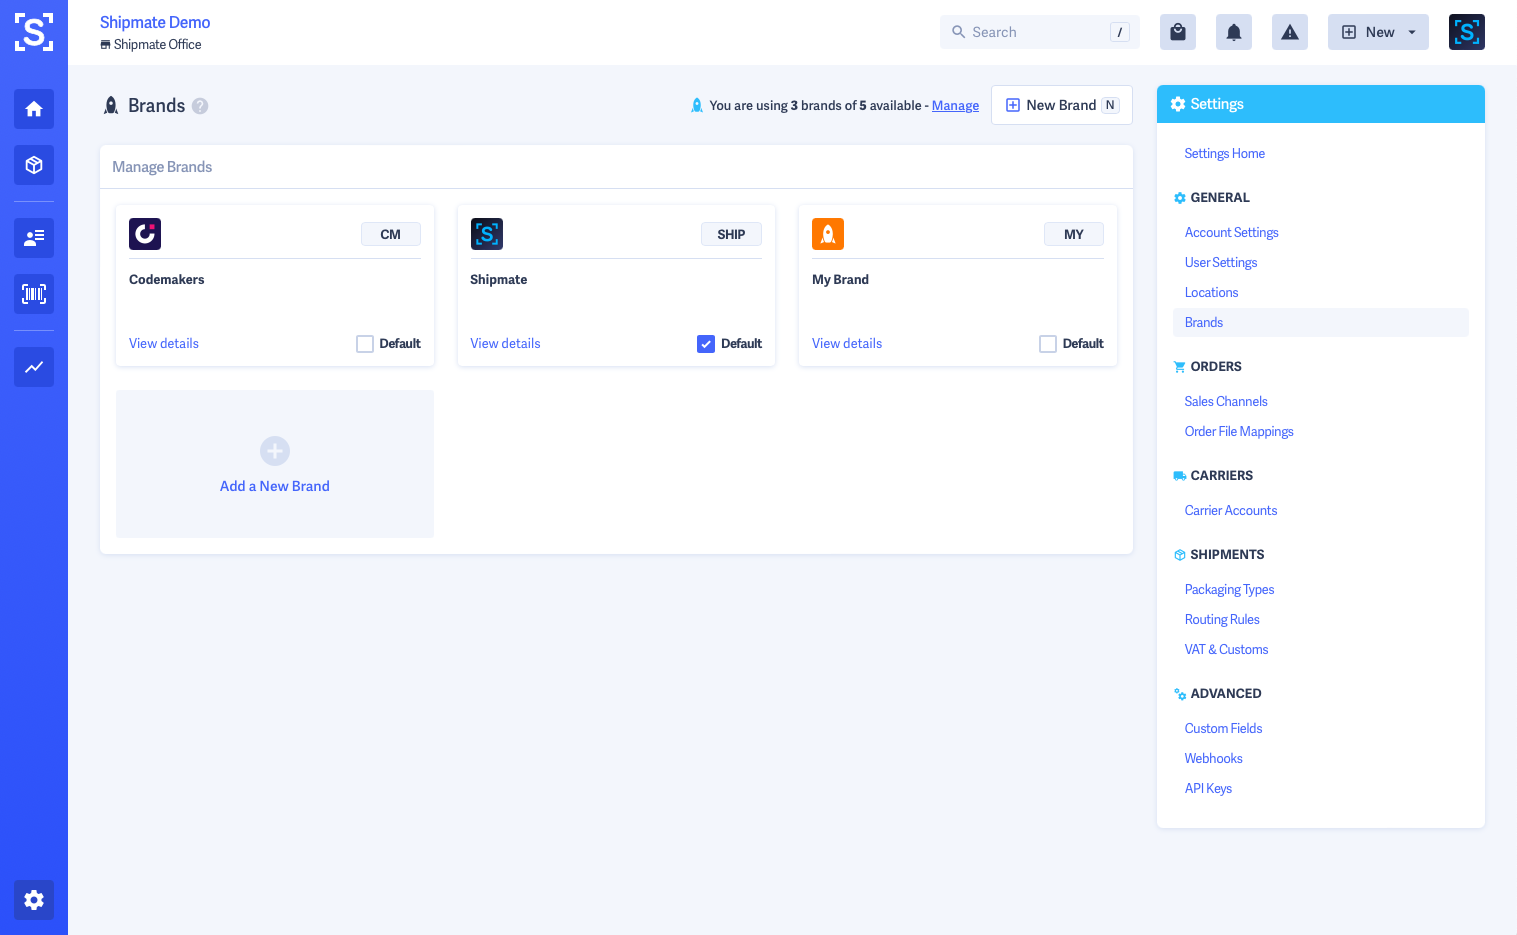
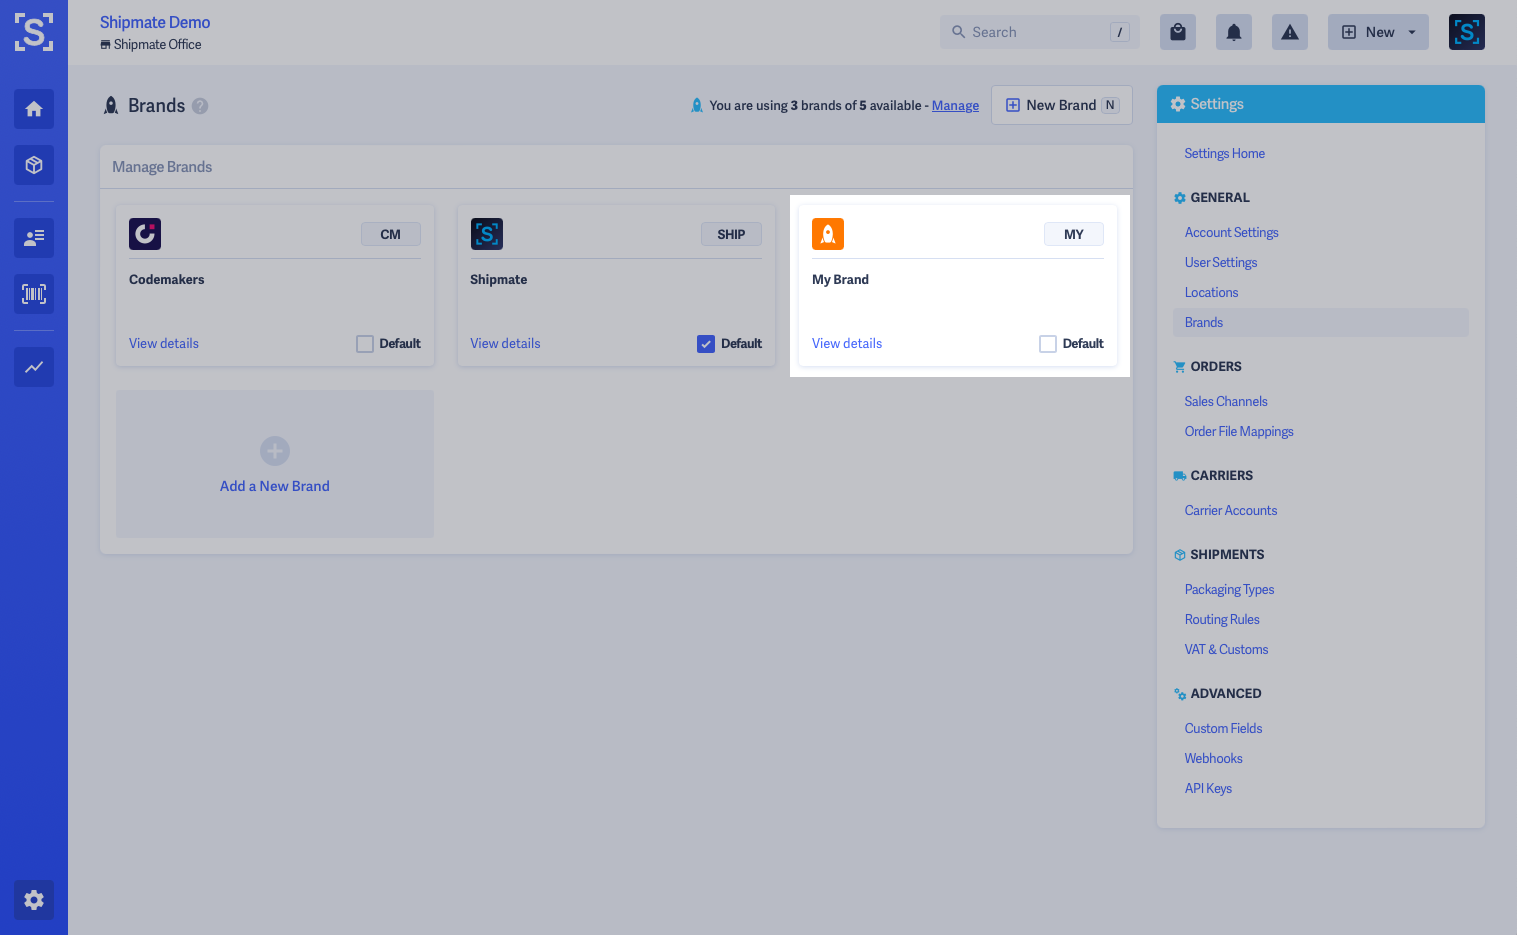
Your account will already have a Brand reflecting the name of your account when you open your Shipmate account. Simply click on the Brand to configure it.
At the top of the Brand page you can change the brand icon, name and key by clicking into them and editing them in place.
The brand name is the user-facing name displayed throughout Shipmate, meanwhile the key is used as a unique system reference in API requests and in CSV files.
The brand icon is used throughout the Shipmate web portal in drop-down menus, lists and view screens acting as a quick visual reference for the brand.
The Brand page is split into two tabs - Brand Settings and Tracking Portal.
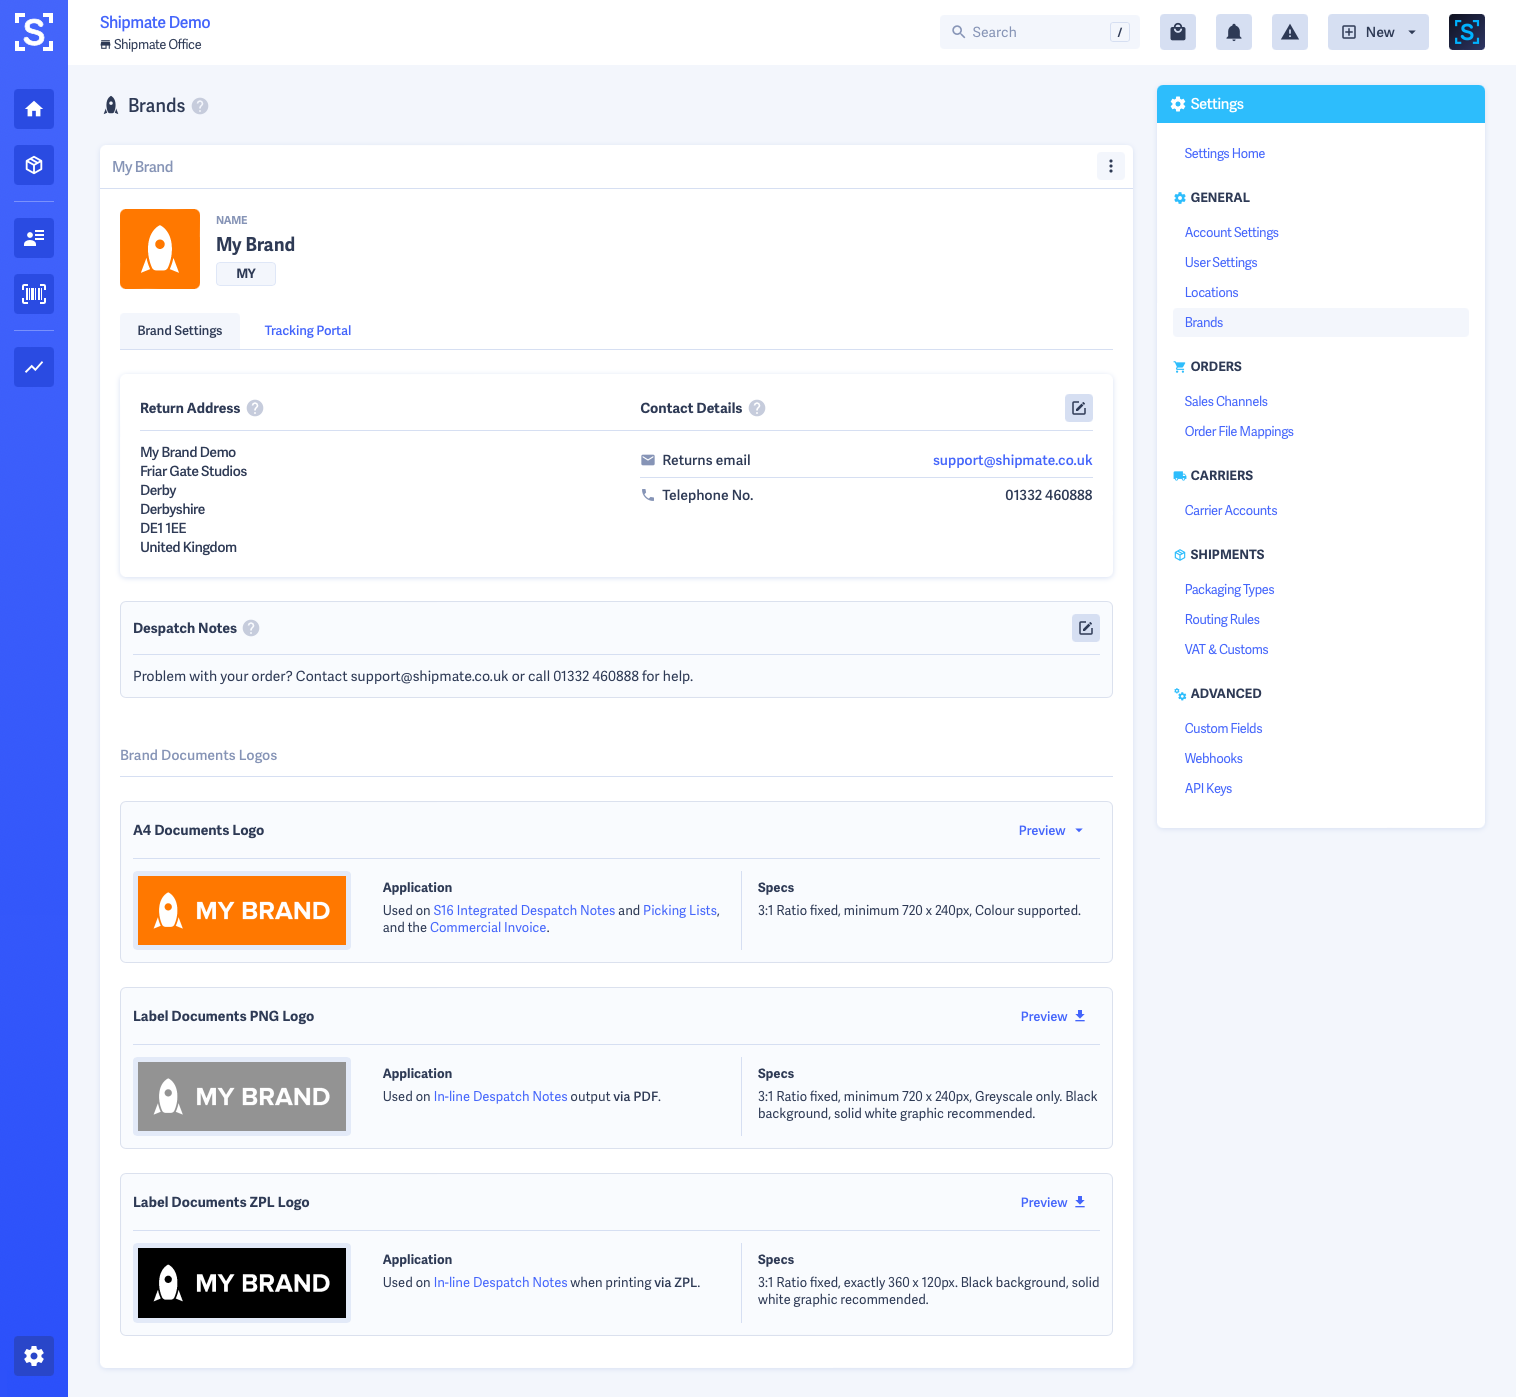
Within the Brand Settings tab you are able to configure:
- Return Address – whenever supported by the carrier this will be used to override the returns address on carrier labels
- Contact Details – whenever supported by the carrier this will be used to override the email and telephone contact details on carrier labels
- Despatch Notes – these are used as notes printed on Despatch Notes if you enable them and can include customer support or returns details
- Document Logos – these are used on Despatch Notes, Commercial Invoices and other documents across Shipmate. Find out more about uploading logos to Shipmate
To update each section, click the Edit button to make the section editable, make your changes then click Save. Your changes will be saved automatically. If you want to cancel your changes, click the grey Cancel button to close the edit form.
Within the Tracking Portal tab you are able to configure your Tracking Portal URL – find out more in Setting up Tracking Portals.
Uploading Logo Images
Adding your logos to Shipmate is easy – we provide a comprehensive logo uploader that allows you to apply logos that will work in every context when working with Shipmate, with the flexibility to upload separate logos for each application.
The brand icon used throughout the Shipmate web portal is a square image, so you can easily upload the logo you use on social media accounts as a starting point.
Logos used on documents are all stored in a rectangular 3:1 ratio and are printed in the top-left corner of documents.
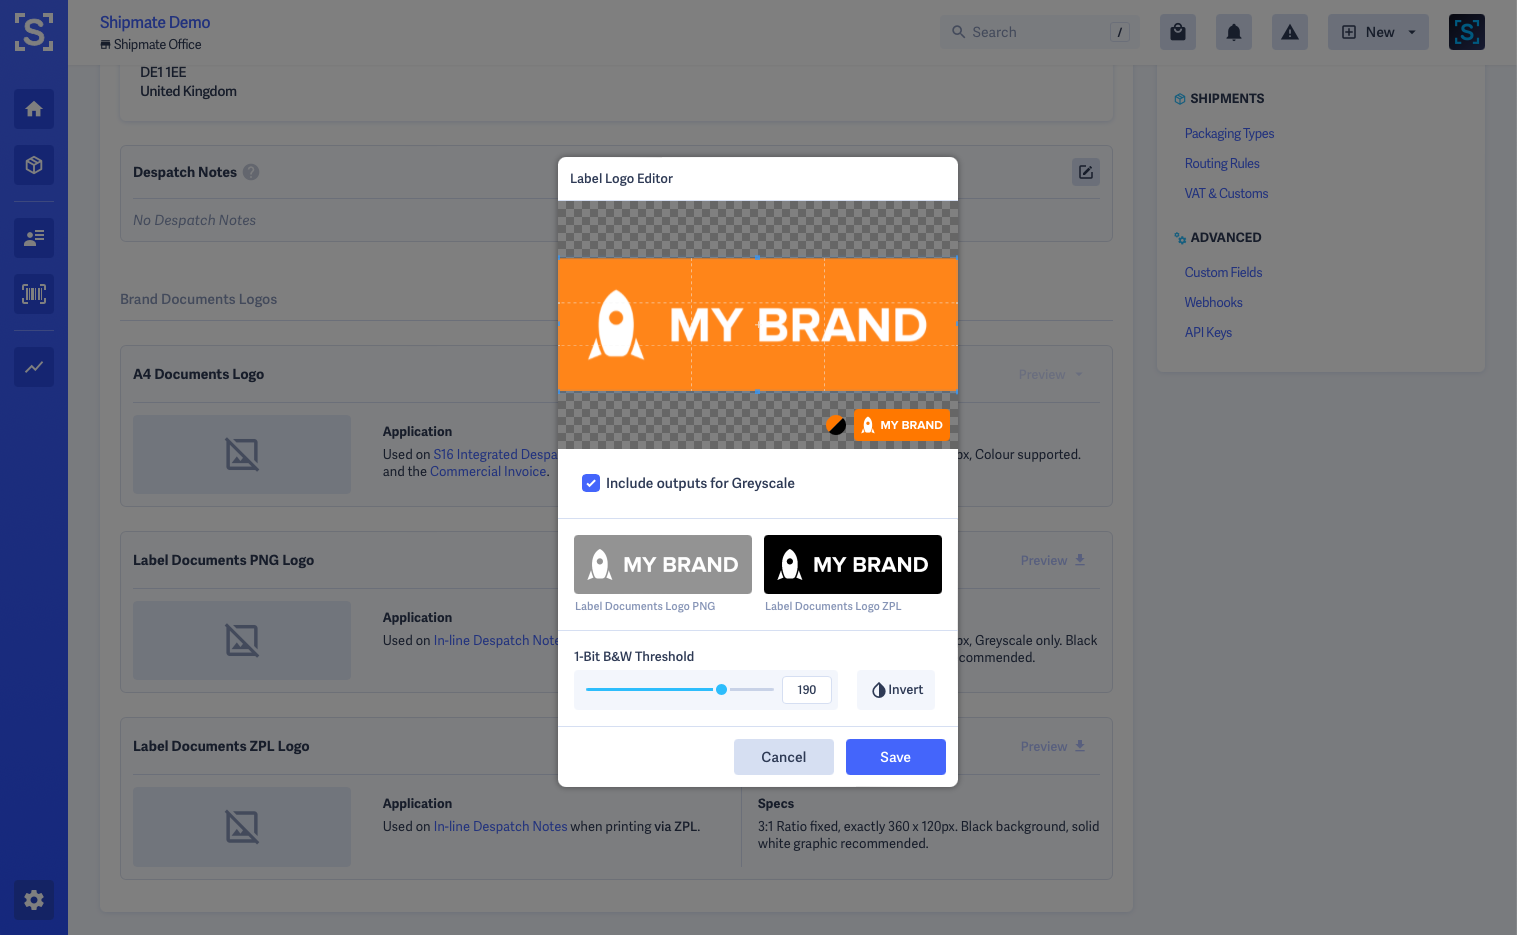
The image uploader allows you to pan, zoom and crop your logo to fit:
- To pan the image around, drag the middle of the selected area around the preview
- To zoom in and out, scroll the mouse wheel up and down
- To crop the image, drag the preview edges or square handles in the direction you want to reduce or expand the image
A small preview is shown in the corner of the uploader to show how the image will be output on documents. You can switch the background colour of the image by clicking the contrast icon next to the preview – this is ideal when uploading images with a transparent background to get best results.
You can quickly upload a logo for all three document types from the A4 Documents Logo option – the first document logo on the page. As the A4 Document Logo can be in full colour, the image uploader can generate greyscale and monochrome variants for use on label printers automatically by checking the Include outputs for Greyscale option.
Due to the technical limitations of most thermal label printers, for label documents your logo will be rendered in black and white pixels with no shading in between, so we offer a threshold slider to tweak how we will output your logo to label printers. You can also invert the background and foreground colours to create variants of your logo best suited to label printers. We recommend a black background with white logo for best results.
For full creative control, each logo has its own specification if you would prefer to produce your artwork in graphics software separately and upload each one individually.
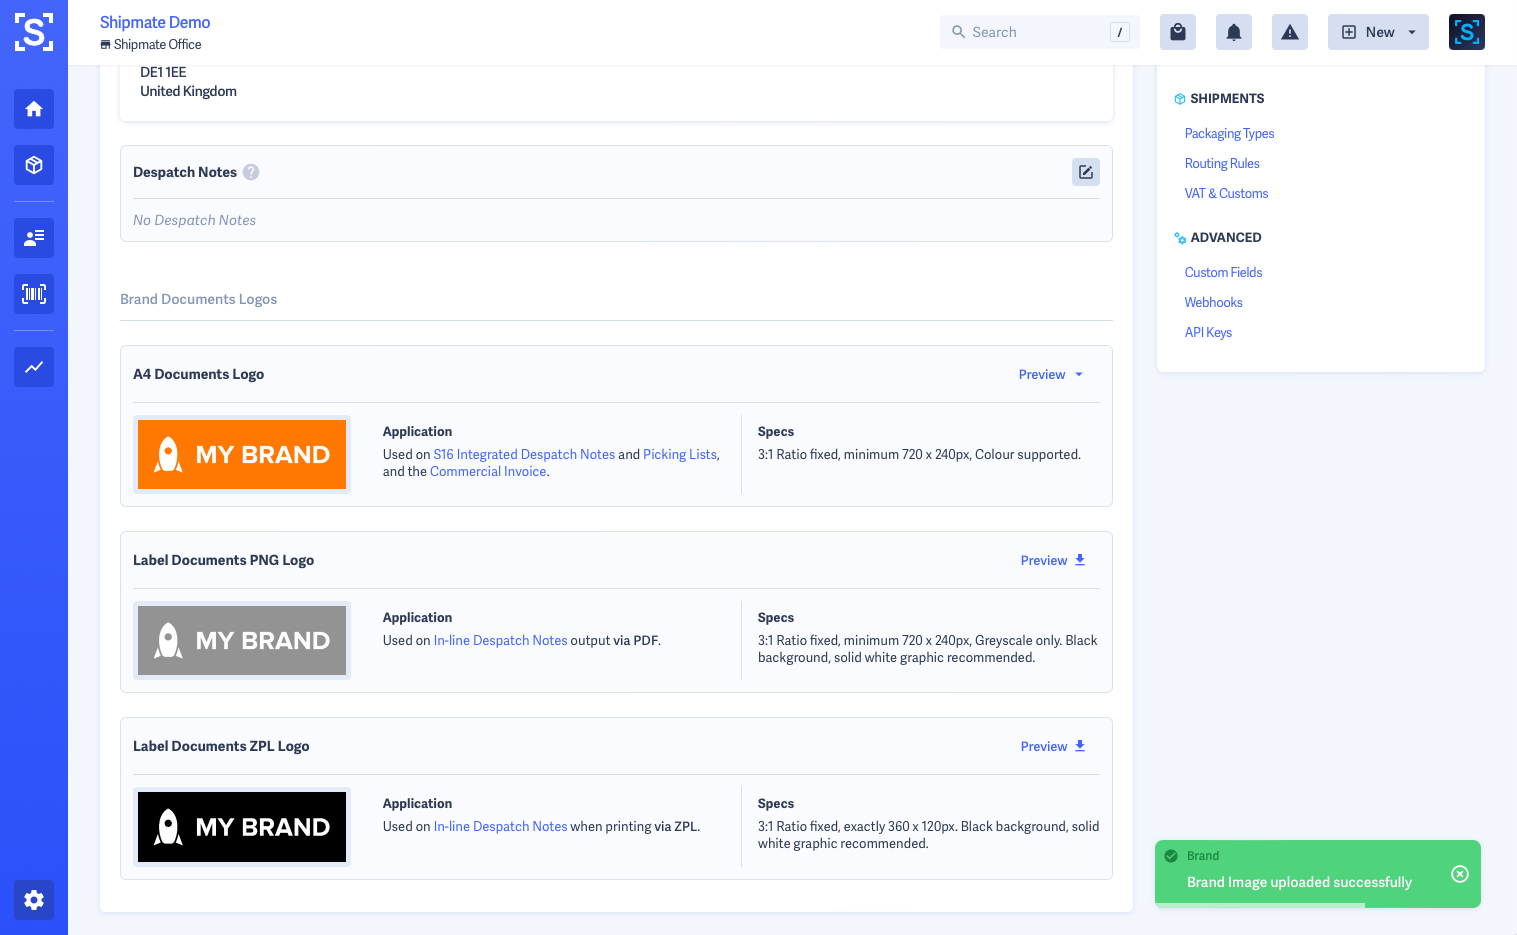
Once uploaded, you can preview your logos in-situ using the multiple Preview options on the page. You can then experiment with sizing and positioning until you get the perfect results for your logo.
Setting up Tracking Portals
To set up a Tracking Portal for your brand, first head to the Tracking Portal tab on the brand.
From here you can configure a Tracking Domain and configure the design of your tracking portal.
For your Tracking Domain, typically we recommend a subdomain such as tracking.yourdomain.com or track.yourdomain.com, although the choice is yours.
First you will need to log into your Domain Name Control Panel to access DNS settings. Set up the same subdomain as a CNAME record and point this to tracking.shipmate.co.uk
Once the CNAME record has been provisioned, head back to the Shipmate web portal, enter the Tracking Domain and click Connect. Shipmate will attempt to resolve the CNAME and if this is successful, will provision your tracking portal and secure it via SSL.
You are then able to configure the design of your portal using the on-screen options to upload a logo and define the key colours you want the tracking portal to use. If you want more granular control over the colour scheme of your portal, click the Advanced tab to define colours for each individual element.
The logo may be a PNG or JPG image in a 3:1 ratio. We recommend transparent PNG files for the best results. You can add a website link that will be applied on your logo – for this we recommend linking to the brand's main website home page or customer support page.
A dynamic preview of your tracking portal will show you an outline of how your portal will look. To see your edits as a web page, click the Live Preview button in the top-right corner of the dynamic preview image.
You can enable Customer Service Notes that will appear beneath the tracking events when a shipment is being displayed. Use this to help your customers find out more information about their order, or how to obtain help in case they need it.
Once you are happy with the way your tracking portal will look, click the Publish button. Changes will be applied immediately.
Adding Brands
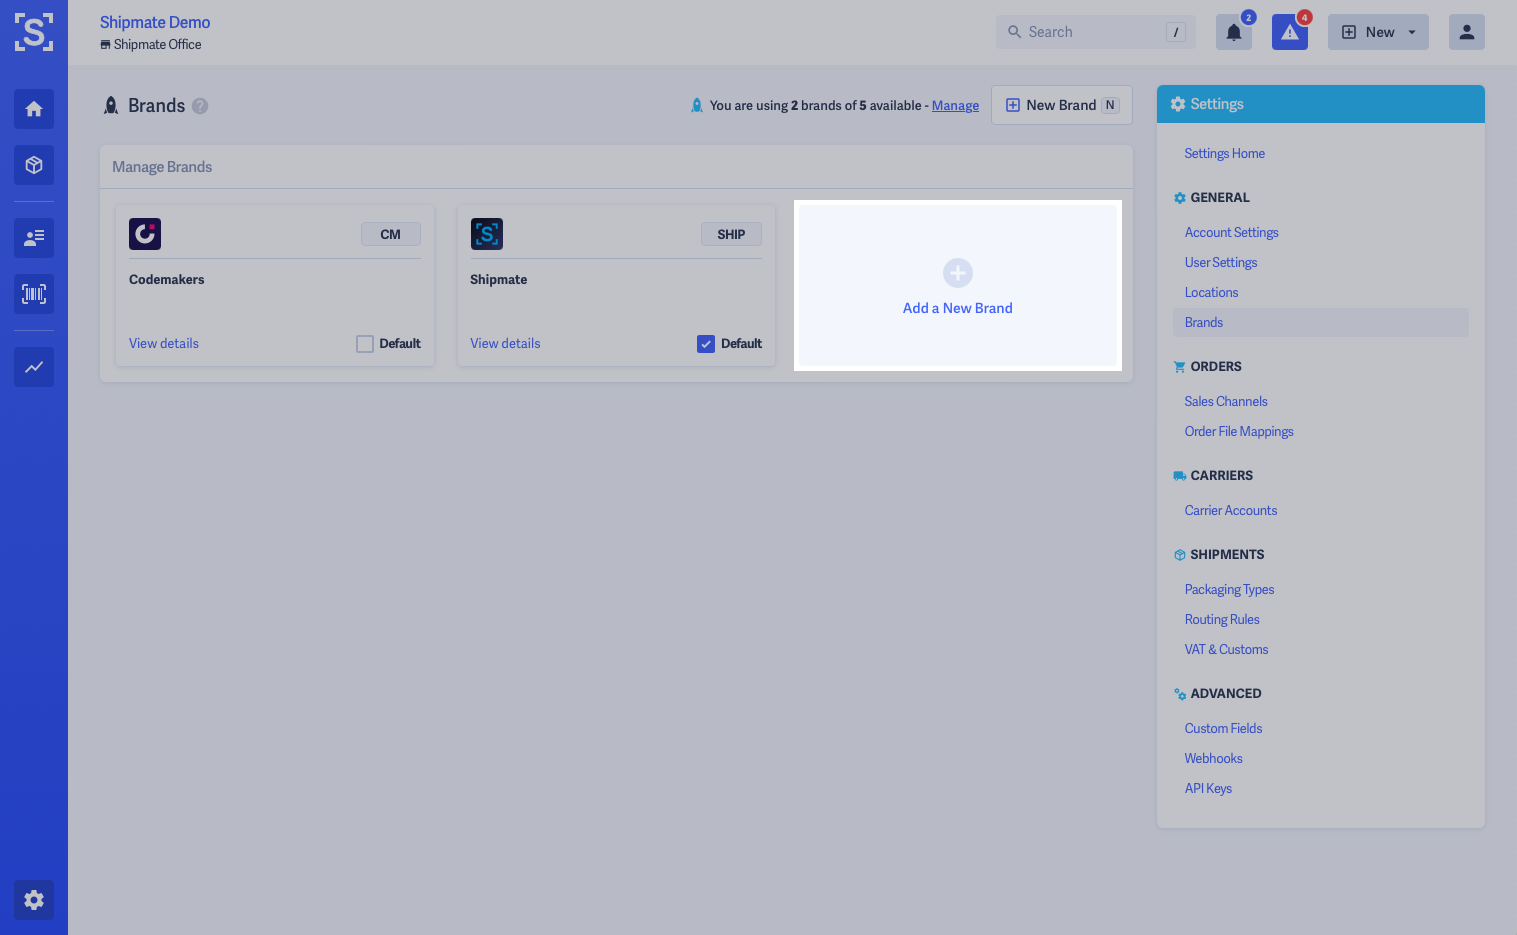
Each Shipmate account includes one Brand as standard, but you can add more for an additional monthly fee. Before being able to add another Brand, you may first need to upgrade your account using the on-screen options.
Brands are charged as a 'bolt-on' service and you can flex the number of brands on your account up and down throughout the lifetime of your Shipmate account. Further details are shown on the upgrade pop-up that appears within the web portal.
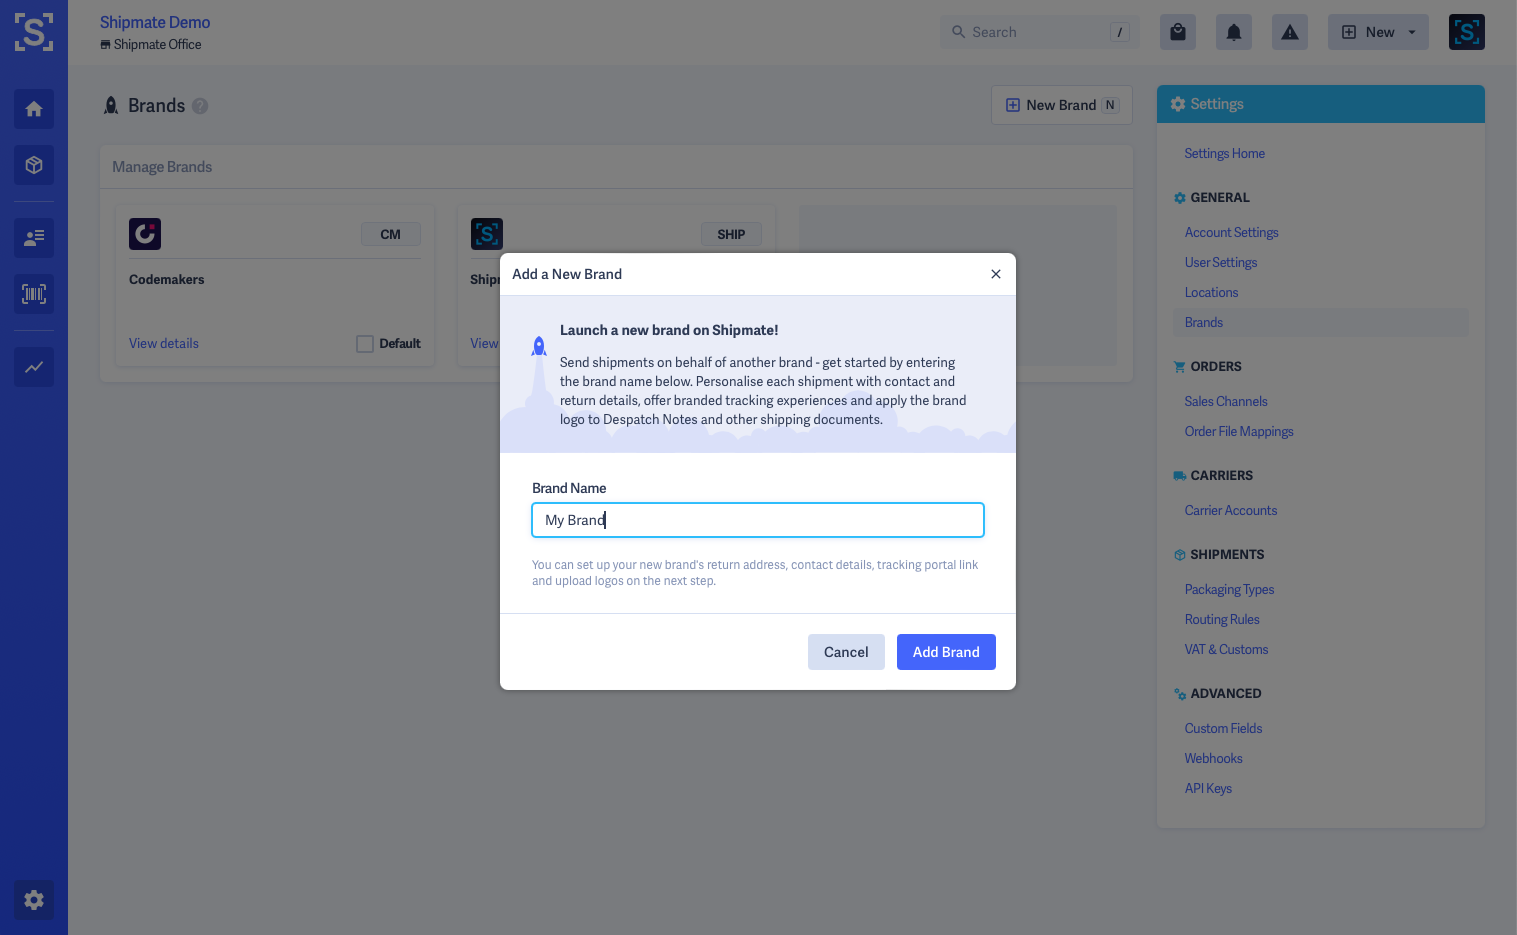
Once your account is upgraded, simply click the New Brand button to start adding your new brand. The pop-up first asks for the brand's name - enter this and click the Add Brand button.
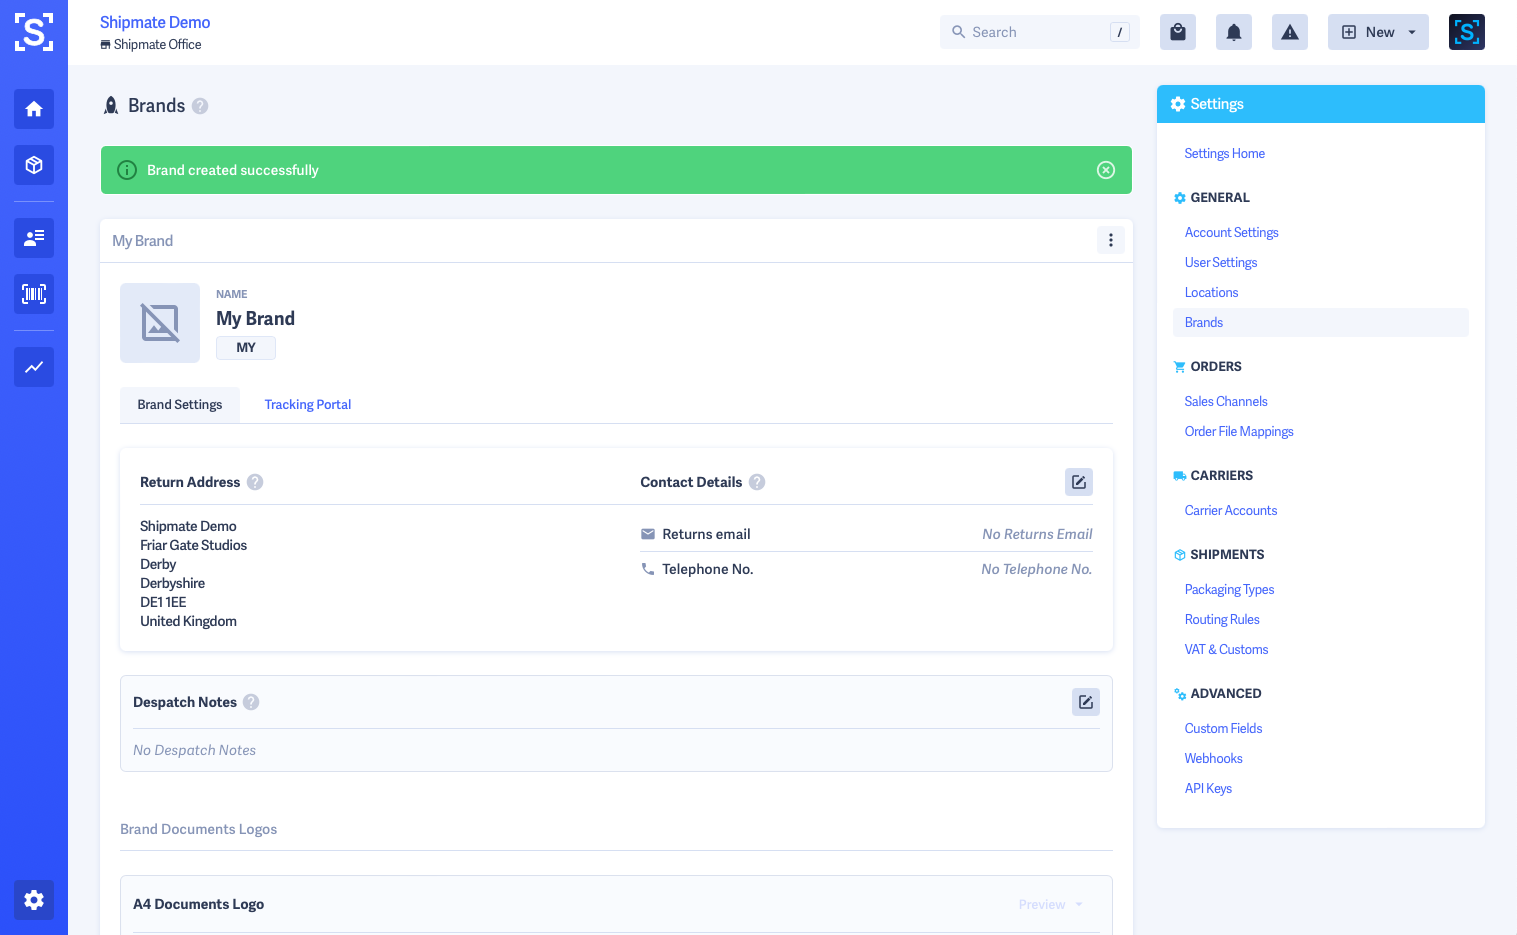
Your newly created Brand will then be displayed and you can edit all the details, upload logos and set the tracking portal URL.

Setting a Default Brand
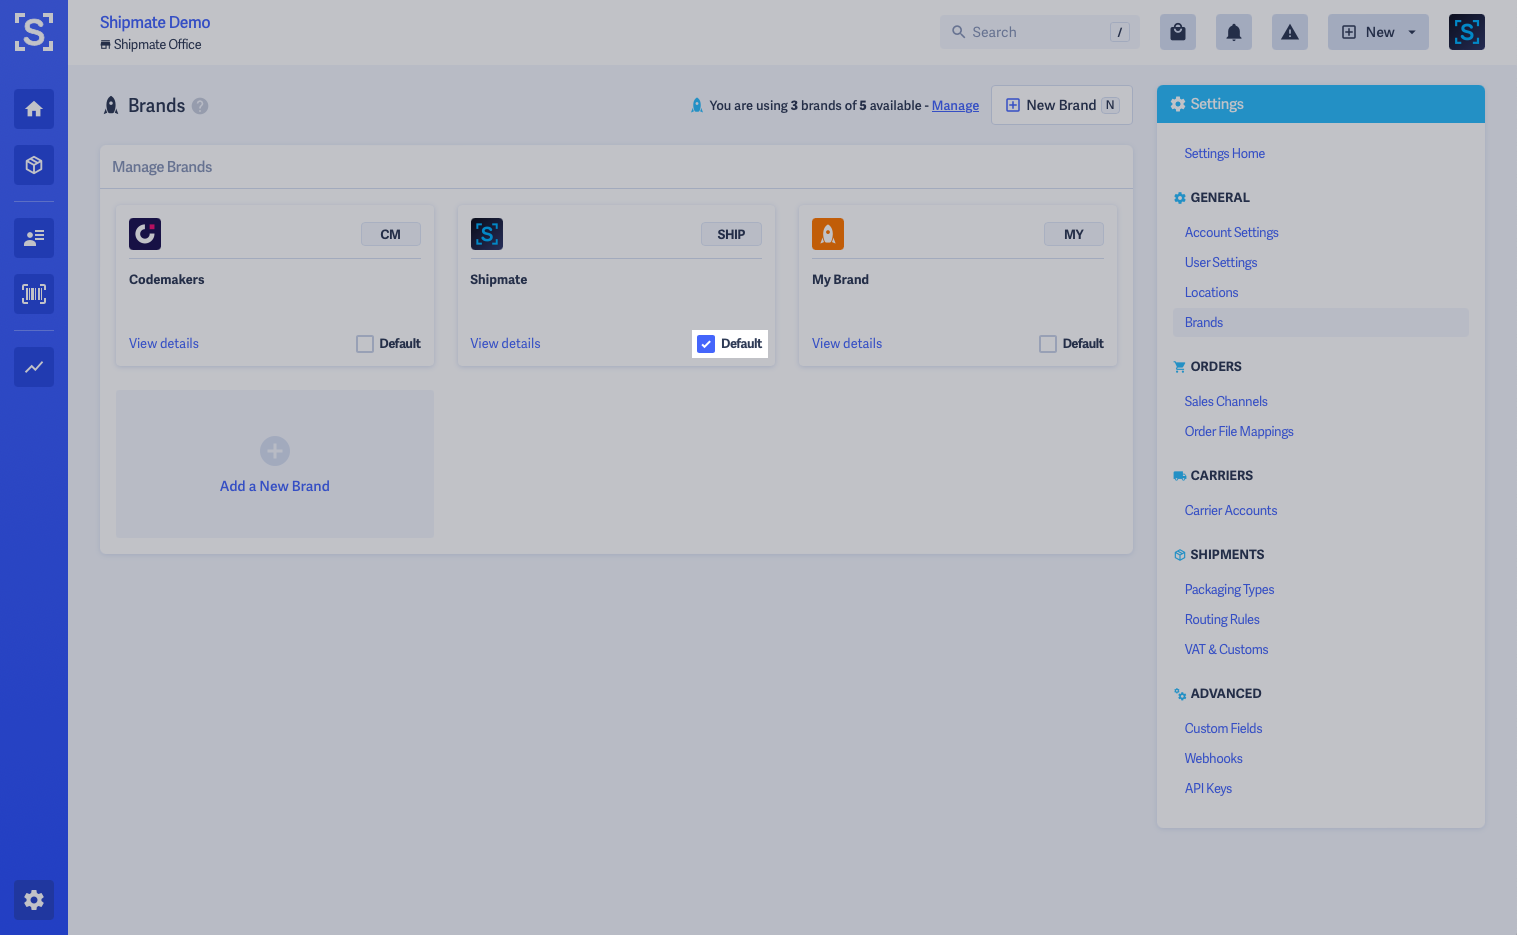
If you have multiple Brands on your Shipmate account, you can change the Default Brand from the Brands list by checking the Default checkbox on the Brand you want to make default.
The Default Brand is then applied automatically when creating Shipments if a Brand isn't otherwise specified.
Brands are applied to Shipments in the following priority order:
- The Brand specified via API, CSV file or selected in the web portal
- The Brand applied to the originating Channel, if configured
- The Default Brand

Applying Brands to Channels
Each Channel can have a different Brand applied to it, meaning Shipments created from that Channel will automatically have the selected Brand applied to them upon creation.
This is ideal if you operate multiple websites with different brands and want to personalise the customer experience for purchases made on each of your websites through one Shipmate account.
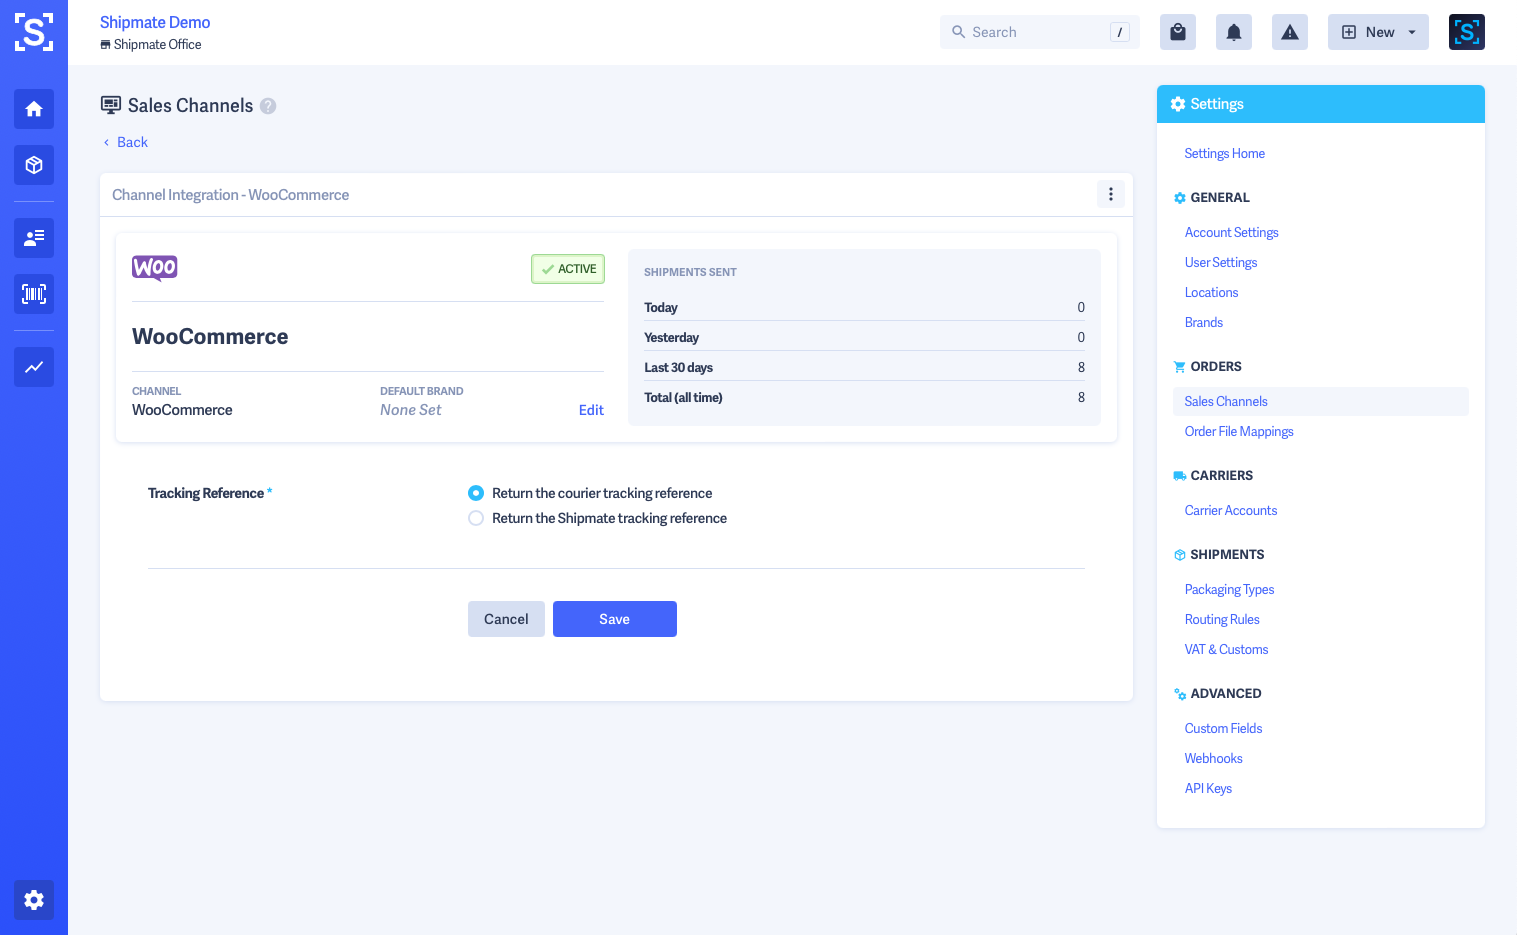
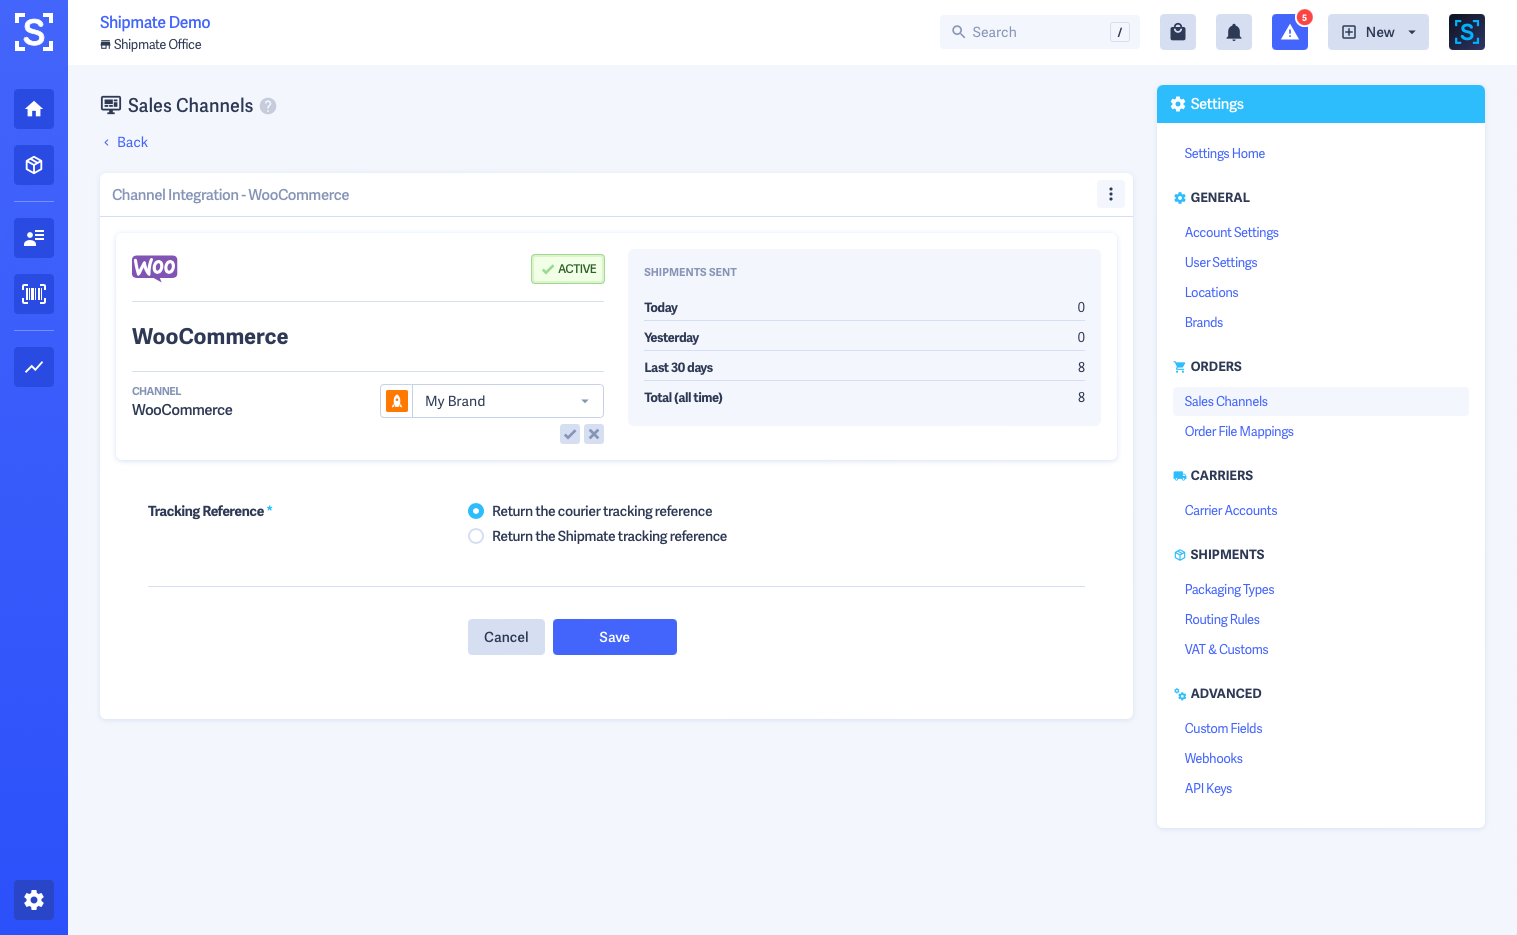
To apply a Brand to a Channel, first navigate to the Channel from Settings > Channels and then select the Channel you wish to update.
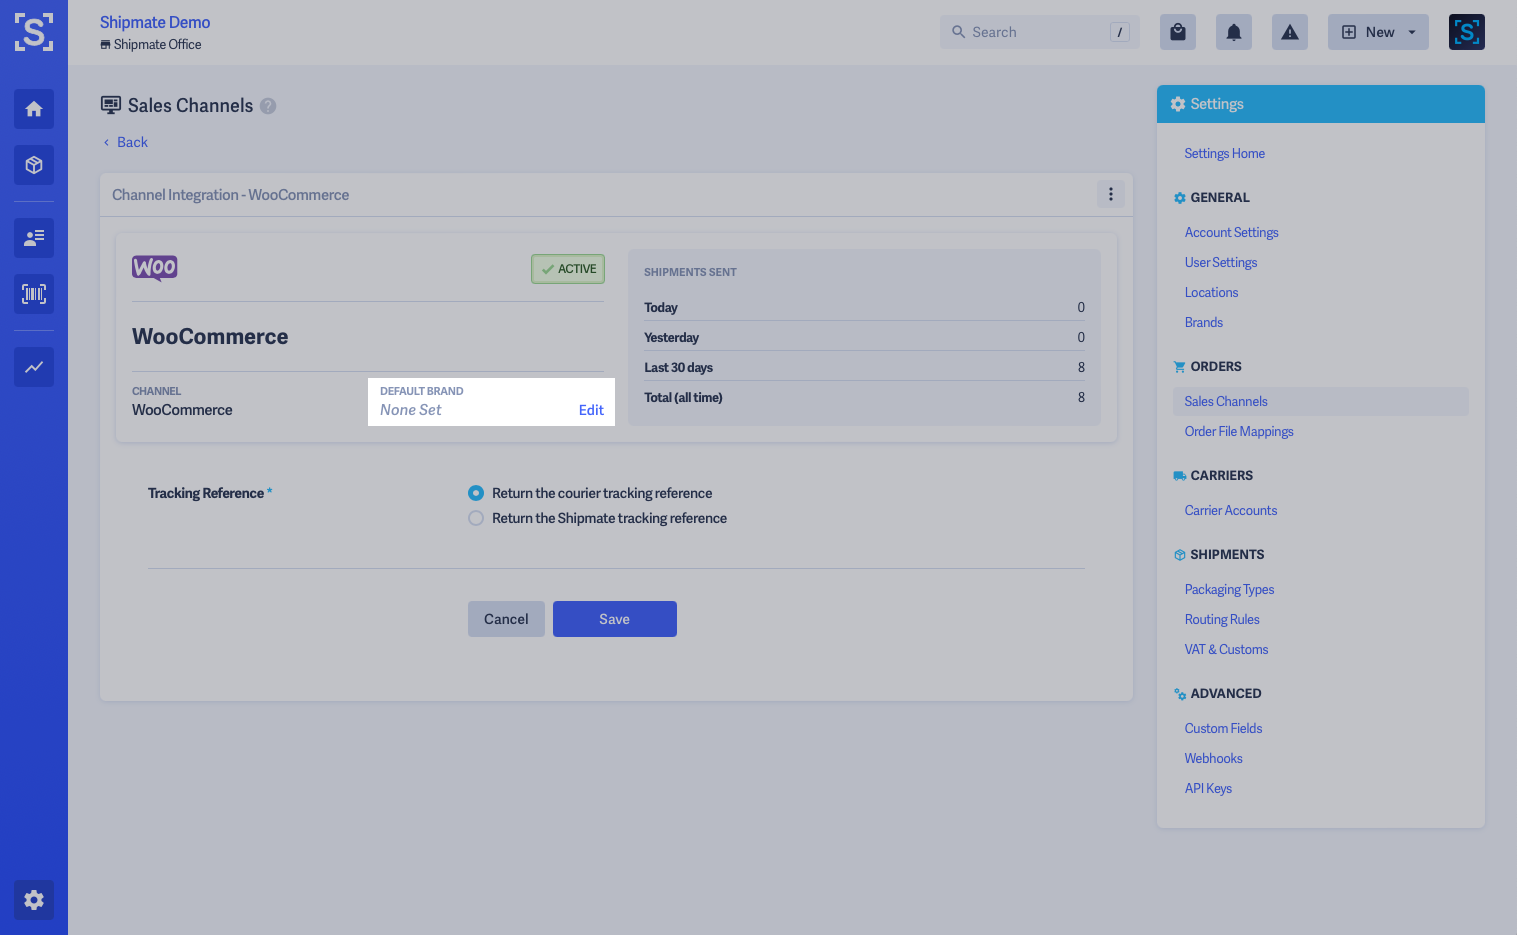
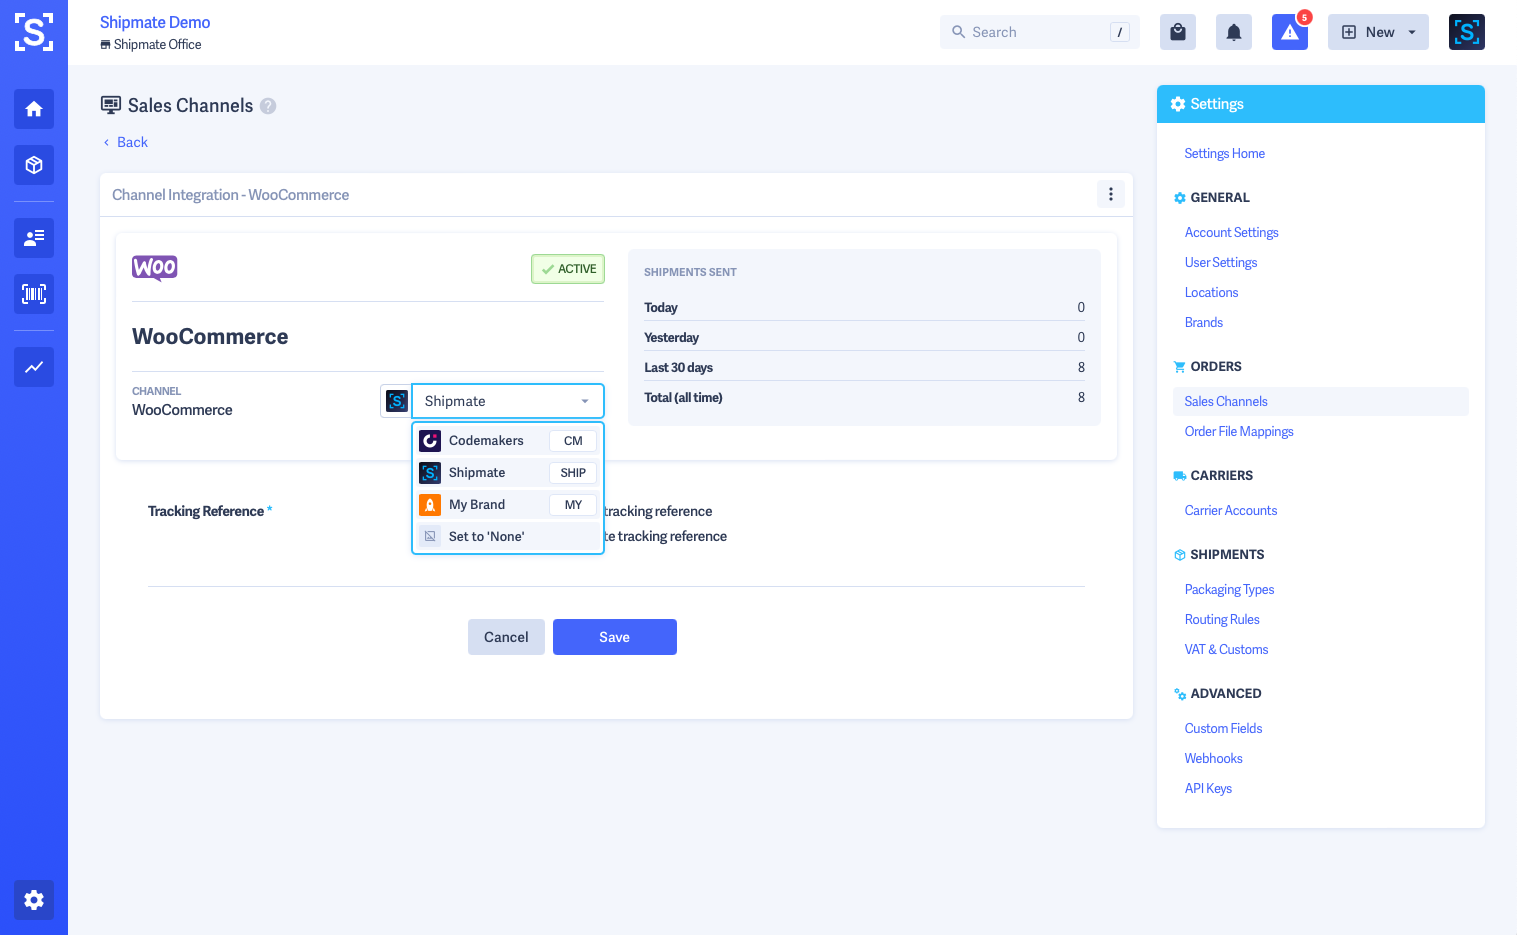
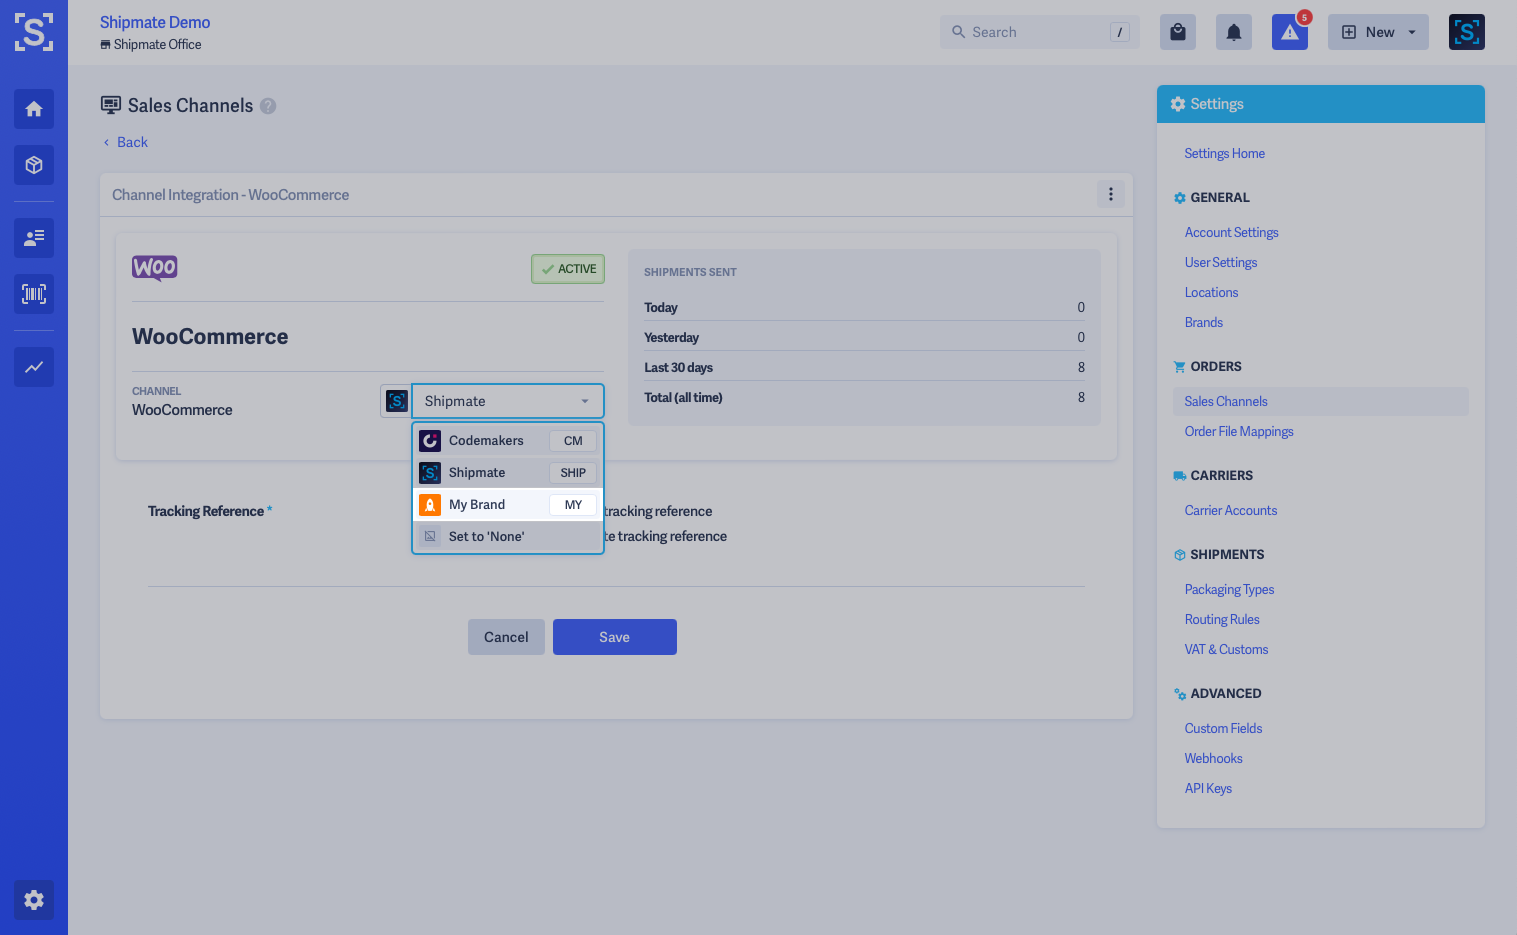
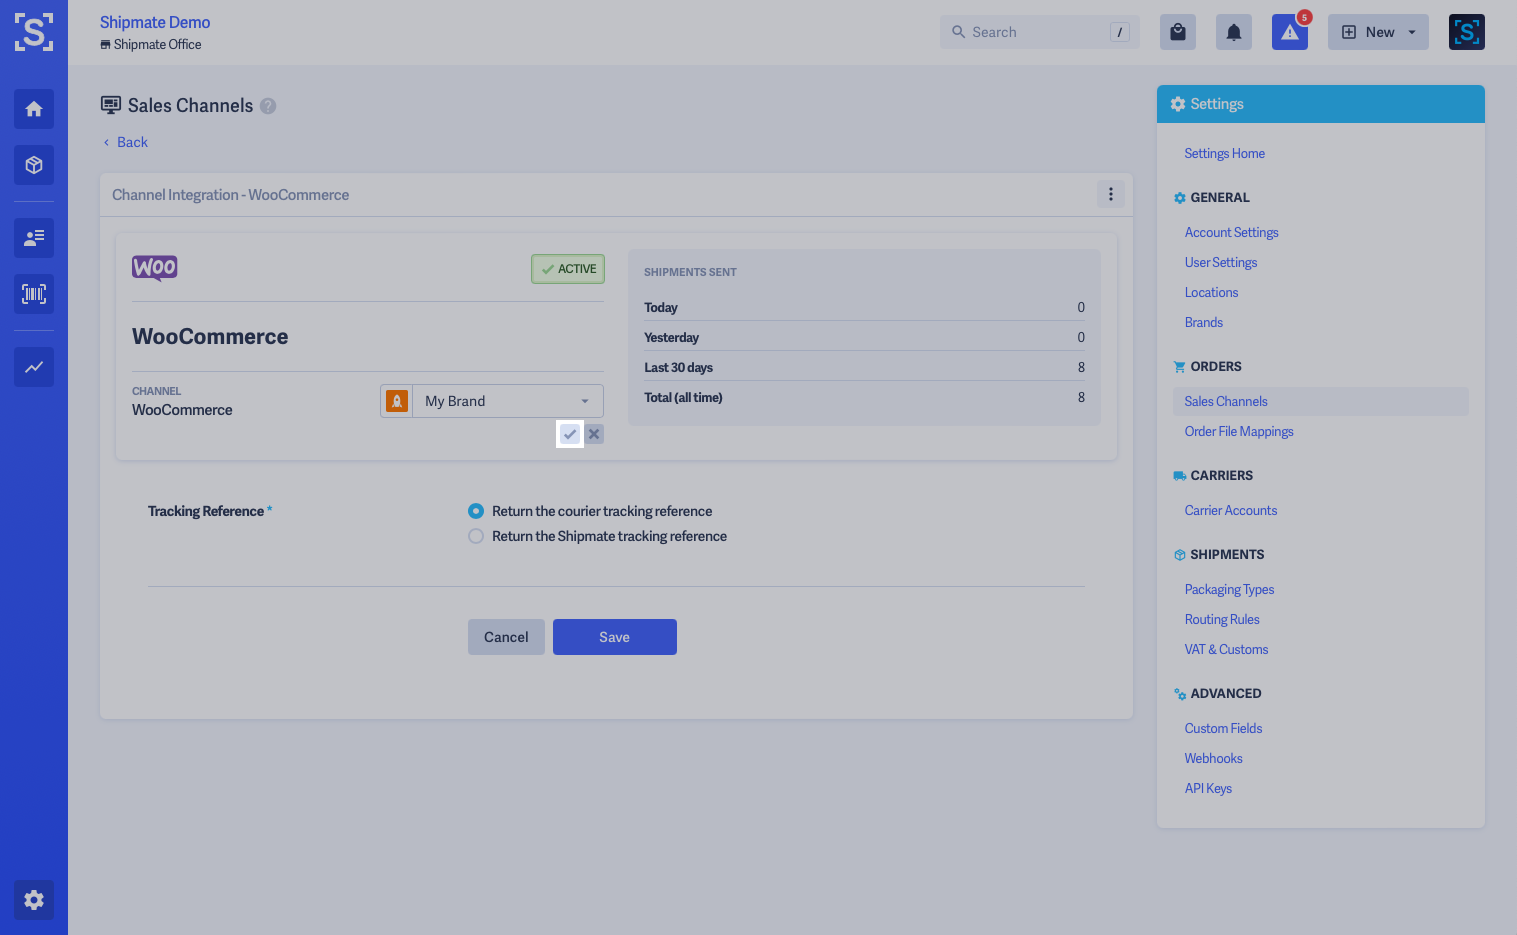
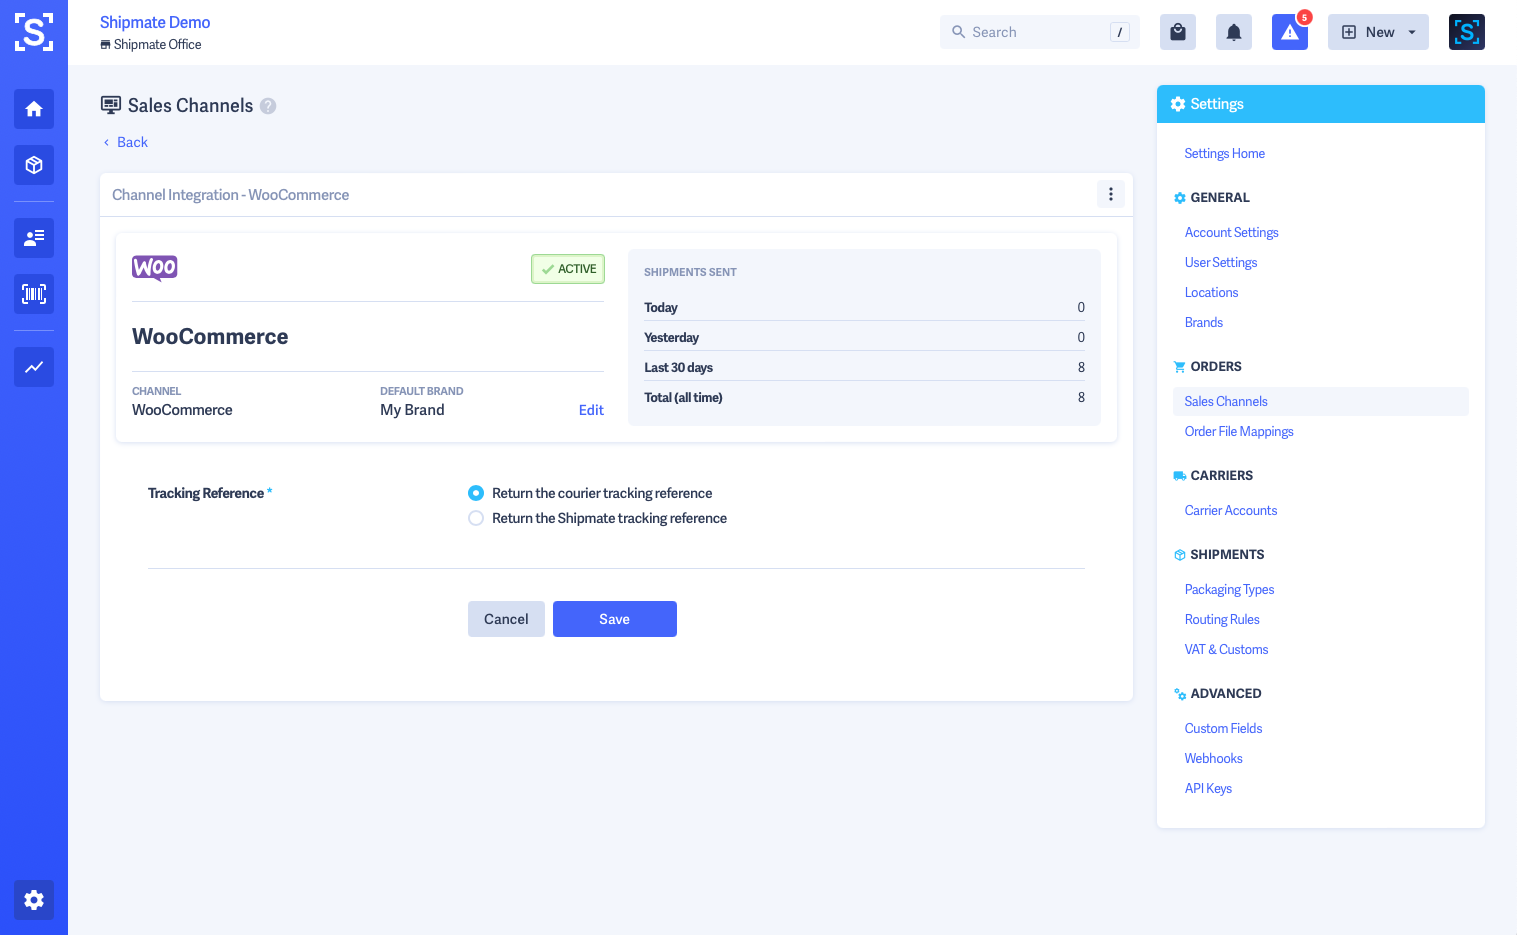
In the summary area at the top of the screen you will see that initially the Brand is stated as None Set. Click the Edit button to apply the Brand corresponding to this Channel - a drop-down menu will show all the available Brands on your account. Select the Brand you wish to apply then click the tick button to save your changes.
The selected Brand will then be automatically applied to all Shipments from this Channel, unless otherwise stated.
Applying Brands to Shipments
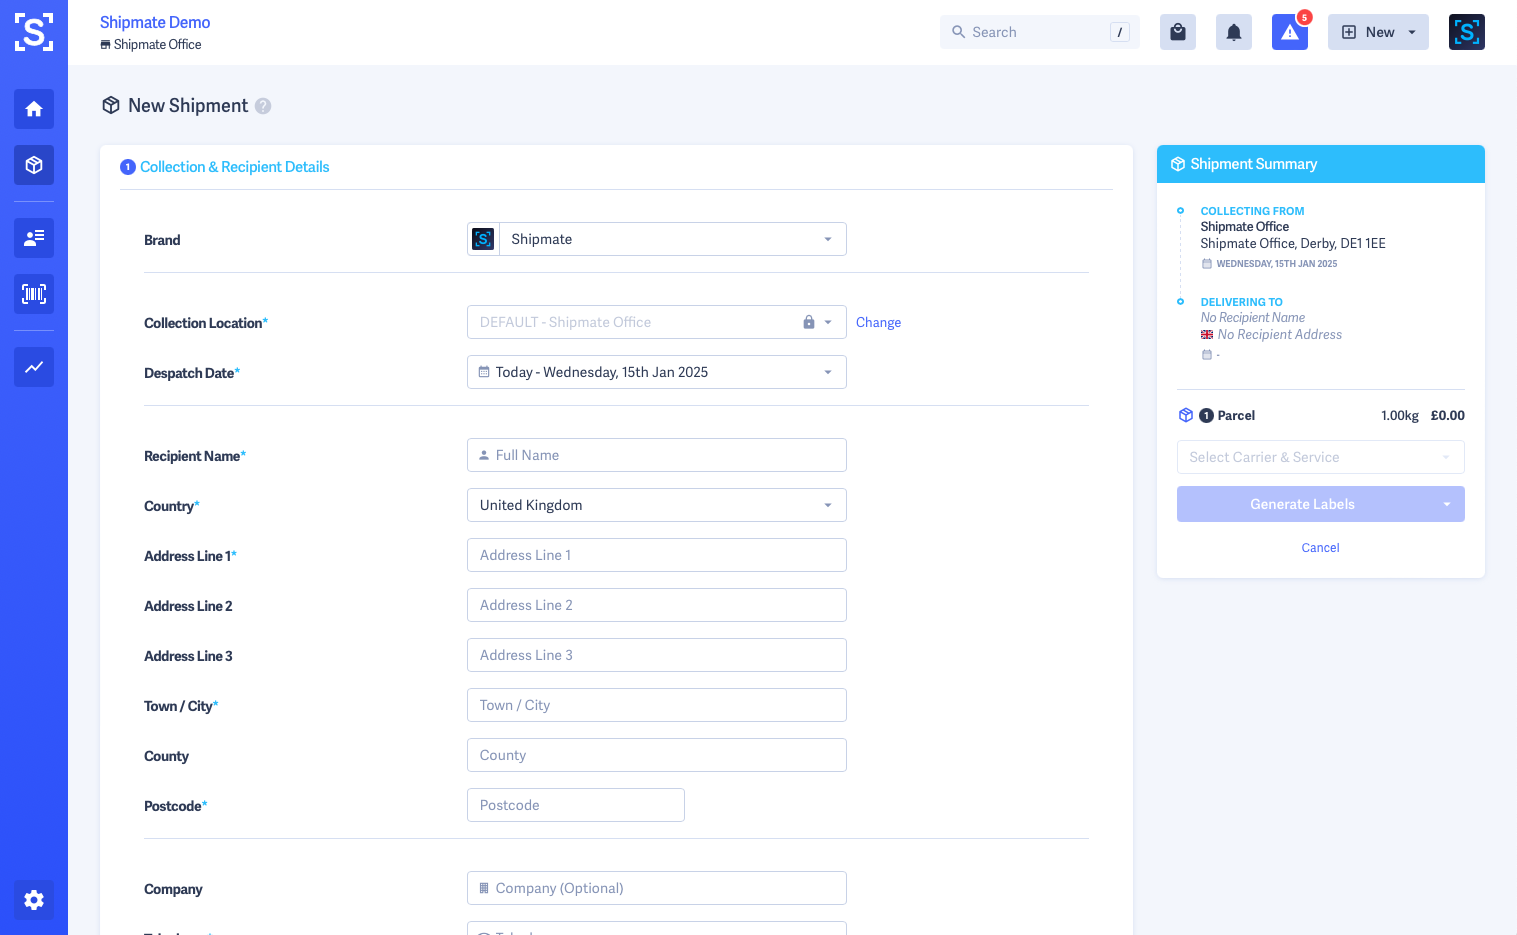
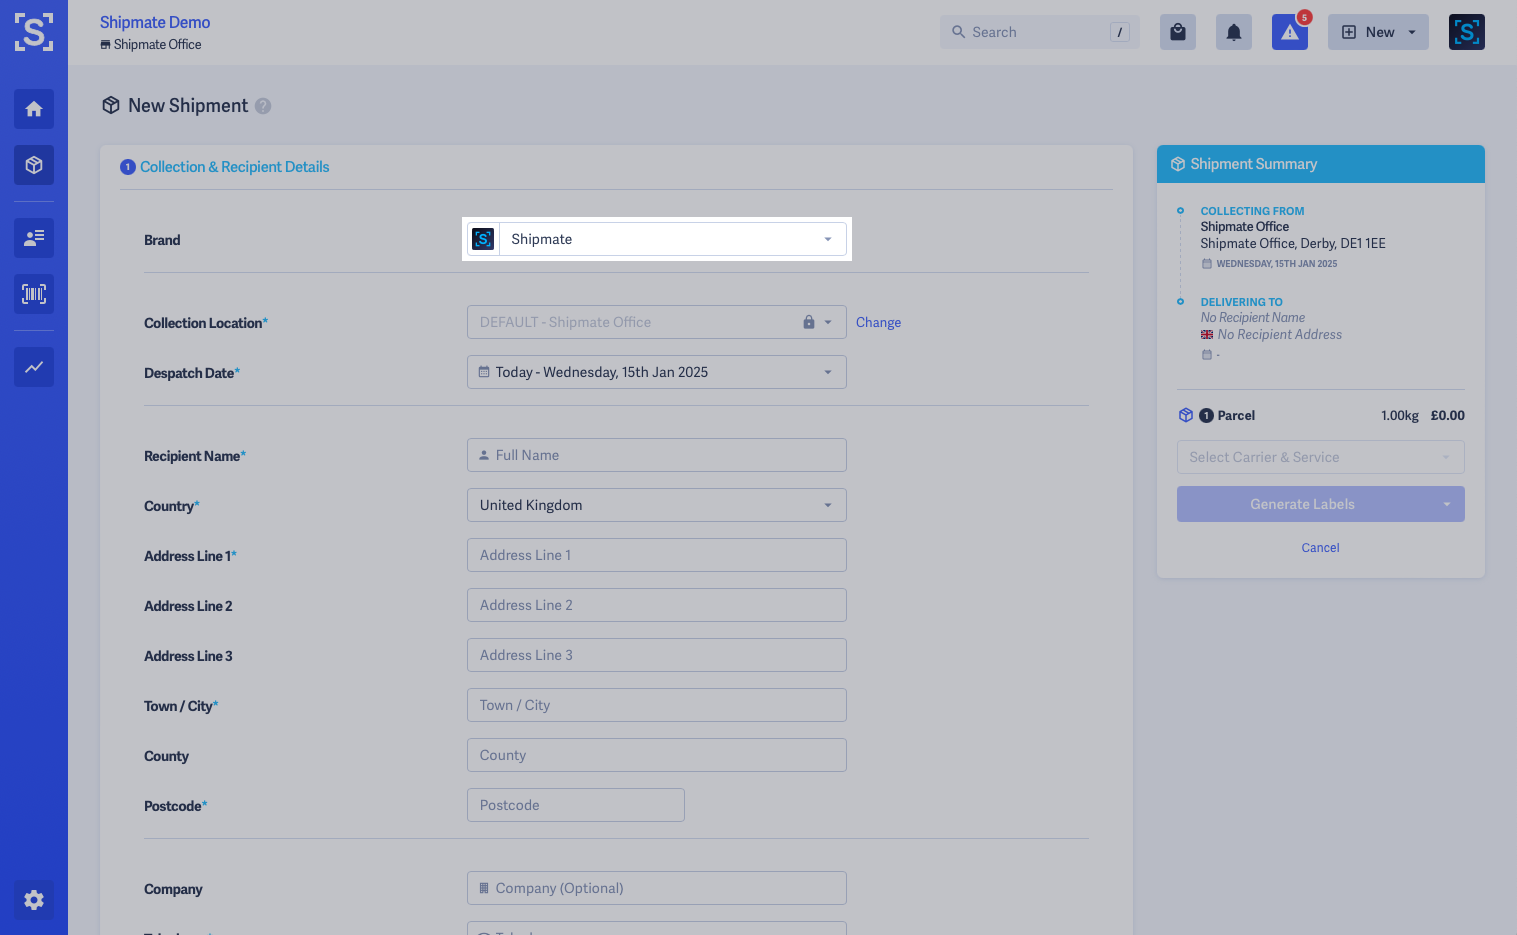
If you have multiple Brands configured on your Shipmate account, you are able to select the Brand applying to each individual Shipment when creating them in the web portal.
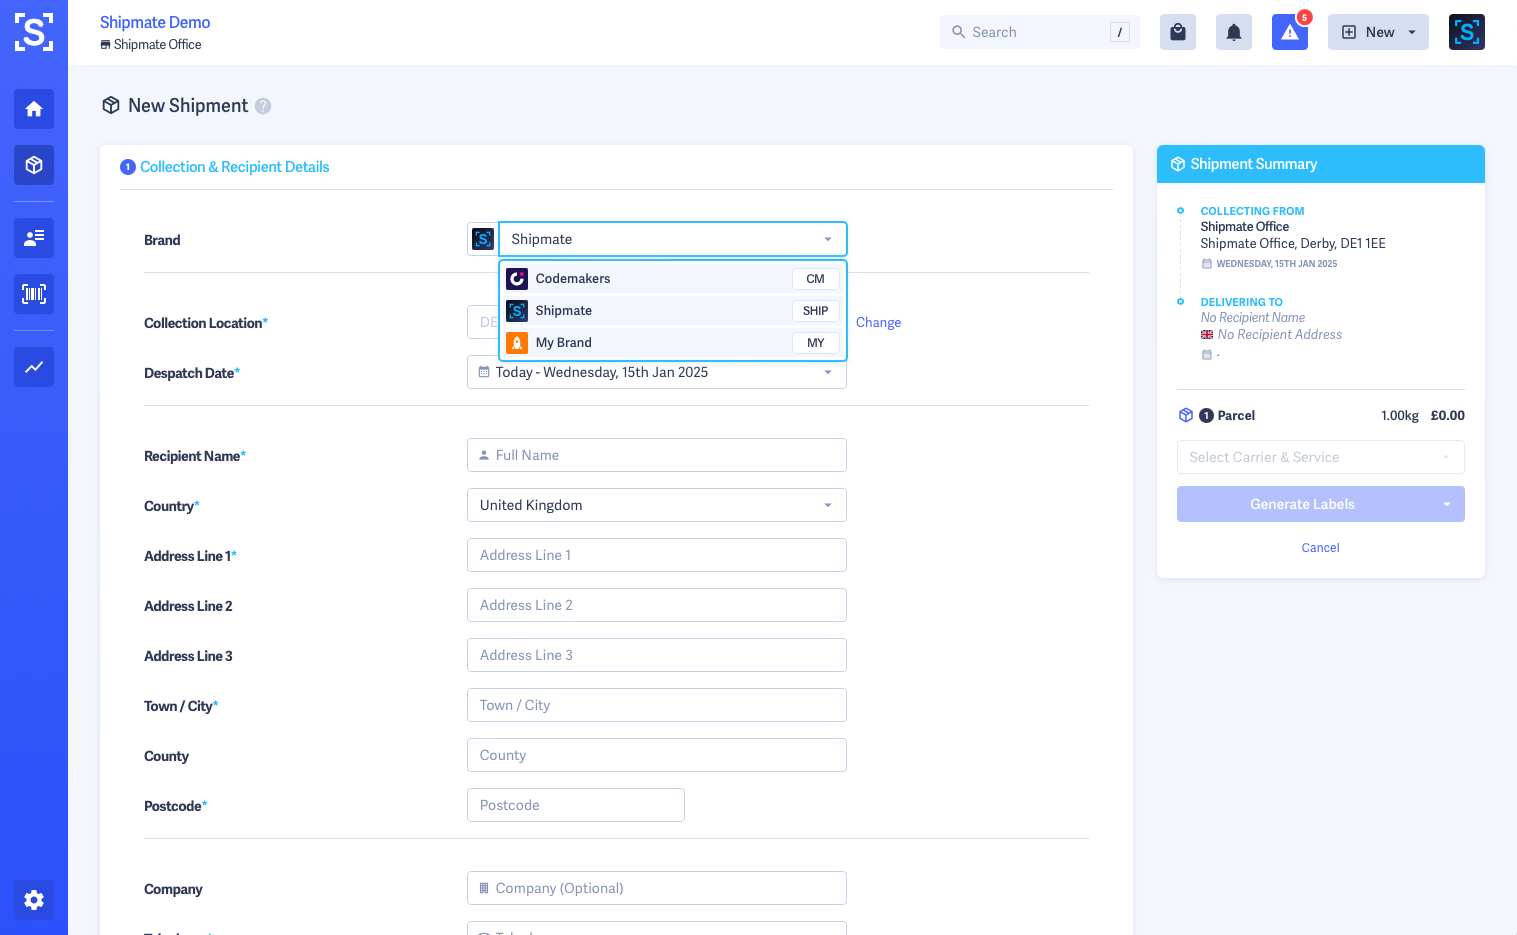
The first option on the New Shipment page is the Brand drop-down list, which will be pre-selected with your account's Default Brand.
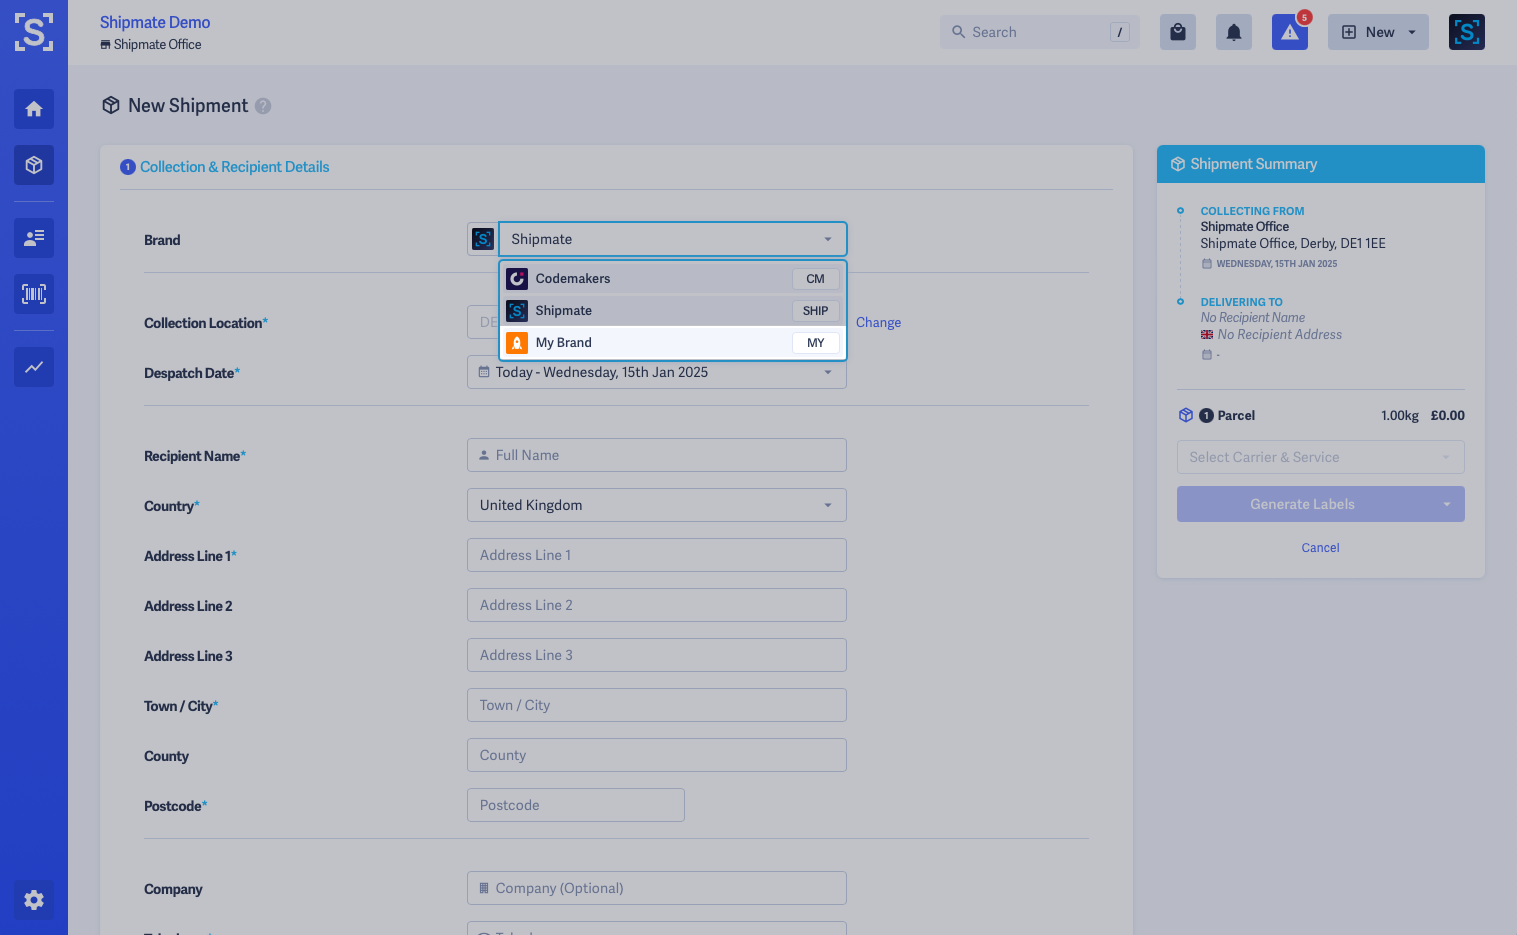
Simply click into the drop-down menu to select another Brand, then continue creating your Shipment as normal.
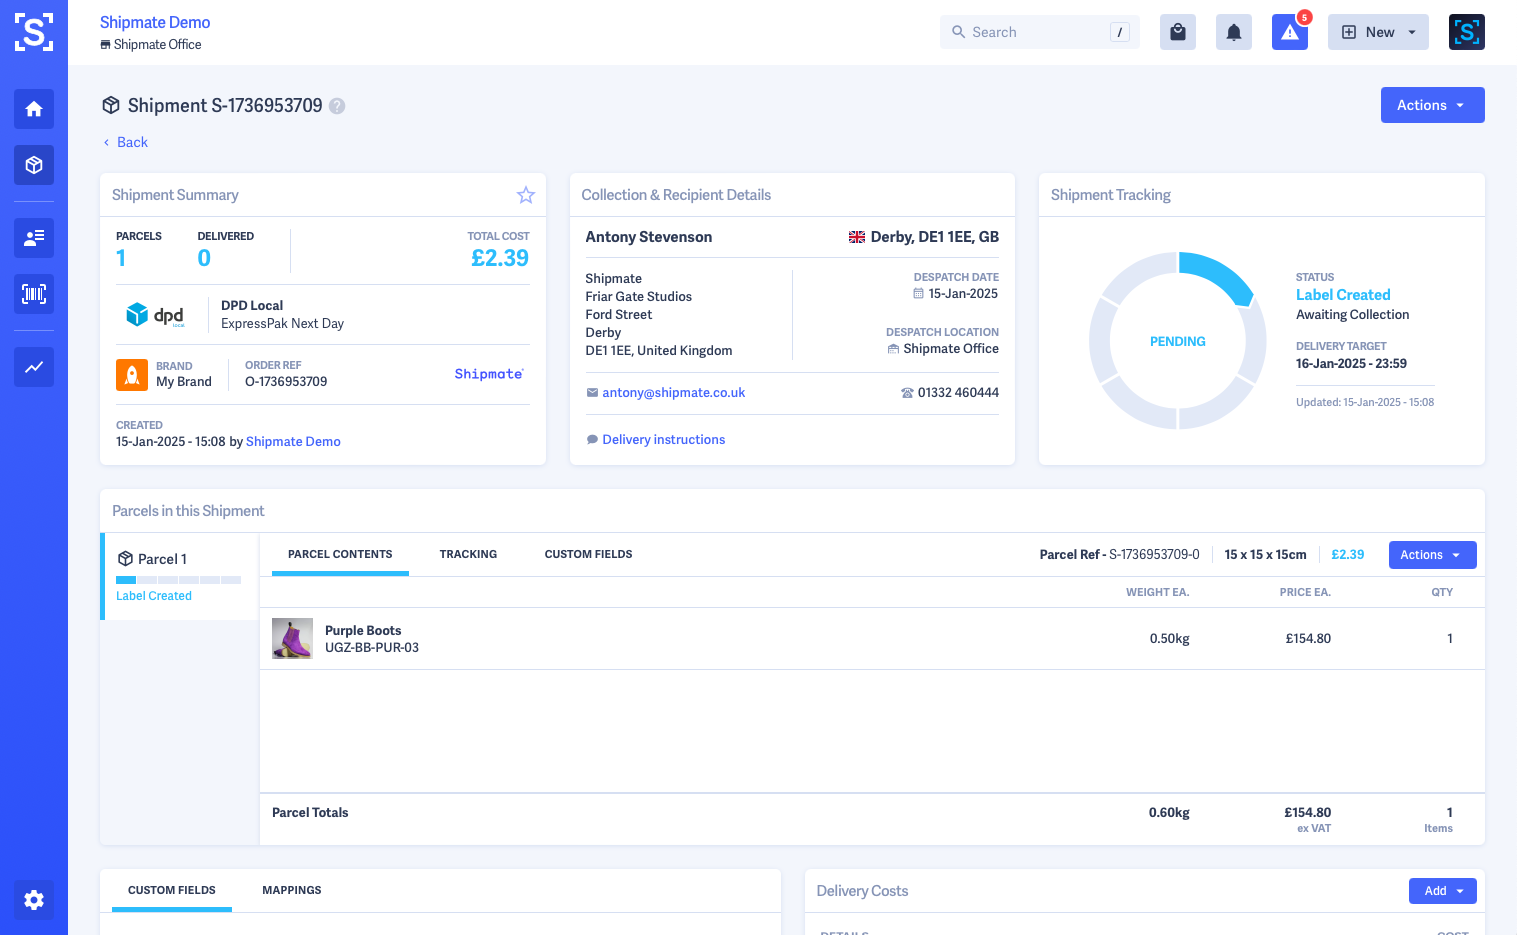
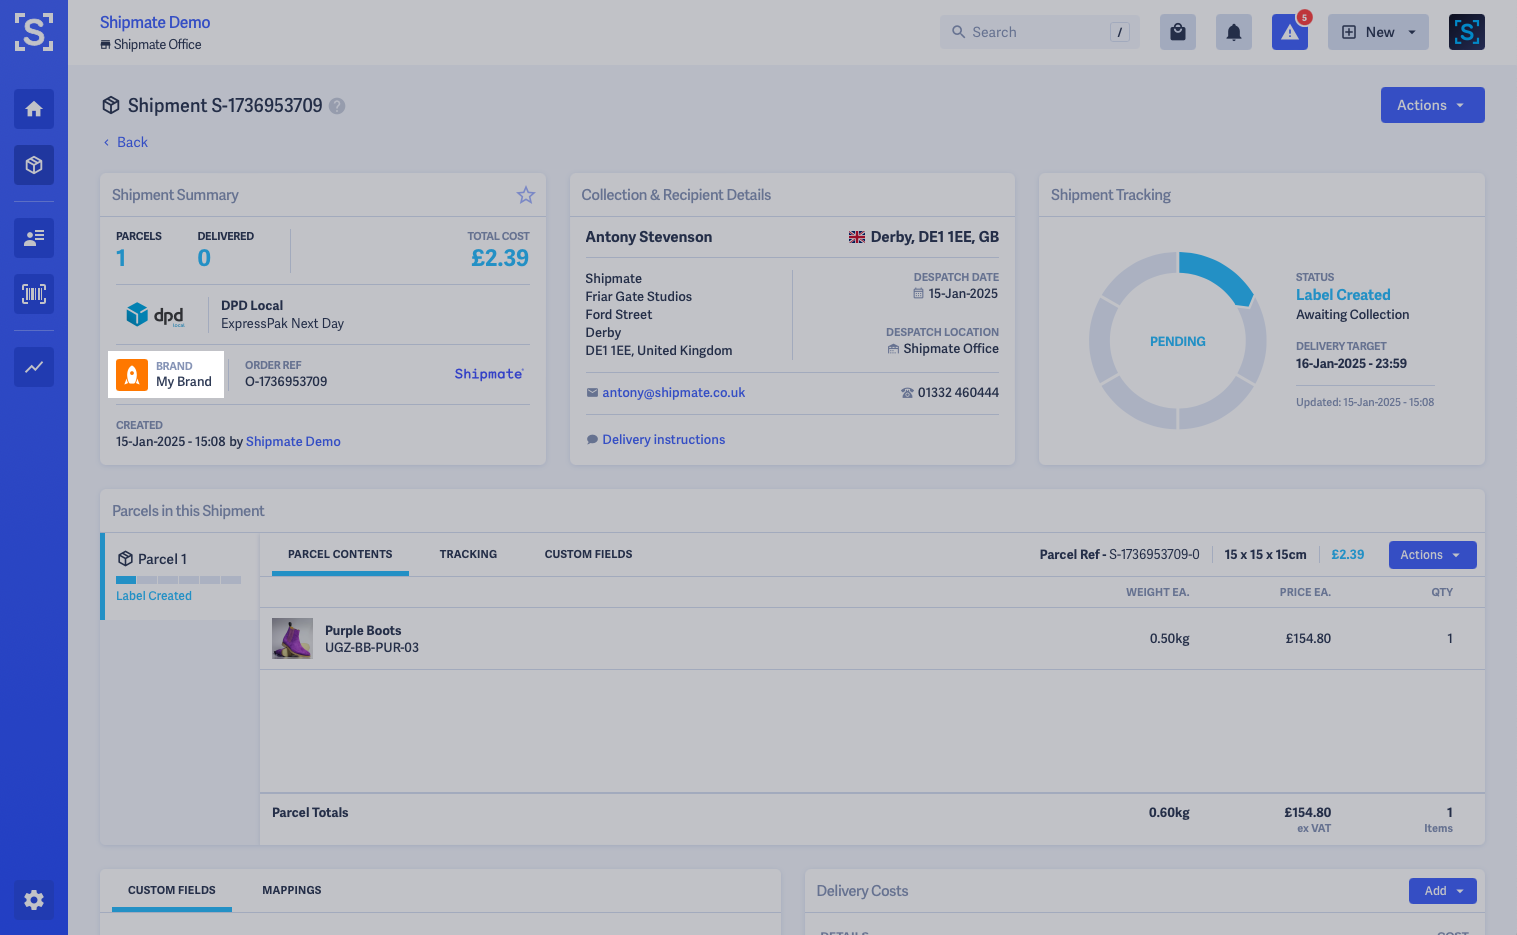
The selected Brand will be shown on the Shipment View page in the Shipment Summary box.
Using Brands in Routing Rules
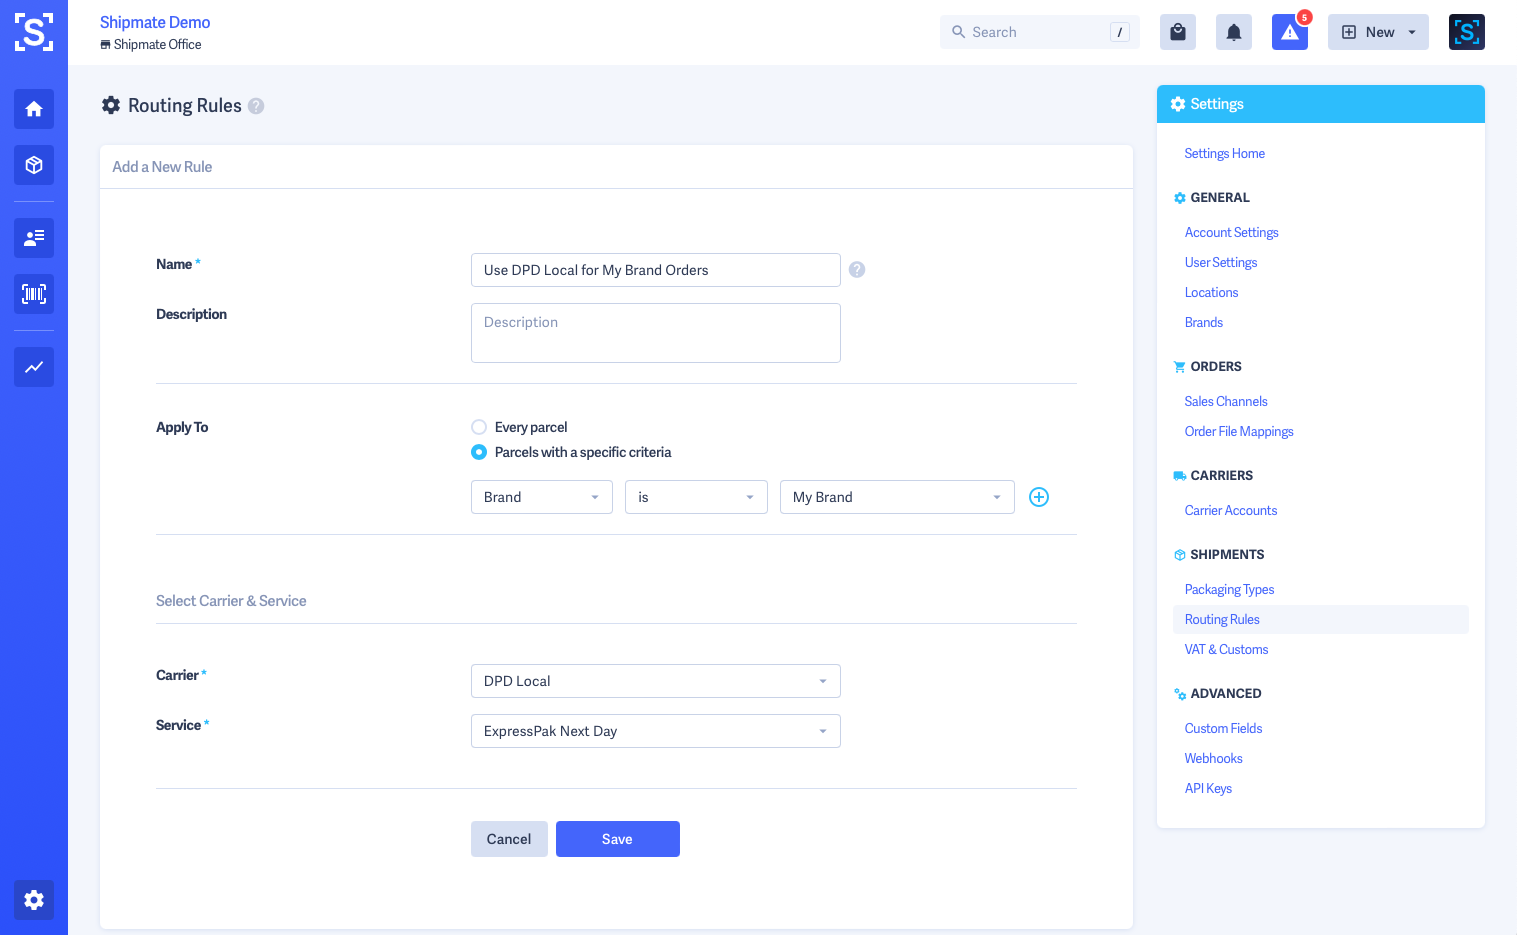
You can use Routing Rules to specify Delivery Services from particular Carrier Accounts when sending Shipments on behalf of any particular Brand.
This is ideal when you have different Carrier Accounts for your different Brands, or the type of product you ship requires varying service levels etc.
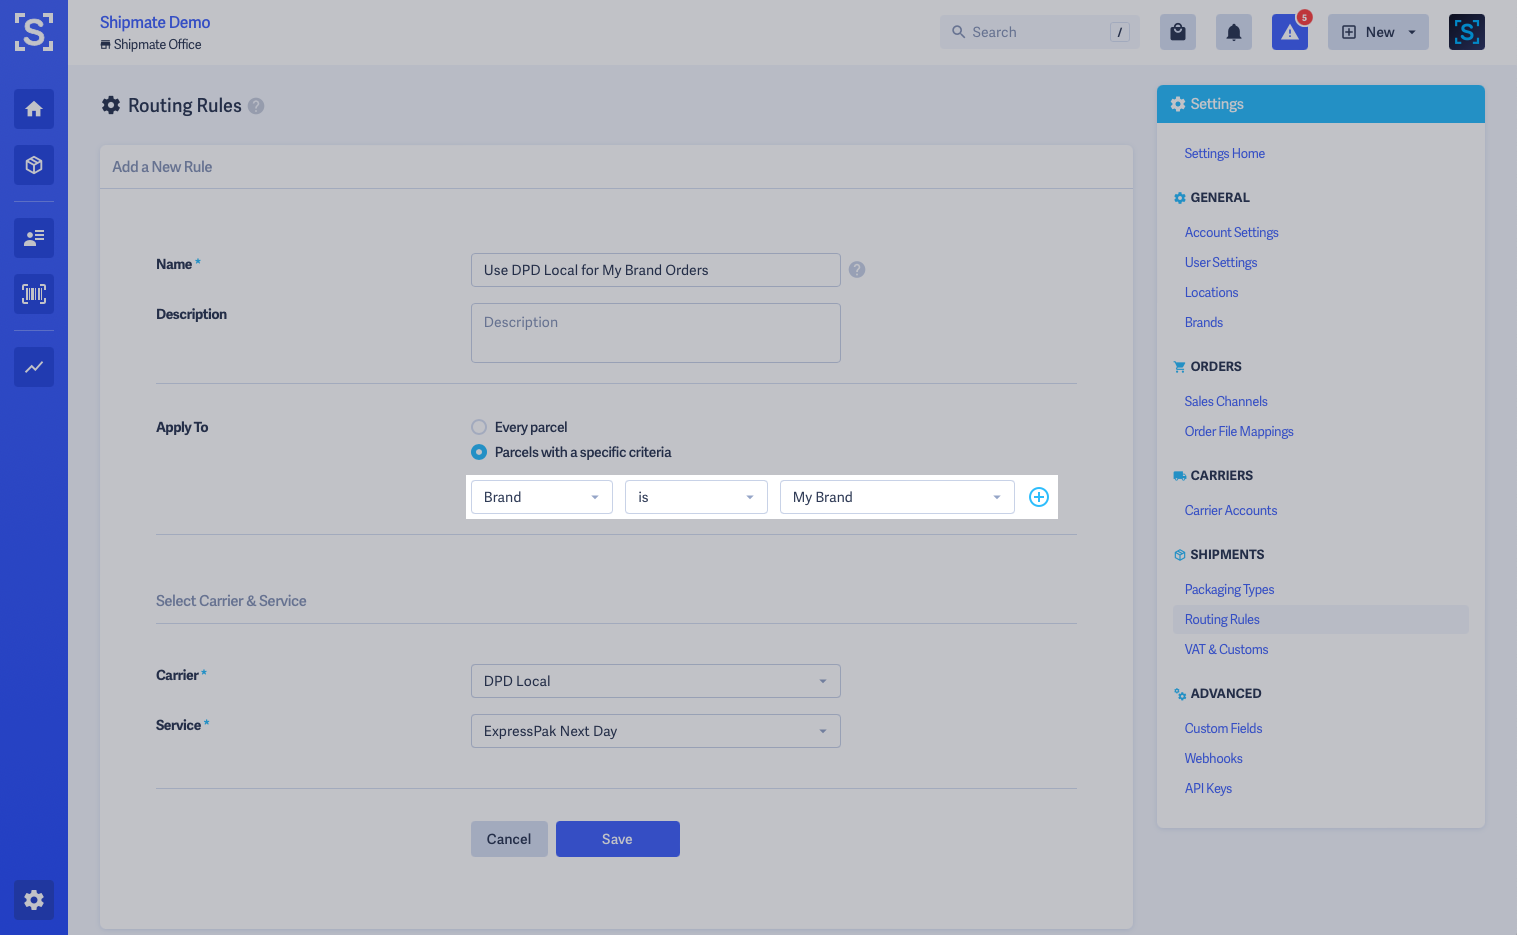
When creating Routing Rules, you are able to apply Brand as a condition alongside other criteria to provide Shipmate with the intelligence to automatically select the correct Delivery Service for each Shipment.
Searching Shipments by Brand
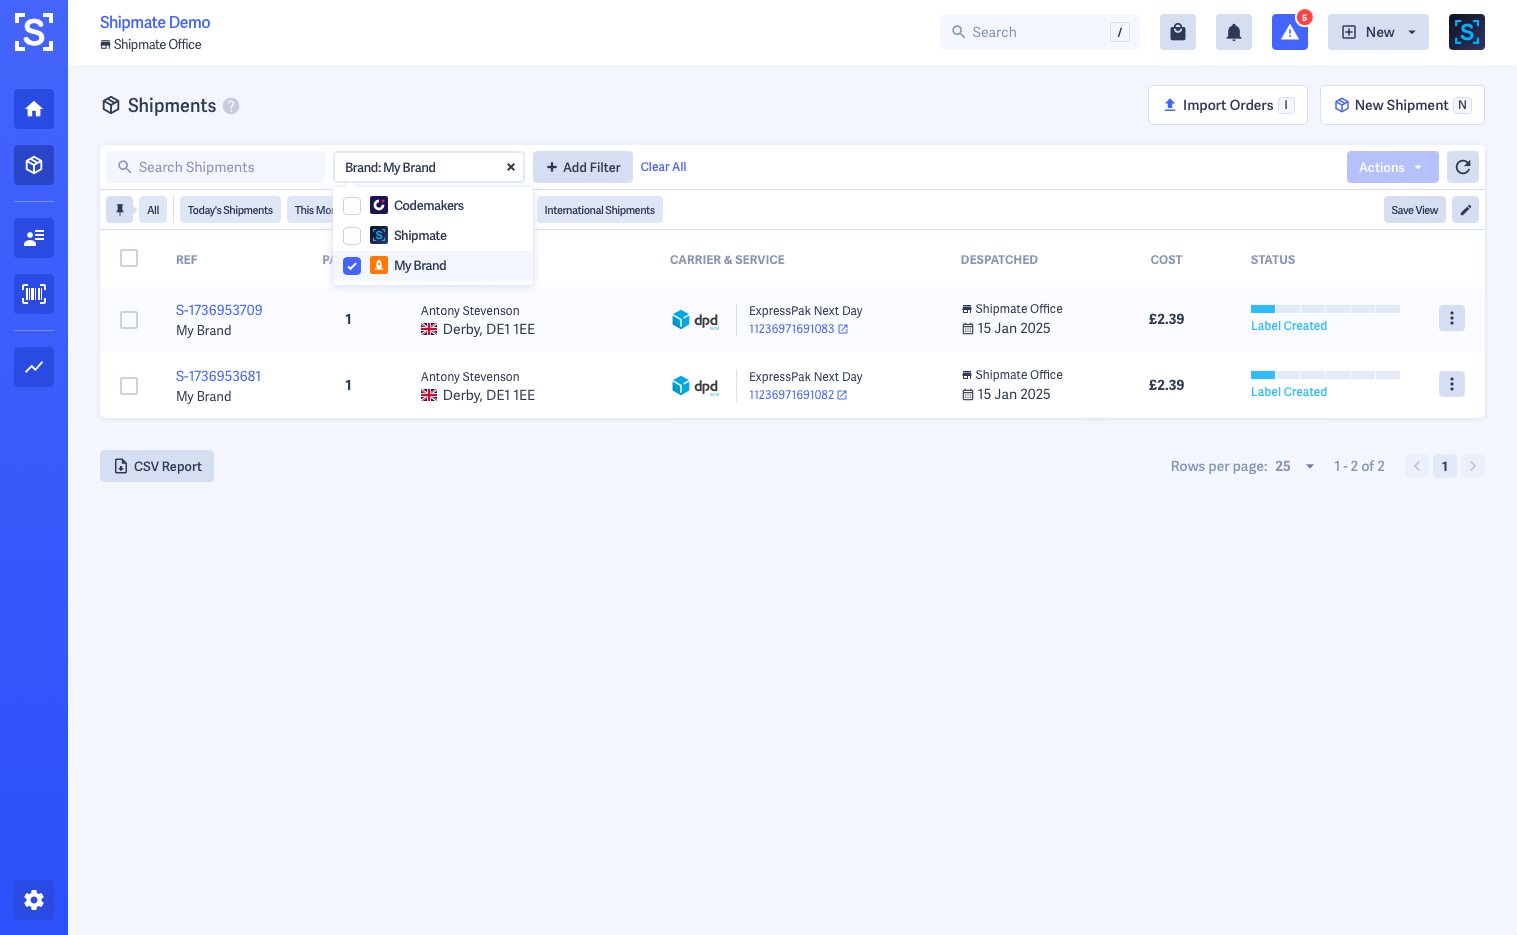
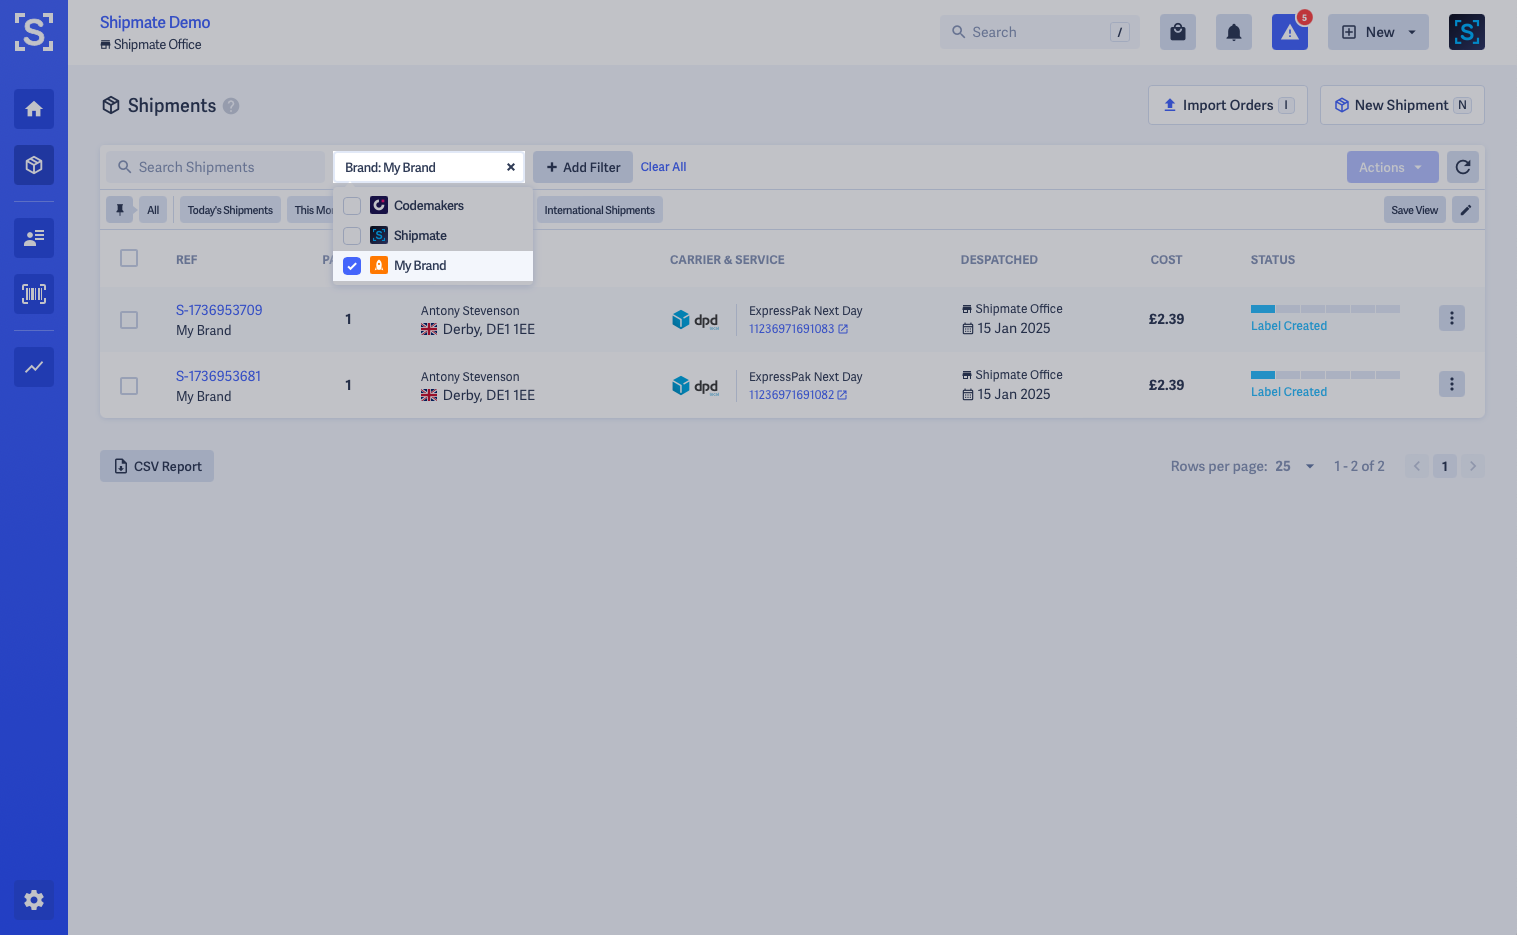
From the Shipments list, you can apply a Brand filter to narrow down Shipments from just one or a selected number of Brands.
Simply click the Add Filter button, select the Brand option then check one or more Brands to apply the filter dynamically.
Carriers
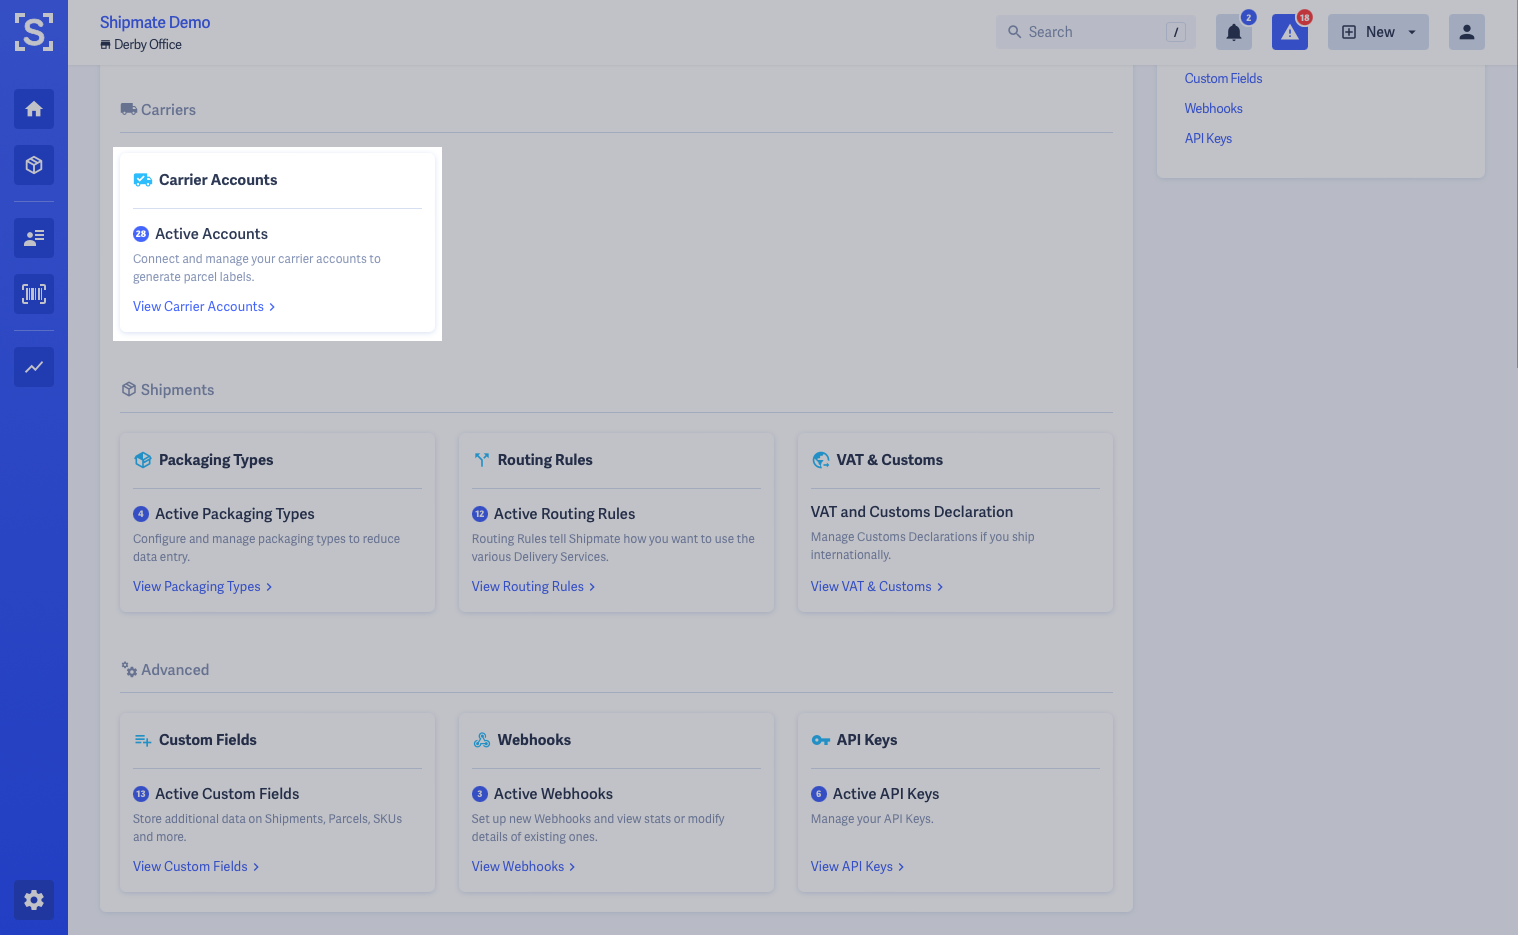
You can access Carrier Accounts from the Carriers section of the Settings page.
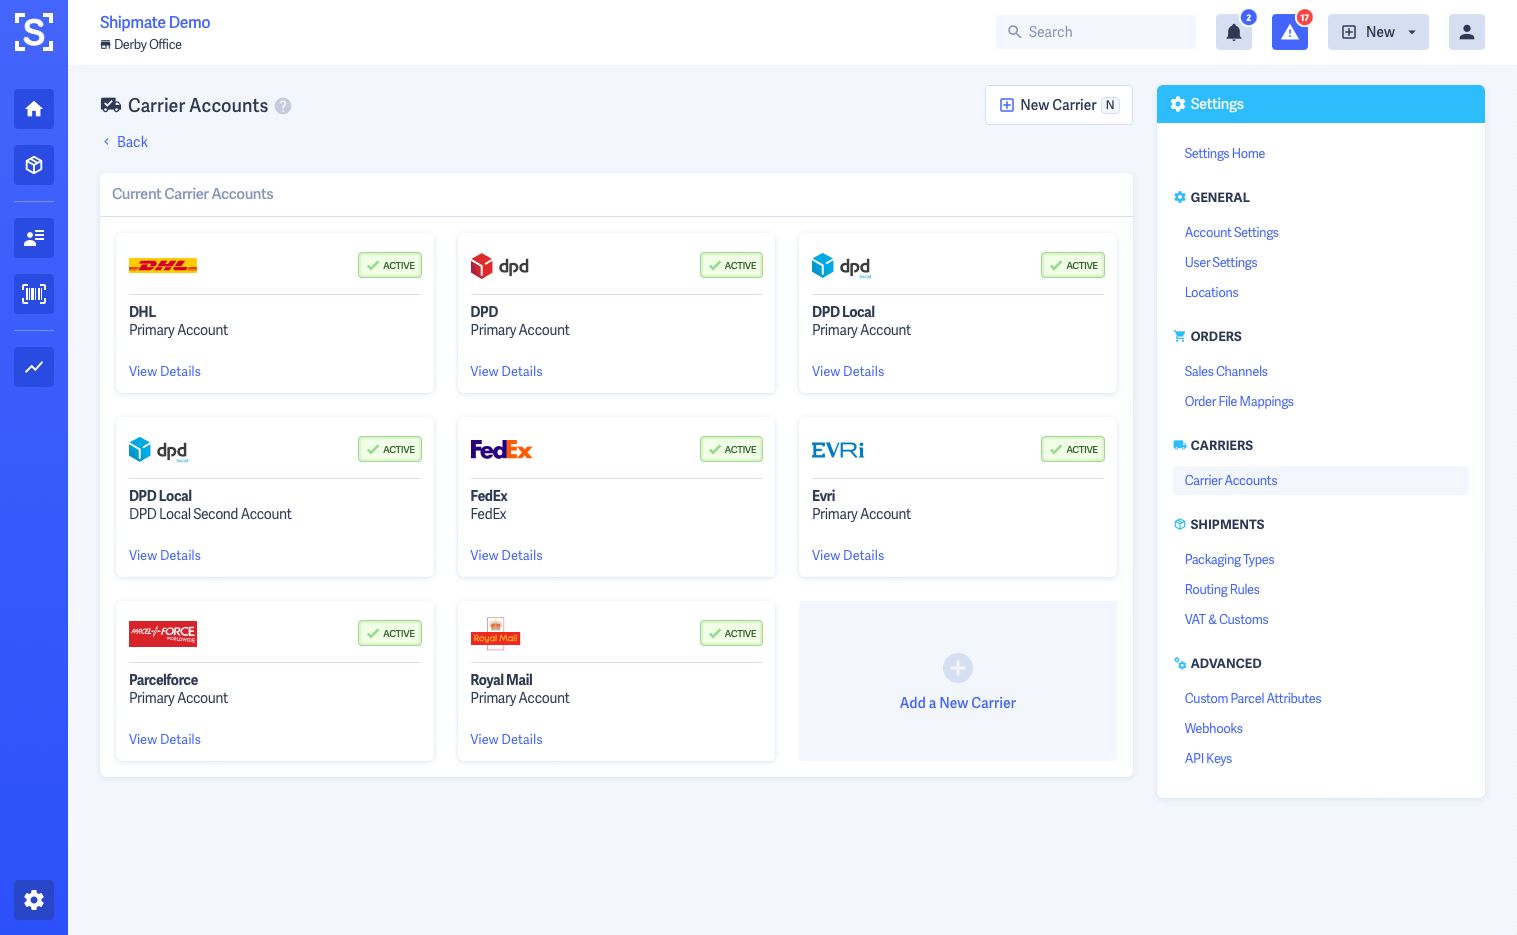
Shipmate allows you to bring all your carrier accounts into one place, offering a unified labeling and tracking platform for your business. You are able to add multiple accounts with the same carrier, and we support all mainstream UK carriers, and most popular carriers in the Republic of Ireland.
A current list of our supported carriers can be found on our main website on our Integrations page.

Adding a Carrier Account
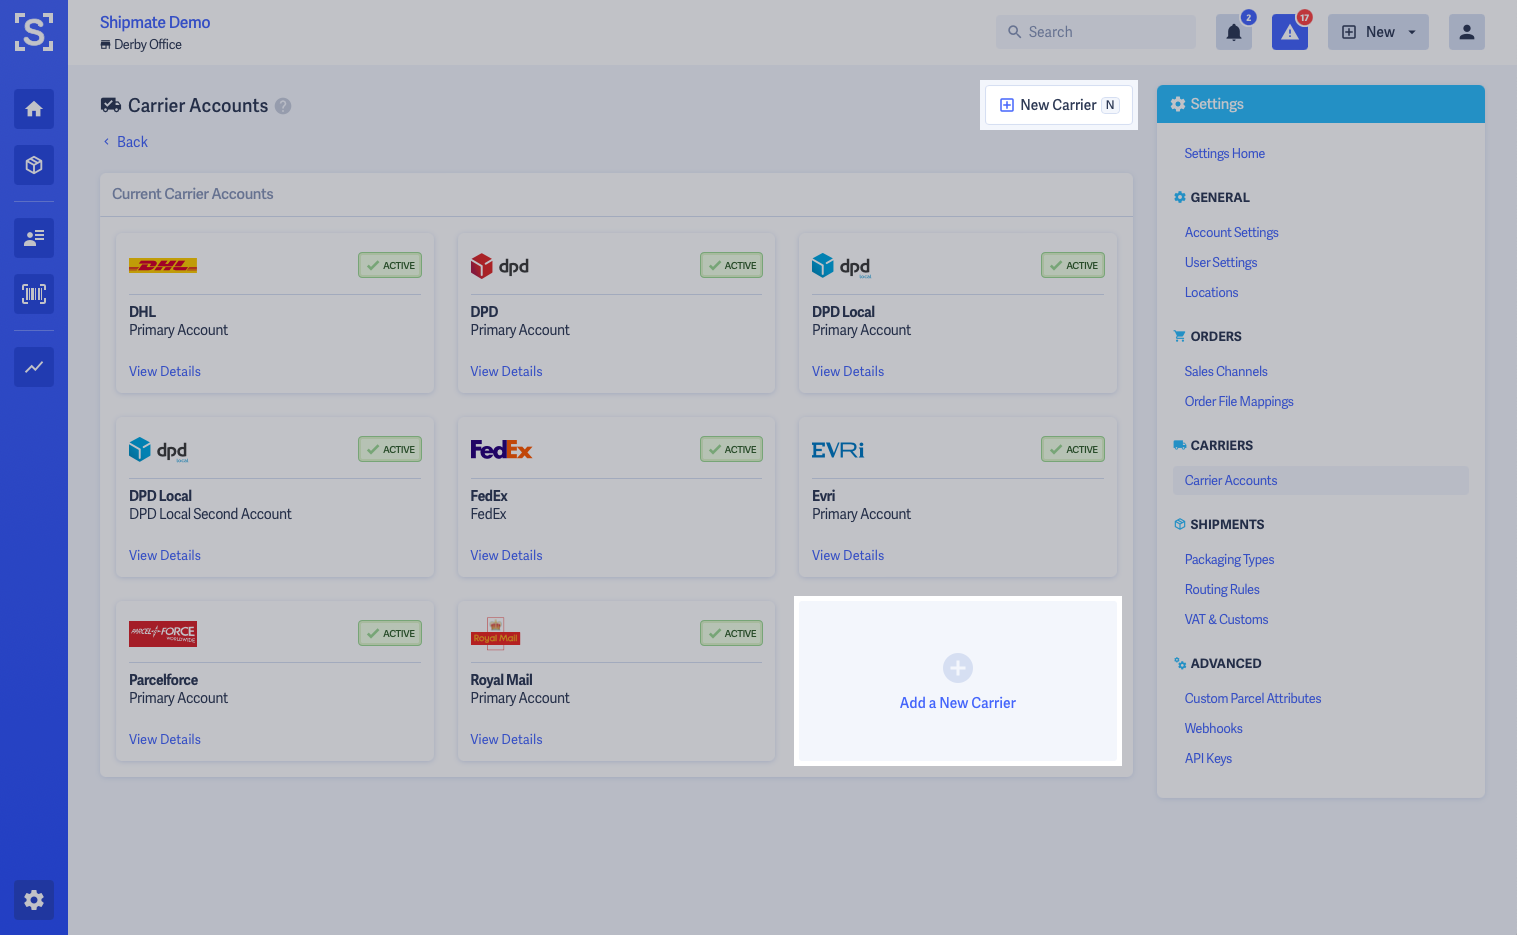
From the Carriers list, click the New Carrier button at the top of the page, or the large Add a New Carrier panel at the end of your list of Carrier accounts.
You will then be able to provide a name for this account, and set the Location it will be used from. Typical names used include Primary Account, Secondary Account etc, or name it after the location or purpose you are using it.
Once you are happy with the details provided, click the Add Carrier button.
In most cases, the link between your Carrier account and Shipmate will be carried out by our on-boarding team, working in partnership with the Carrier's IT Integrations team. We are notified as soon as you request a carrier integration, and will be in touch to request further details to start the on-boarding process. You may be required to print out test packs and send them to the carriers, depending on the carrier's on-boarding and testing policy.
We are introducing self carrier on-boarding, allowing you to set up carrier accounts directly in your account. Each carrier will request different information to link your account - follow the on-screen instructions to complete this process.

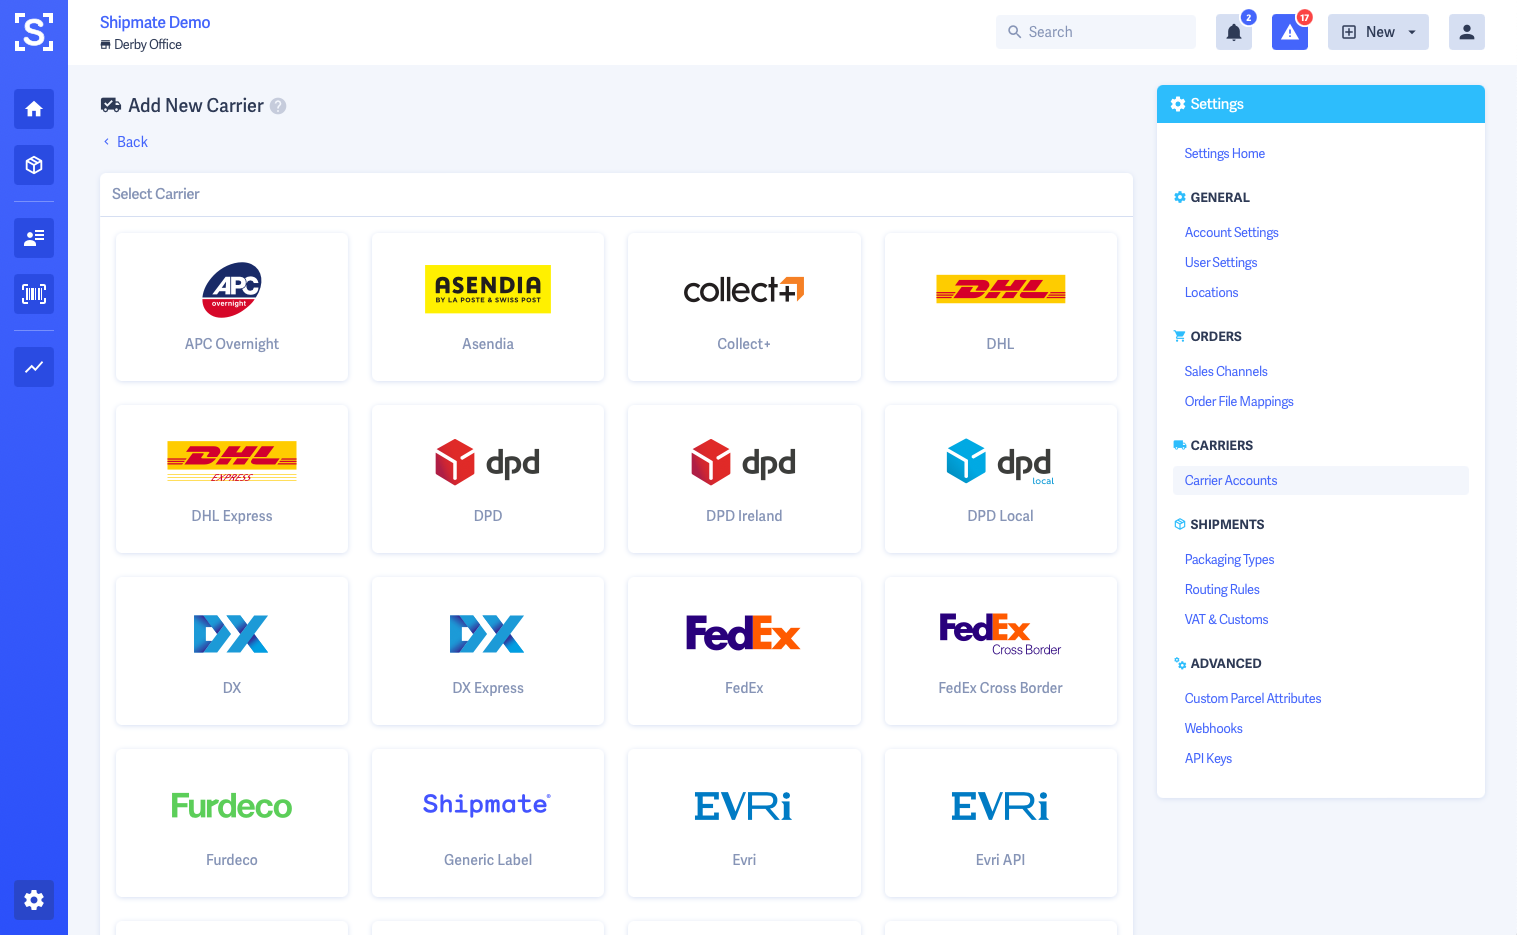
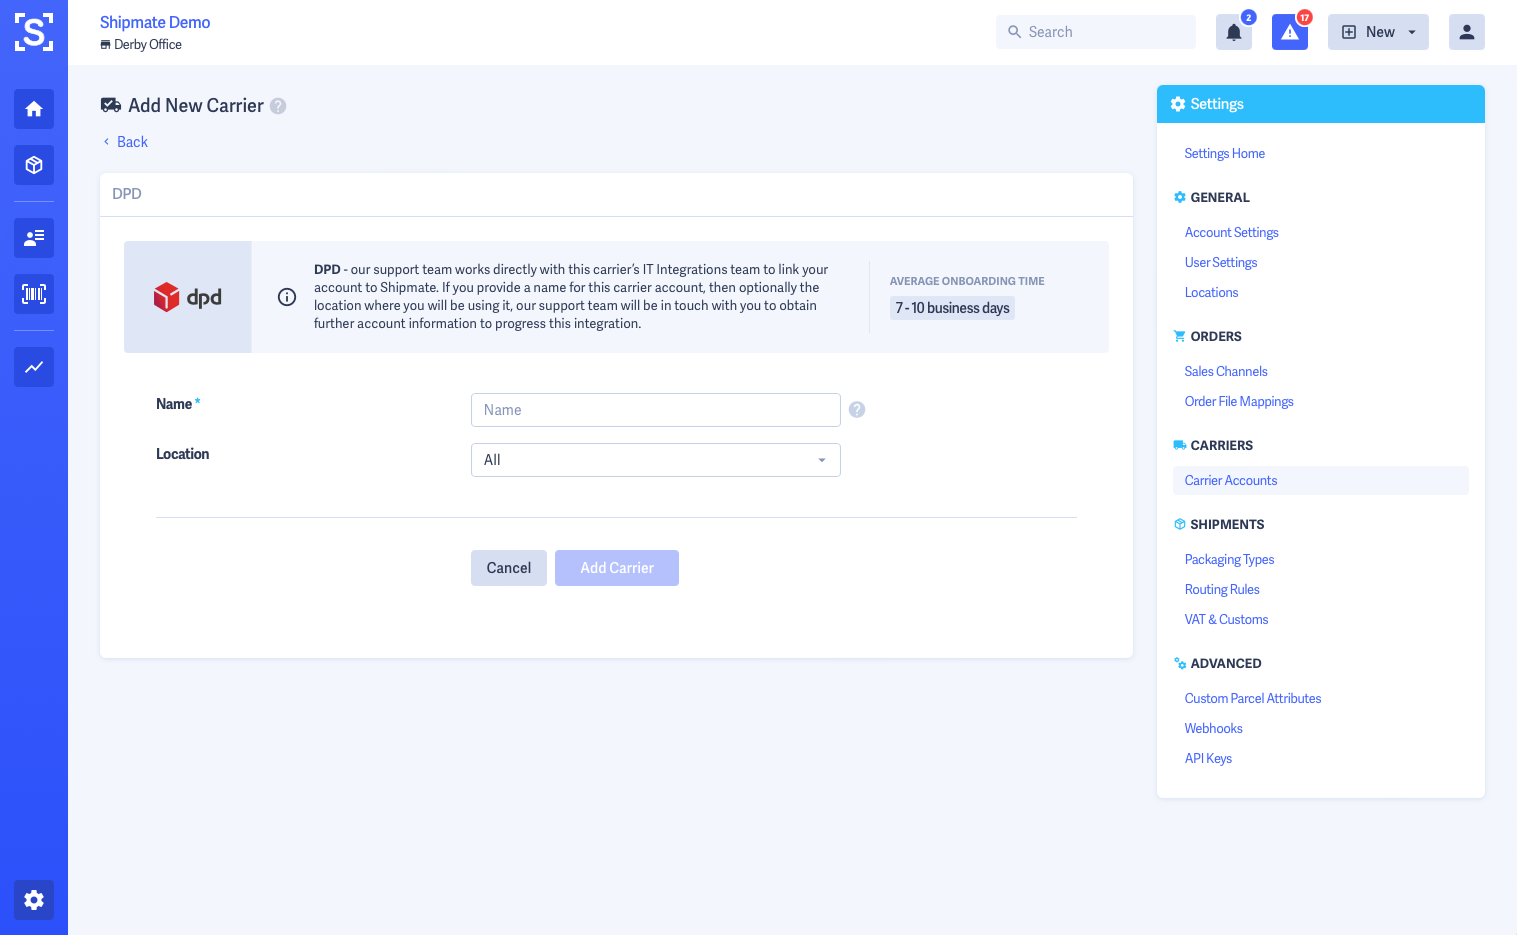
Viewing a Carrier Account
Simply click on the Carrier account you wish to view. From here you can view more details about the account as well as set up and manage Delivery Services for that account.

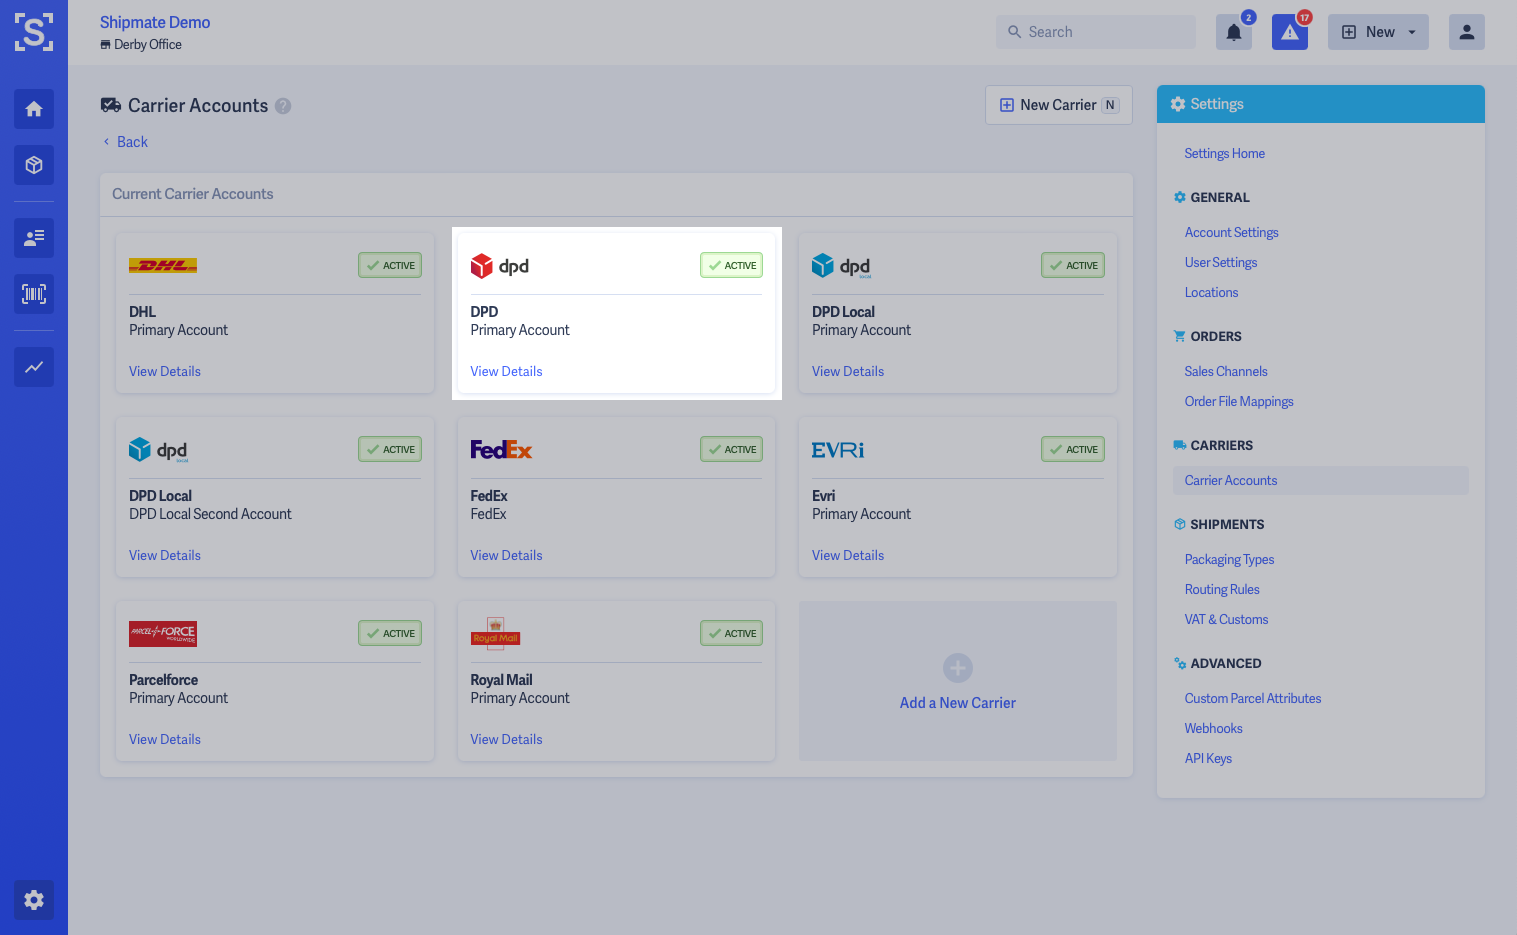
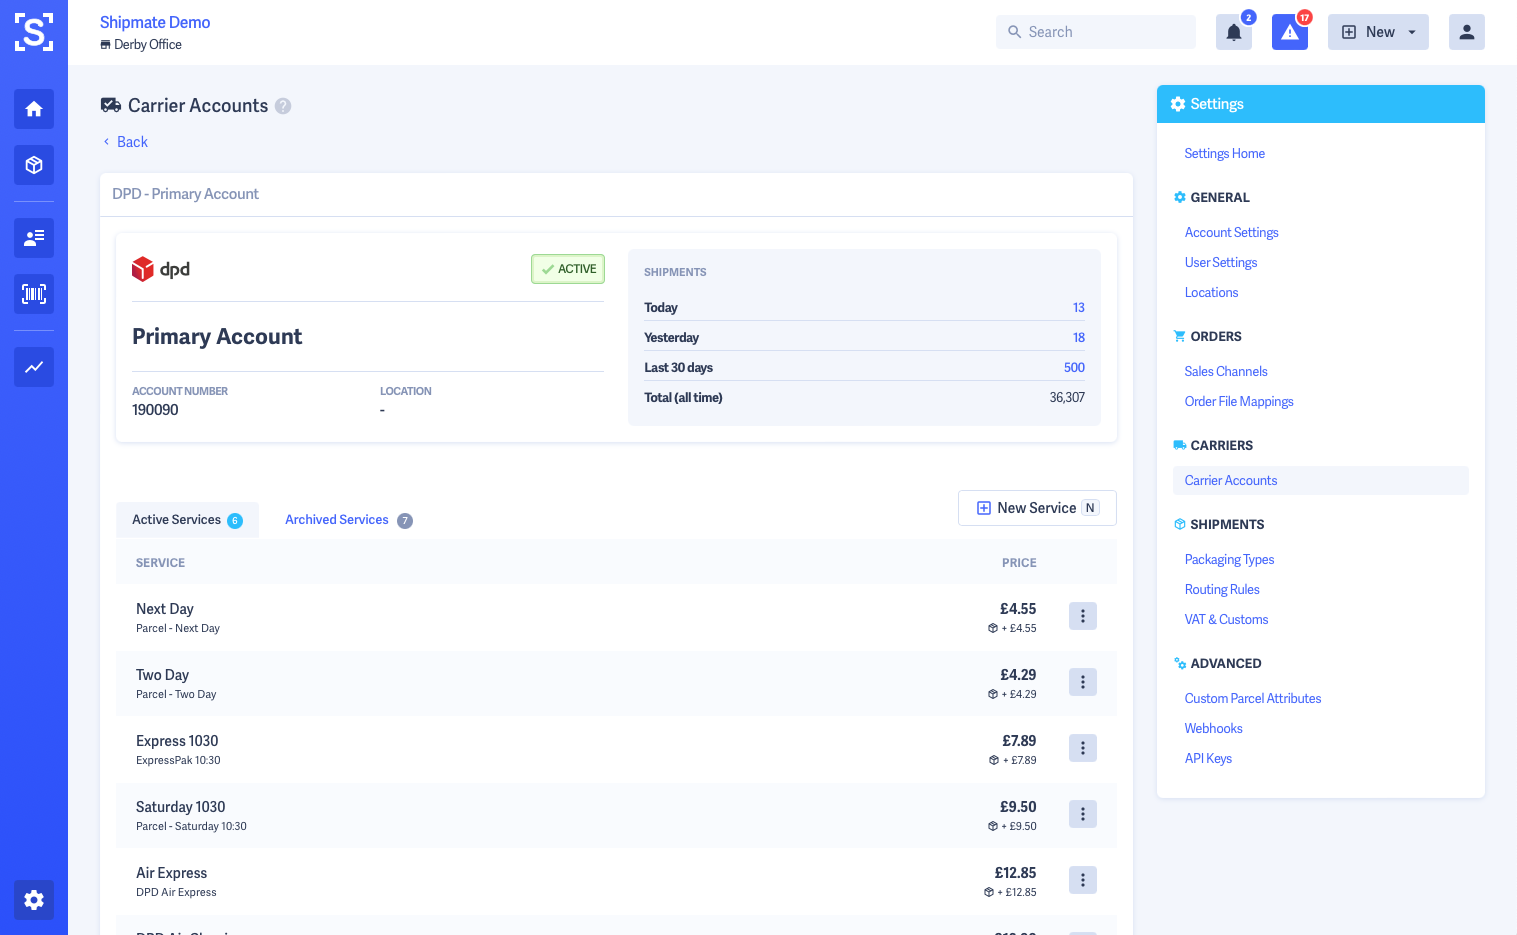
Disabling A Carrier
Please contact support@shipmate.co.uk to disable a carrier on your account.
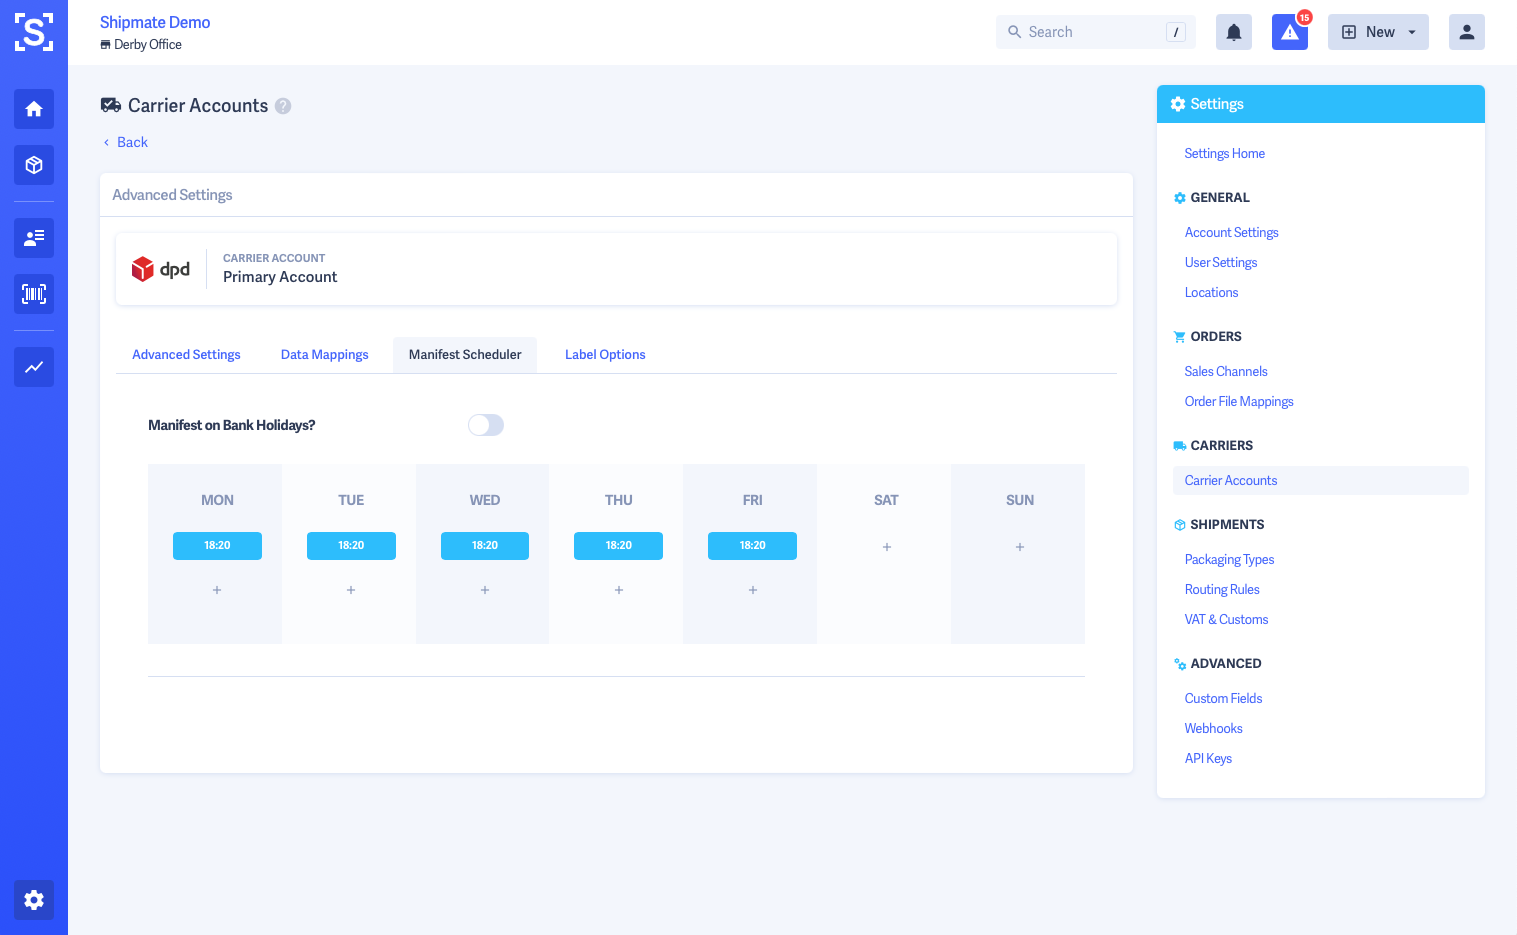
Manifest Schedule
Many carriers automatically manifest Shipments as they are created, however some carriers require a manifest process to be carried out ahead of collections.
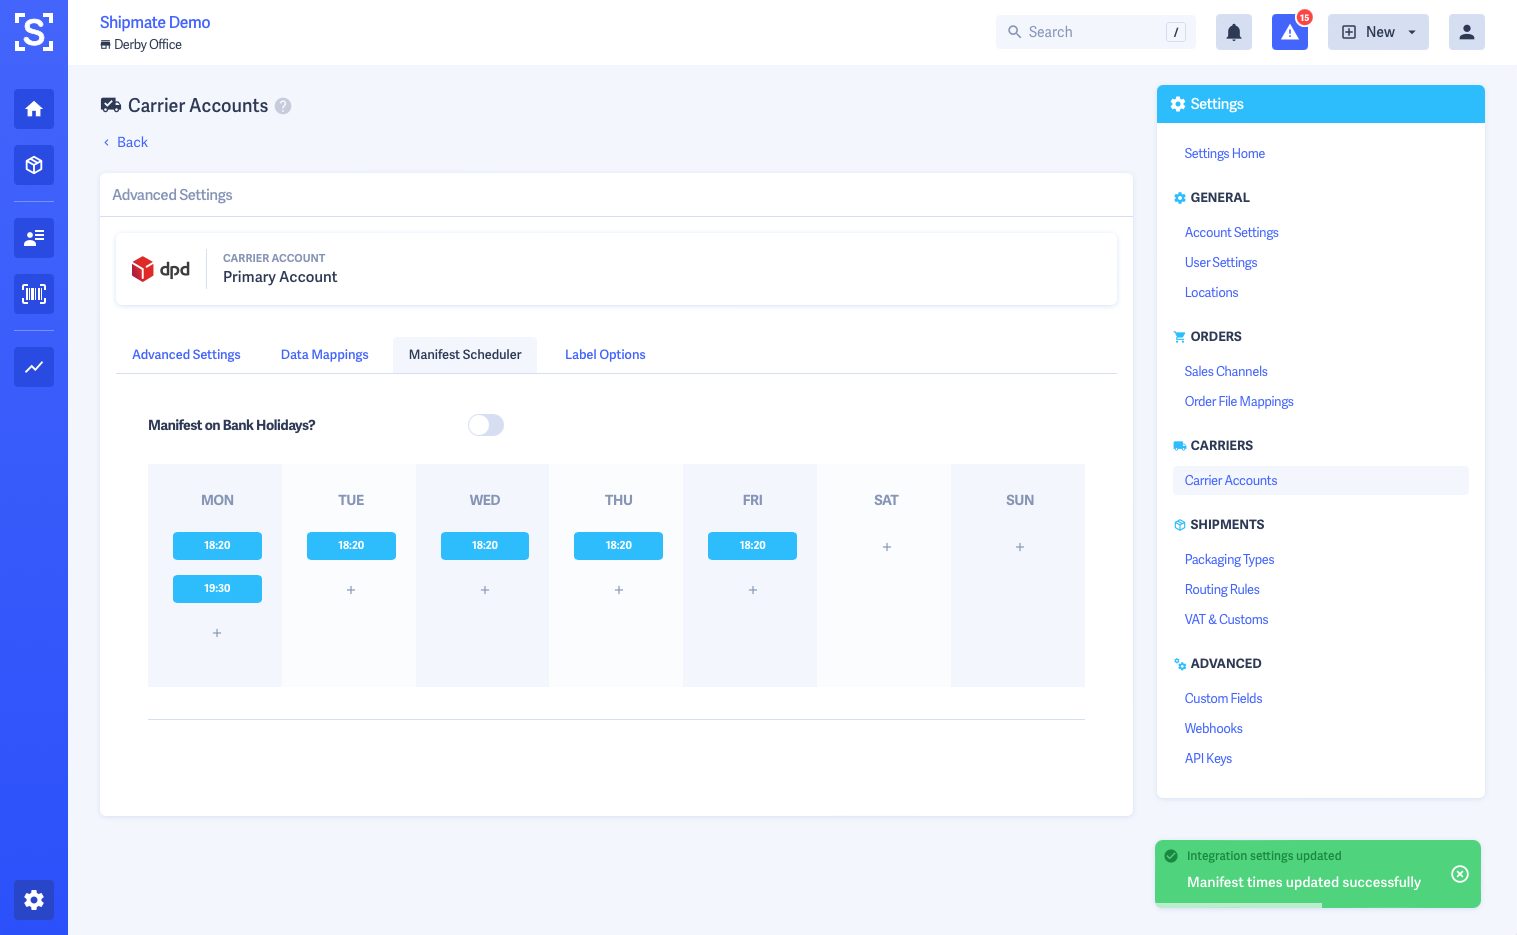
For carriers requiring a manifest, you are able to configure a Manifest Schedule to determine what time(s) the manifest process is ran, on a 7-day schedule.
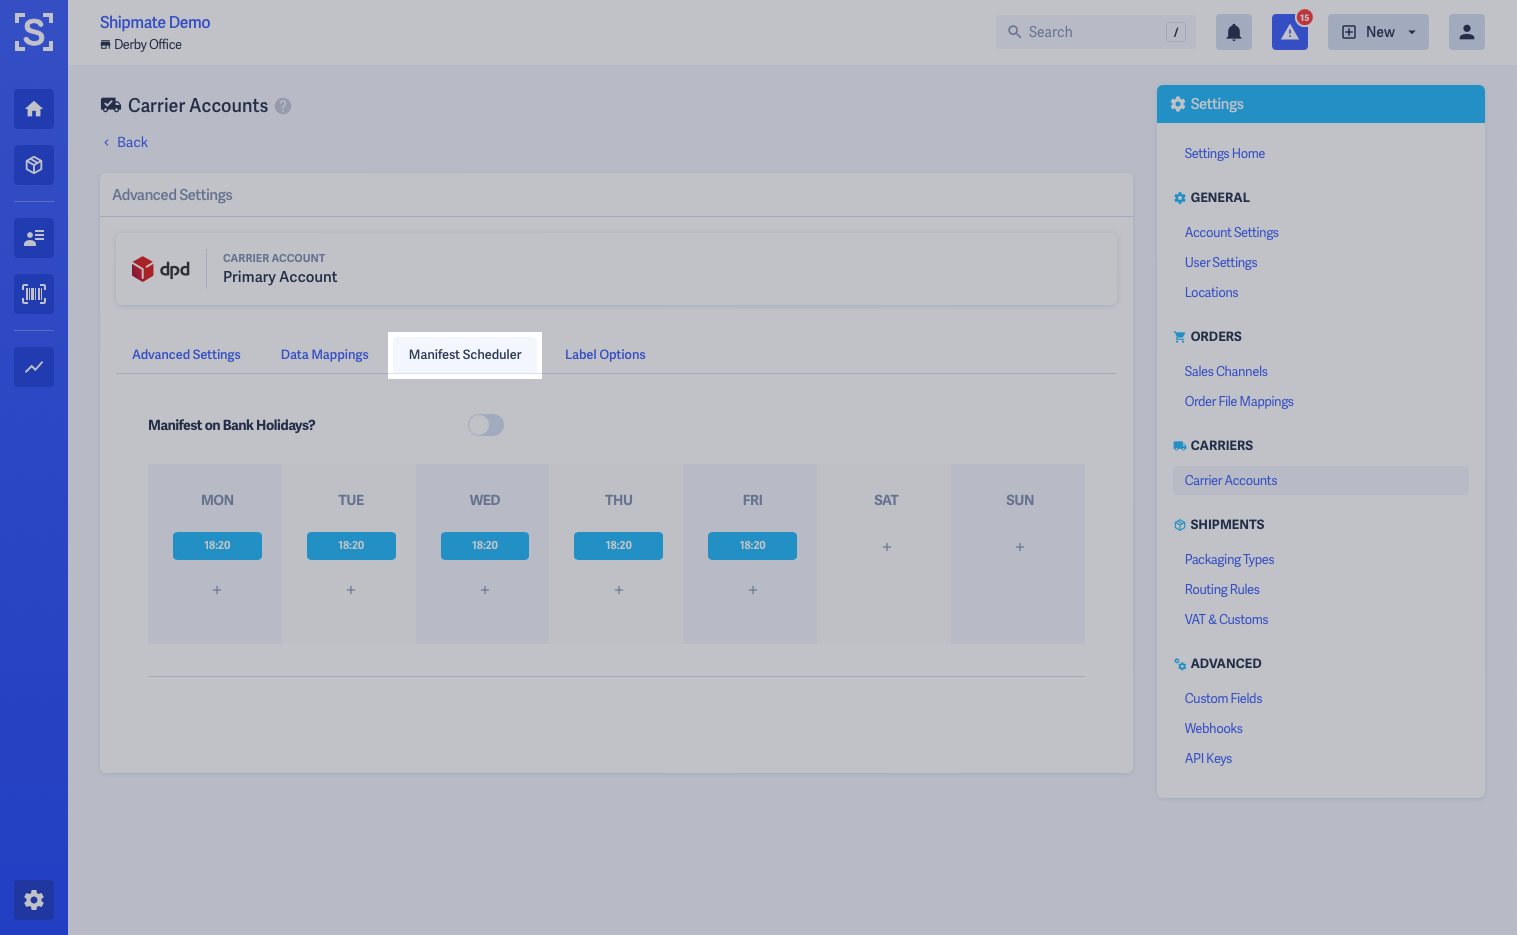
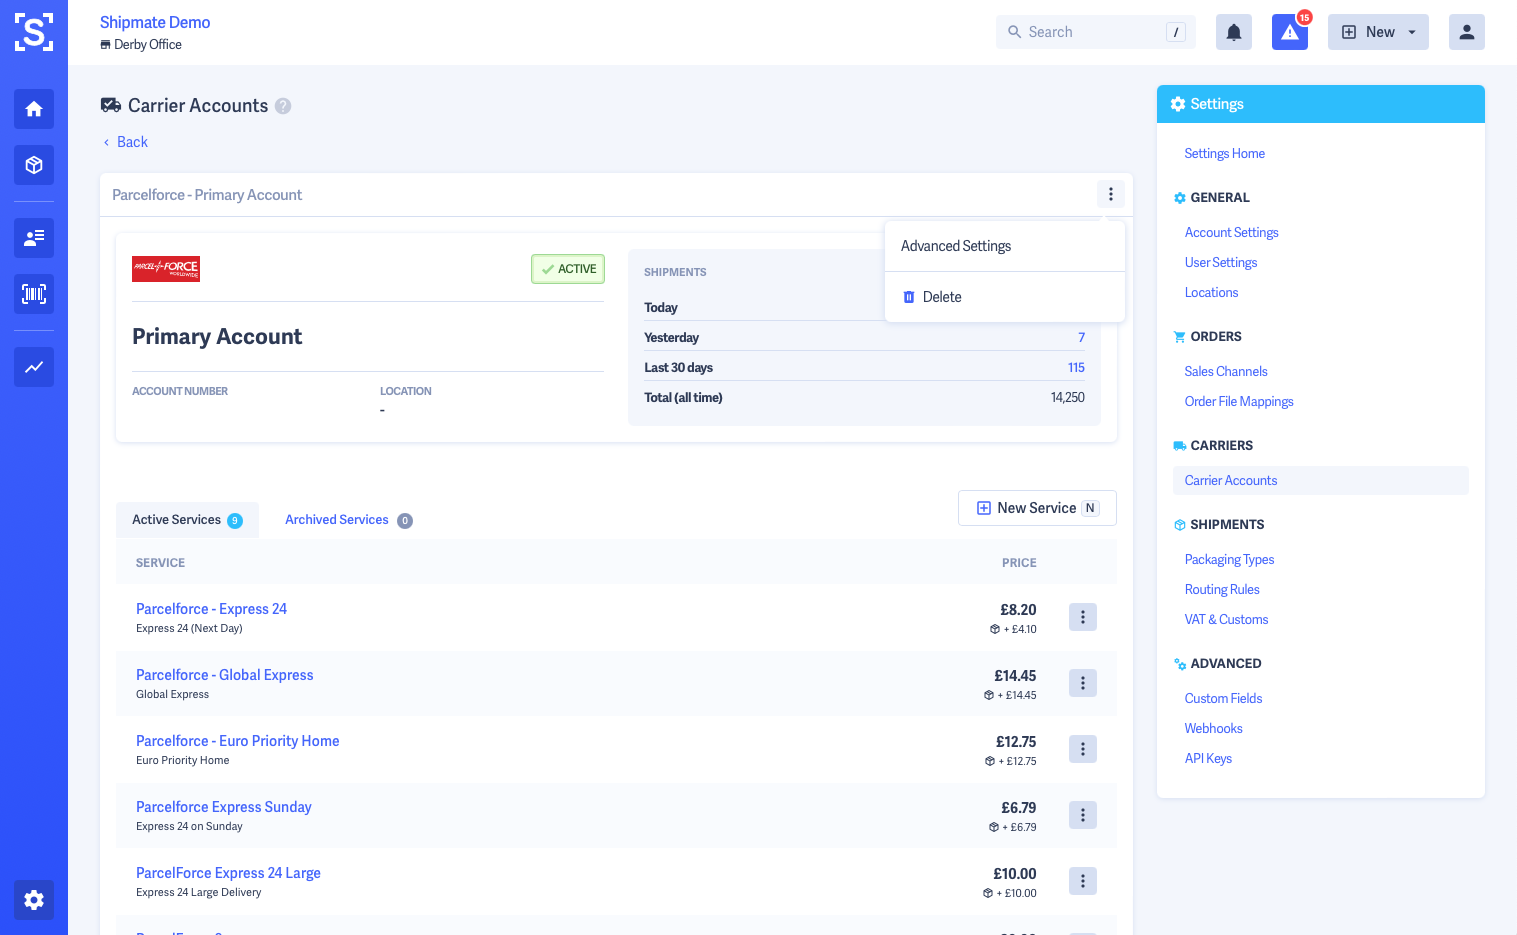
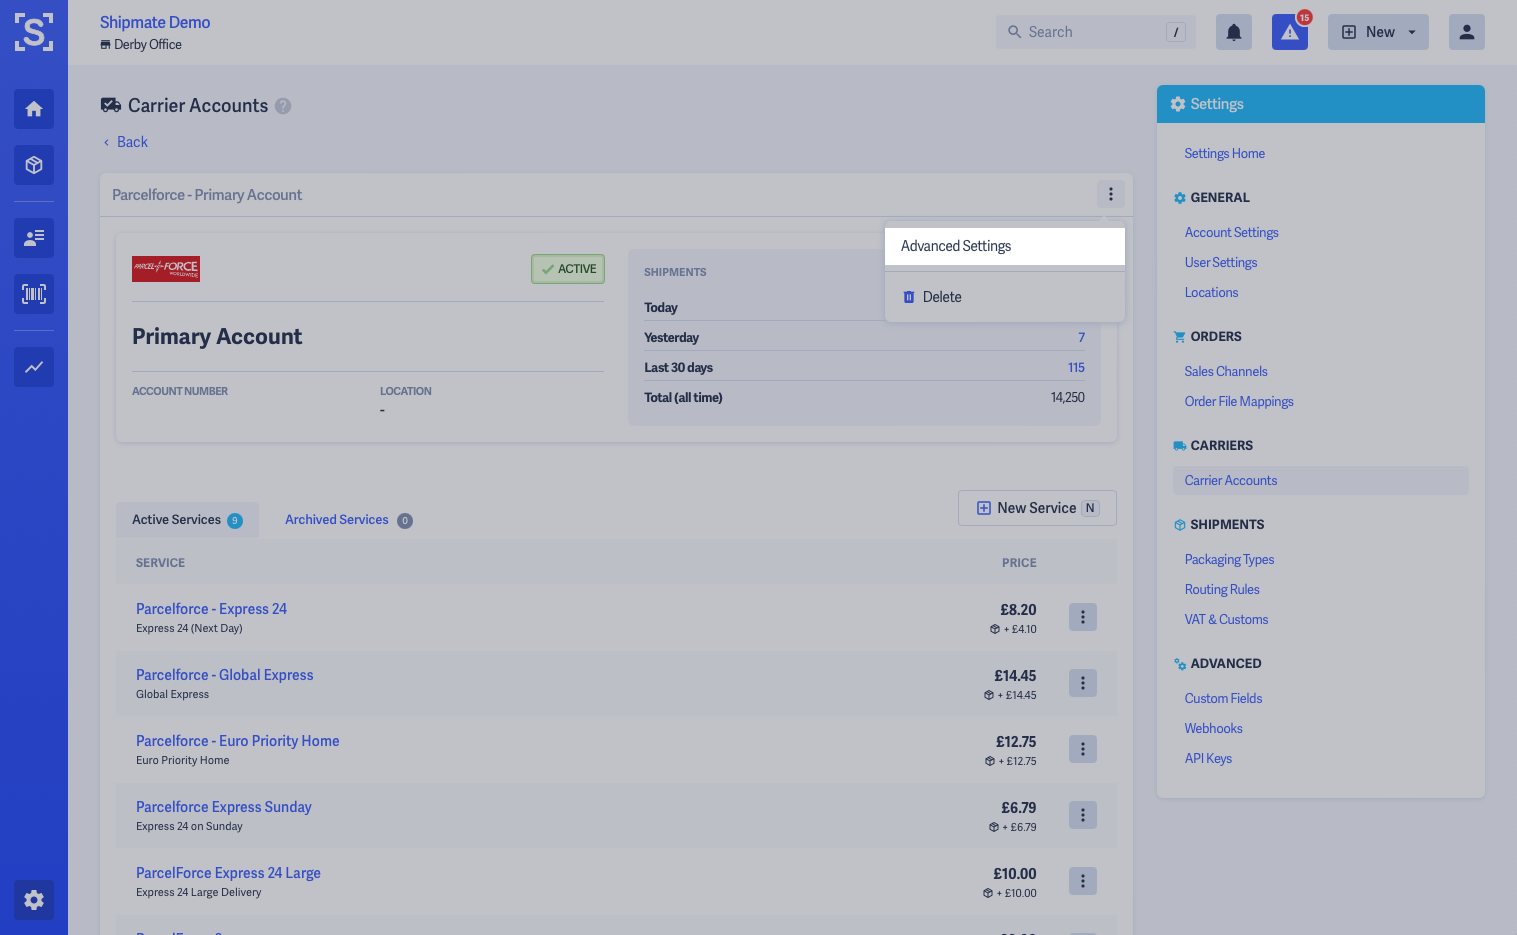
To access the Manifest Schedule, head to the Carrier Account you wish to configure, then select Advanced Settings from the more options menu, then select the Manifest Scheduler tab.
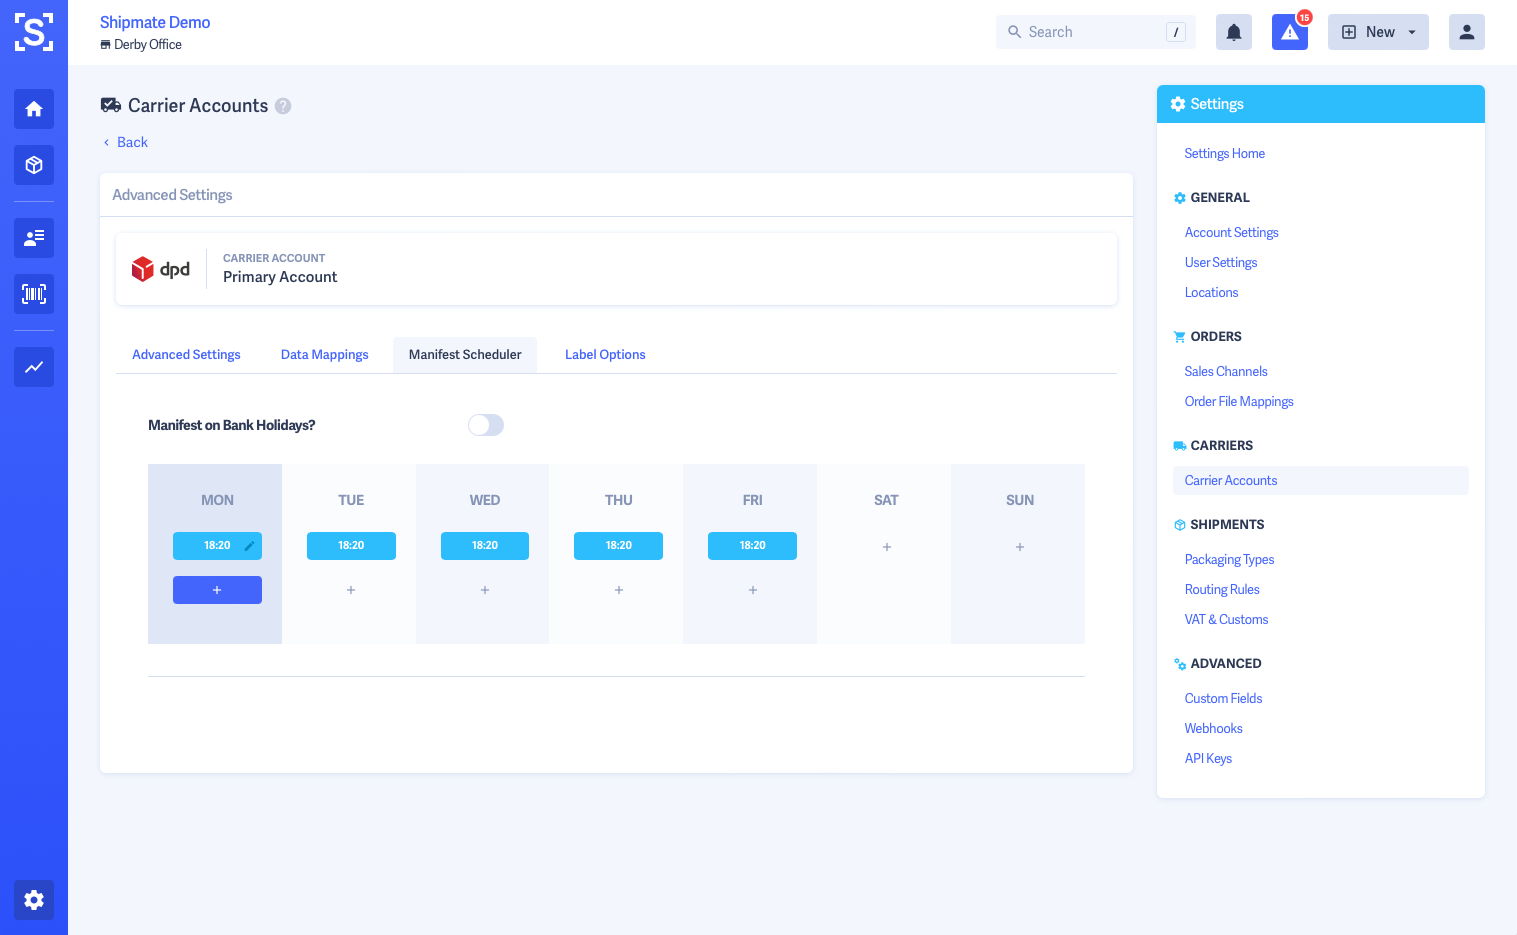
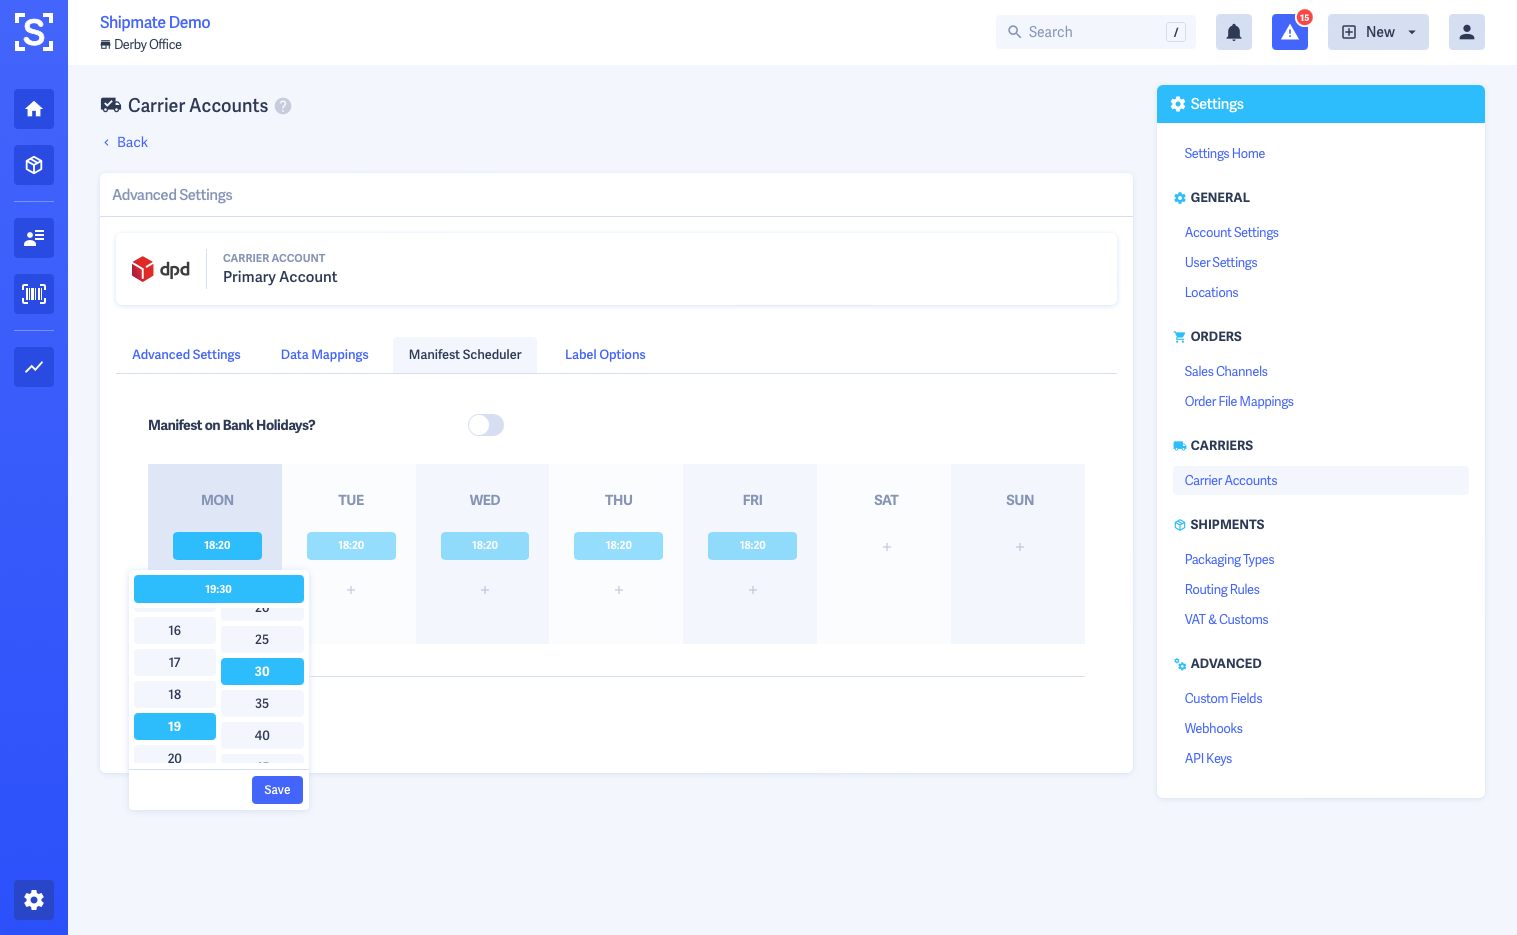
It is possible to configure multiple manifests per day - ideal for busy periods or whenever you have multiple collections per day.
You can also choose whether to run the manifest process on Bank Holidays, according to your preference.
Use the on-screen options to add, edit or remove manifest times on your schedule. Changes are saved as you confirm amendments, with green pop-up notices appearing as the changes are saved.

Carrier Data Mappings
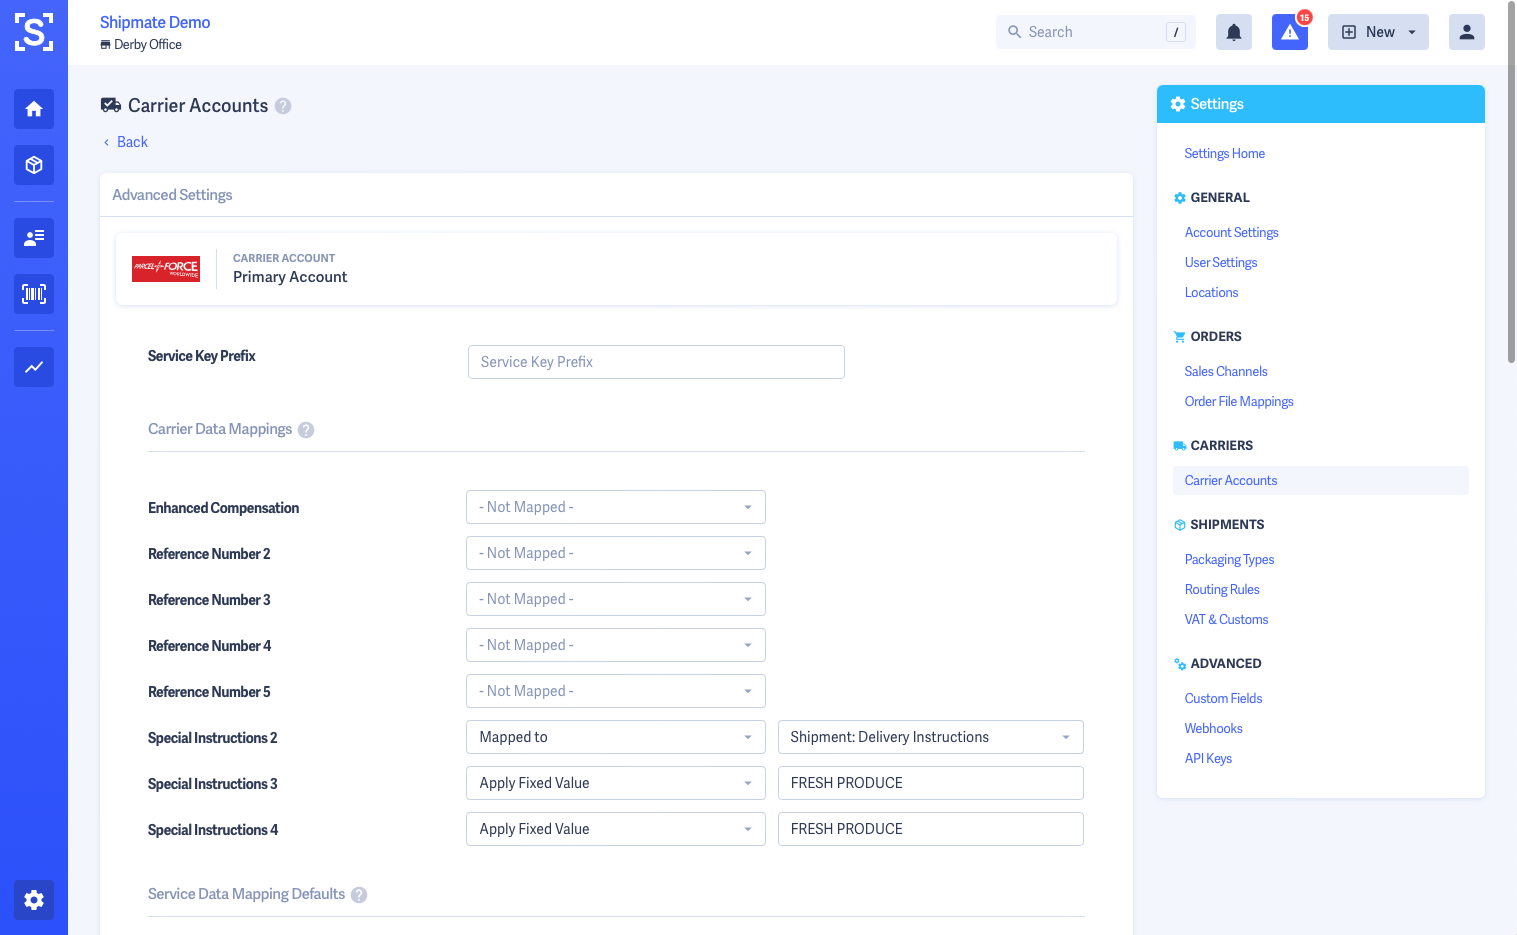
Carrier Data Mappings allow you to map data to any value available on carrier systems, unlocking the full range of services and features they have to offer.
You can use Carrier Data Mappings to supply details such as insurance values, parcel shop codes, service identifiers, contents indicators such as perishable and hazardous, hazard codes and more.
Data can be mapped to any standard attribute within Shipmate, a Custom Field or set to a fixed value to be applied every time, at both Carrier Account and Delivery Service level.
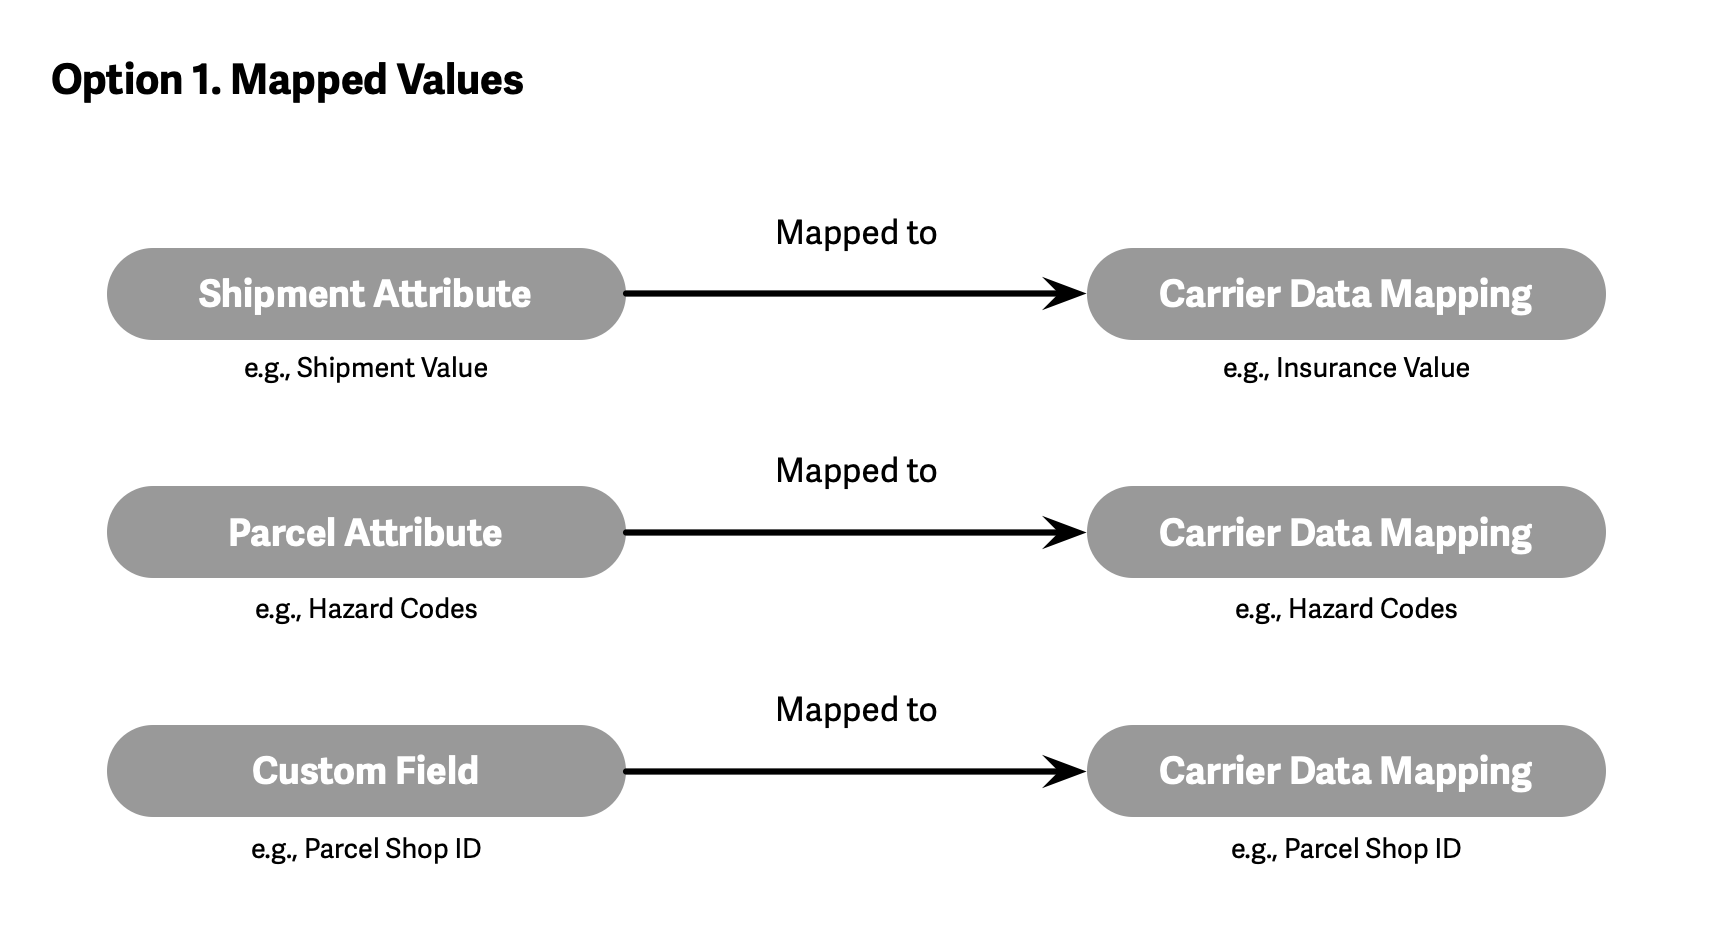
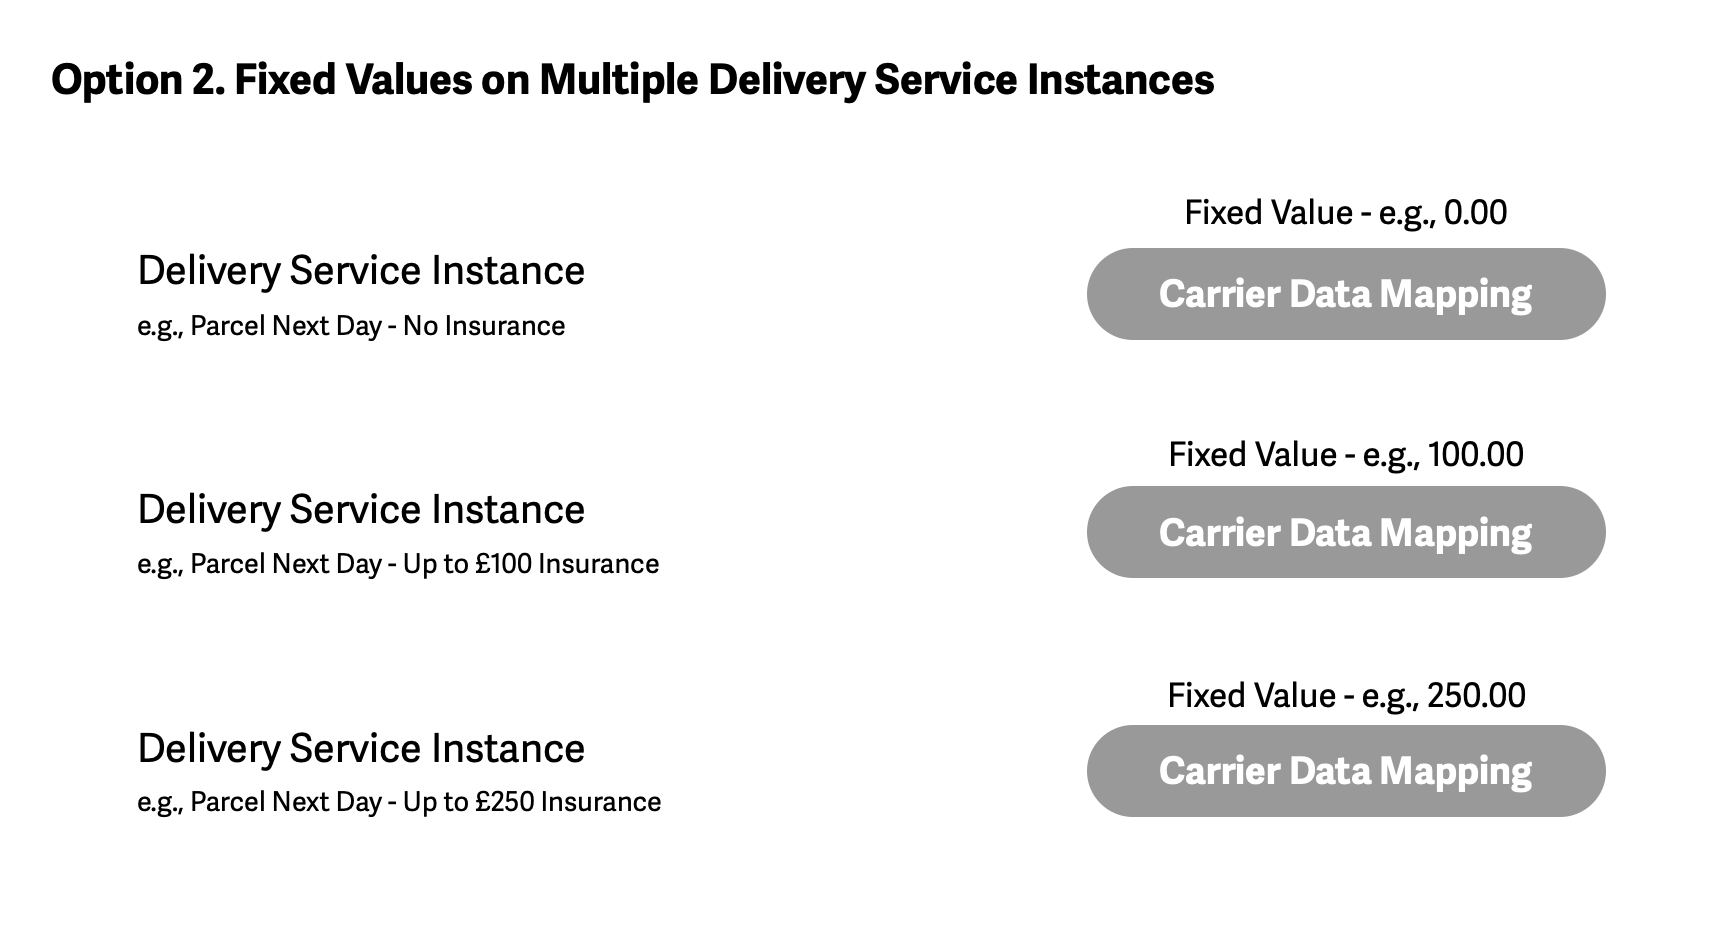
Two key ways of using Carrier Data Mappings are explained as follows:
- Mapped Values - details captured on the Shipment or Parcel will be mapped directly to the carrier each time a new Shipment is created
- Fixed Values on Multiple Delivery Service Instances - supply Fixed Values on the Carrier Data Mappings and select the Delivery Service or use Routing Rules to supply the appropriate value to the carrier
For example, if you wanted to supply an insurance value to the carrier, you could either:
- Map the Shipment Value to the Carrier on a Shipment-by-Shipment basis
- Set up multiple Delivery Services, one for each band of values, configure a fixed value for the Insurance Value Mapping and use a Routing Rule to select the appropriate service
Certain scenarios will lend themselves towards using one method or the other - for instance, Option 1 would be appropriate for supplying a Parcel Shop ID as you would need to set this on a case-by-case basis, whereas Option 2 might be more practical for insurance values, setting up a Delivery Service for each insurance value band, according to your commercial agreement with the carrier.
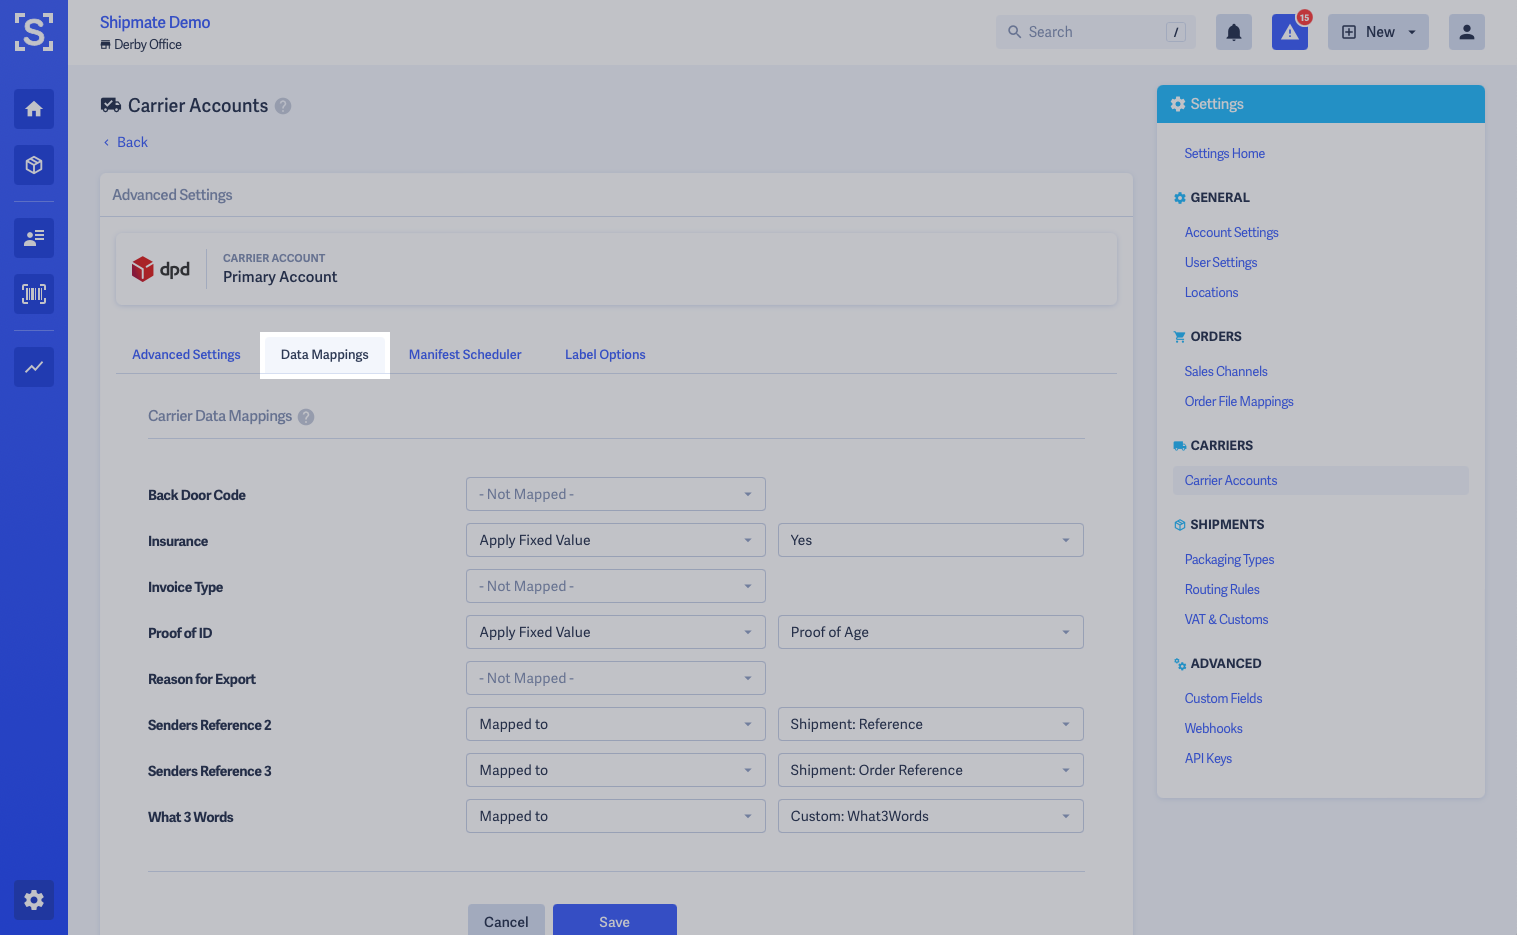
To access Carrier Data Mappings, select Advanced Settings from the More Options menu on either the Carrier or Delivery Service, then select the Data Mappings tab. Data Mappings can be configured at Carrier Account level, or Delivery Service level.
You can set defaults for Delivery Services when setting up Carrier Data Mappings on the Carrier Account Advanced Settings screen.
A list of all mappable data attributes are shown, with options to set each one as follows:
- Not Mapped - Shipmate will not populate this data (Default Option)
- Mapped to - Shipmate will populate this data with data held in the selected attribute
- Apply Fixed Value - Shipmate will populate this data with the same fixed value you supply each time
- Conditionally Apply Value - Shipmate will calculate a value to populate this data with based on certain criteria. Requires a callback method to be developed - please raise a support ticket to request this. Development charges may apply.
Once you are satisfied with the configuration of the Carrier Data Mappings, click the Save button.
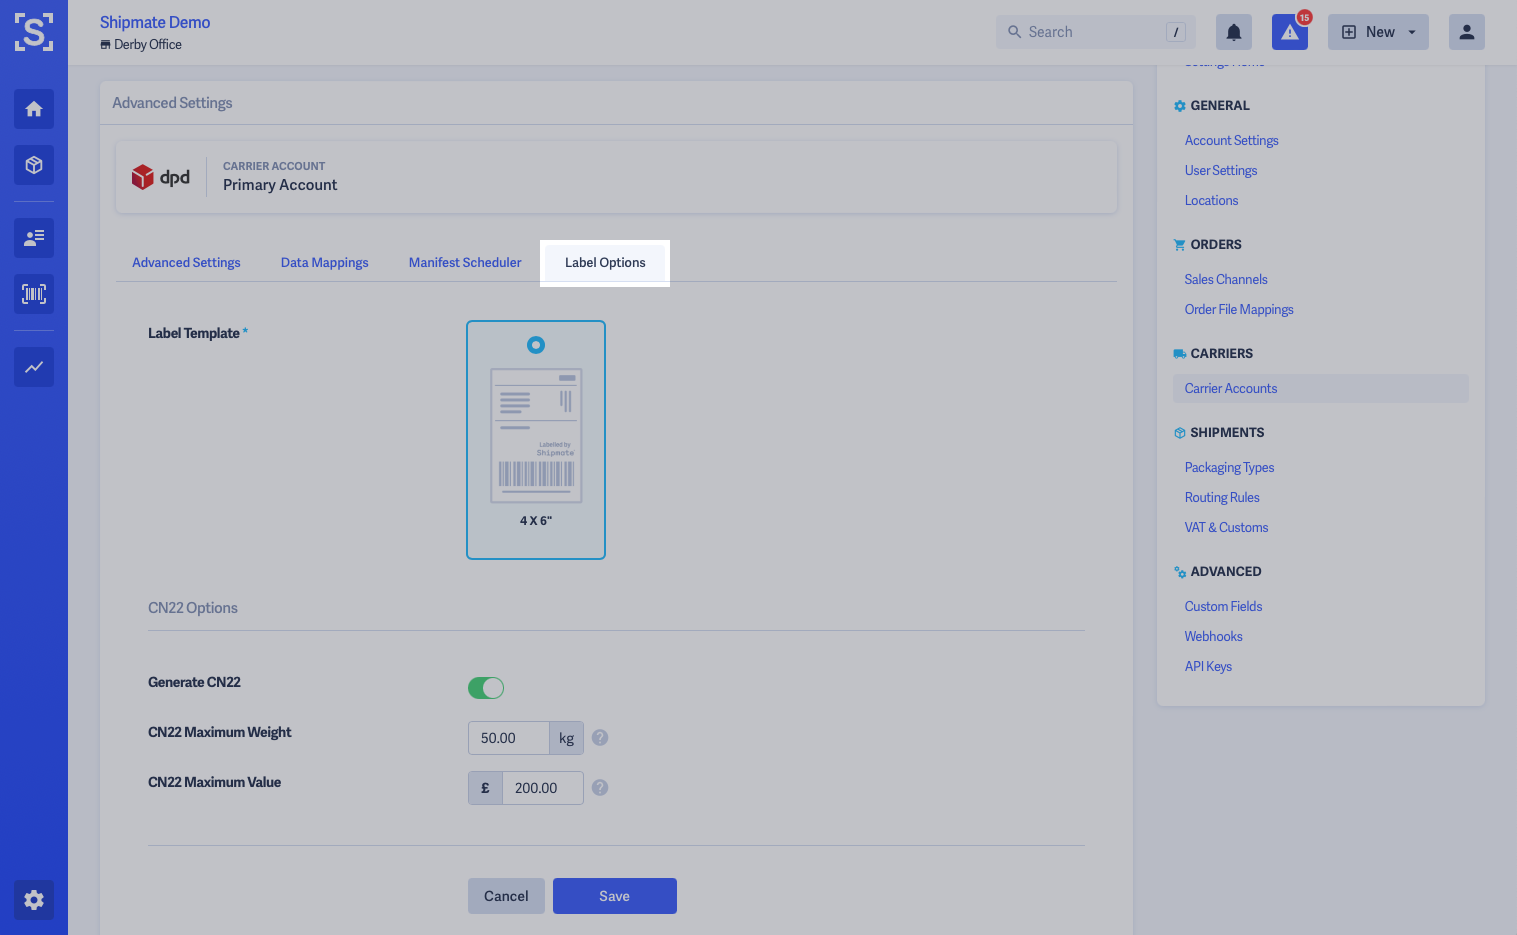
Label Options & Mappings
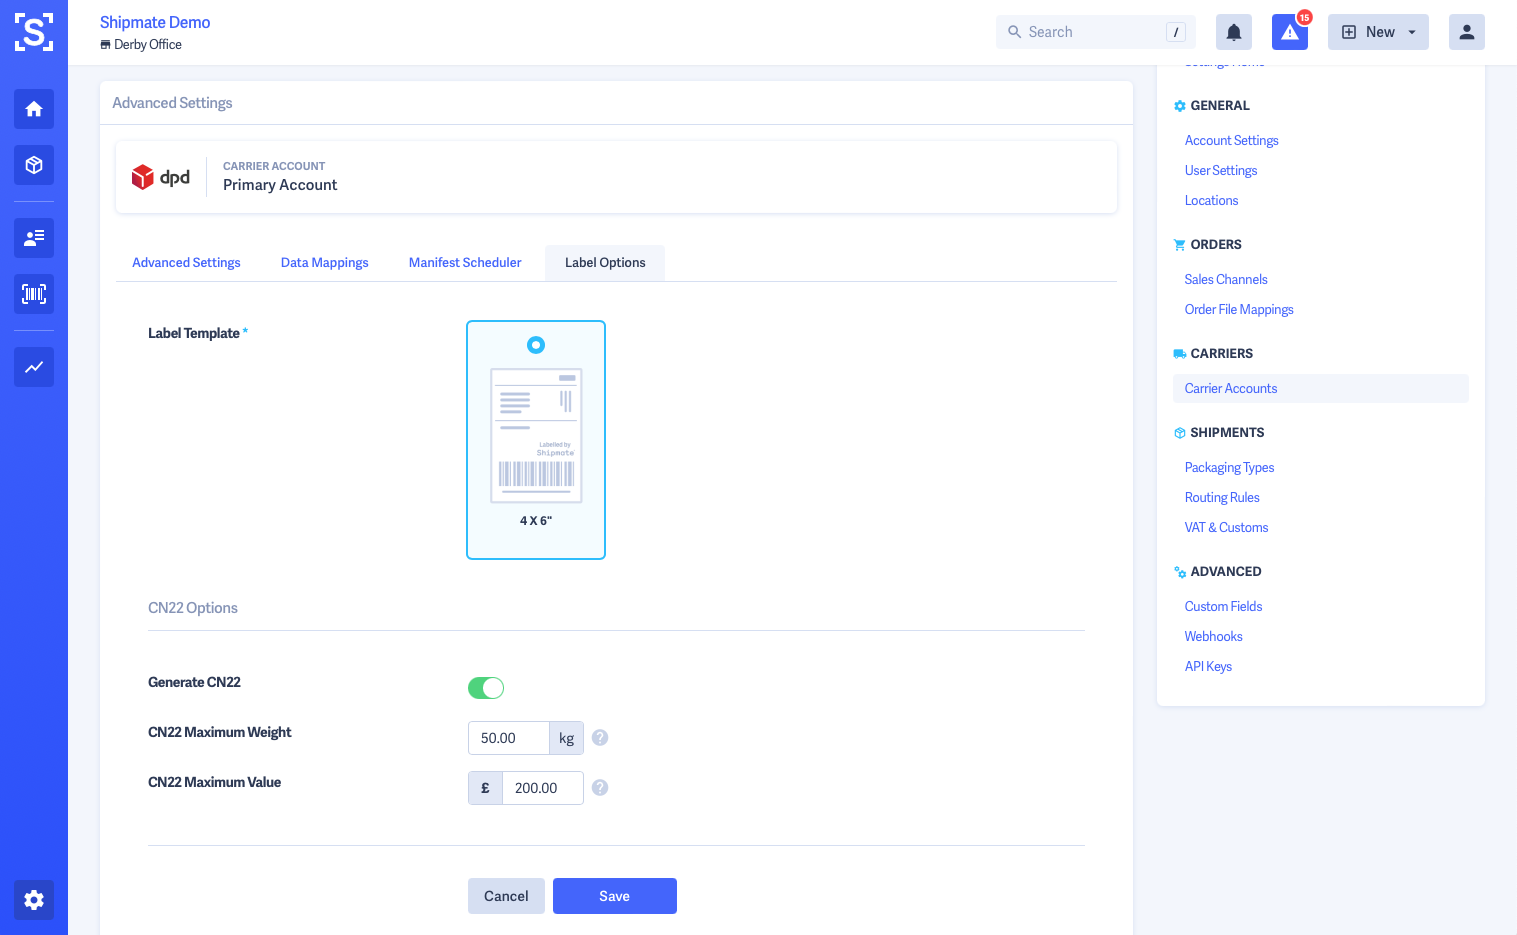
Label Options allow you to control carrier-level settings for how labels are printed, including label dimensions and format, CN22 output and label data mappings where available.
To access Label Options, navigate to Settings > Carrier Accounts and select the Carrier Account you wish to modify. Select Advanced Settings from the more options menu then select the Label Options tab.
Explanations of what each feature can achieve are outlined below. Not all carriers support all features, so the options that appear on any given carrier account will be a selection from the following:
Label Template: Choose one of the ready-made label templates available for this carrier. Some carriers support multiple label formats or dimensions and wherever these are available you can select them. We may also be able to add custom label formats to your account, see the note below.
Label Data Mappings: Some carriers support additional data being printed on the label, but that are not otherwise transmitted to their systems. Where this is supported you will be able to map this data to Shipment data or Custom Fields configured on your account.
CN22 Options: For carriers supporting international shipments, you are able to toggle on and off CN22 output. This overrides your account-level configuration set in VAT & Customs. You are also able to set the weight and value limits that apply to CN22 Customs Declarations for this particular carrier.
Other Options: Some carriers support optional printing of additional labels, such as their own Commercial Invoices or Air Waybills. If applicable, additional settings will be shown here to toggle them on and off, or other carrier specific options.
Once you are satisfied with the configuration of the Label Options, click the Save button. Changes will be reflected immediately so when the next label is printed your newly configured options will be applied.
Delivery Services
Adding A Delivery Service
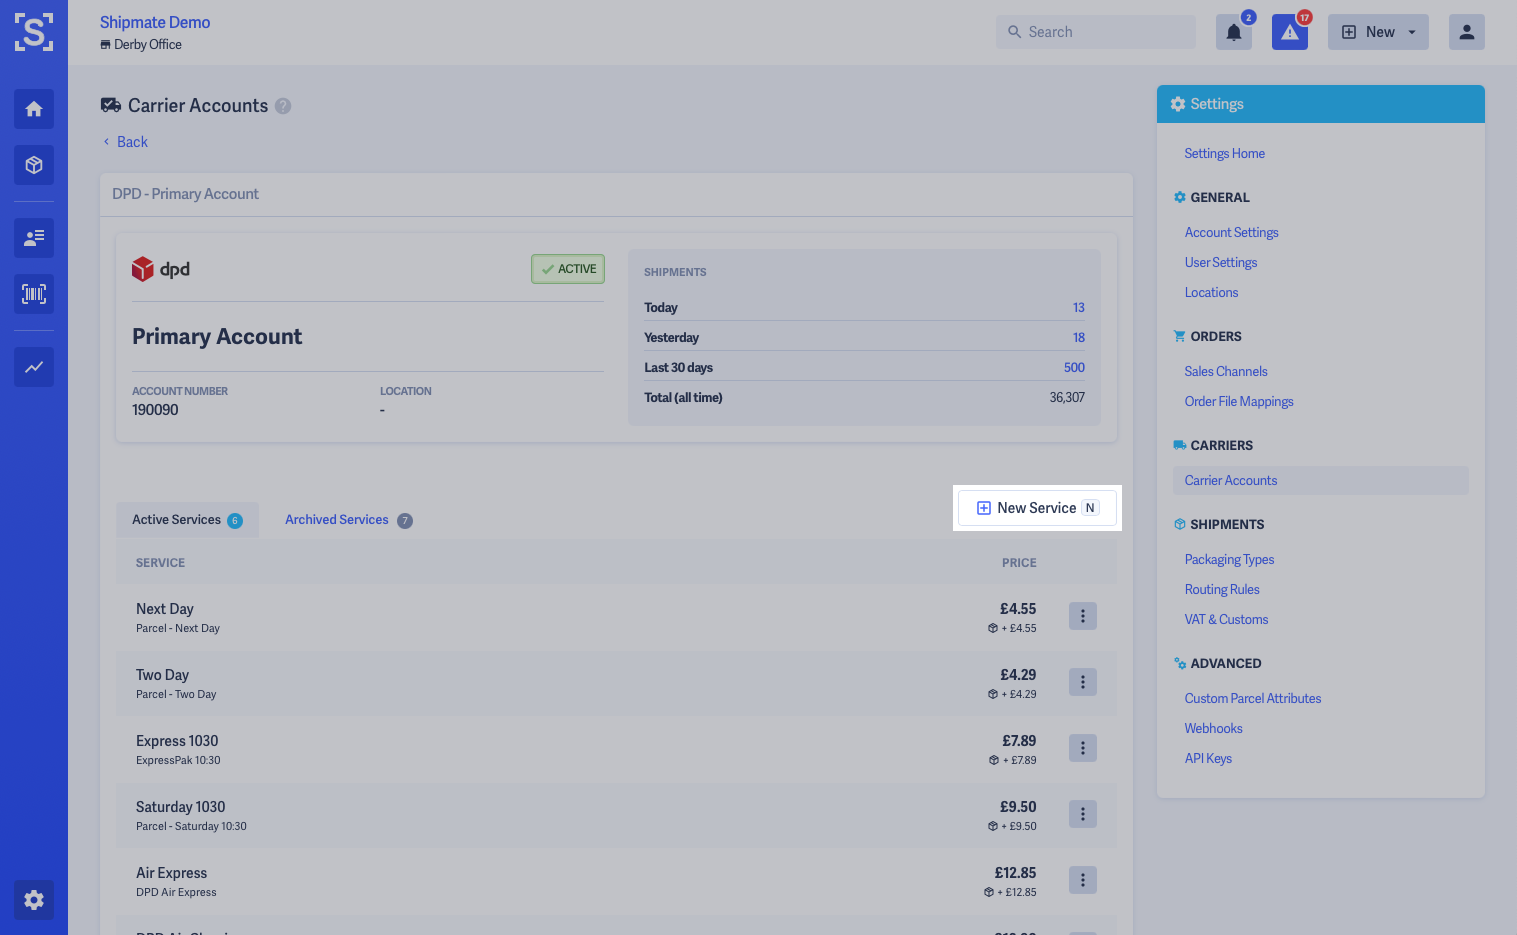
Delivery Services can be found inside each of your Carrier Accounts. To add a Delivery Service, first choose the Carrier Account, then click the New Service button.
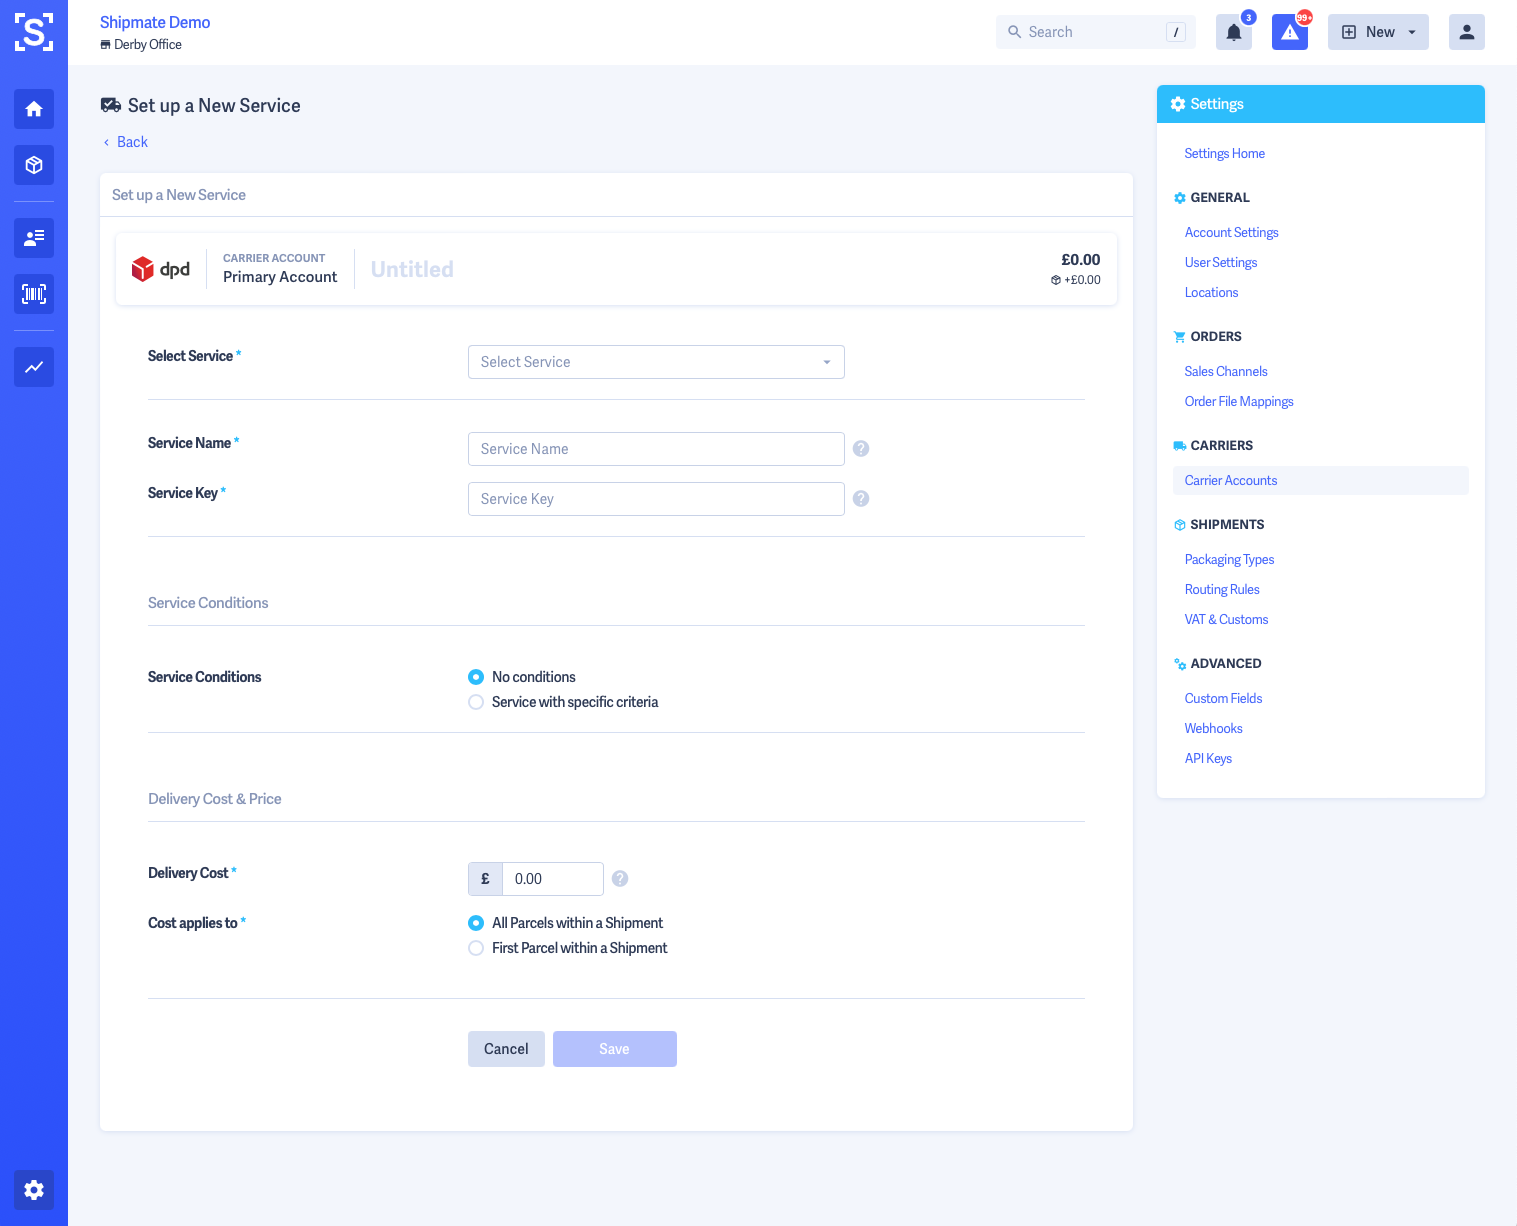
This will open the New Delivery Service page, where the service may be selected and configured.
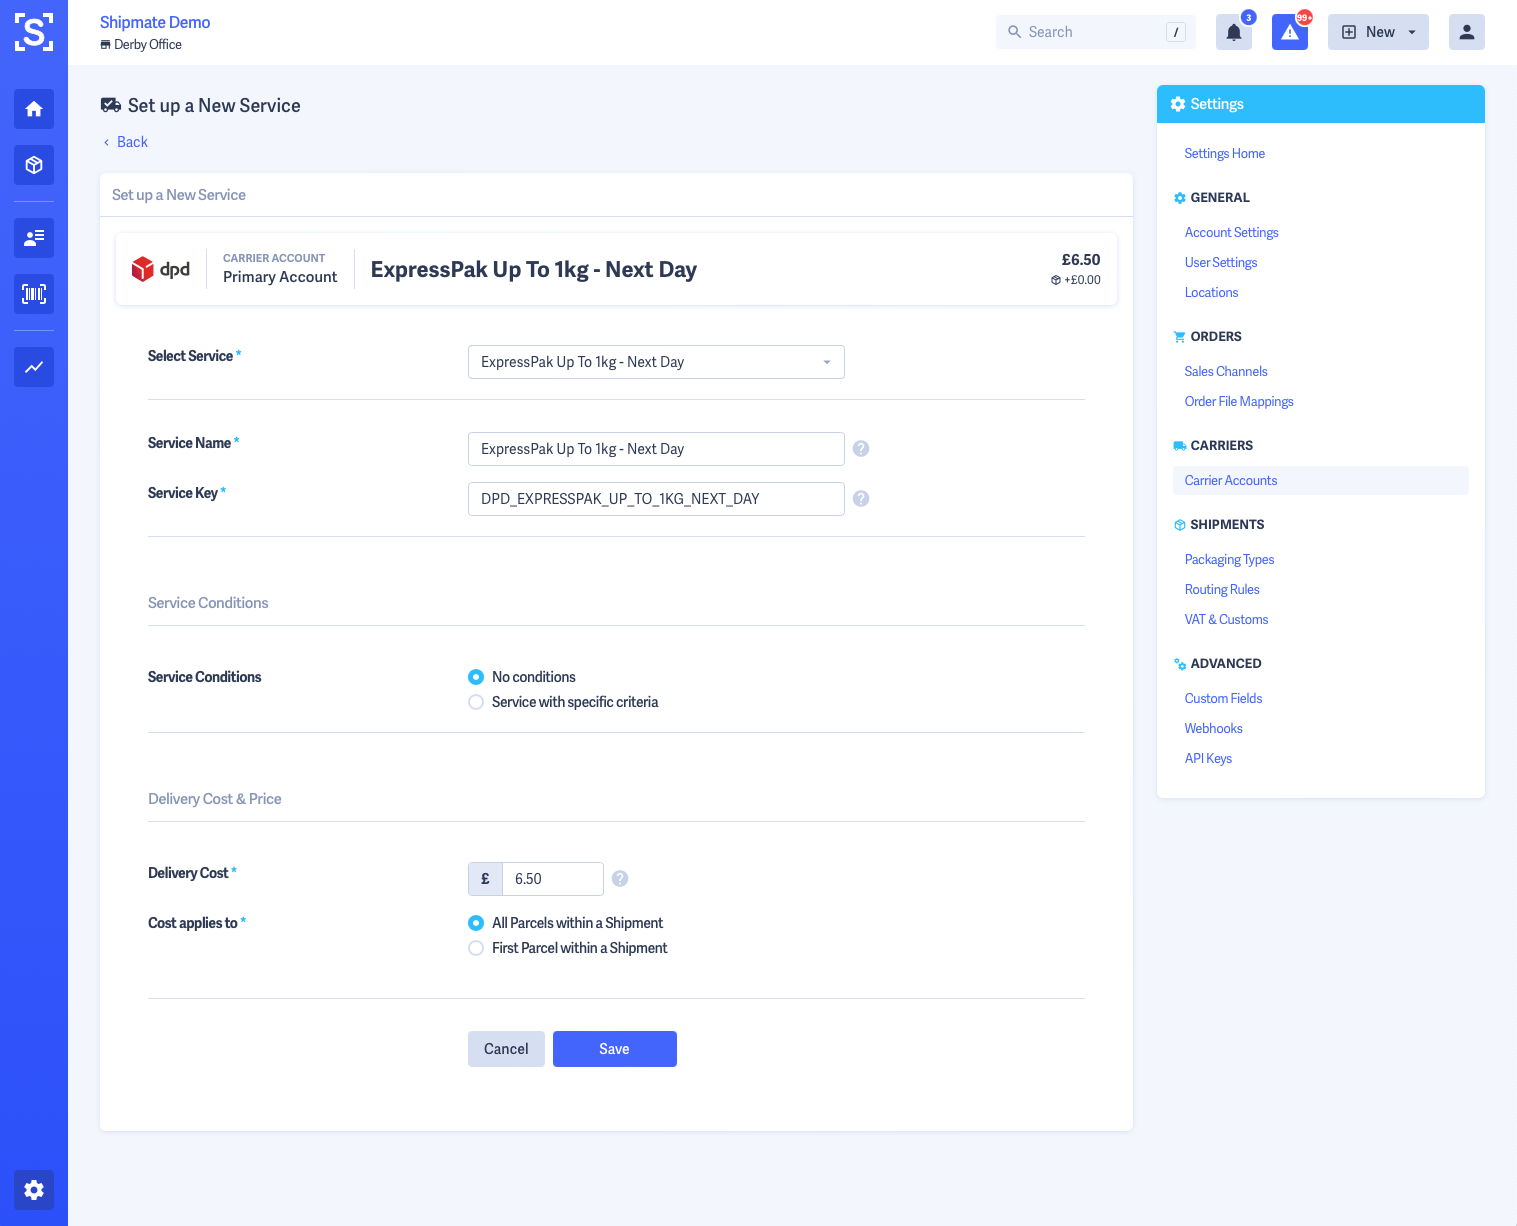
Selecting a Delivery Service will pre-populate parts of the form, but you are able to change them to suit your needs.
Service Name - this is the name the Delivery Service will be referred to throughout your Shipmate account. It will be displayed in menus, on screens and printed onto Despatch Notes and Commercial Invoices.
Service Key - this is used by the API and CSV uploader to uniquely identify each Delivery Service on your account. If you already use other systems with Delivery Method codes, you could use these so they align easily.


Delivery Service Conditions
Delivery Service Conditions give Shipmate the intelligence to know when a particular Delivery Service is suitable for any given Shipment.
Here you list out the conditions that have to be met in order for the service to be used, and effectively state the limits of the service. You can also add conditions to set business logic as to when this service should be made available, such as the current day of the week and time.
You can add multiple conditions for each service - they are logically AND-ed together so all specified criteria need to be met in order for the service to be available for use.
It is sometimes appropriate to configure multiple instances of the same Delivery Service, each with different conditions to narrow down particular options or costings.
You can apply Conditions to Delivery Services on the following criteria:
- Contents
- SKU - is or is not a SKU code or in a list of SKU codes
- Delivery Address
- Delivery Country - is or is not one or more countries
- UK Postcode - is or is not one or more postcode starting patterns of a mixed format (e.g., DE, DE1, DE22, DE1 1)
- UK Postcode Area - is or is not one or more postcode areas (e.g., DE, NG, LE)
- UK Postcode Outward Code - is or is not one or more postcode outward codes (e.g., DE1, DE22, DE23)
- Largest Parcel
- Actual Weight - equal, greater or less than a given value
- Chargeable Weight - equal, greater or less than a given value
- Volumetric Weight - equal, greater or less than a given value
- Longest Dimension - equal, greater or less than a given value
- Length - equal, greater or less than a given value
- Width - equal, greater or less than a given value
- Depth - equal, greater or less than a given value
- Volume - equal, greater or less than a given value
- Girth - equal, greater or less than a given value
- Length and Girth Combined - equal, greater or less than a given value
- Operations
- Current Day - is or is not the selected day of the week
- Current Time - is before or after the selected time of the day
- Location - is or is not a selected Despatch Location
- Order
- Brand - is or is not the selected Brand
- Channel - order does or does not originate from the selected Channel
- Delivery Day - is or is not a specified Day of the Week
- Delivery Service - is or is not a selected Delivery Service class (e.g., Next Day)
- Delivery Slot - is before a specified time of the day
- Duty Method - is or is not DAP or DDP
- Order Reference - does or does not contain a given string
- Shipment
- Actual Weight - equal, greater or less than a given value
- Chargeable Weight - equal, greater or less than a given value
- Volumetric Weight - equal, greater or less than a given value
- Number of Parcels - equal, greater or less than a given value
- Total Volume - equal, greater or less than a given value
- Total Value - equal, greater or less than a given value
- Shipment Reference - does or does not contain a given string
- Custom Fields - apply conditions based on any data you have applied at Shipment or Parcel level
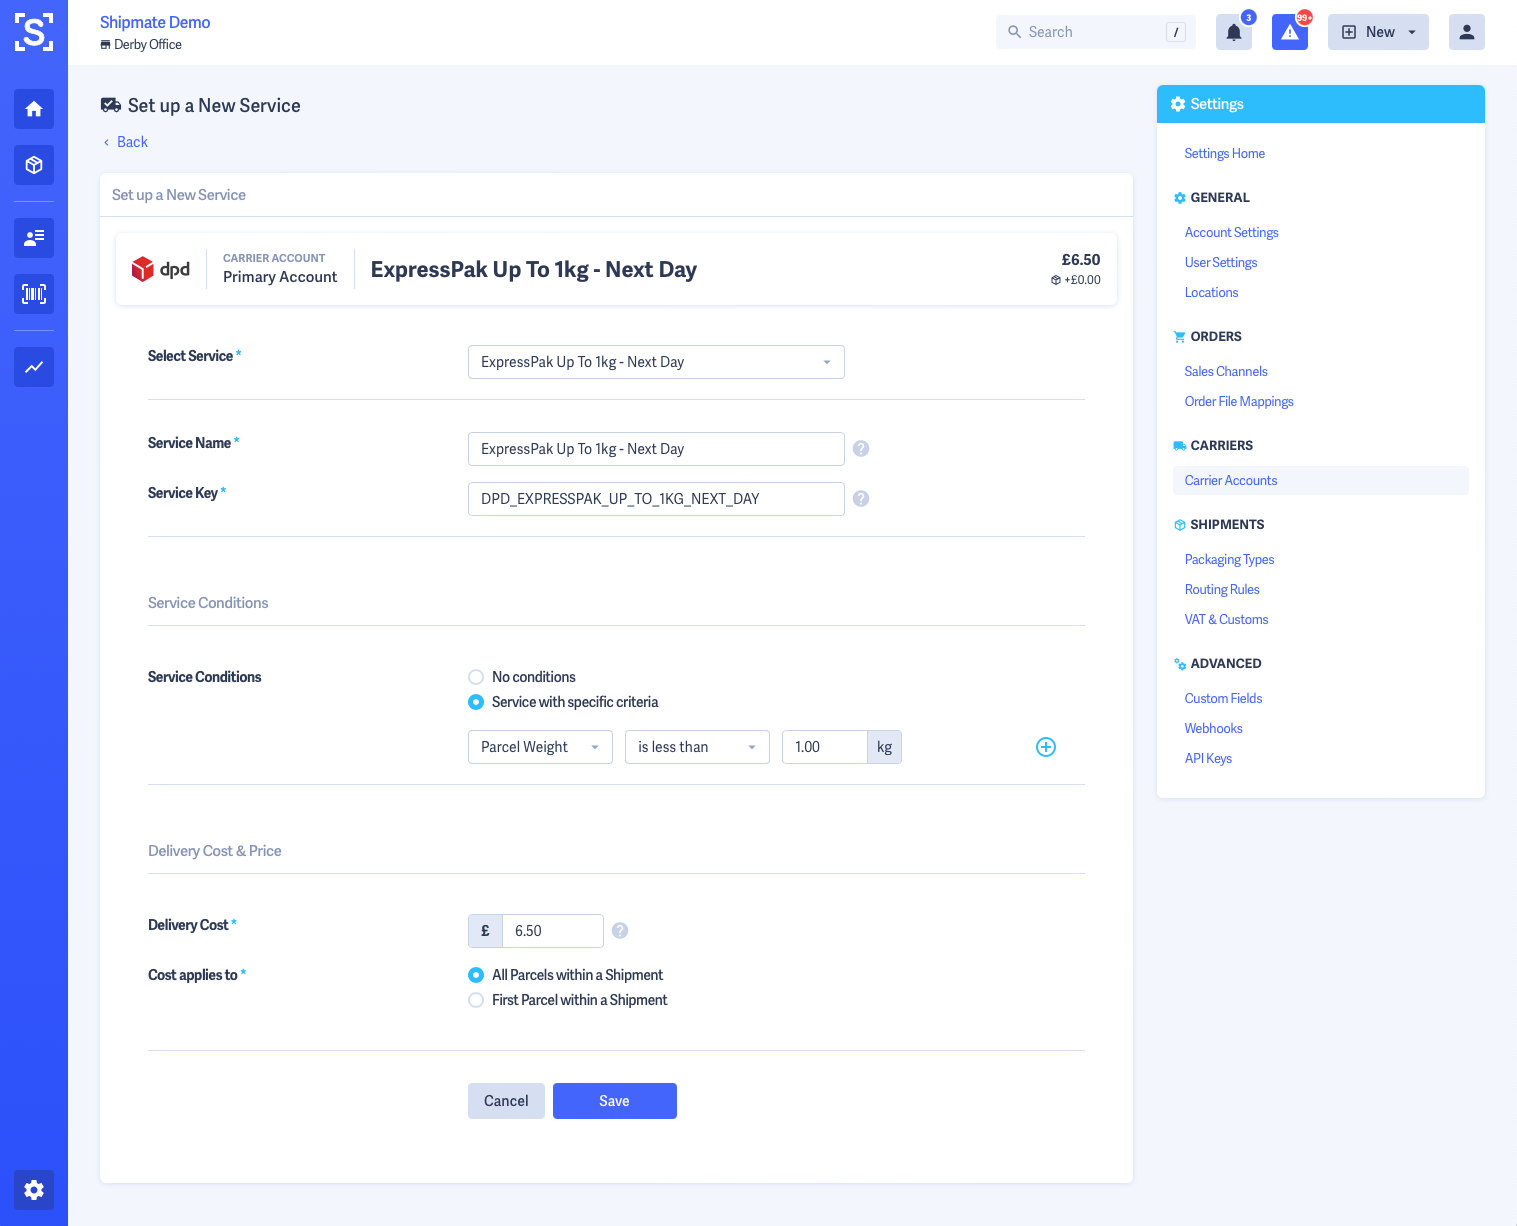
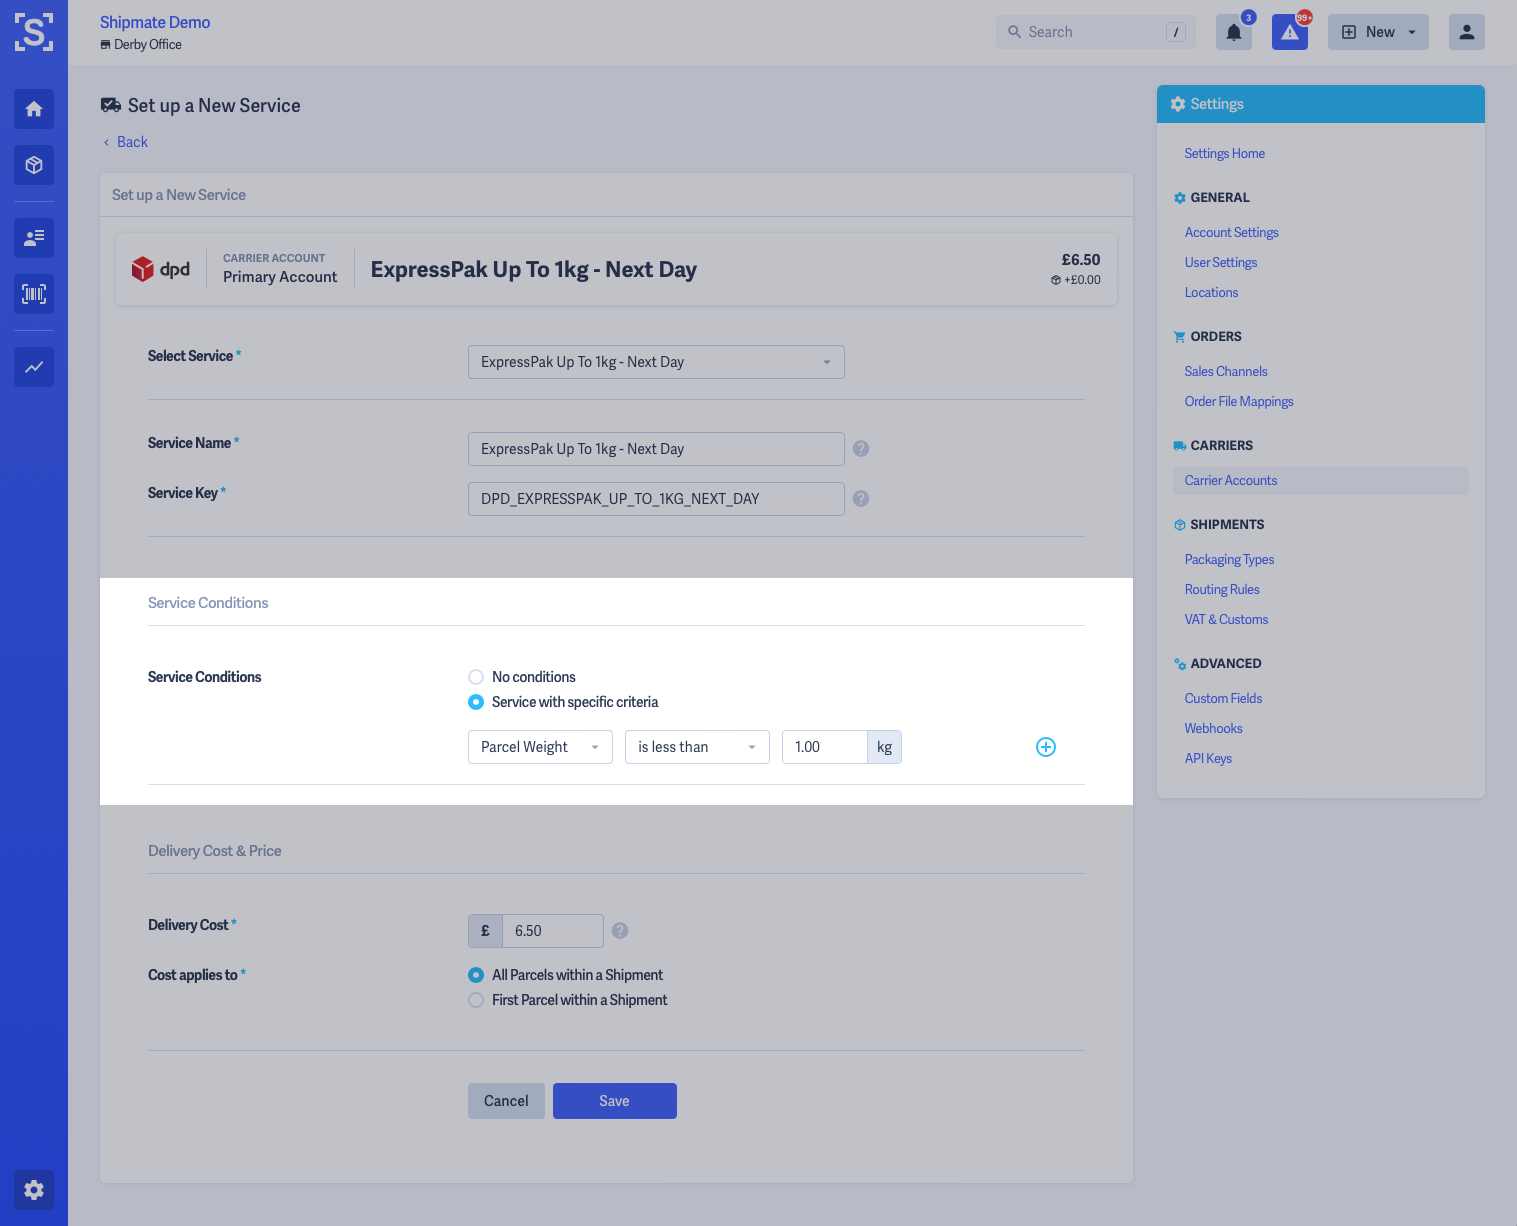
Delivery Costs
By entering the Delivery Cost associated with the Delivery Service, Shipmate is able to select the most cost effective service that matches all the criteria for a given shipment.
When setting up a new Delivery Service, you supply the base cost of the service, and how the Chargeable Weight is applied, by selecting Actual Weight, Volumetric Weight, or Calculate Greatest. The carrier's volumetric weight factor is applied to determine the volumetric weight and using Calculate Greatest will compare this to the Actual Weight given to determine which to apply to the Shipment for cost calculation.
You can choose how this cost is applied:
- Every Parcel within a Shipment applies this cost to each parcel within each Shipment, effectively multiplying the cost.
- First Parcel within a Shipment applies this cost at Shipment level, with an optional Additional Parcel Cost if you have agreed an additional rate for subsequent parcels within a Shipment.
If the cost is calculated at Shipment level regardless of the number of parcels, select First Parcel within a Shipment and leave the Additional Parcel Cost at 0.00.
You are able to add Weight Bands, Surcharges and Fuel Surcharges once the Delivery Service has been added.

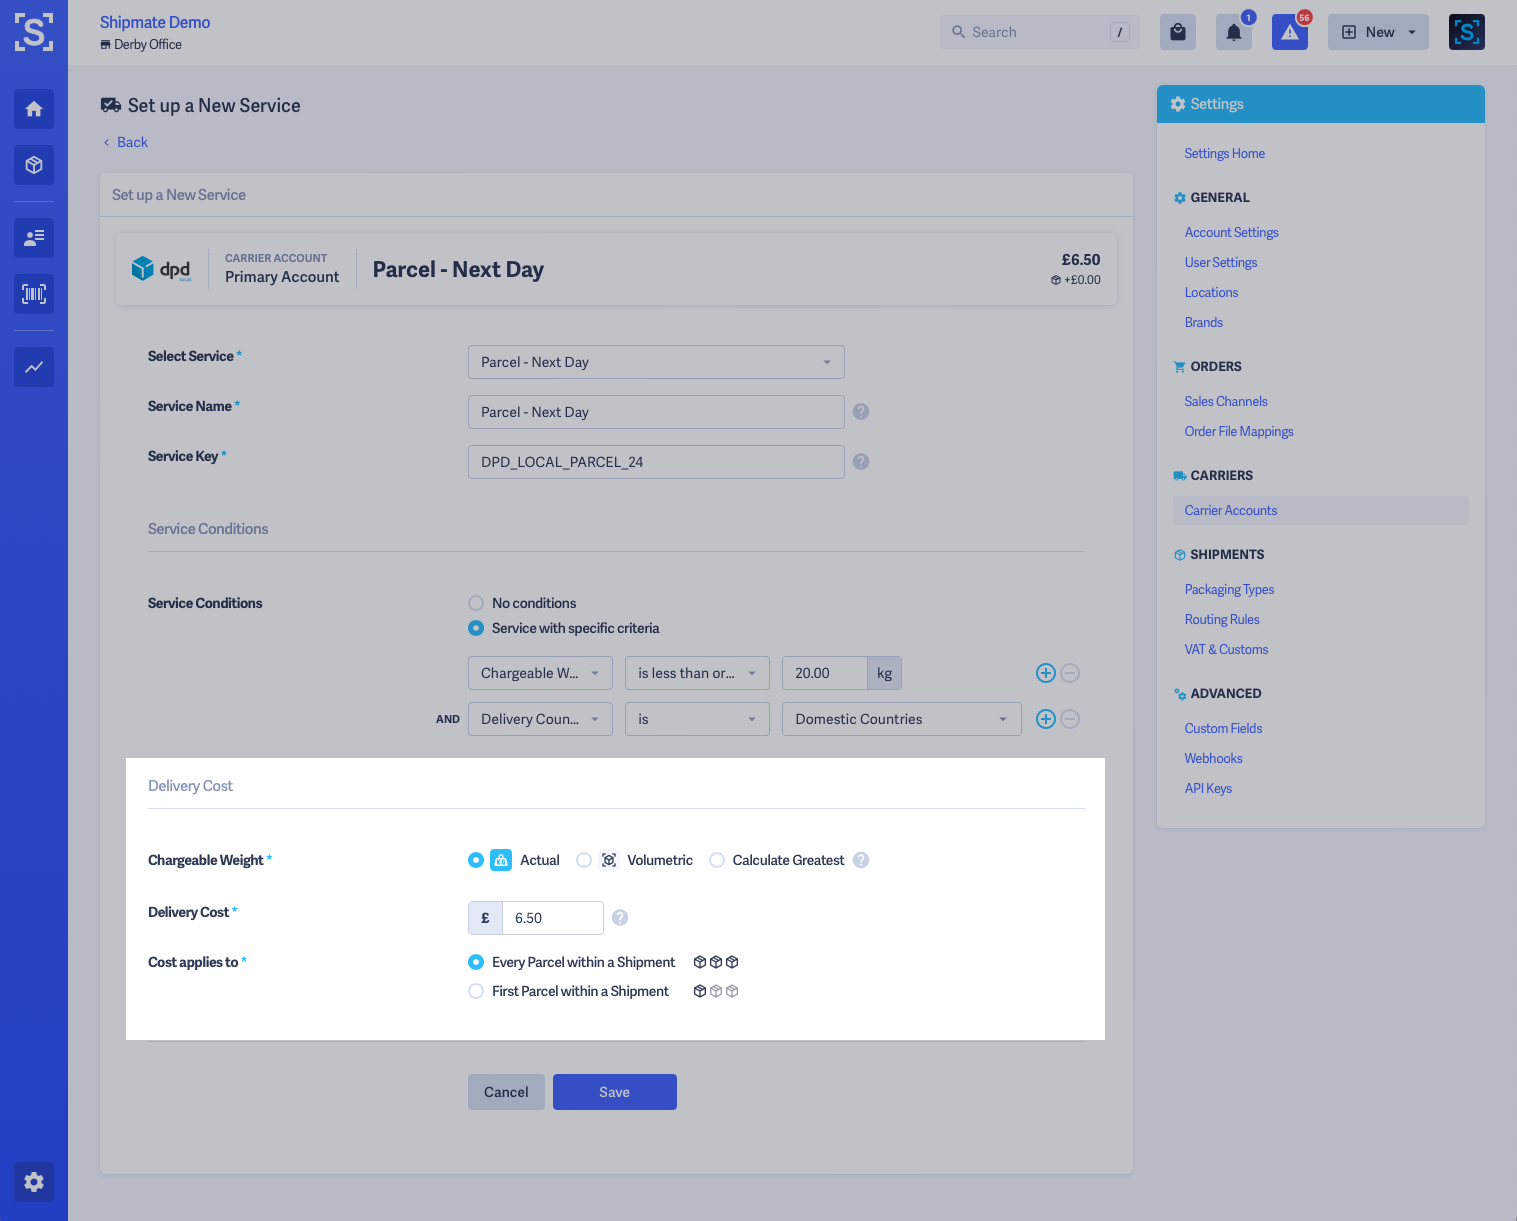
Editing a Delivery Service
To edit a Delivery Service, simply choose the Edit Service option from the pop-up menu of the service you wish to change.
This will open the Delivery Service in an editable form similar to when you originally added it. Simply make your changes then click the Save Service button.
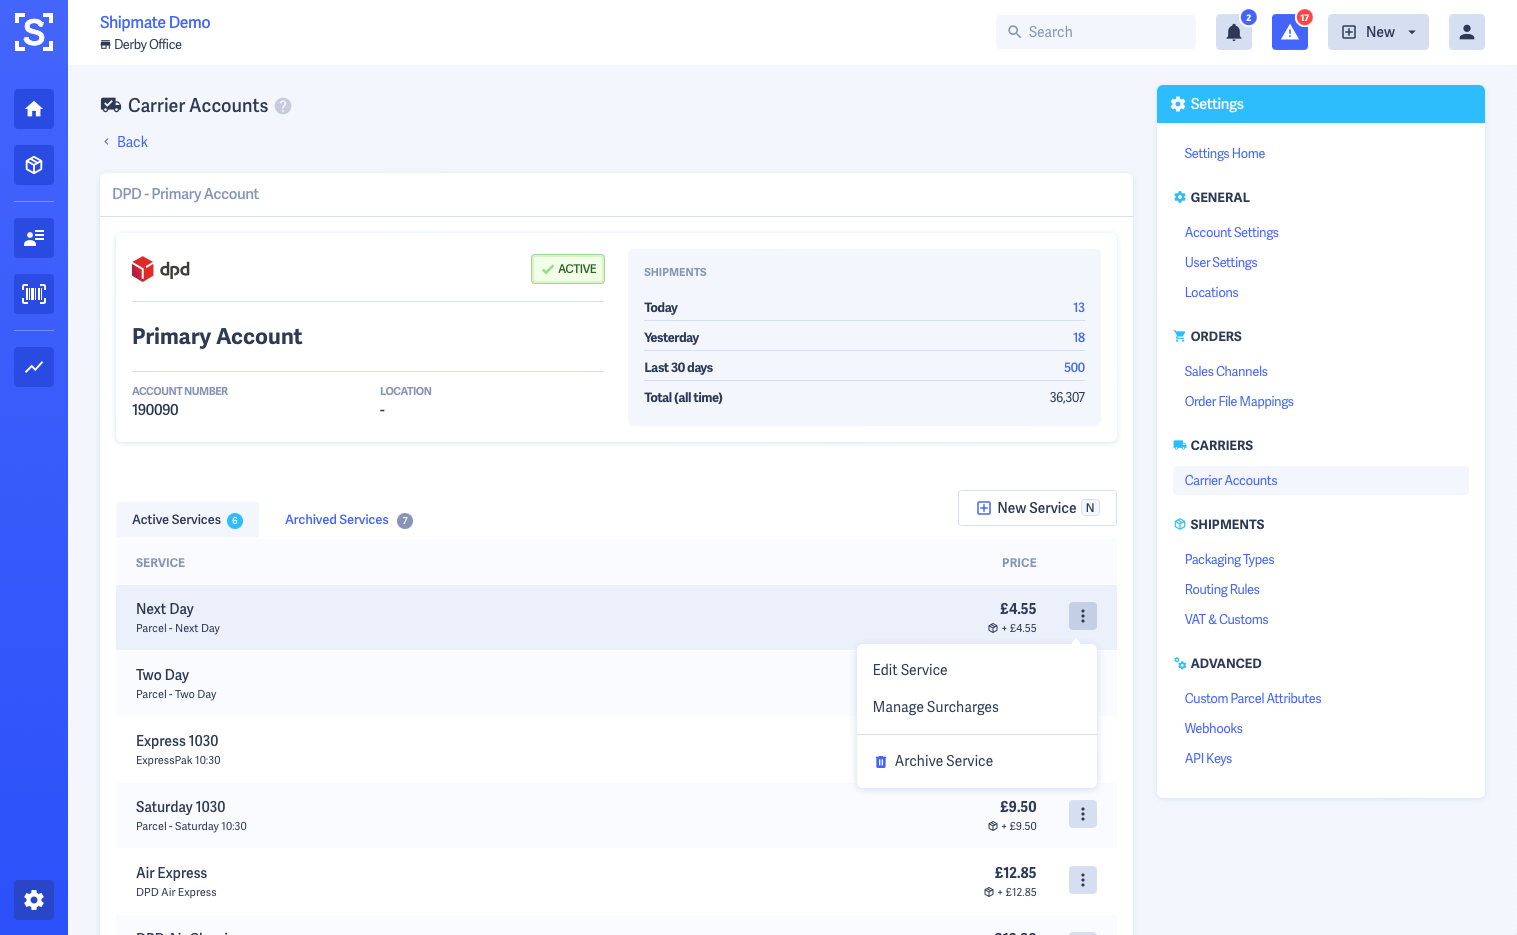
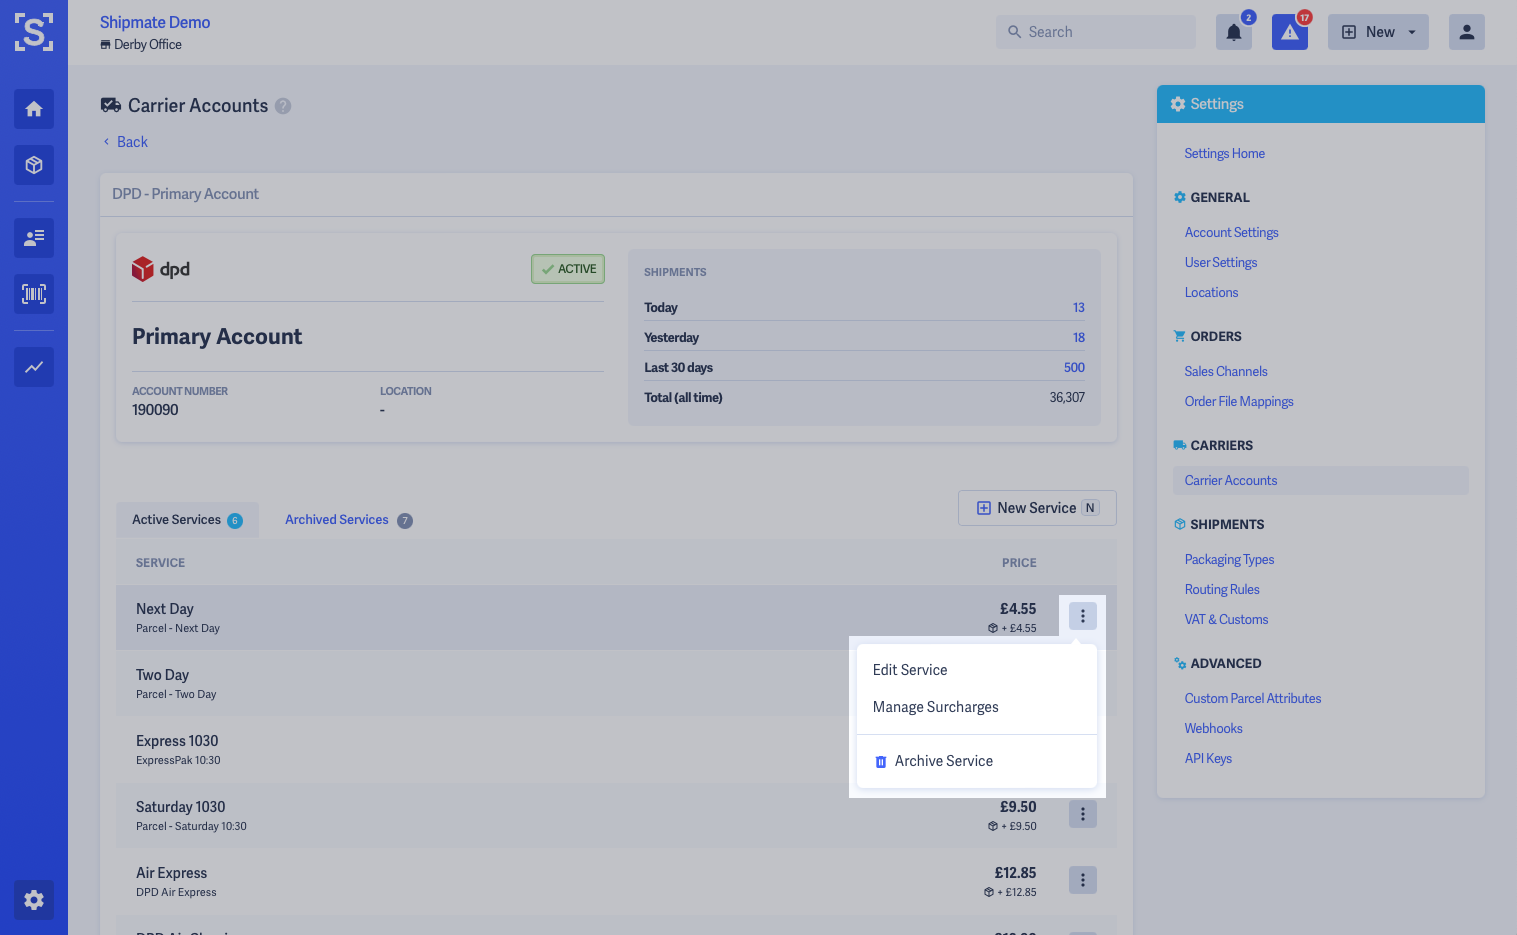
Deleting a Delivery Service
To delete a Delivery Service, simply choose the Archive Service option from the pop-up menu of the service you wish to remove.
You can reinstate a previously archived service by selecting the Archived Services tab, then selecting the Restore option from the pop-up menu of the service you wish to restore.


Surcharges
You can manage three types of surcharge for each Delivery Service:
- Weight Bands - adds a value when a parcel reaches a certain weight band
- Surcharges - adds a value when a parcel meets a wide variety of criteria such as postcode area
- Fuel Surcharges - adds a value over a supplied date range to determine the fuel surcharge
Surcharges can add a fixed or percentage value to the base cost. To add a Surcharge, select the tab for the type of Surcharge you wish to add, then click the New button. Follow the on-screen instructions to add your Surcharge.
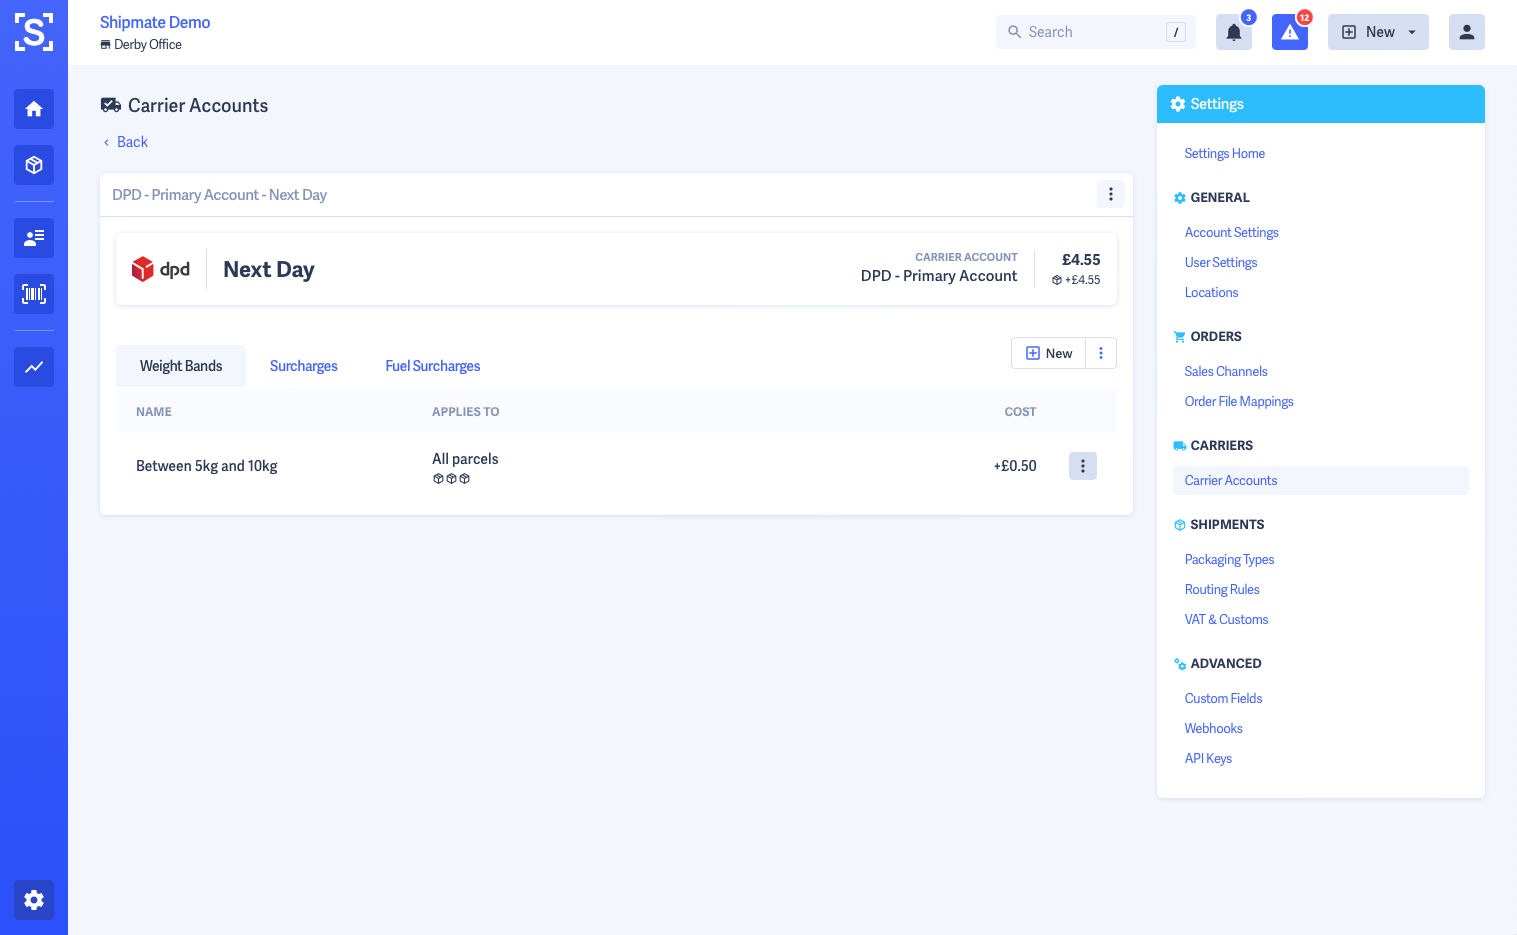
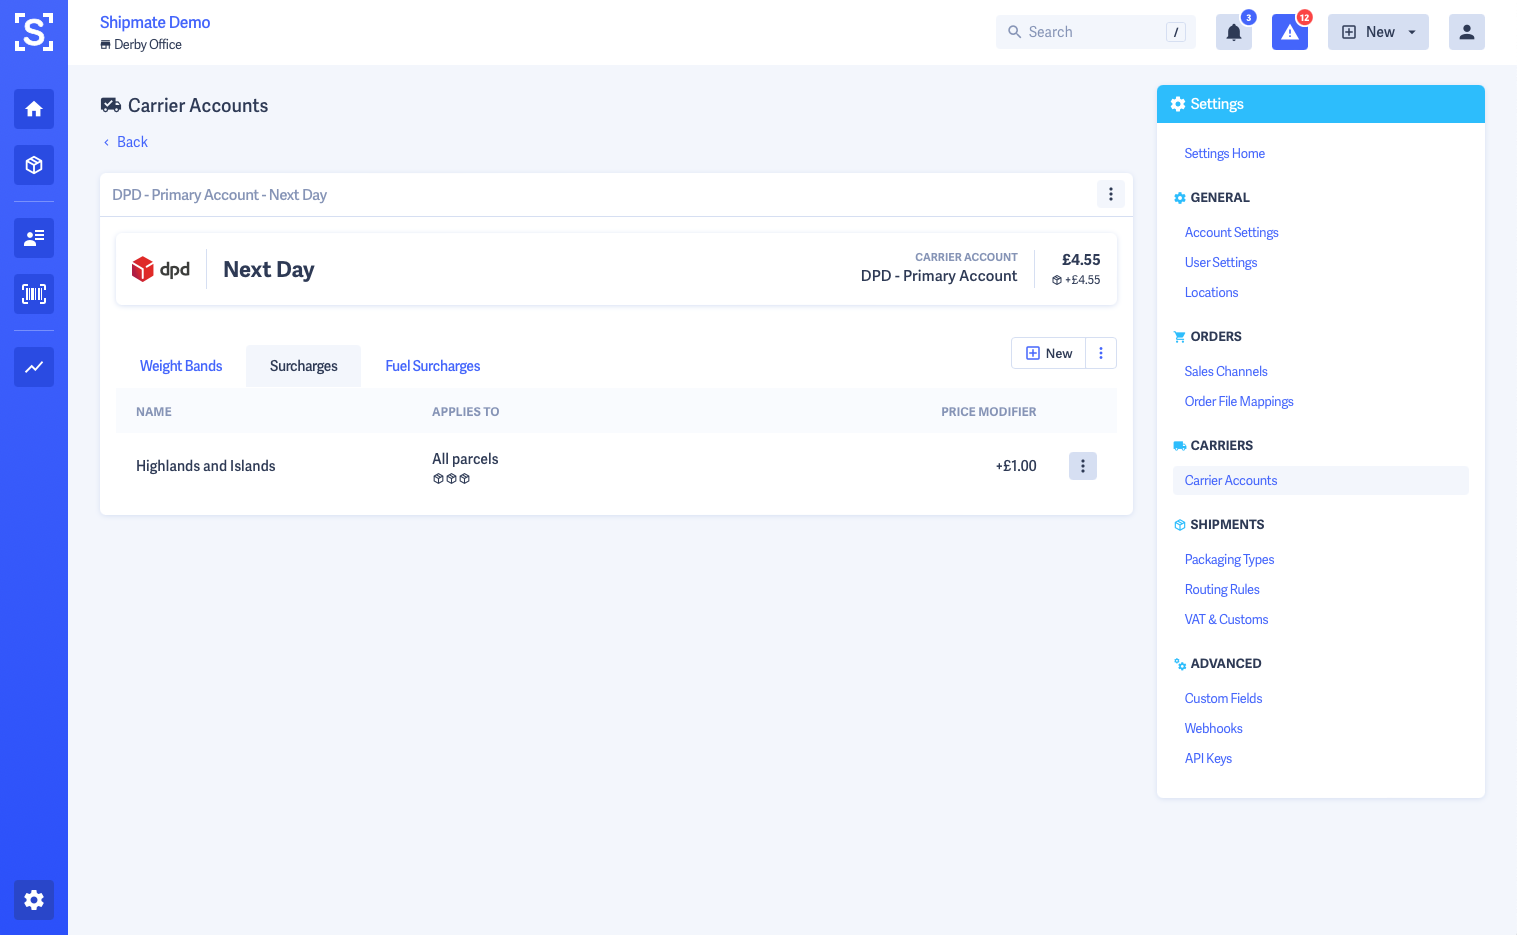
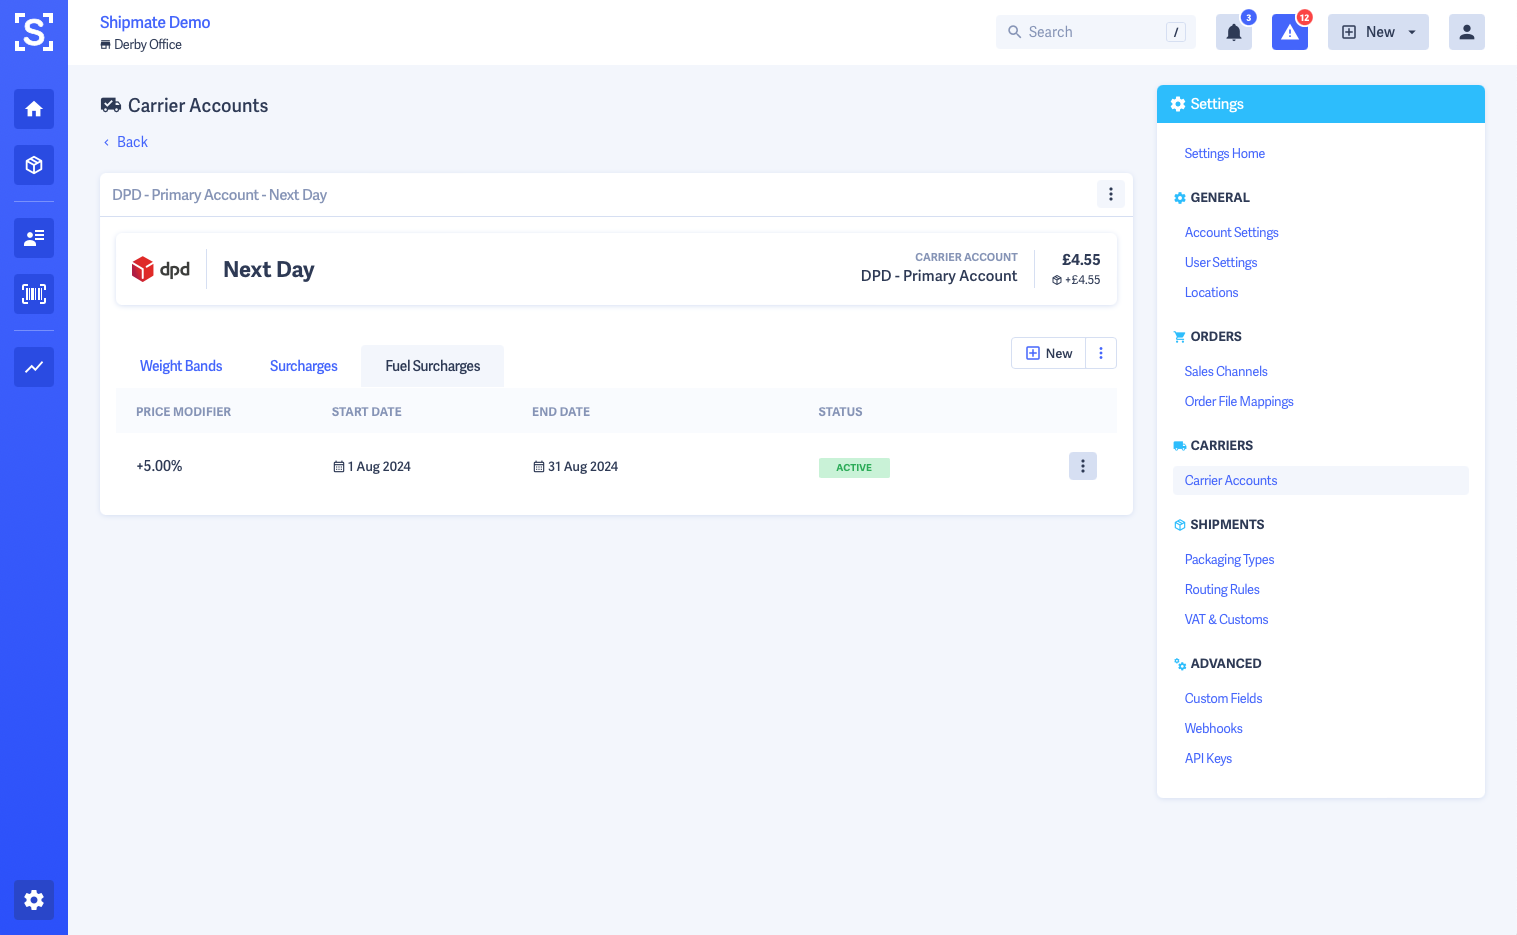
Surcharges - Weight Bands
You can apply Weight Band charges to Delivery Services on the following criteria:
- Largest Parcel
- Actual Weight
- Chargeable Weight
- Volumetric Weight
- Shipment
- Actual Weight
- Chargeable Weight
- Volumetric Weight
In all cases, the charge can be applied when the selected weight type is equal to, less than, less than or equal to, greater than, greater than or equal to a given value, or between two values.
When applying a weight band between two values, it is possible to apply the cost as a Single Band, meaning a single charge applies to the entire range, or apply the charge to increments using the For each option - for example apply £0.50 for each 1Kg between 21kg and 50kg.
Multiple Weight Bands may be configured for each Delivery Service. Shipments meeting criteria for multiple configured weight bands will have each charge applied.
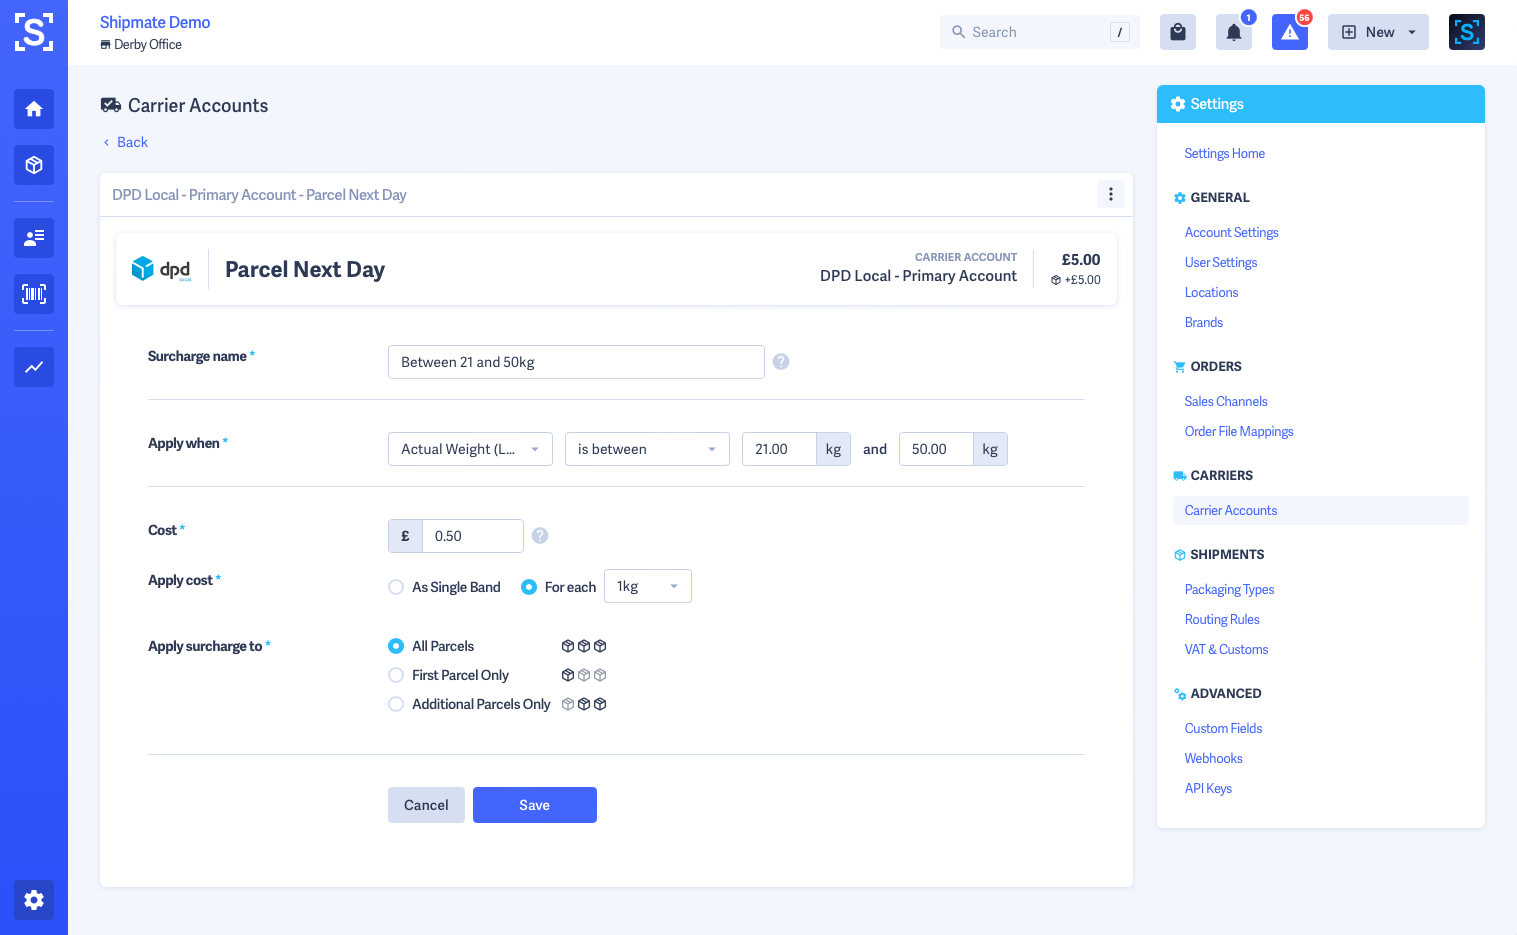
Surcharges - General Surcharges
You can apply surcharges to Delivery Services on the following criteria:
- Delivery Address
- Delivery Country - select one or more countries this surcharge applies to
- UK Postcode - state one or more postcode starting patterns of a mixed format (e.g., DE, DE1, DE22, DE1 1)
- UK Postcode Area - state one or more postcode areas (e.g., DE, NG, LE)
- UK Postcode Outward Code - state one or more postcode outward codes (e.g., DE1, DE22, DE23)
- Largest Parcel
- Actual Weight - apply surcharge when equal, greater or less than a given value
- Chargeable Weight - apply surcharge when equal, greater or less than a given value
- Volumetric Weight - apply surcharge when equal, greater or less than a given value
- Longest Dimension - apply surcharge when equal, greater or less than a given value
- Length - apply surcharge when equal, greater or less than a given value
- Width - apply surcharge when equal, greater or less than a given value
- Depth - apply surcharge when equal, greater or less than a given value
- Shipment
- Actual Weight - apply surcharge when equal, greater or less than a given value
- Chargeable Weight - apply surcharge when equal, greater or less than a given value
- Volumetric Weight - apply surcharge when equal, greater or less than a given value
- Custom Fields - apply surcharges based on any data you have applied at Shipment or Parcel level
- Carrier Data Mappings - apply surcharges based on any data you have mapped at Carrier or Delivery Service level
Each Surcharge may have multiple criteria, which are logically AND-ed together. For example, apply surcharge when Shipment: Chargeable Weight is over 50Kg AND Delivery Address: UK Postcode starts with BT. In this instance both criteria must be met for the surcharge to be applied.
Multiple surcharges may be configured for each Delivery Service. Shipments meeting criteria for multiple configured surcharges will have each surcharge applied in the order processed.
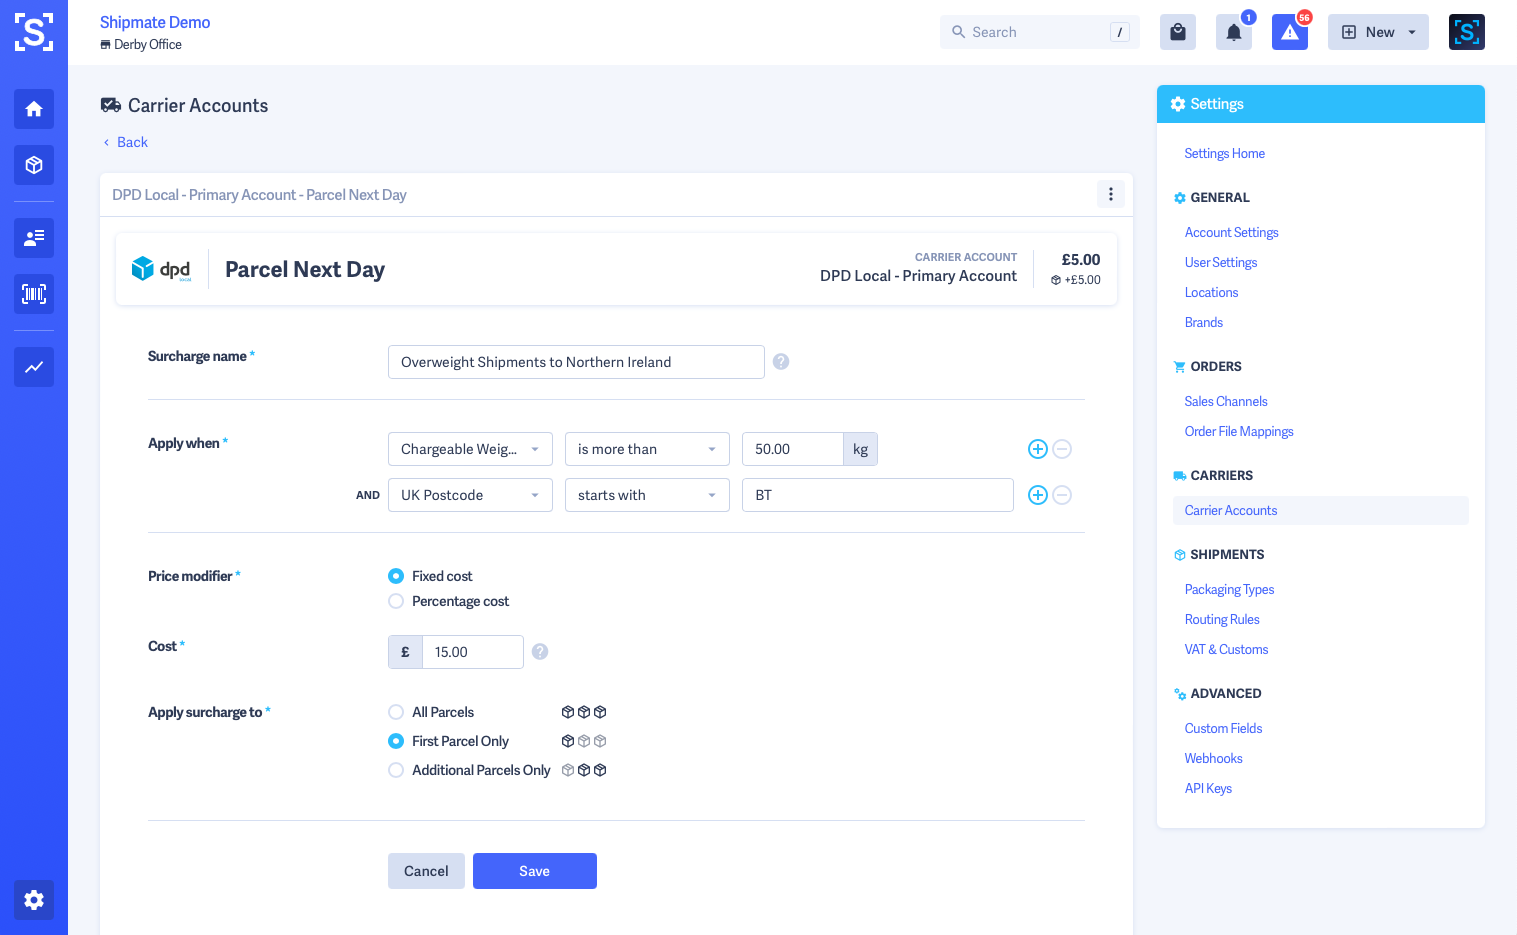
Surcharges - Fuel Surcharges
Fuel Surcharges add either a fixed or percentage value over a supplied date range to determine the fuel surcharge.
Fuel Surcharges are applied to the cost of a Shipment last, including any weight bands or general surcharges that have been applied first.
You are able to apply Fuel Surcharges to individual Delivery Services, or apply them to all services for a given Carrier Account when you add or edit a Fuel Surcharge.
The date range may be applied retrospectively or in the future. If you apply a retrospective Fuel Surcharge, the cost of any existing Shipments within the given date range will be recalculated to apply the new rate.
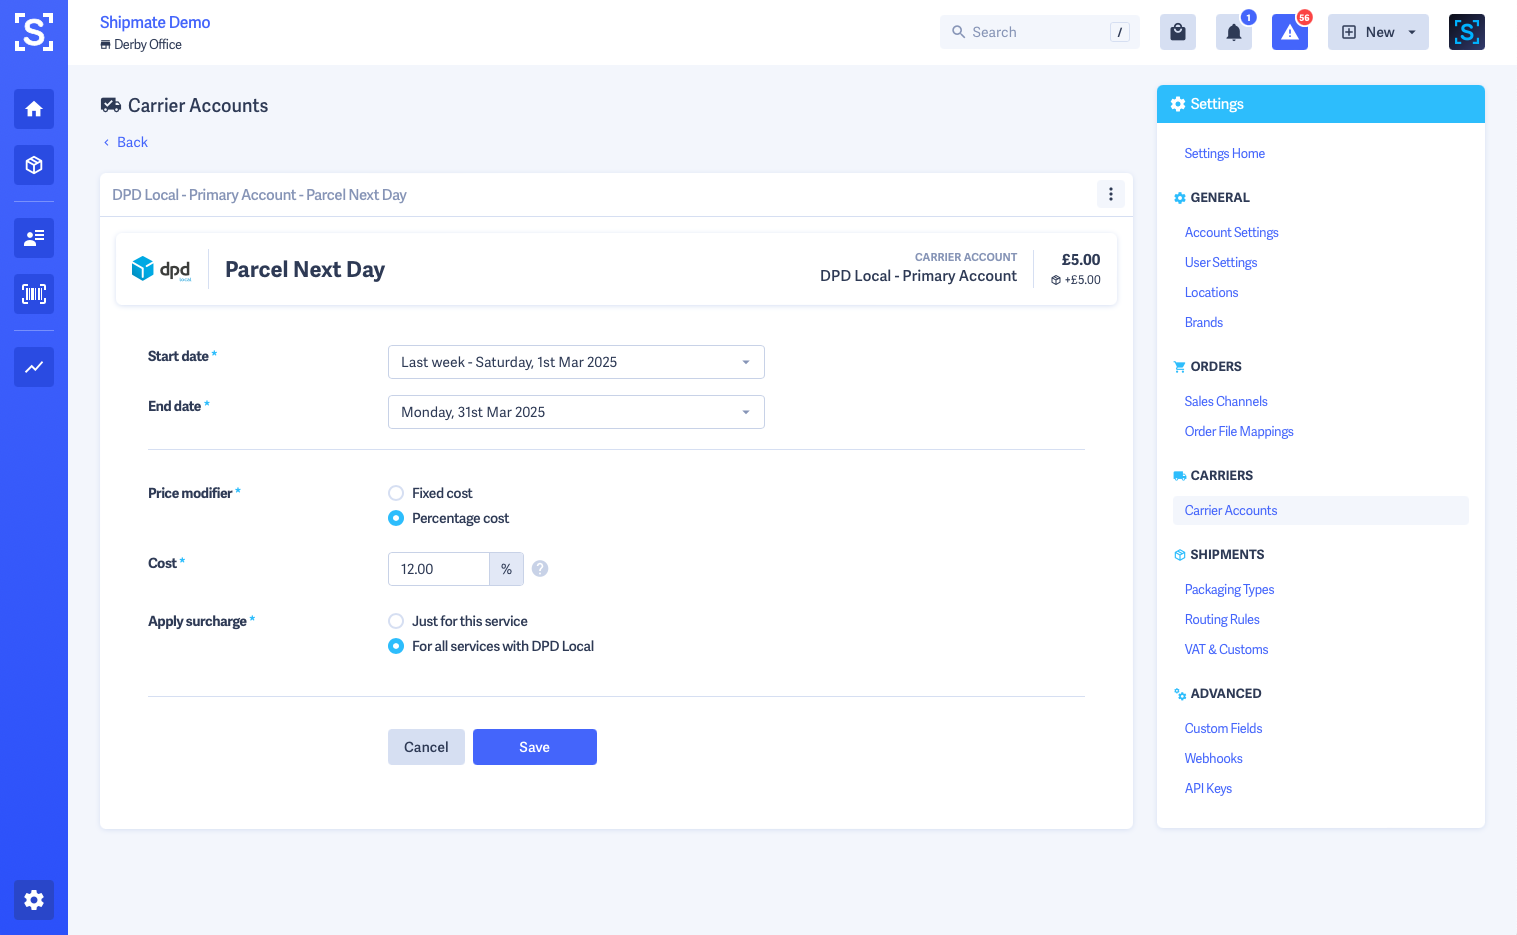
Performance / SLA Targets
If you wish to monitor carrier performance, you can enter an SLA target while setting up each Delivery Service.
This will then be used as a target for on-time first delivery attempts.
From the Delivery Service page, select Advanced from the More Options menu, then adjust the value in the Service Level Agreement section of the Advanced Settings tab.
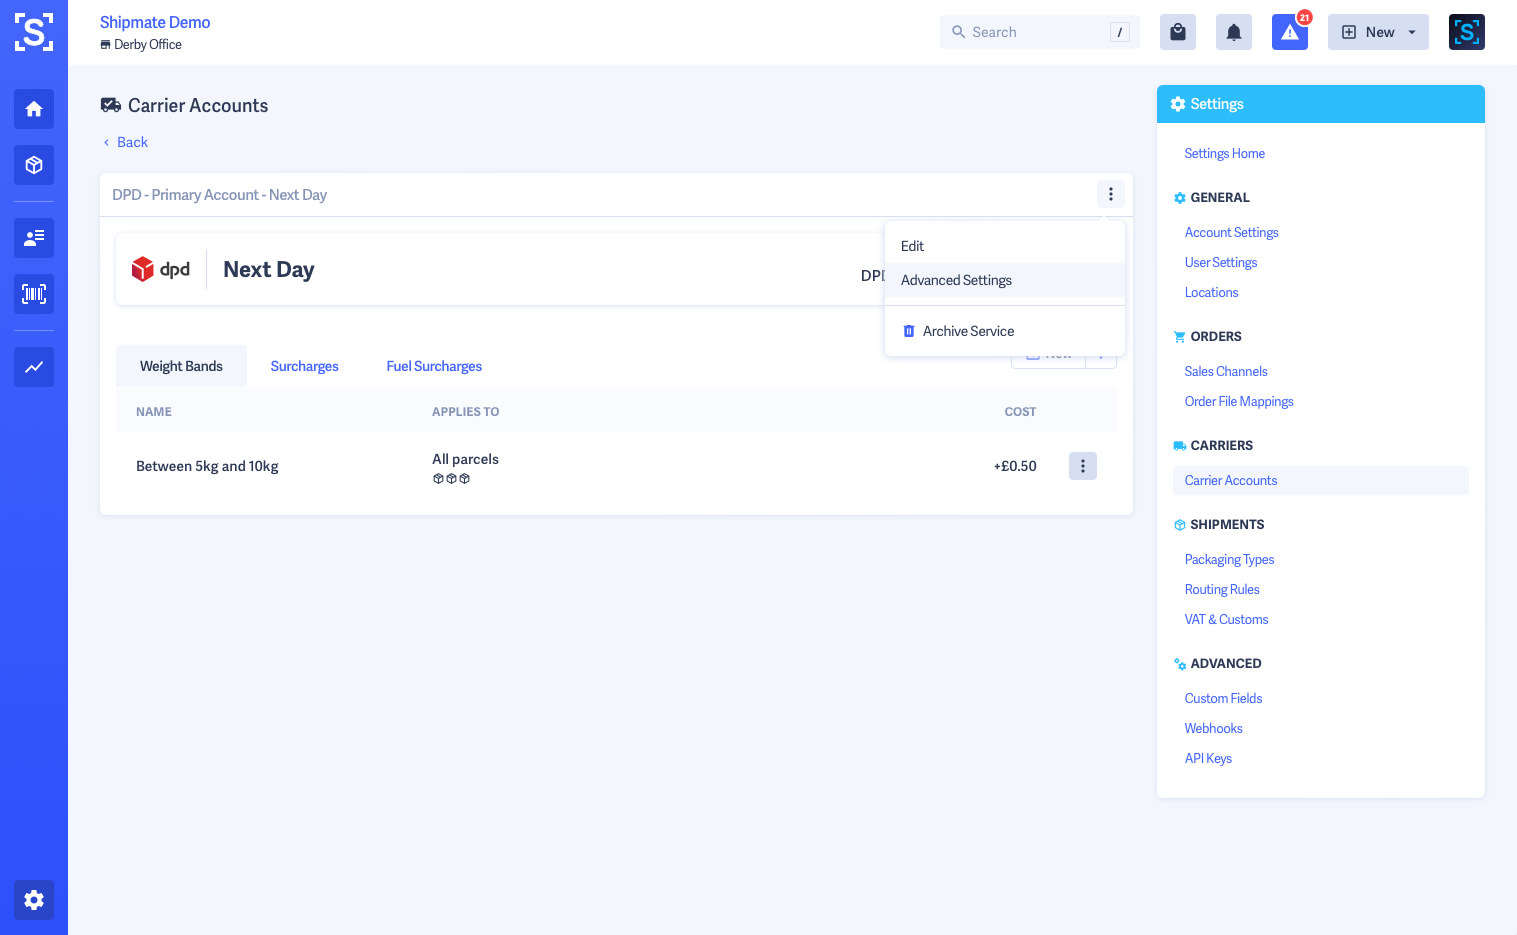
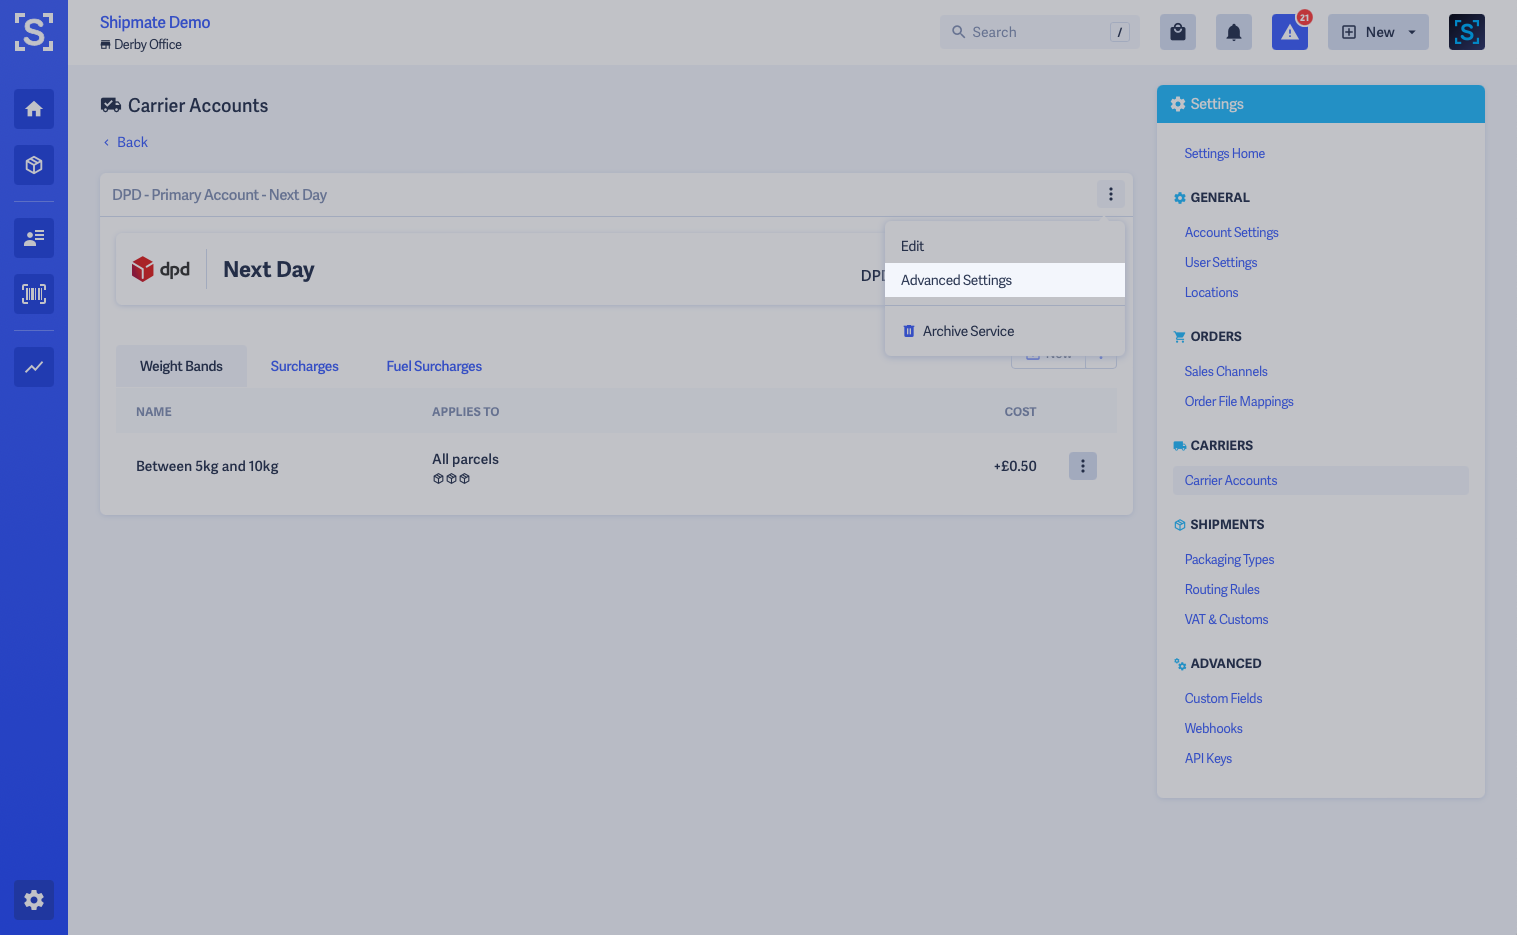
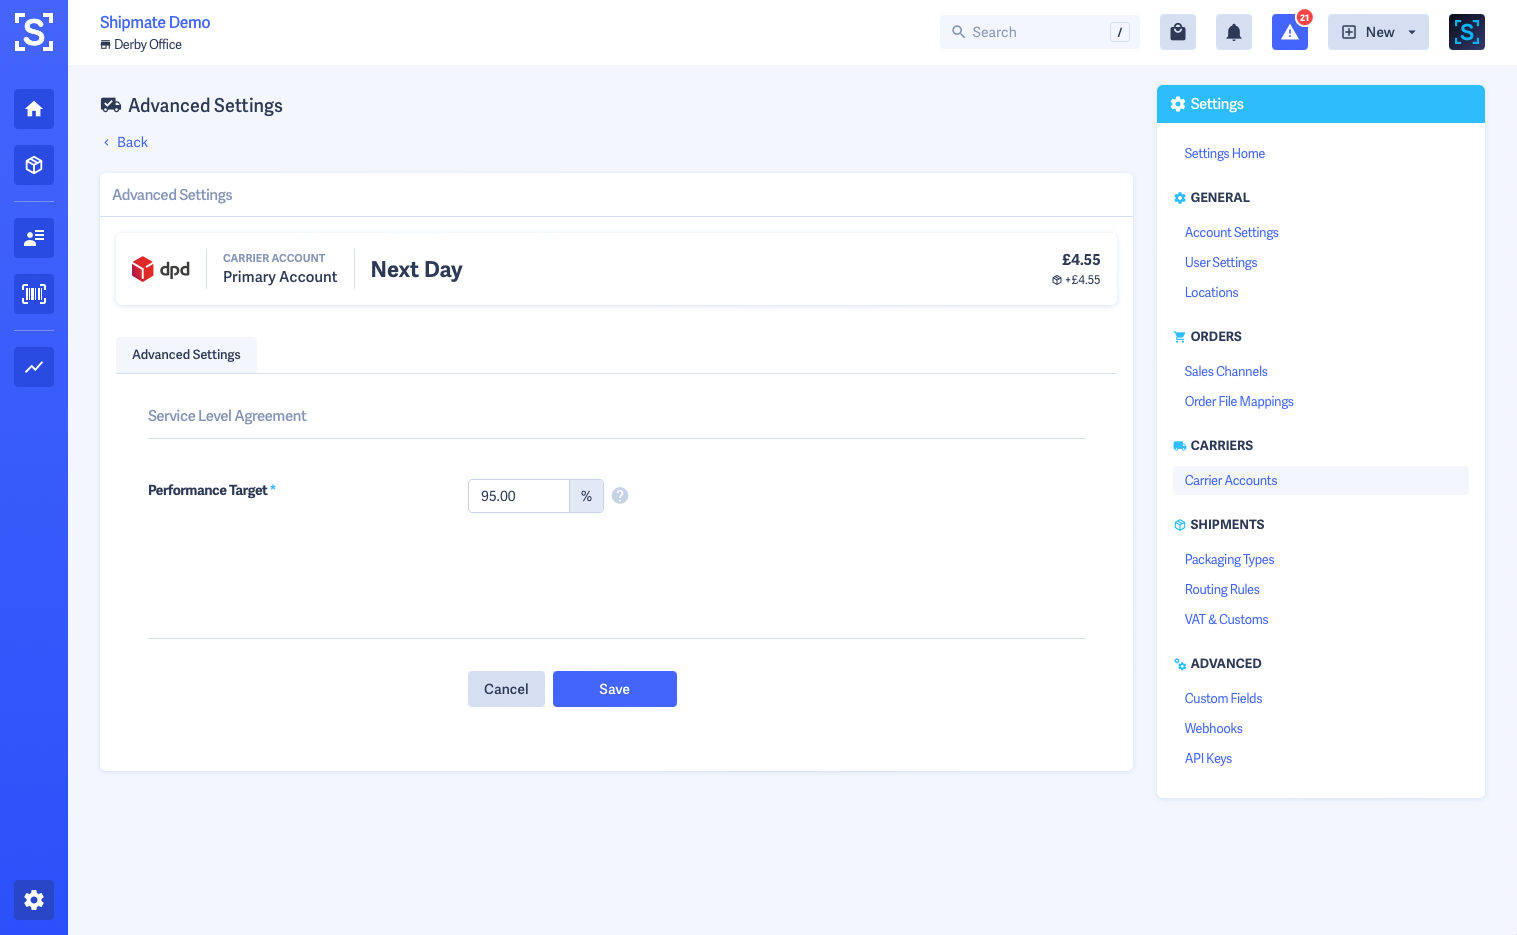
Delivery Service Data Mappings
Delivery Service Data Mappings work in the same way as Carrier Data Mappings, except these are mapped at Delivery Service level rather than globally at Carrier Account level.
This allows you to map data or set mappings to fixed values on each Delivery Service, or set up multiple instances of a particular Delivery Service with different values mapped in order to create a comprehensive set of services on your Shipmate account.
To access Data Mappings for a Delivery Service, first navigate to the Delivery Service, select Advanced Settings from the more options menu, then click the Data Mappings tab.
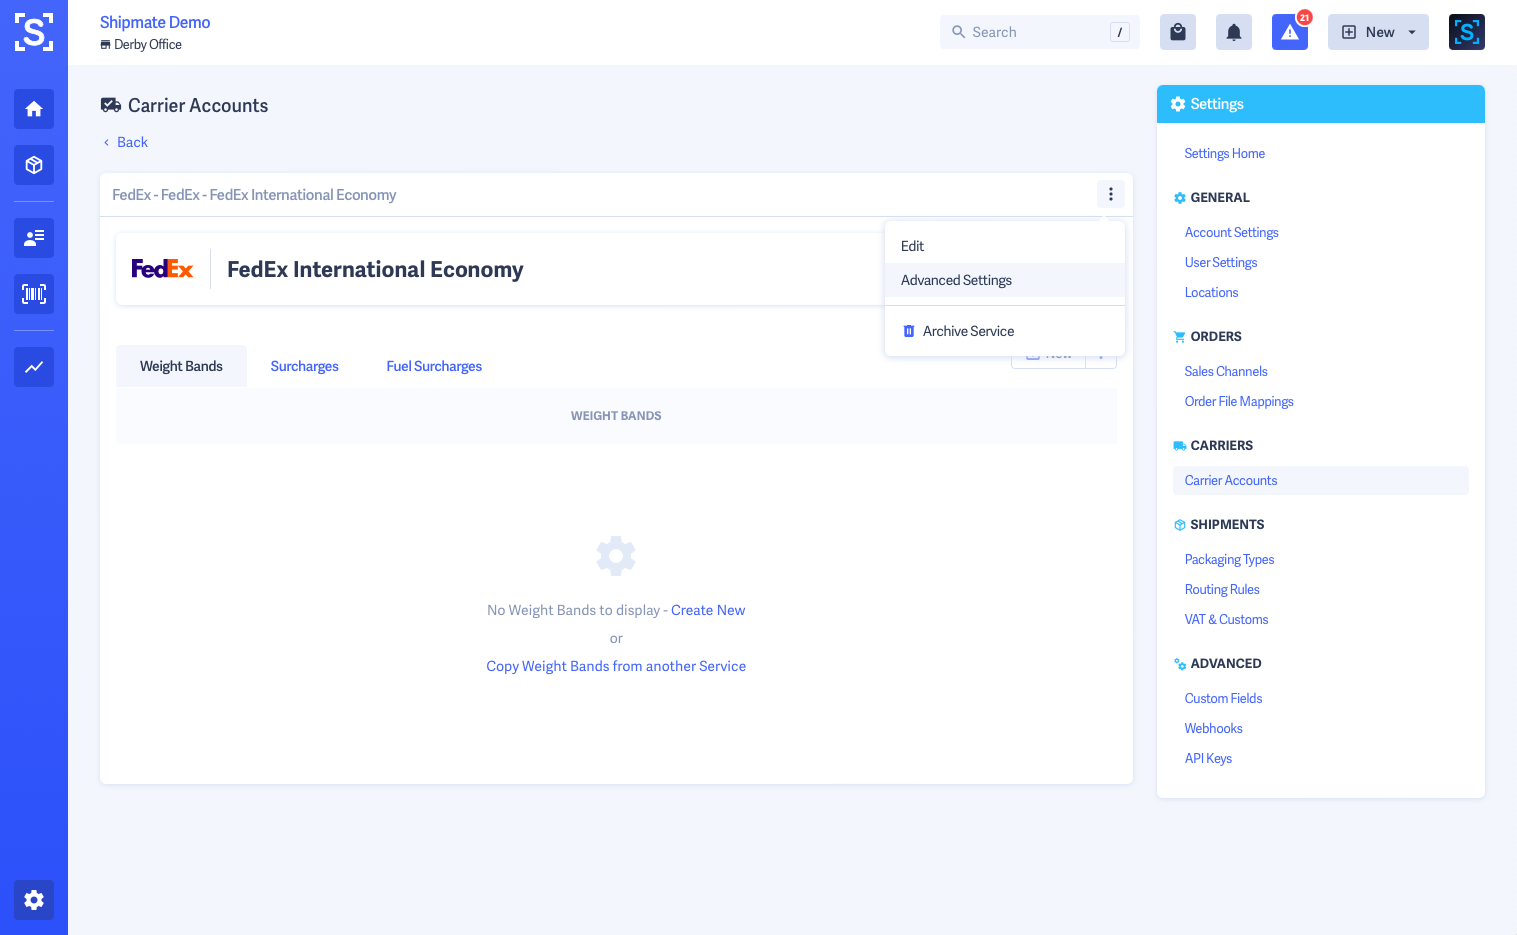
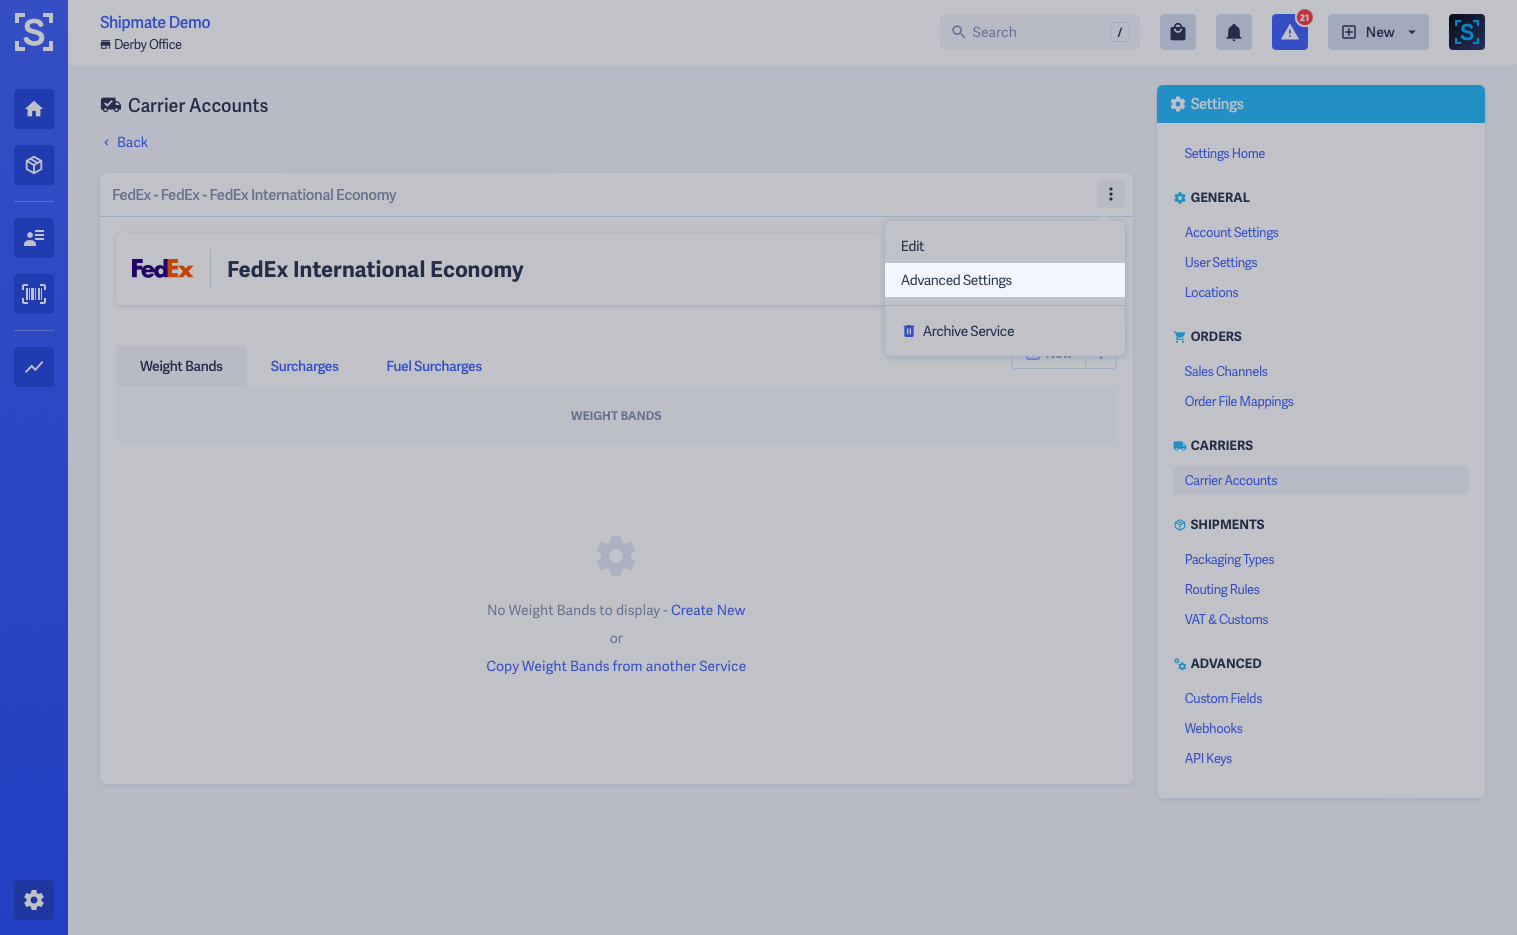
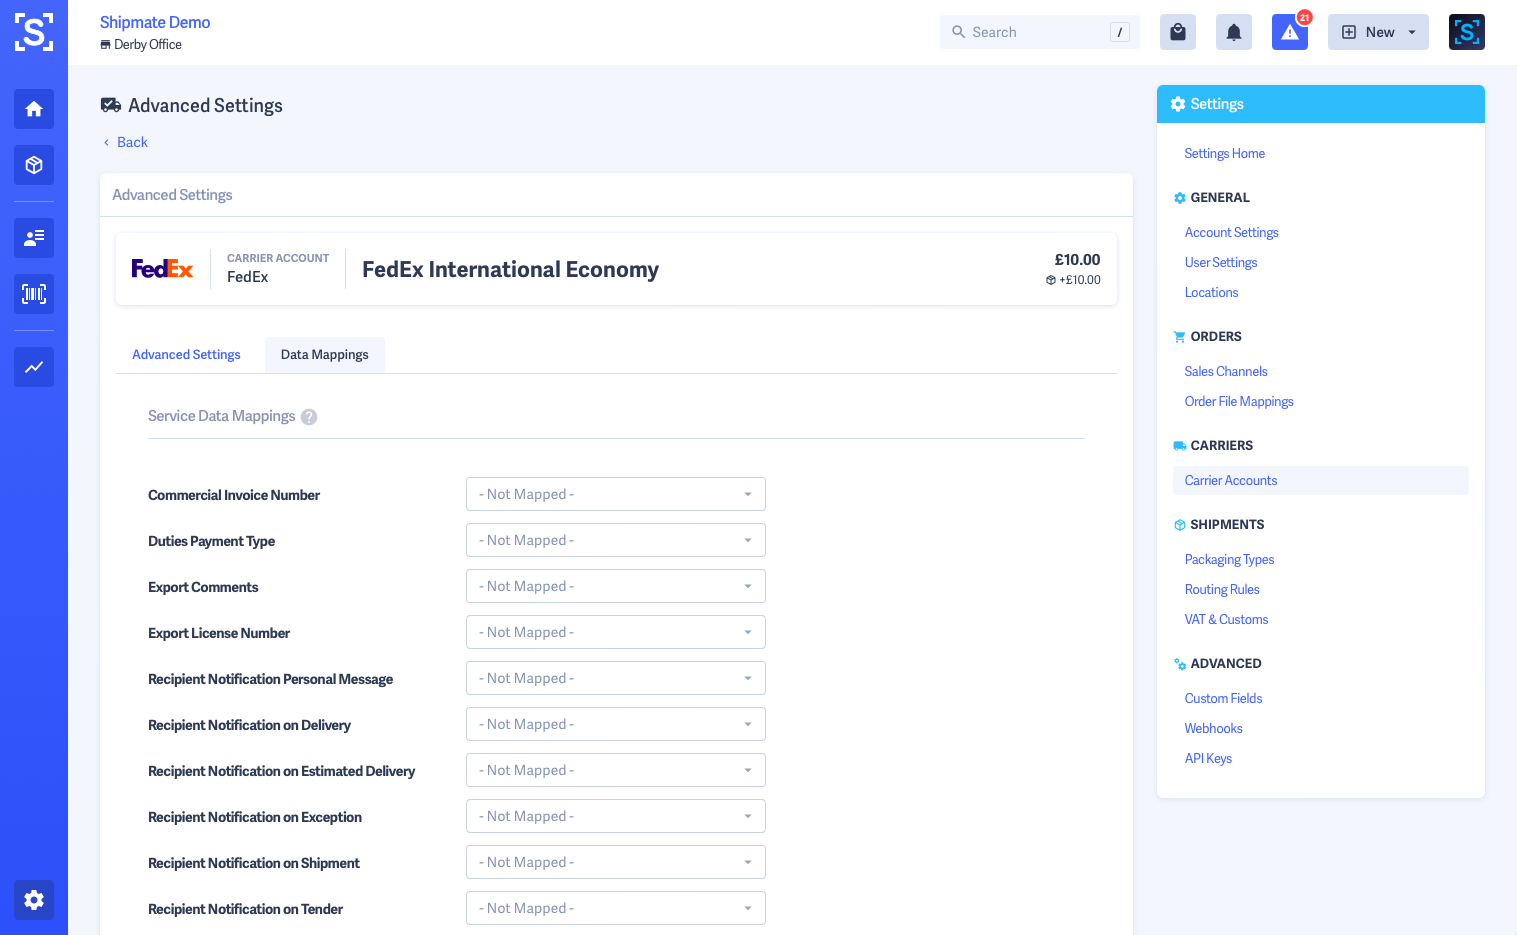
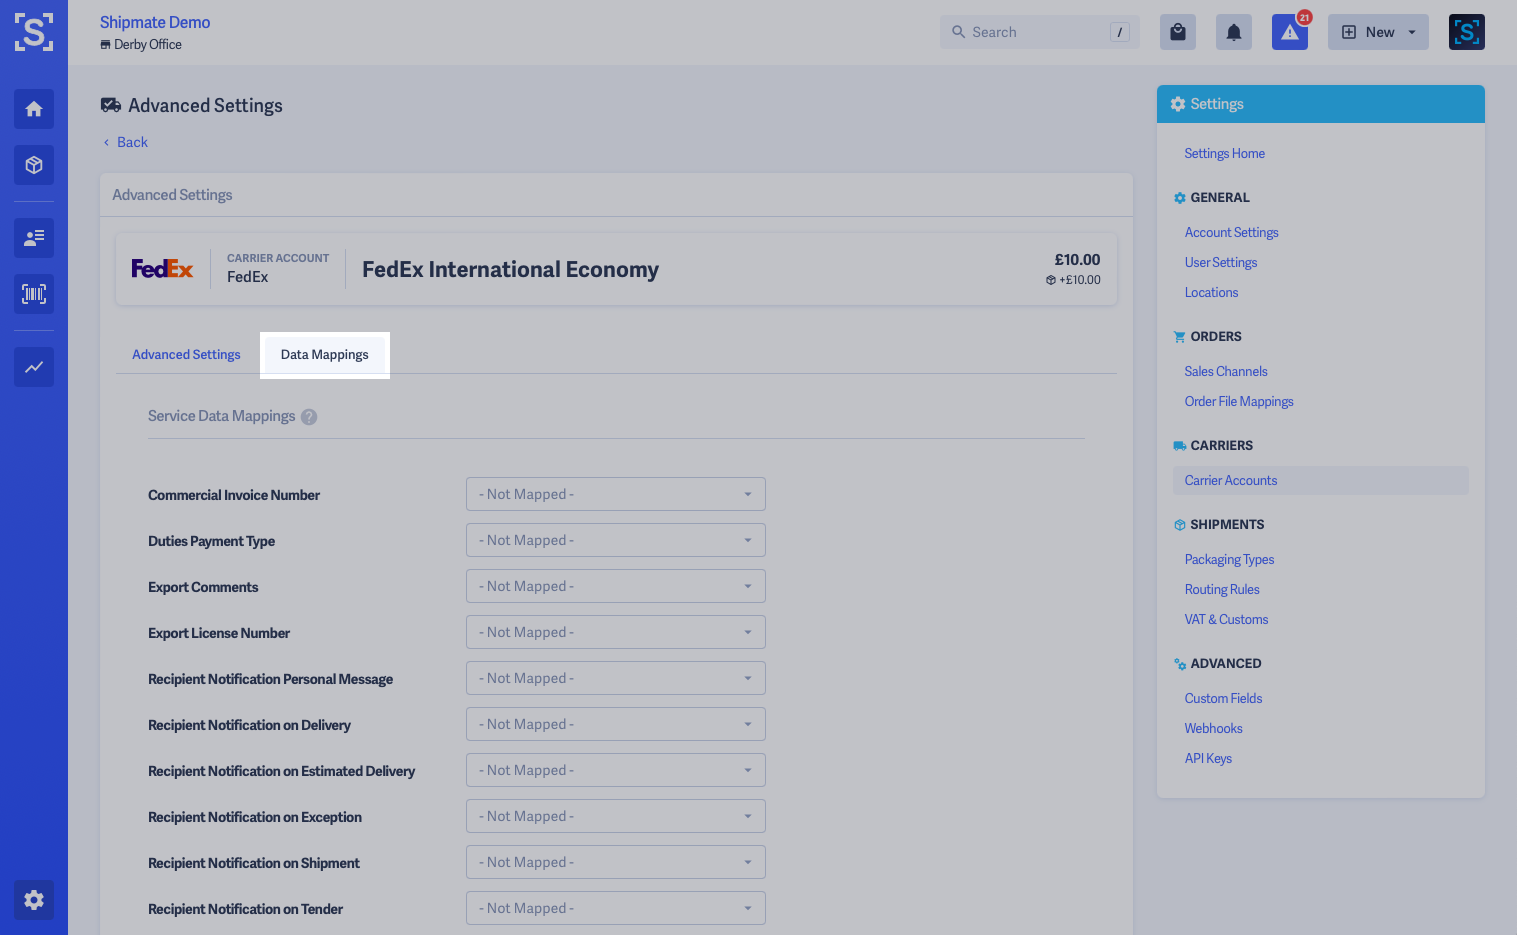
Custom Fields
Use Custom Fields to store additional data across your Shipmate account.
You can access Custom Fields from the Advanced section of the Settings page.
Custom Fields can be applied to the following entities within Shipmate:
- Shipments
- Parcels
- Contacts
- SKUs
Custom Fields can be used in many ways, such as:
- Adding business-specific data for routing decision making using Routing Rules
- Adding carrier-specific data such as Parcel Shop IDs or Insurance Values using Carrier Data Mappings
- Adding data to assist control or flow logic using responses from the API

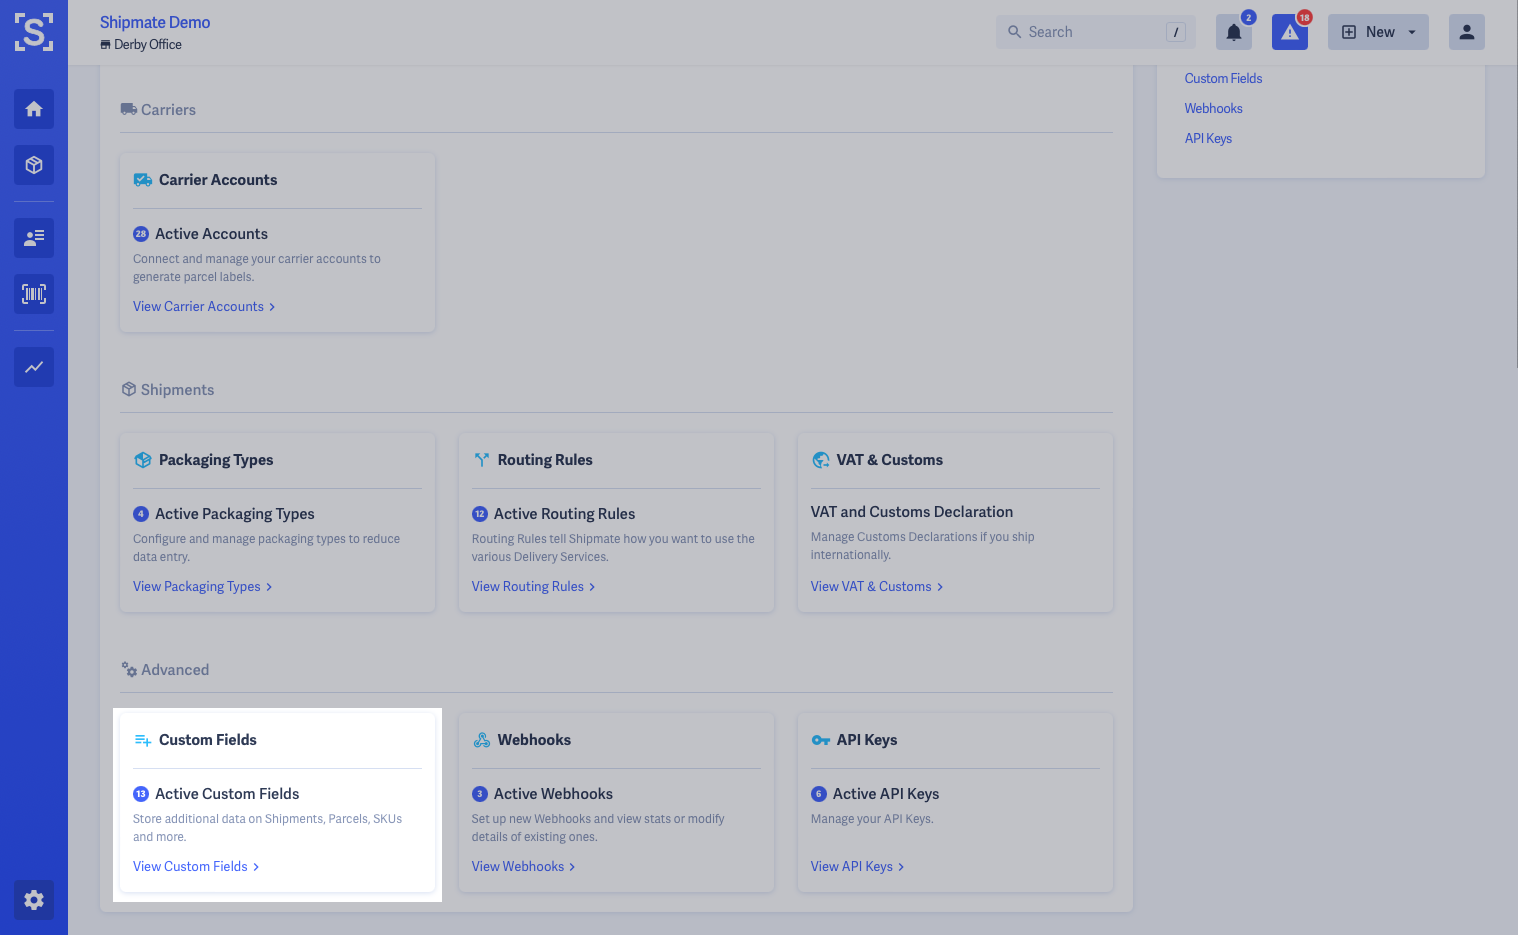
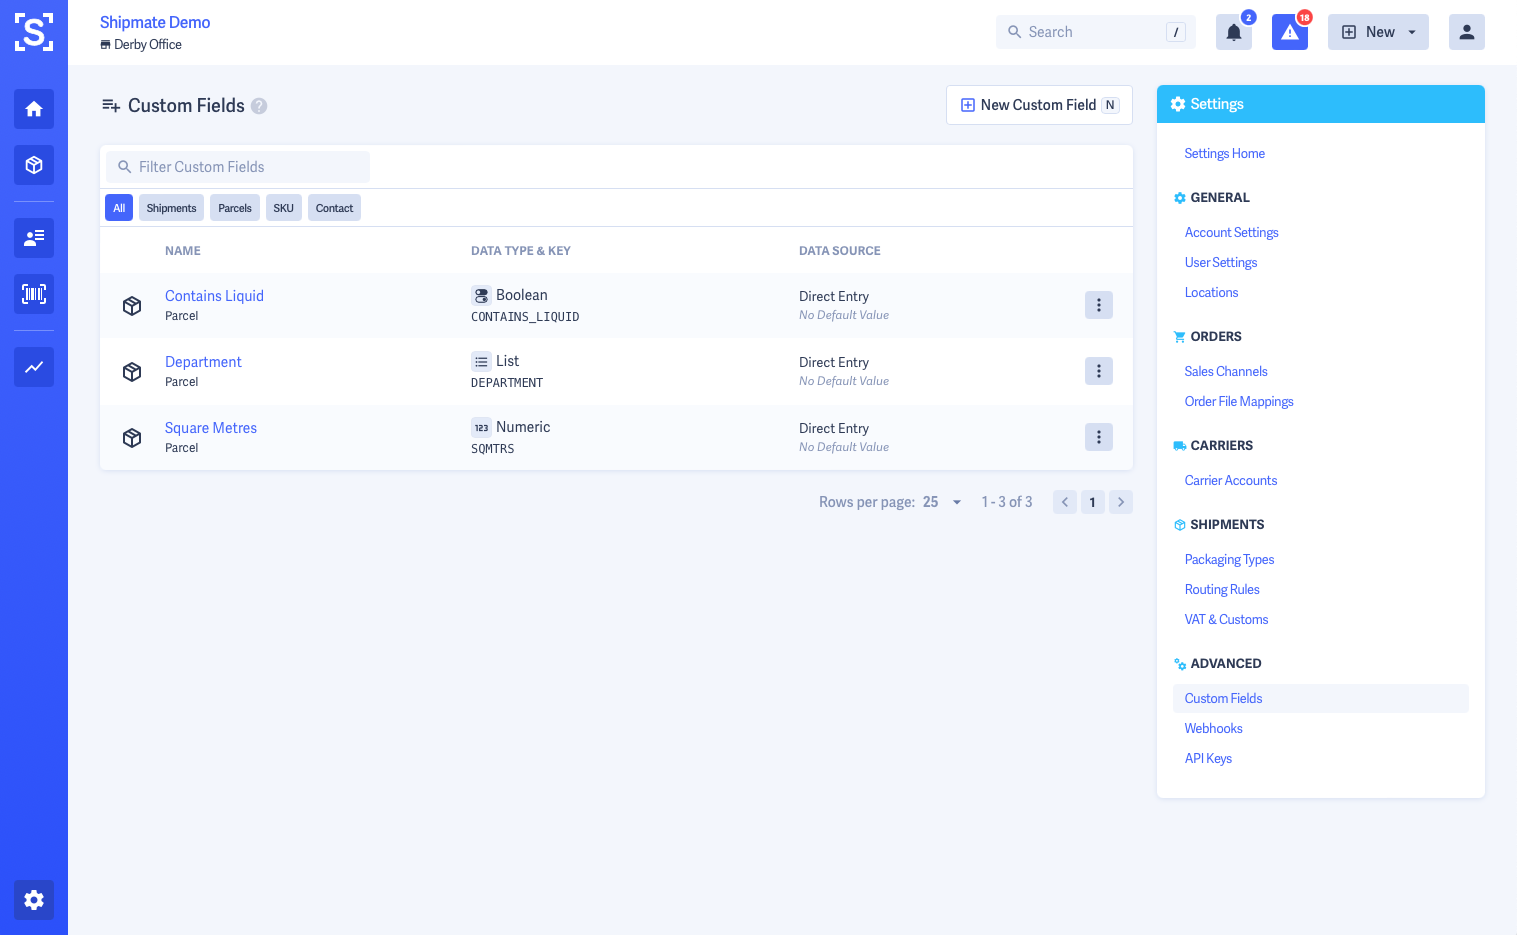
Adding Custom Fields
To add a custom field, select New Custom Field from the Custom Fields list.
First select the entity you wish to apply the custom field to - Shipments, Parcels, Contacts or SKUs, then supply a name for the field and a key.
The key is the reference you can use in API requests or CSV files. Shipmate will suggest a key for you as you type the custom field name however it can be anything you like, but must be unique for your account.
You can then configure how the custom field will work and behave.
Custom Fields may use the following Data Types:
- Text
- Numeric
- Boolean (True or False)
- List
Data can be populated into Custom Fields from one of three Data Sources:
- Direct Entry - the value will be supplied via API or CSV file or entered in the Web Portal
- Fixed Value - the custom field always has the same value applied to it
- Mapped - the value is obtained from another custom field, perhaps from a parent entity (such as from a Shipment for a Parcel)
Depending on the data type and source options you have selected, further options may be shown to supply list values, state whether the field is required, or provide validation rules.
The tooltips shown at the end of each row of controls provide further guidance on using each feature.
Once you are satisfied with the configuration of your new custom field, click the Save button.

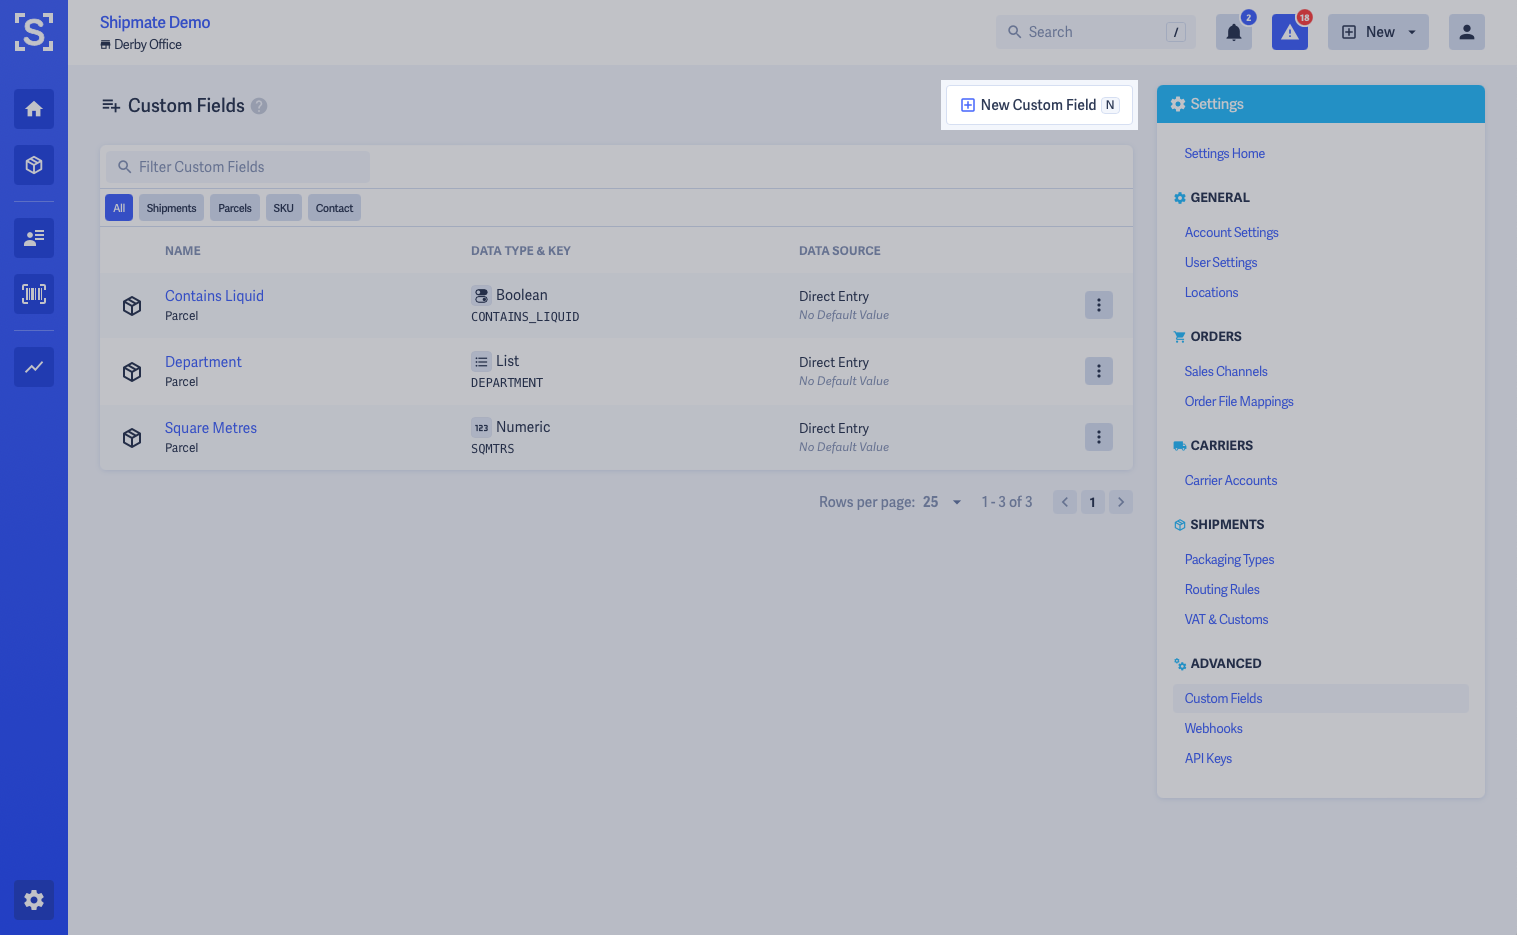
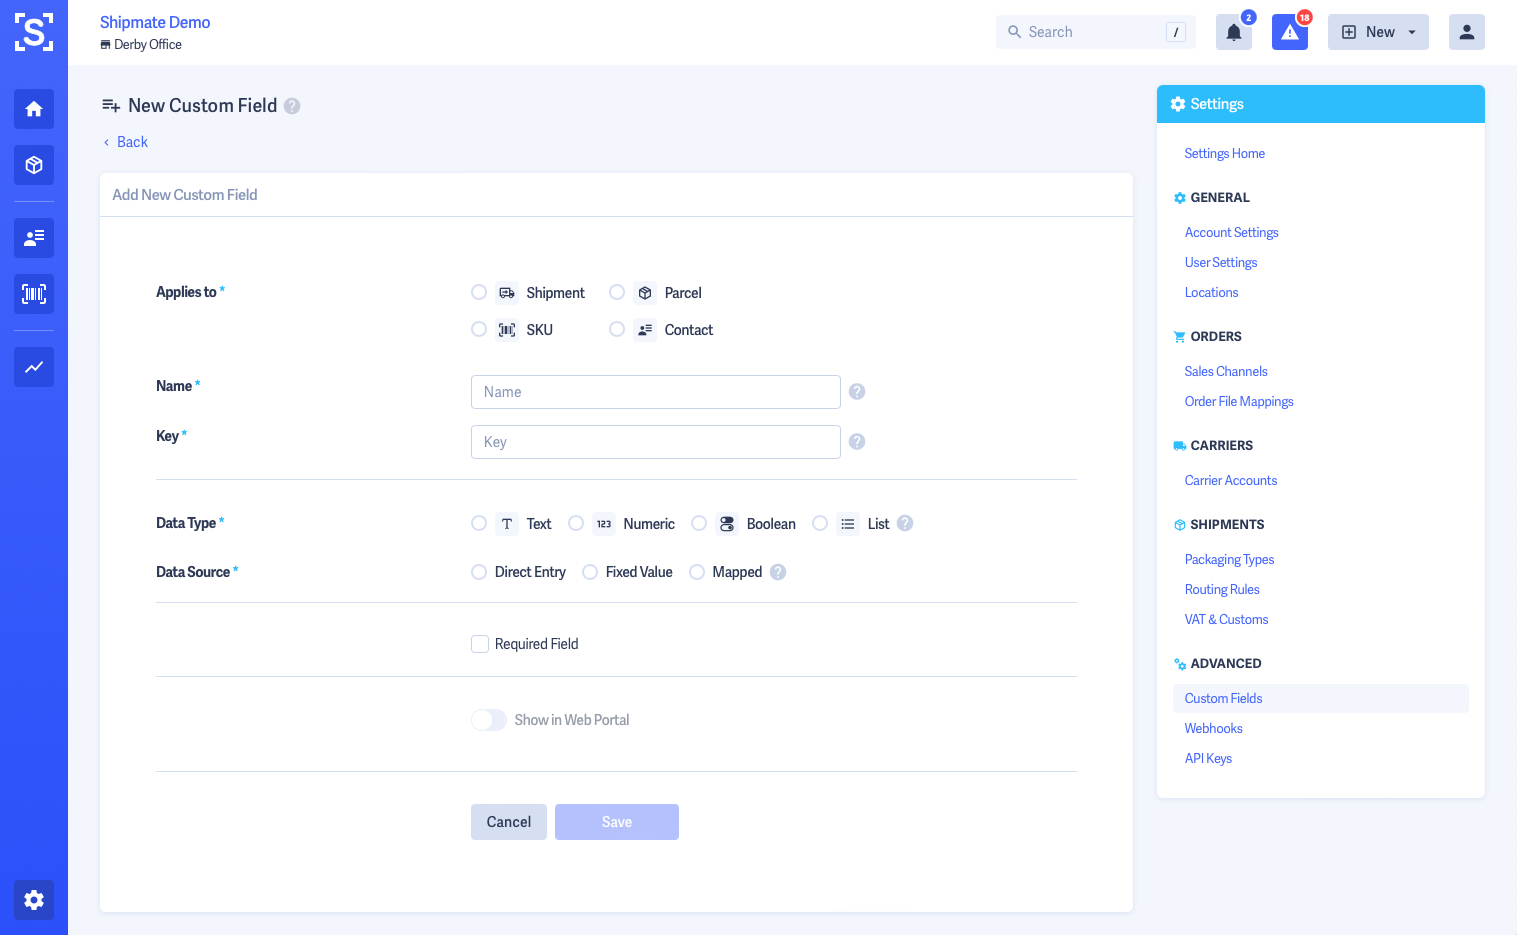
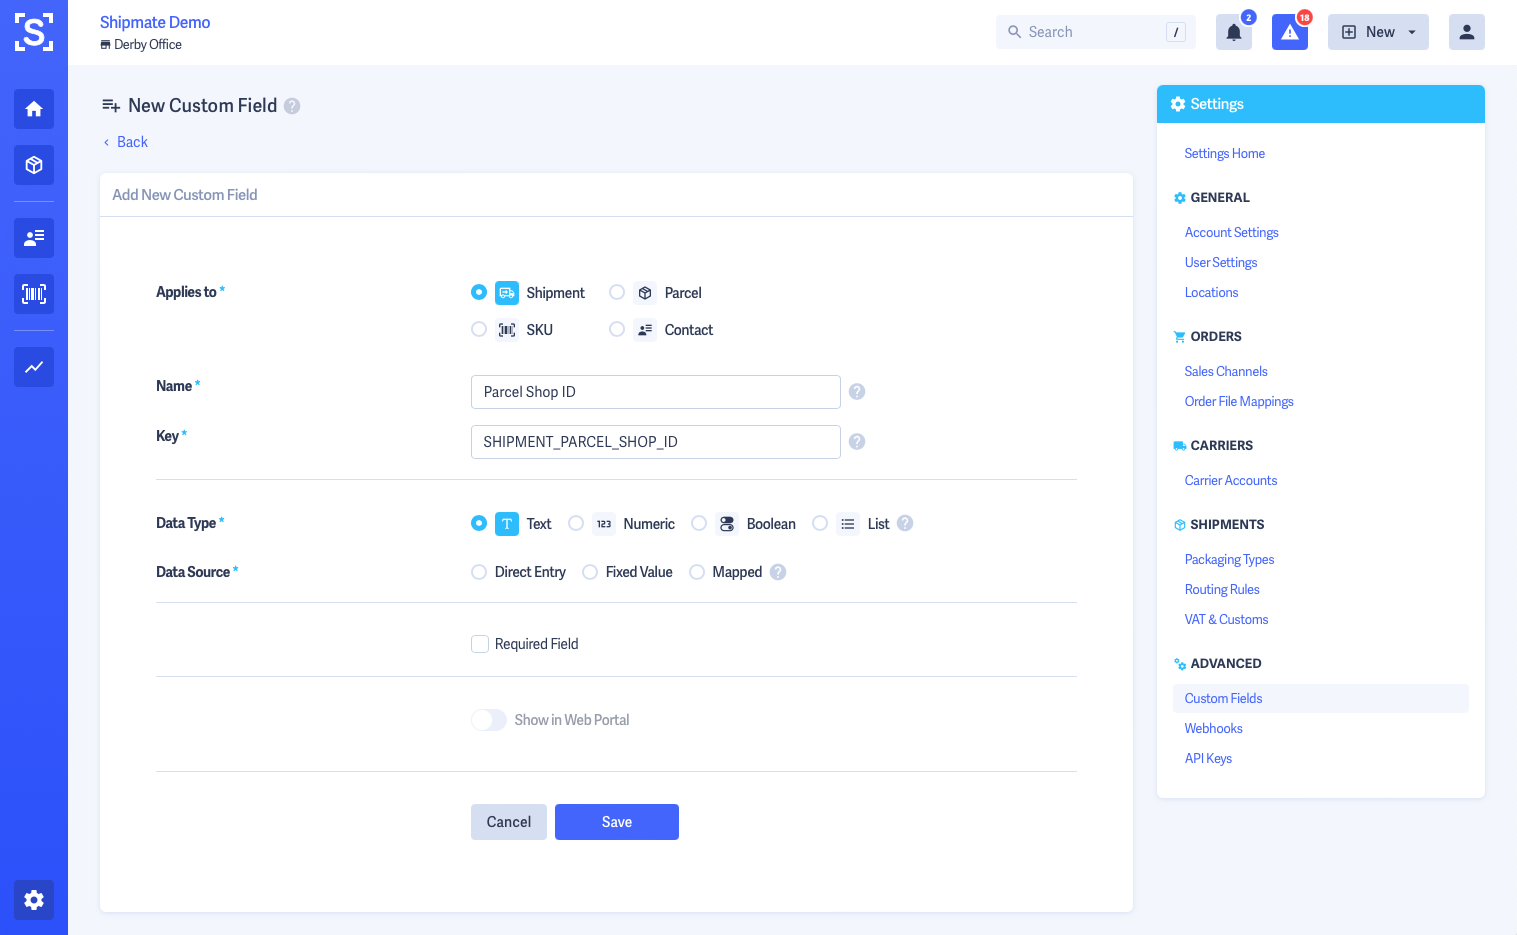
Editing Custom Fields
To edit a custom field, navigate to the Custom Fields list from Settings, then select Edit from the options menu corresponding to the field you need to change.
The custom field may be amended as per the form used to create a new custom field.
Once you are satisfied with the new configuration of your custom field, click the Save button.
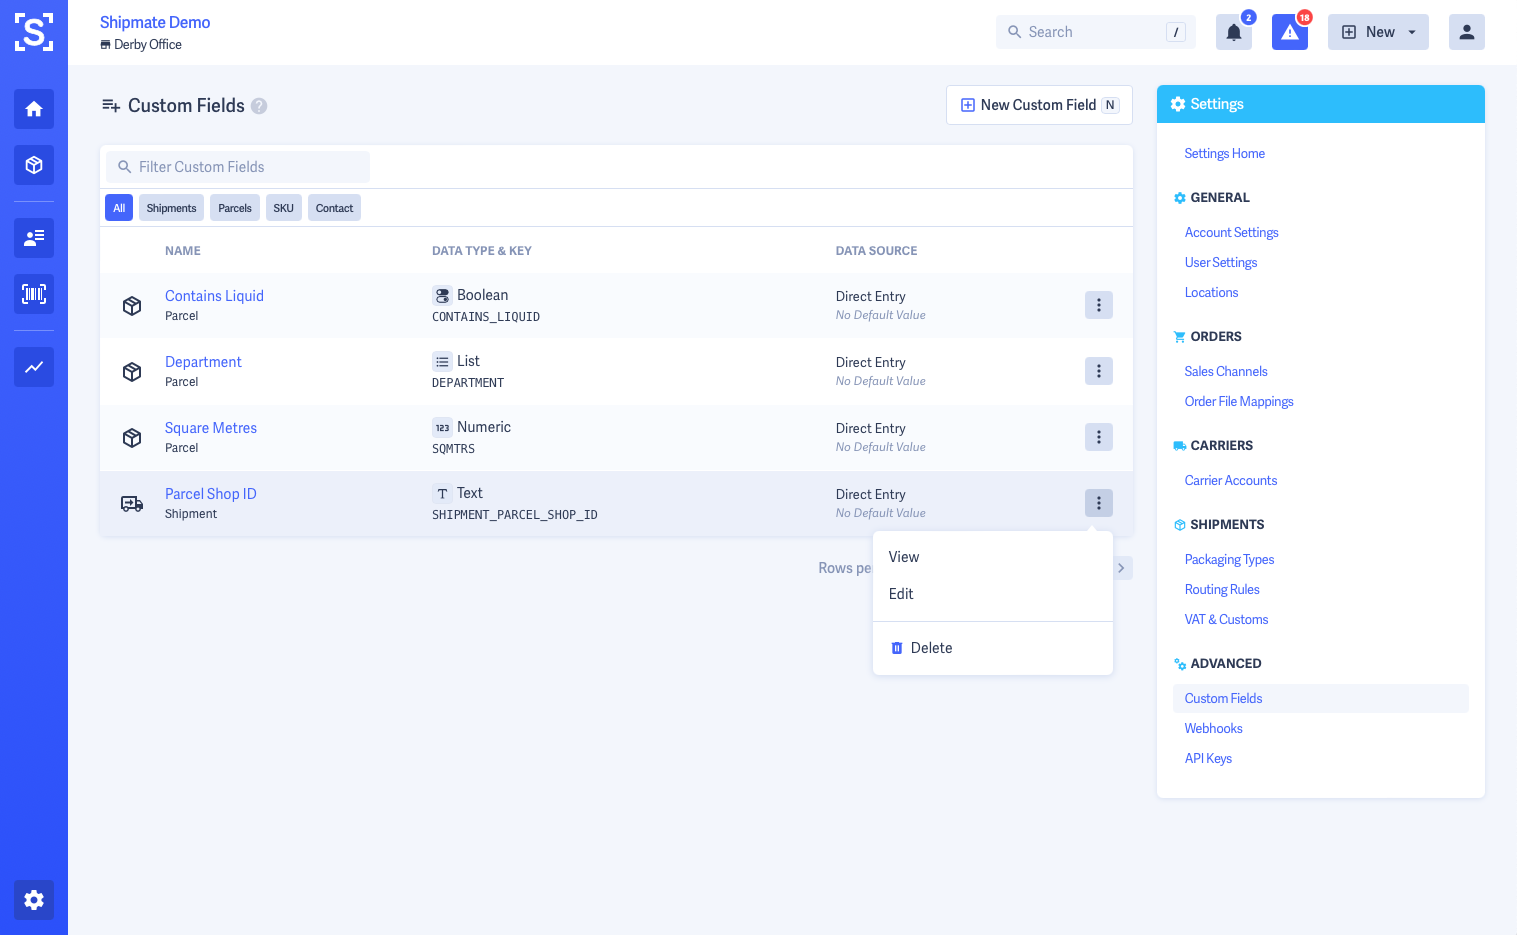
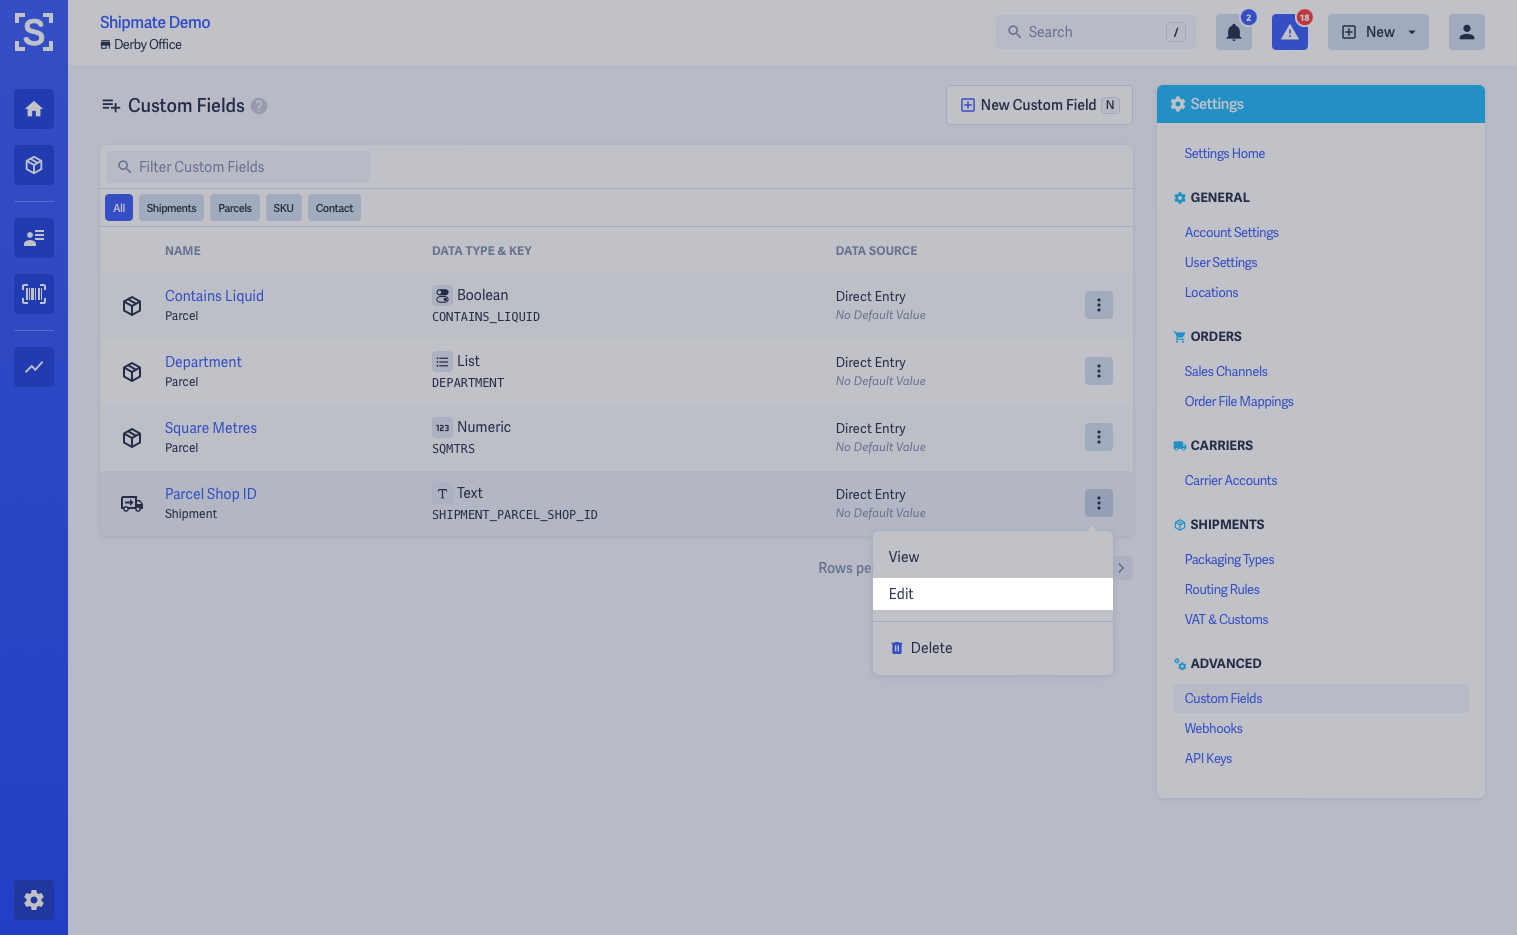
Deleting Custom Fields
To delete a custom field, navigate to the Custom Fields list from Settings, then select Delete from the options menu corresponding to the field you need to remove.
Follow the on-screen confirmation message to delete the custom field.
If the custom field is in use across other parts of your Shipmate account, you may need to reconfigure those other features first before deleting the custom field.

Packaging Types
Packaging Types allow you to set up details of the packaging you commonly use to pack your orders. When creating Shipments you can then select from a list of Packaging Types, filling in weight and dimensions for you automatically.
You can also apply a default Packaging Type to pre-fill weight and dimension values if you send most your orders in the same packaging, or have agreed these with the carrier(s) you ship your orders with.
To access Packaging Types, first click the Settings button, then choose the Packaging Types option.

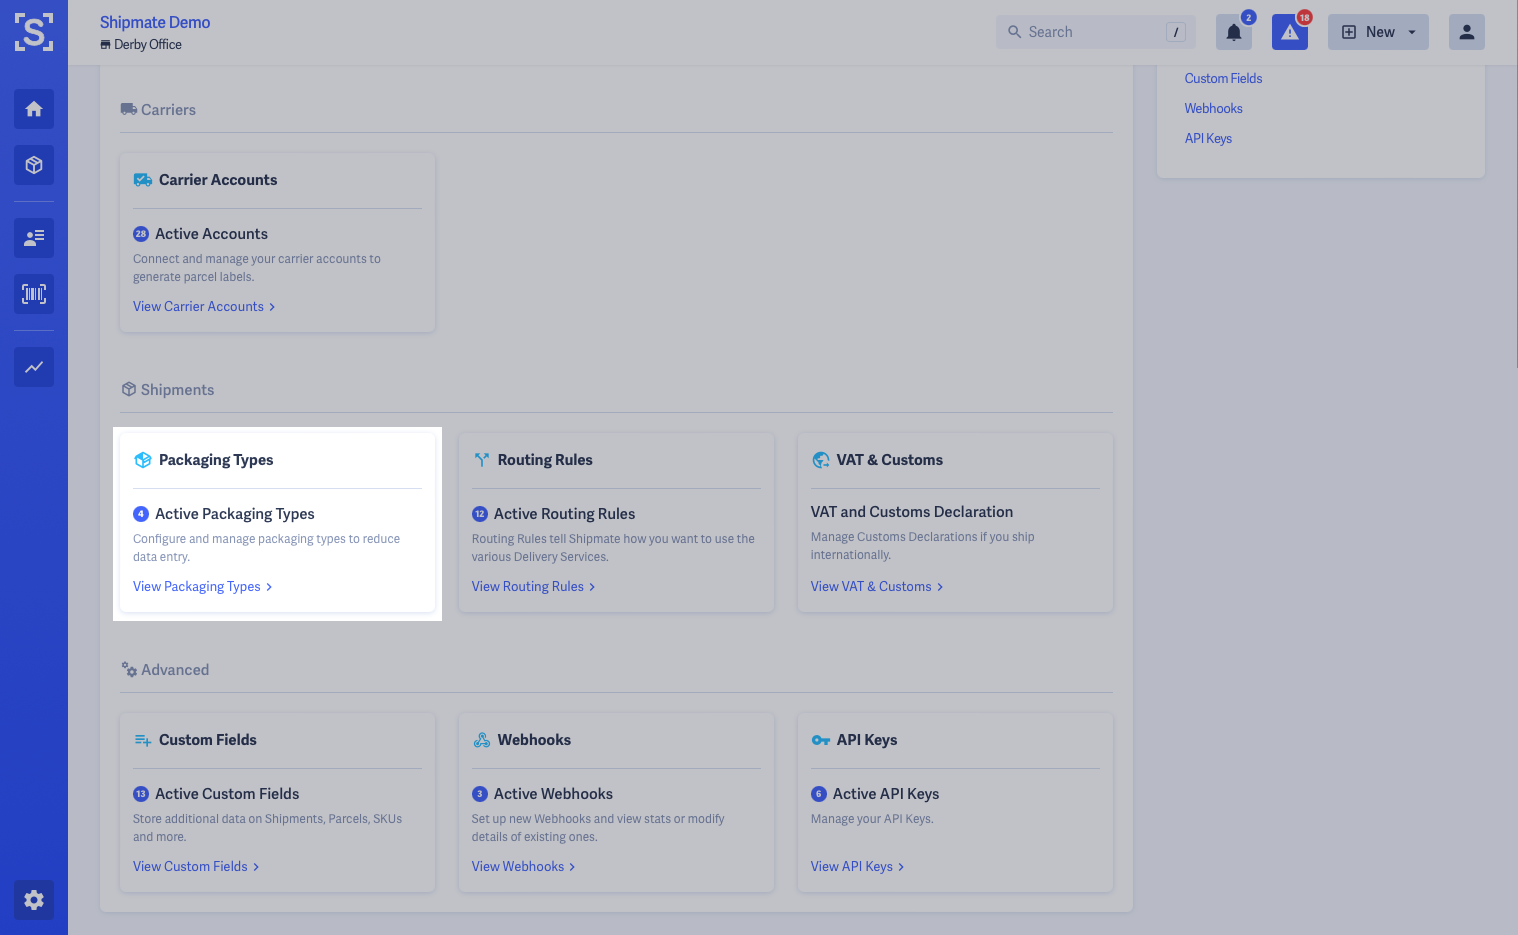
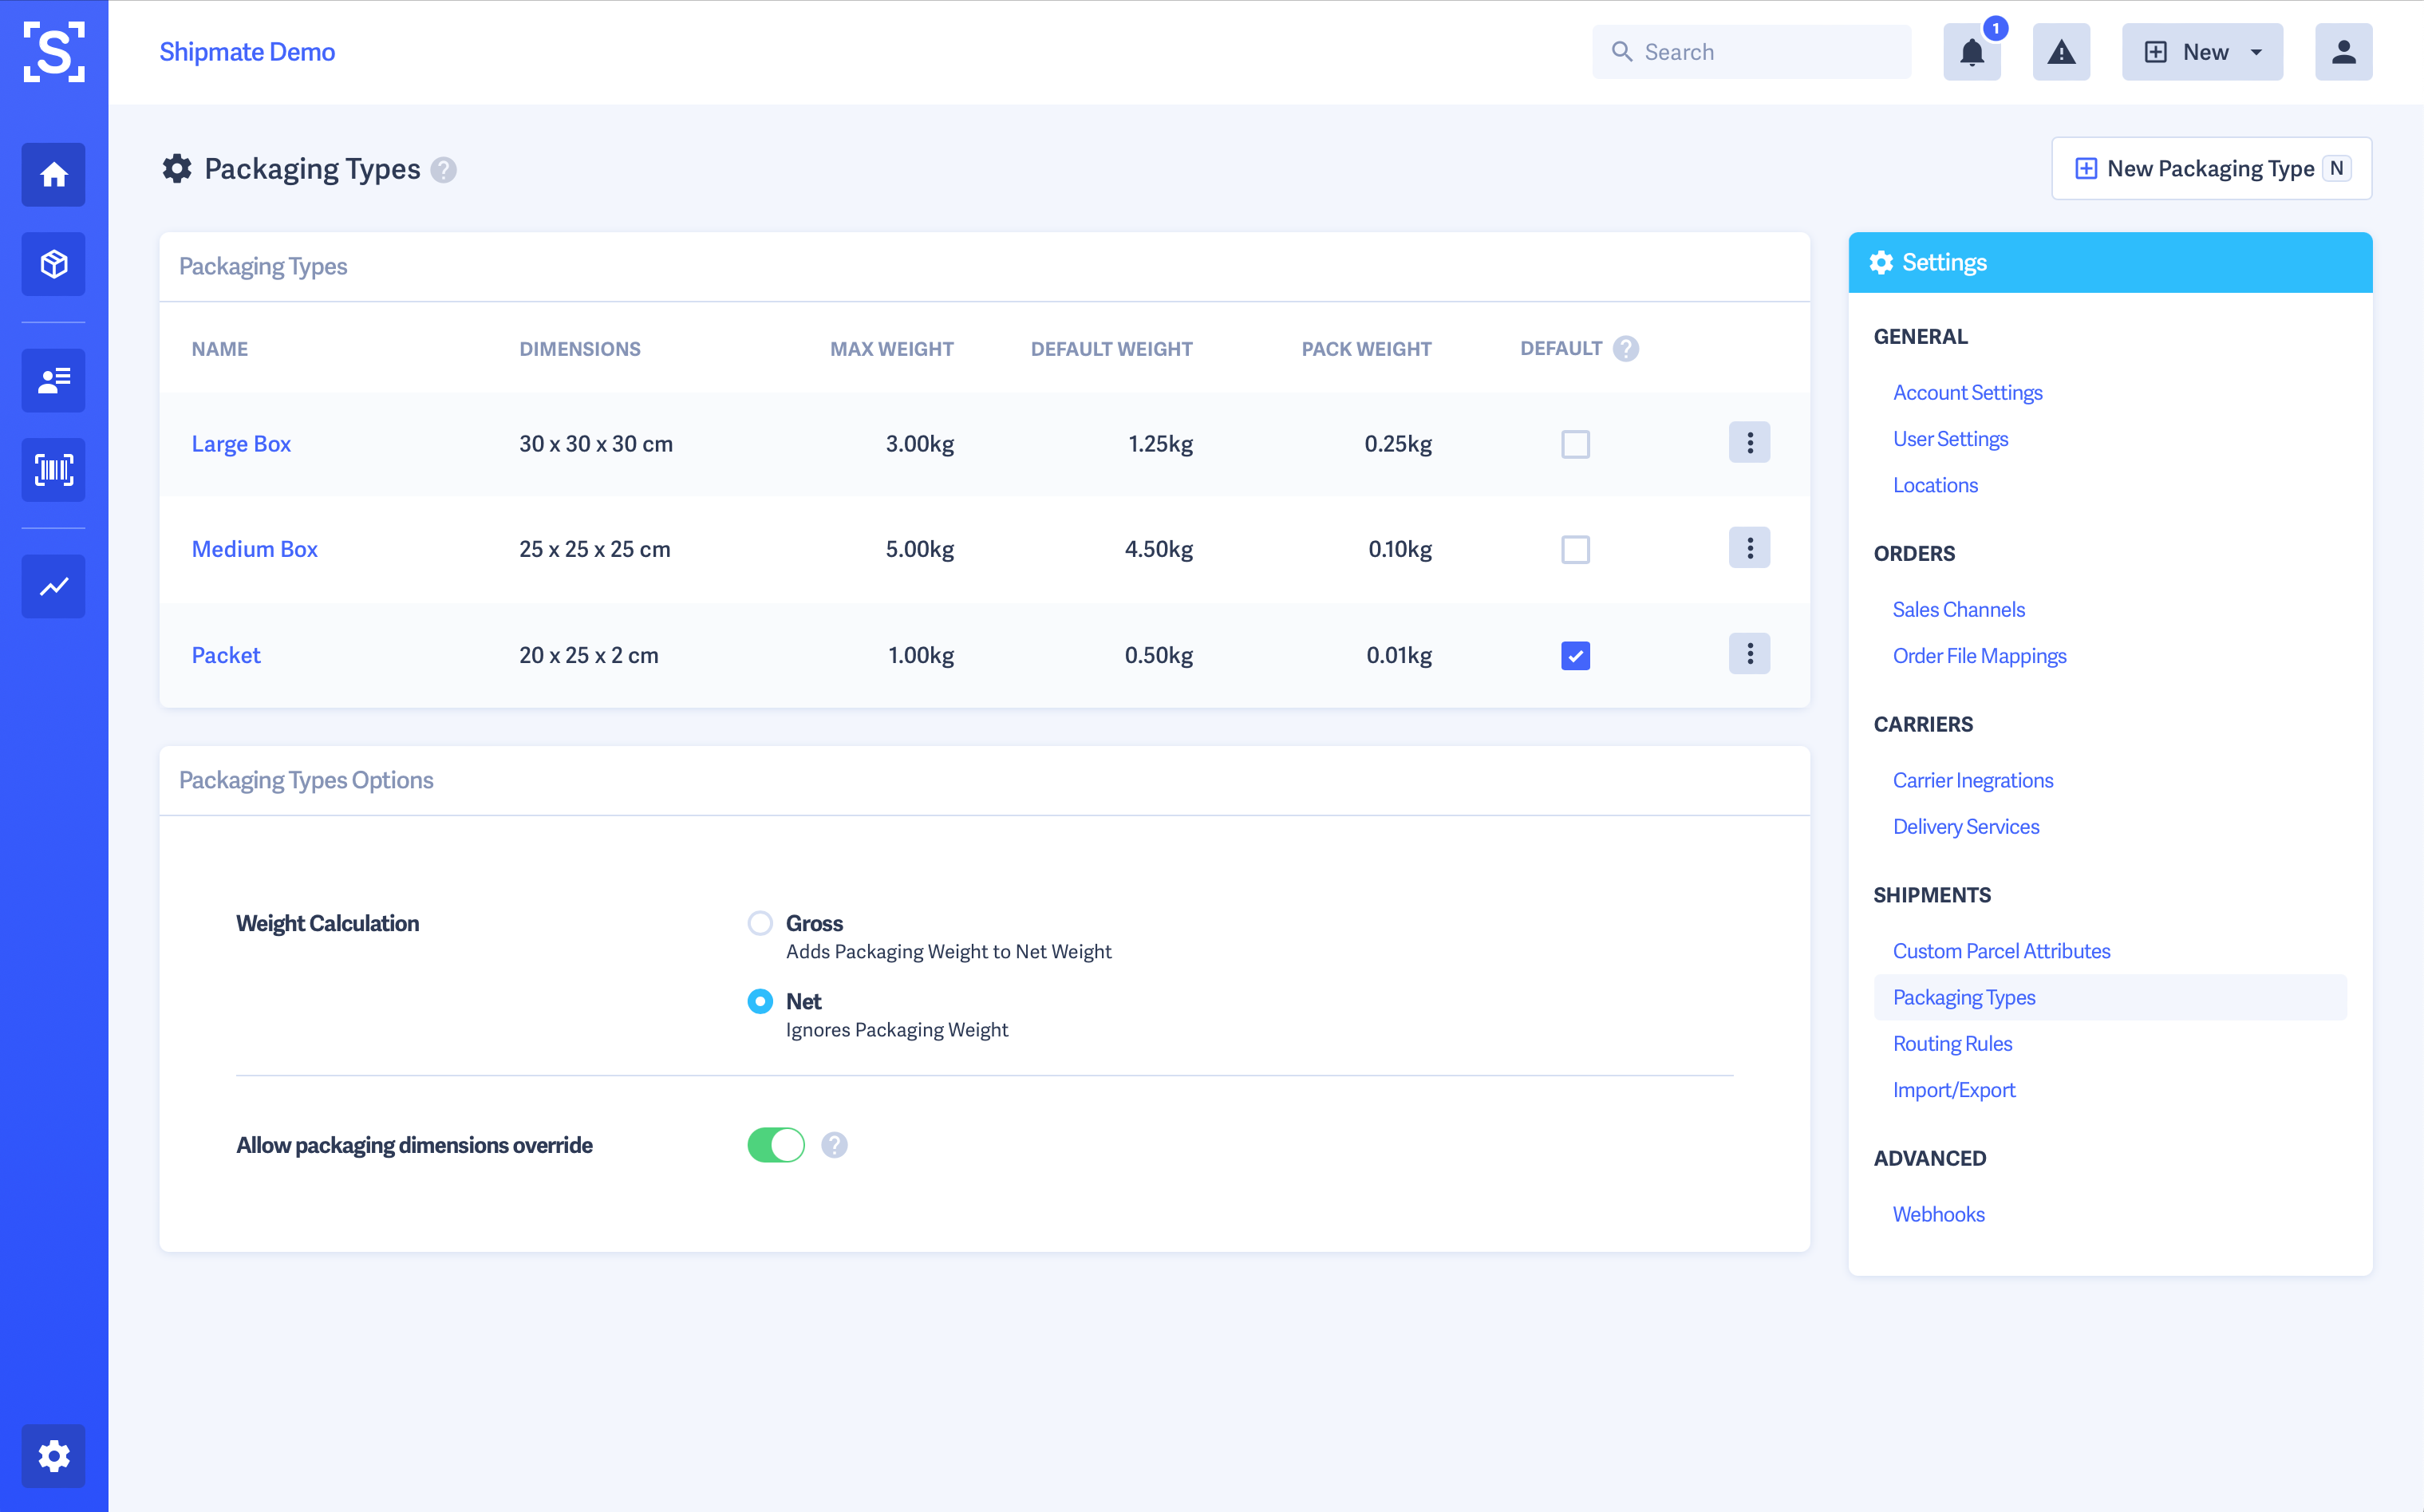
Adding Packaging Types
To add a new Packaging Type, click the New Packaging Type button, or press the N key on your keyboard.
The Packaging Type form will then be shown, where you can enter details of your packaging. Give the Packaging Type a name - this will be shown in drop-down lists throughout Shipmate and plugins or integrations, so keep it simple and something your colleagues will be able to cross-reference with the physical packaging in your despatch process.
"Key" should be a unique reference, sometimes refered to as a "code", "slug" or "SKU", to help Shipmate uniquely identify this Packaging Type.
If you use the Shipmate API or CSV uploader, this is the value you will need to provide so Shipmate knows which Packaging Type to reference. Usually you will give this a less user-friendly, more system-friendly value - for example, if you are adding a Small Box, perhaps the key will be SMALL_BOX. If your 3rd party system such as an eCommerce platform, Order Management System or Warehouse Management System has packaging codes, you should replicate these as the key.
Then simply provide the packaging dimensions, maximum weight this can accept, a default weight you would like to appear when creating Shipments, and finally the weight of the packaging itself. This is used for calculating the net and gross weight of your parcels.
Once you are happy with your selections, click the Save button. Your newly created Packaging Type is then immediately available for use across the platform.

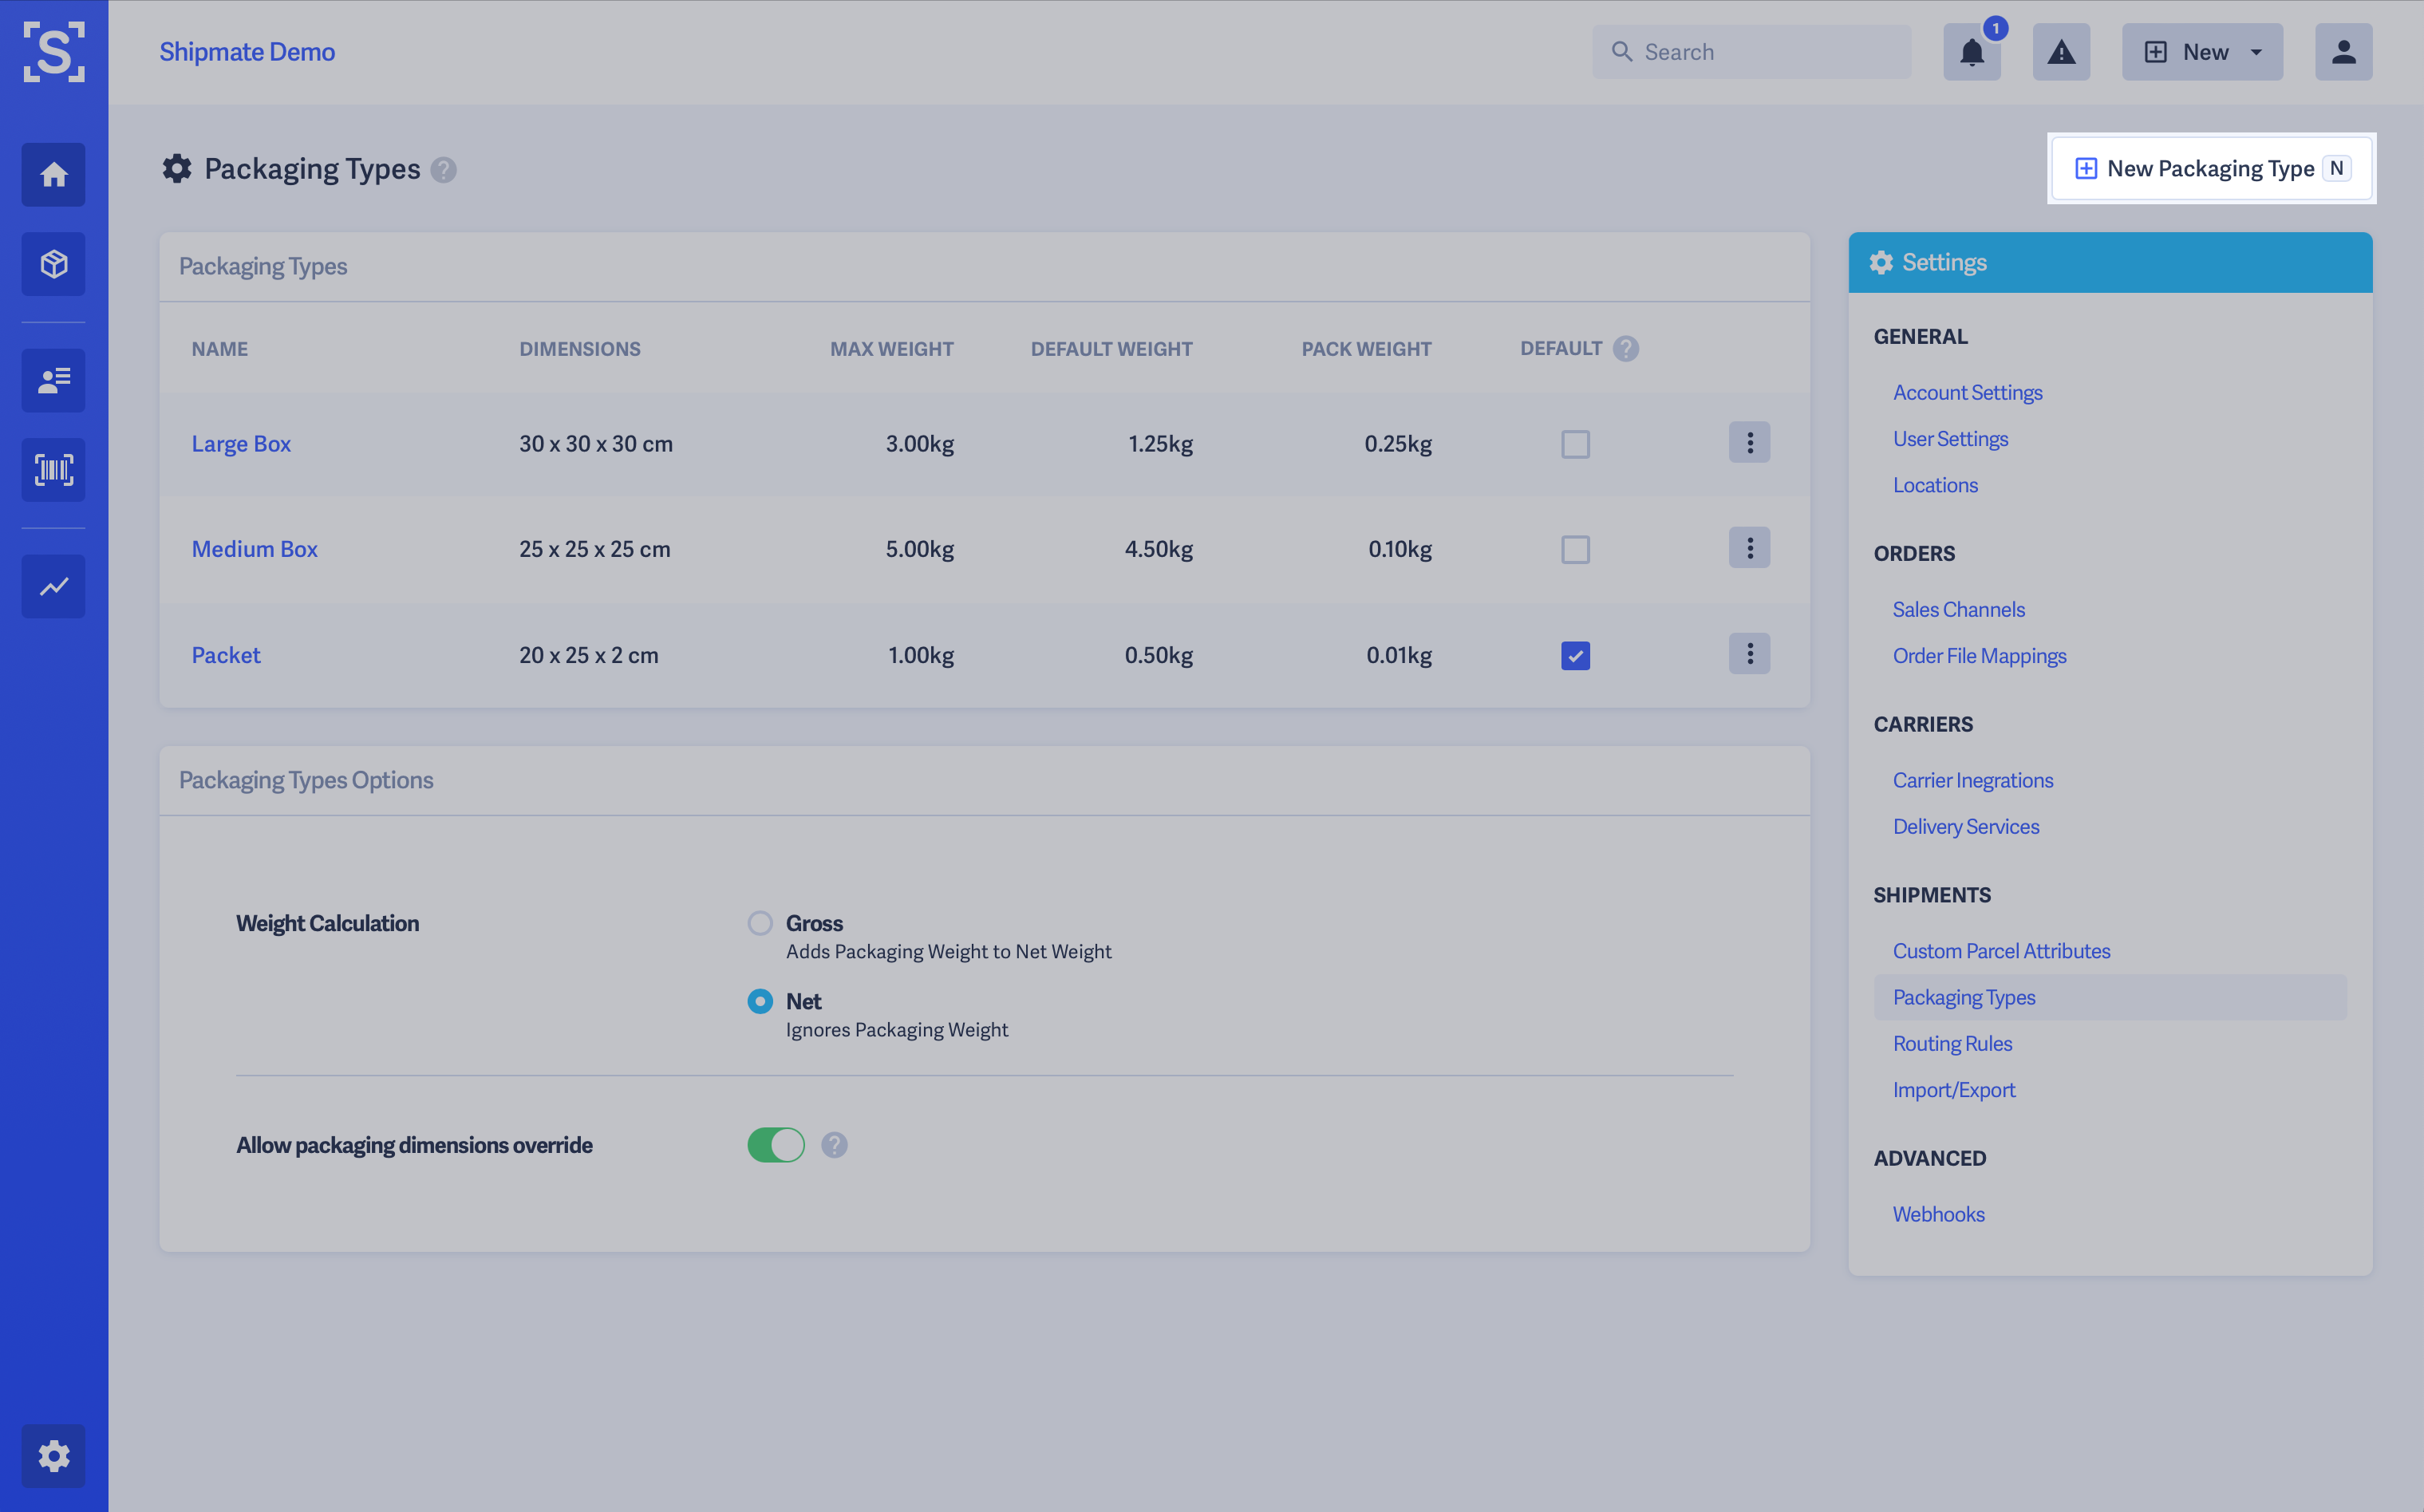
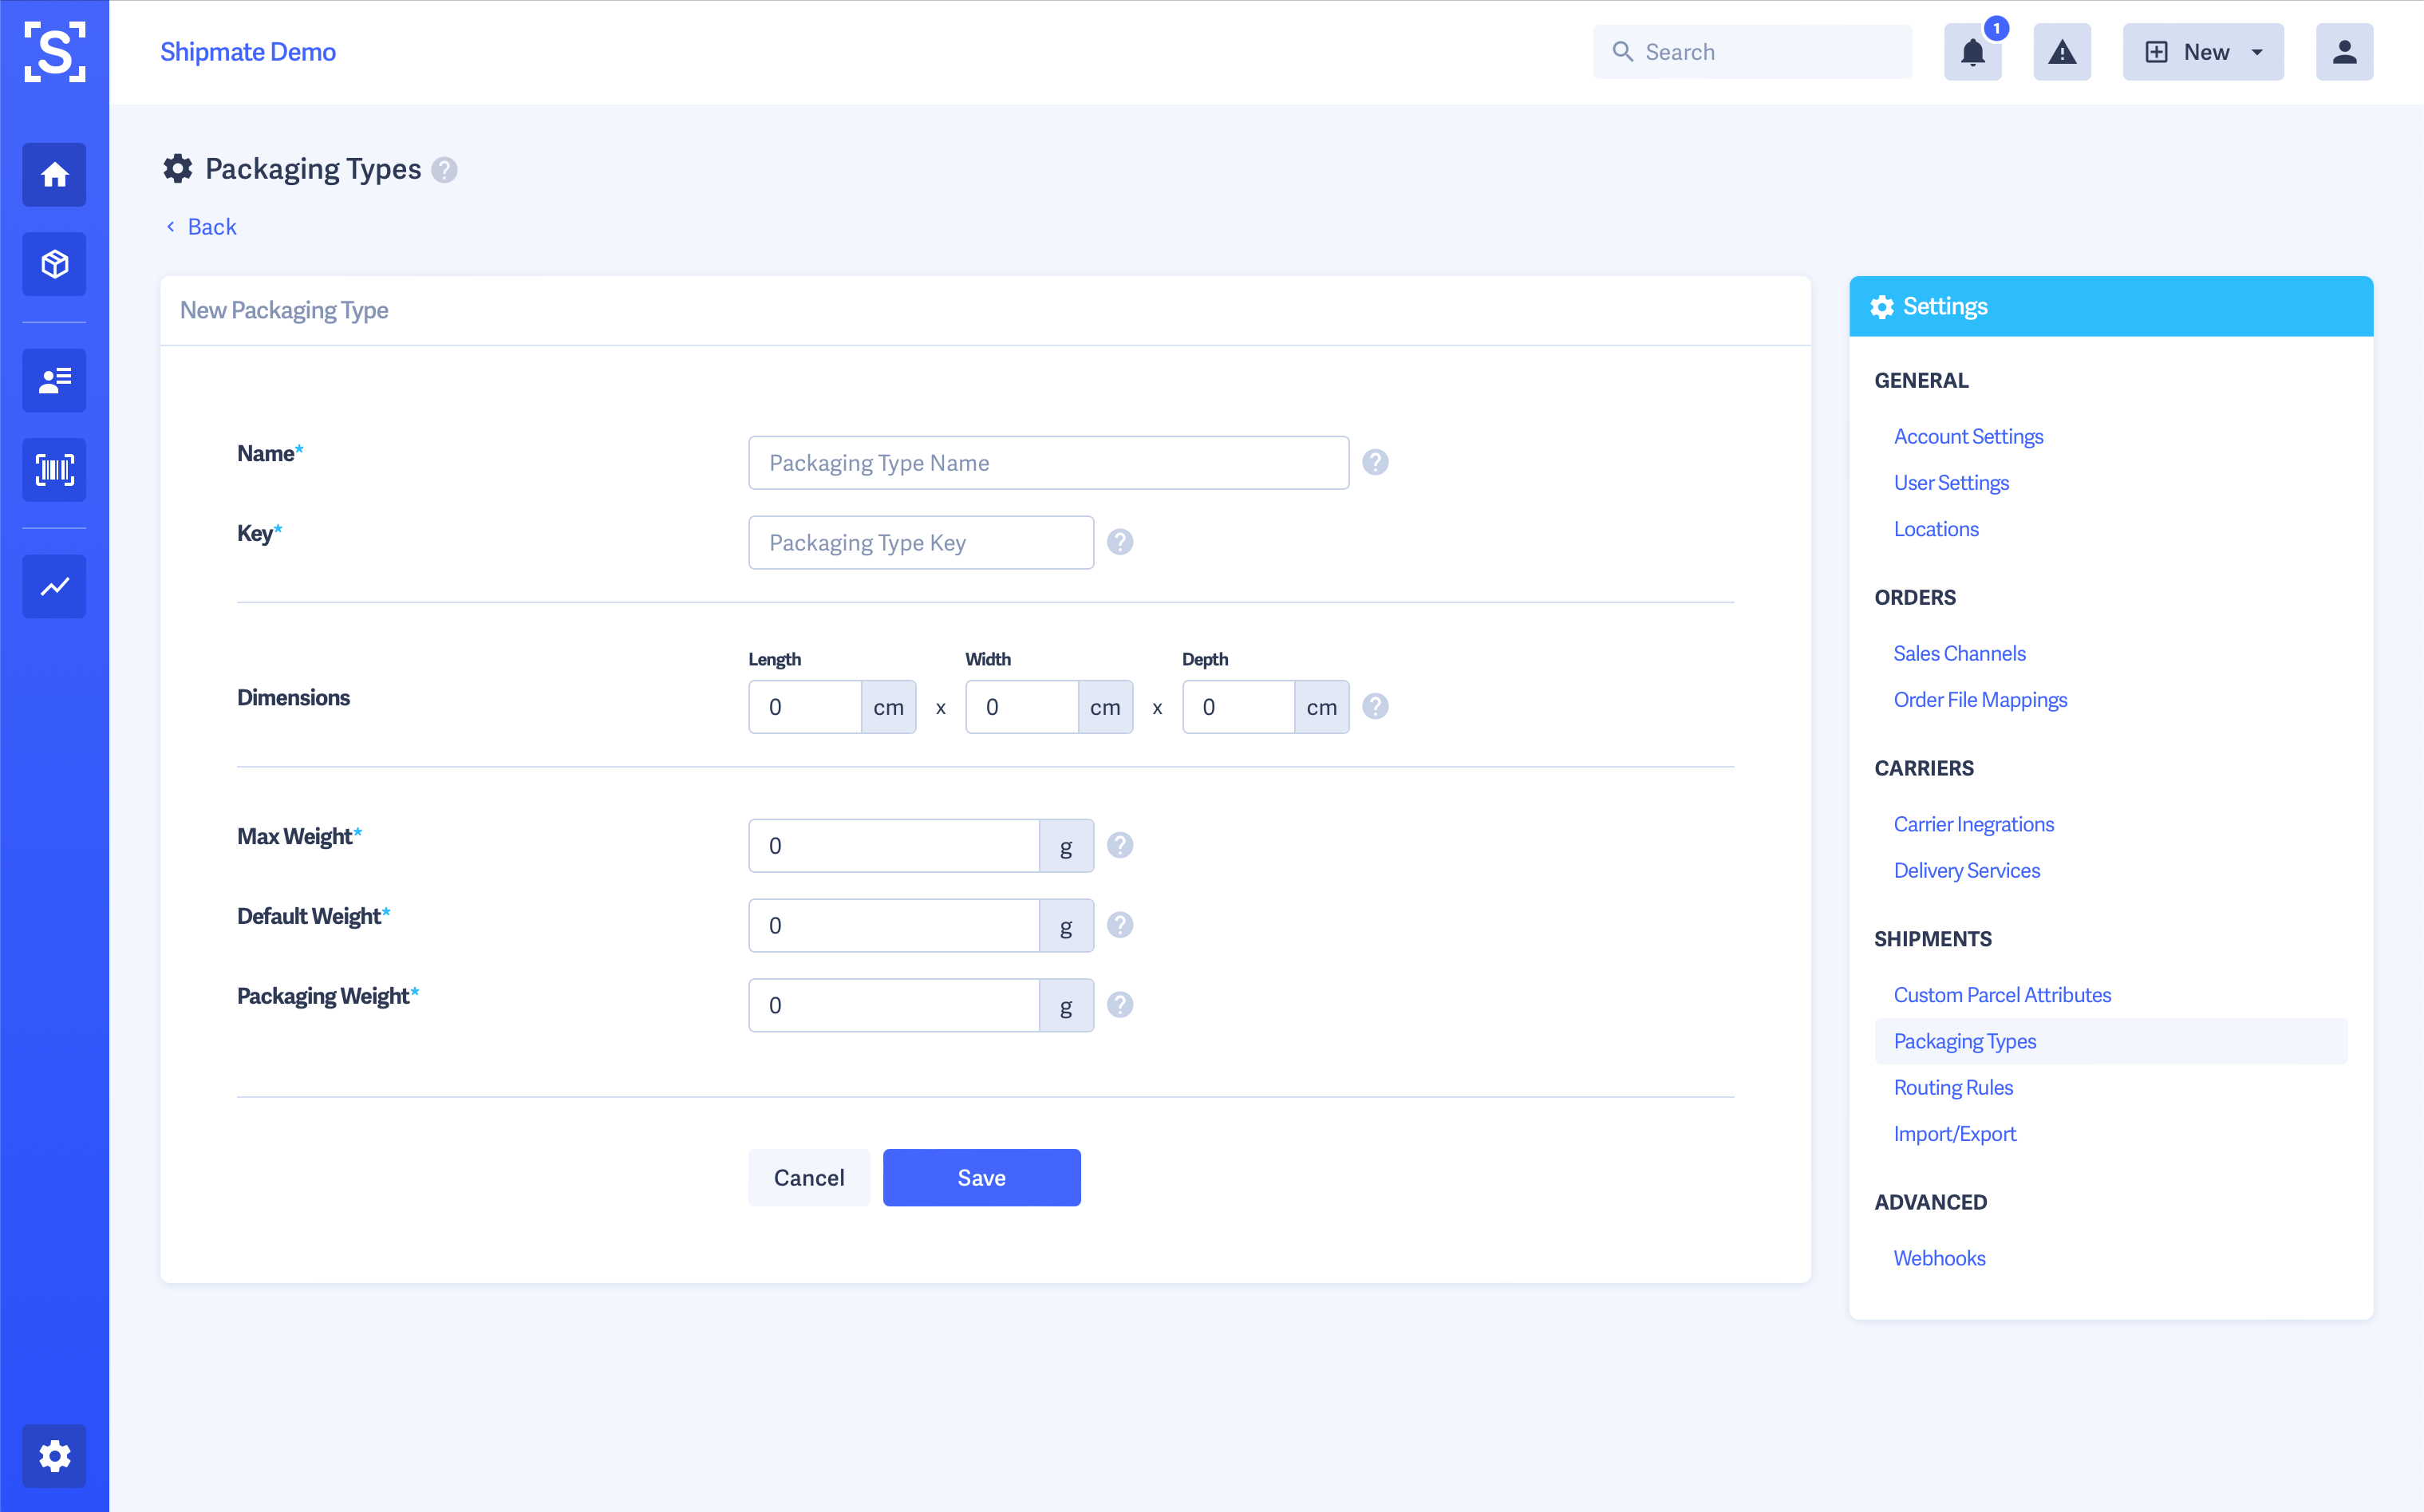
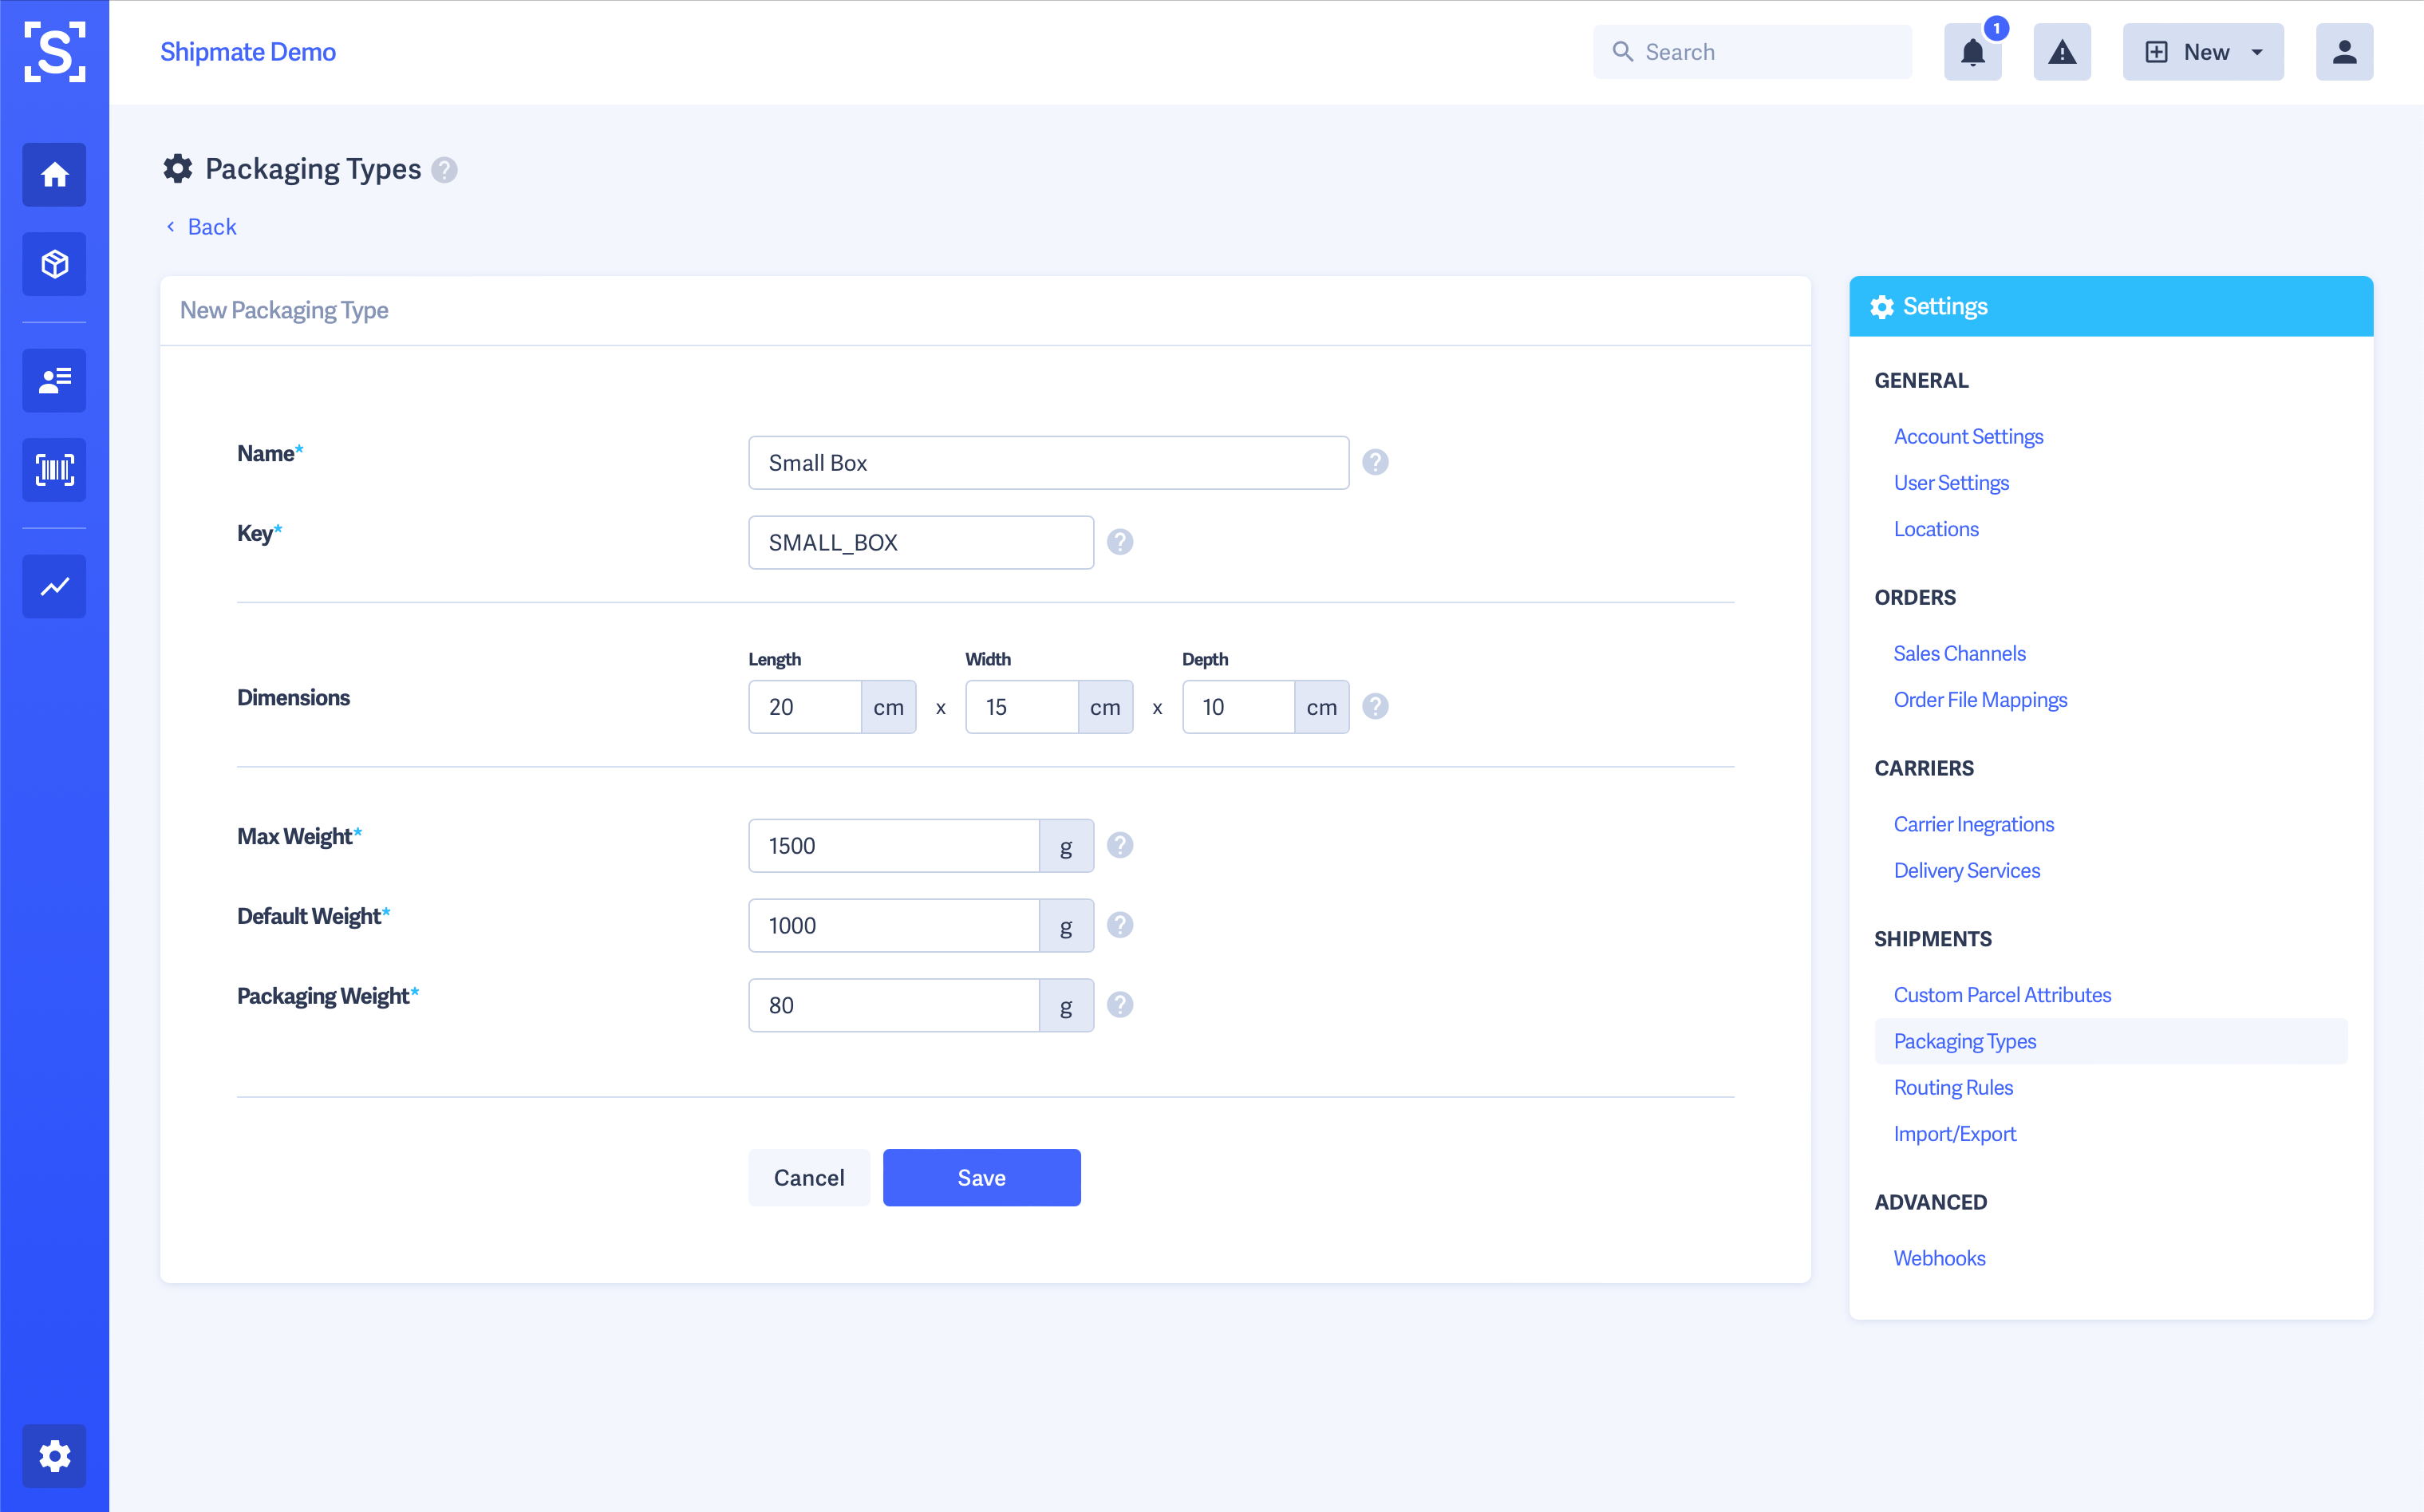
Setting a Default Packaging Type
To choose which Packaging Type is selected by default throughout the platform, simply click the tickbox on the row of your preferred Packaging Type. The setting is automatically applied and a green pop-up message will appear confirming the change.
When using the CSV uploader or API, having a default Packaging Type means you don't have to supply packaging dimensions and weight for each parcel - the default values will be automatically applied.

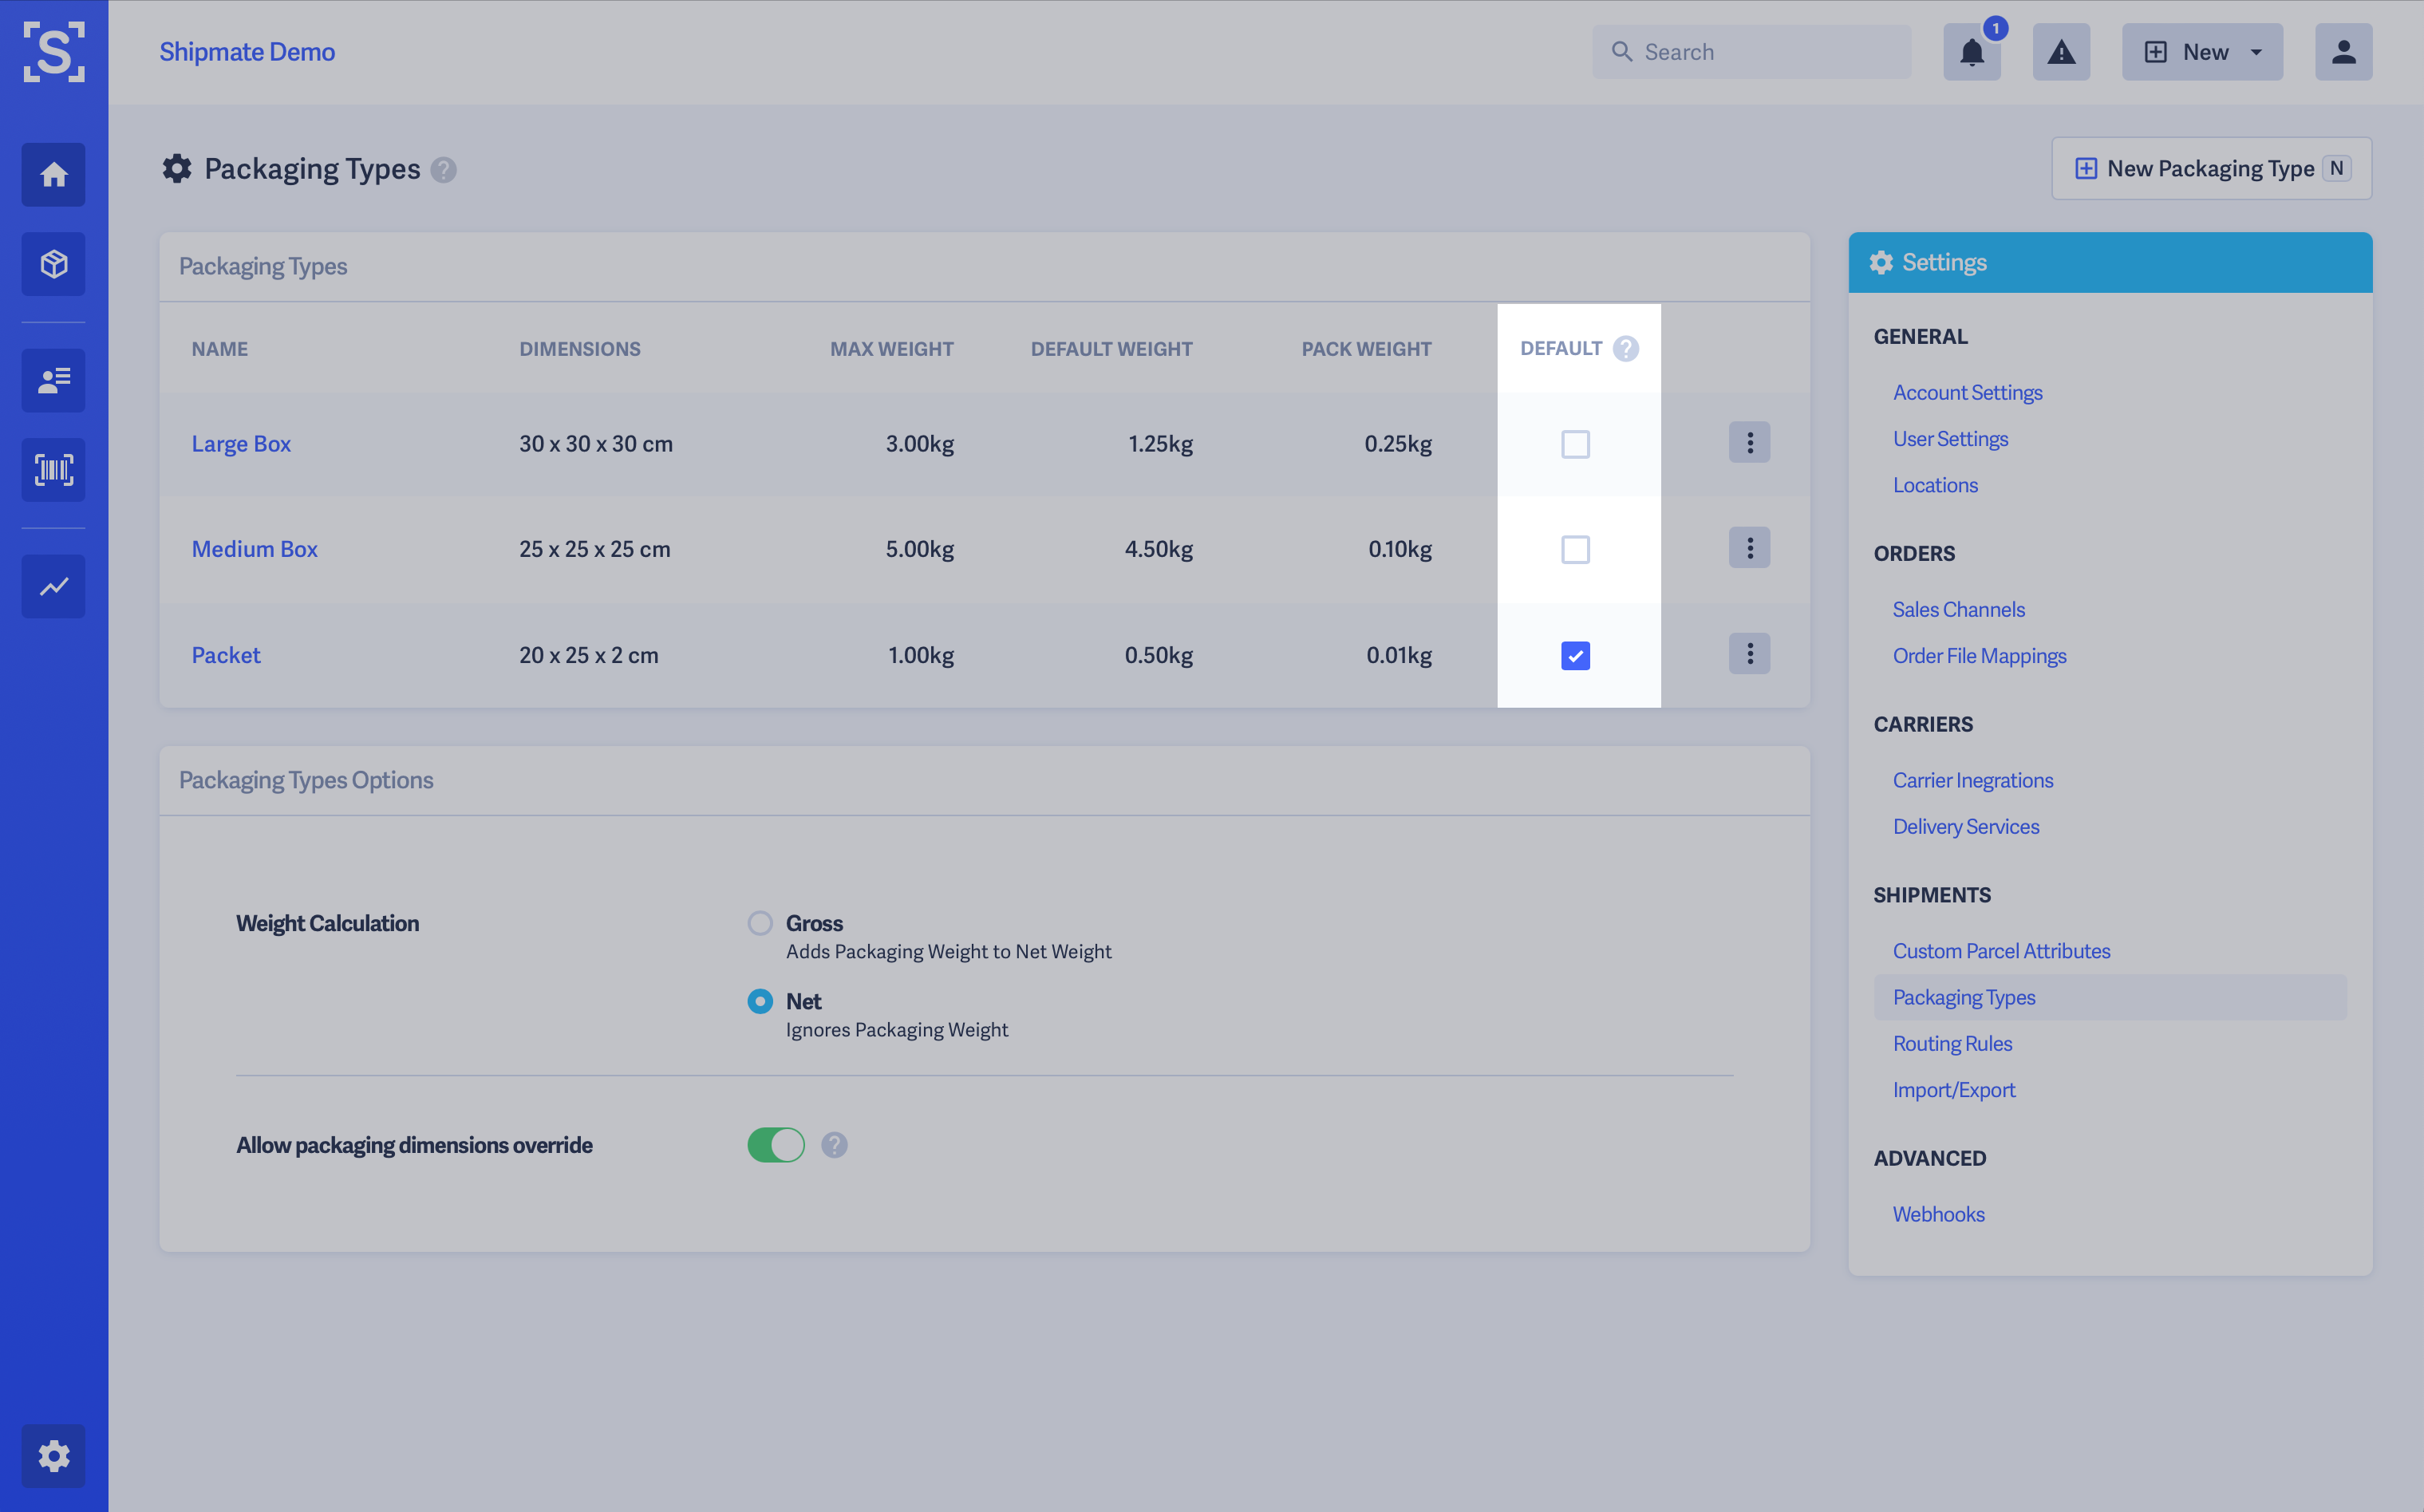
Editing Packaging Types
To edit details of existing Packaging Types, simply click the name of the Packaging Type you wish to change. This will take you to the Packaging Type form with all details able to be changed.
Once you are happy with your selections, click the Save button. Your updated Packaging Type is then immediately available for use across the platform.

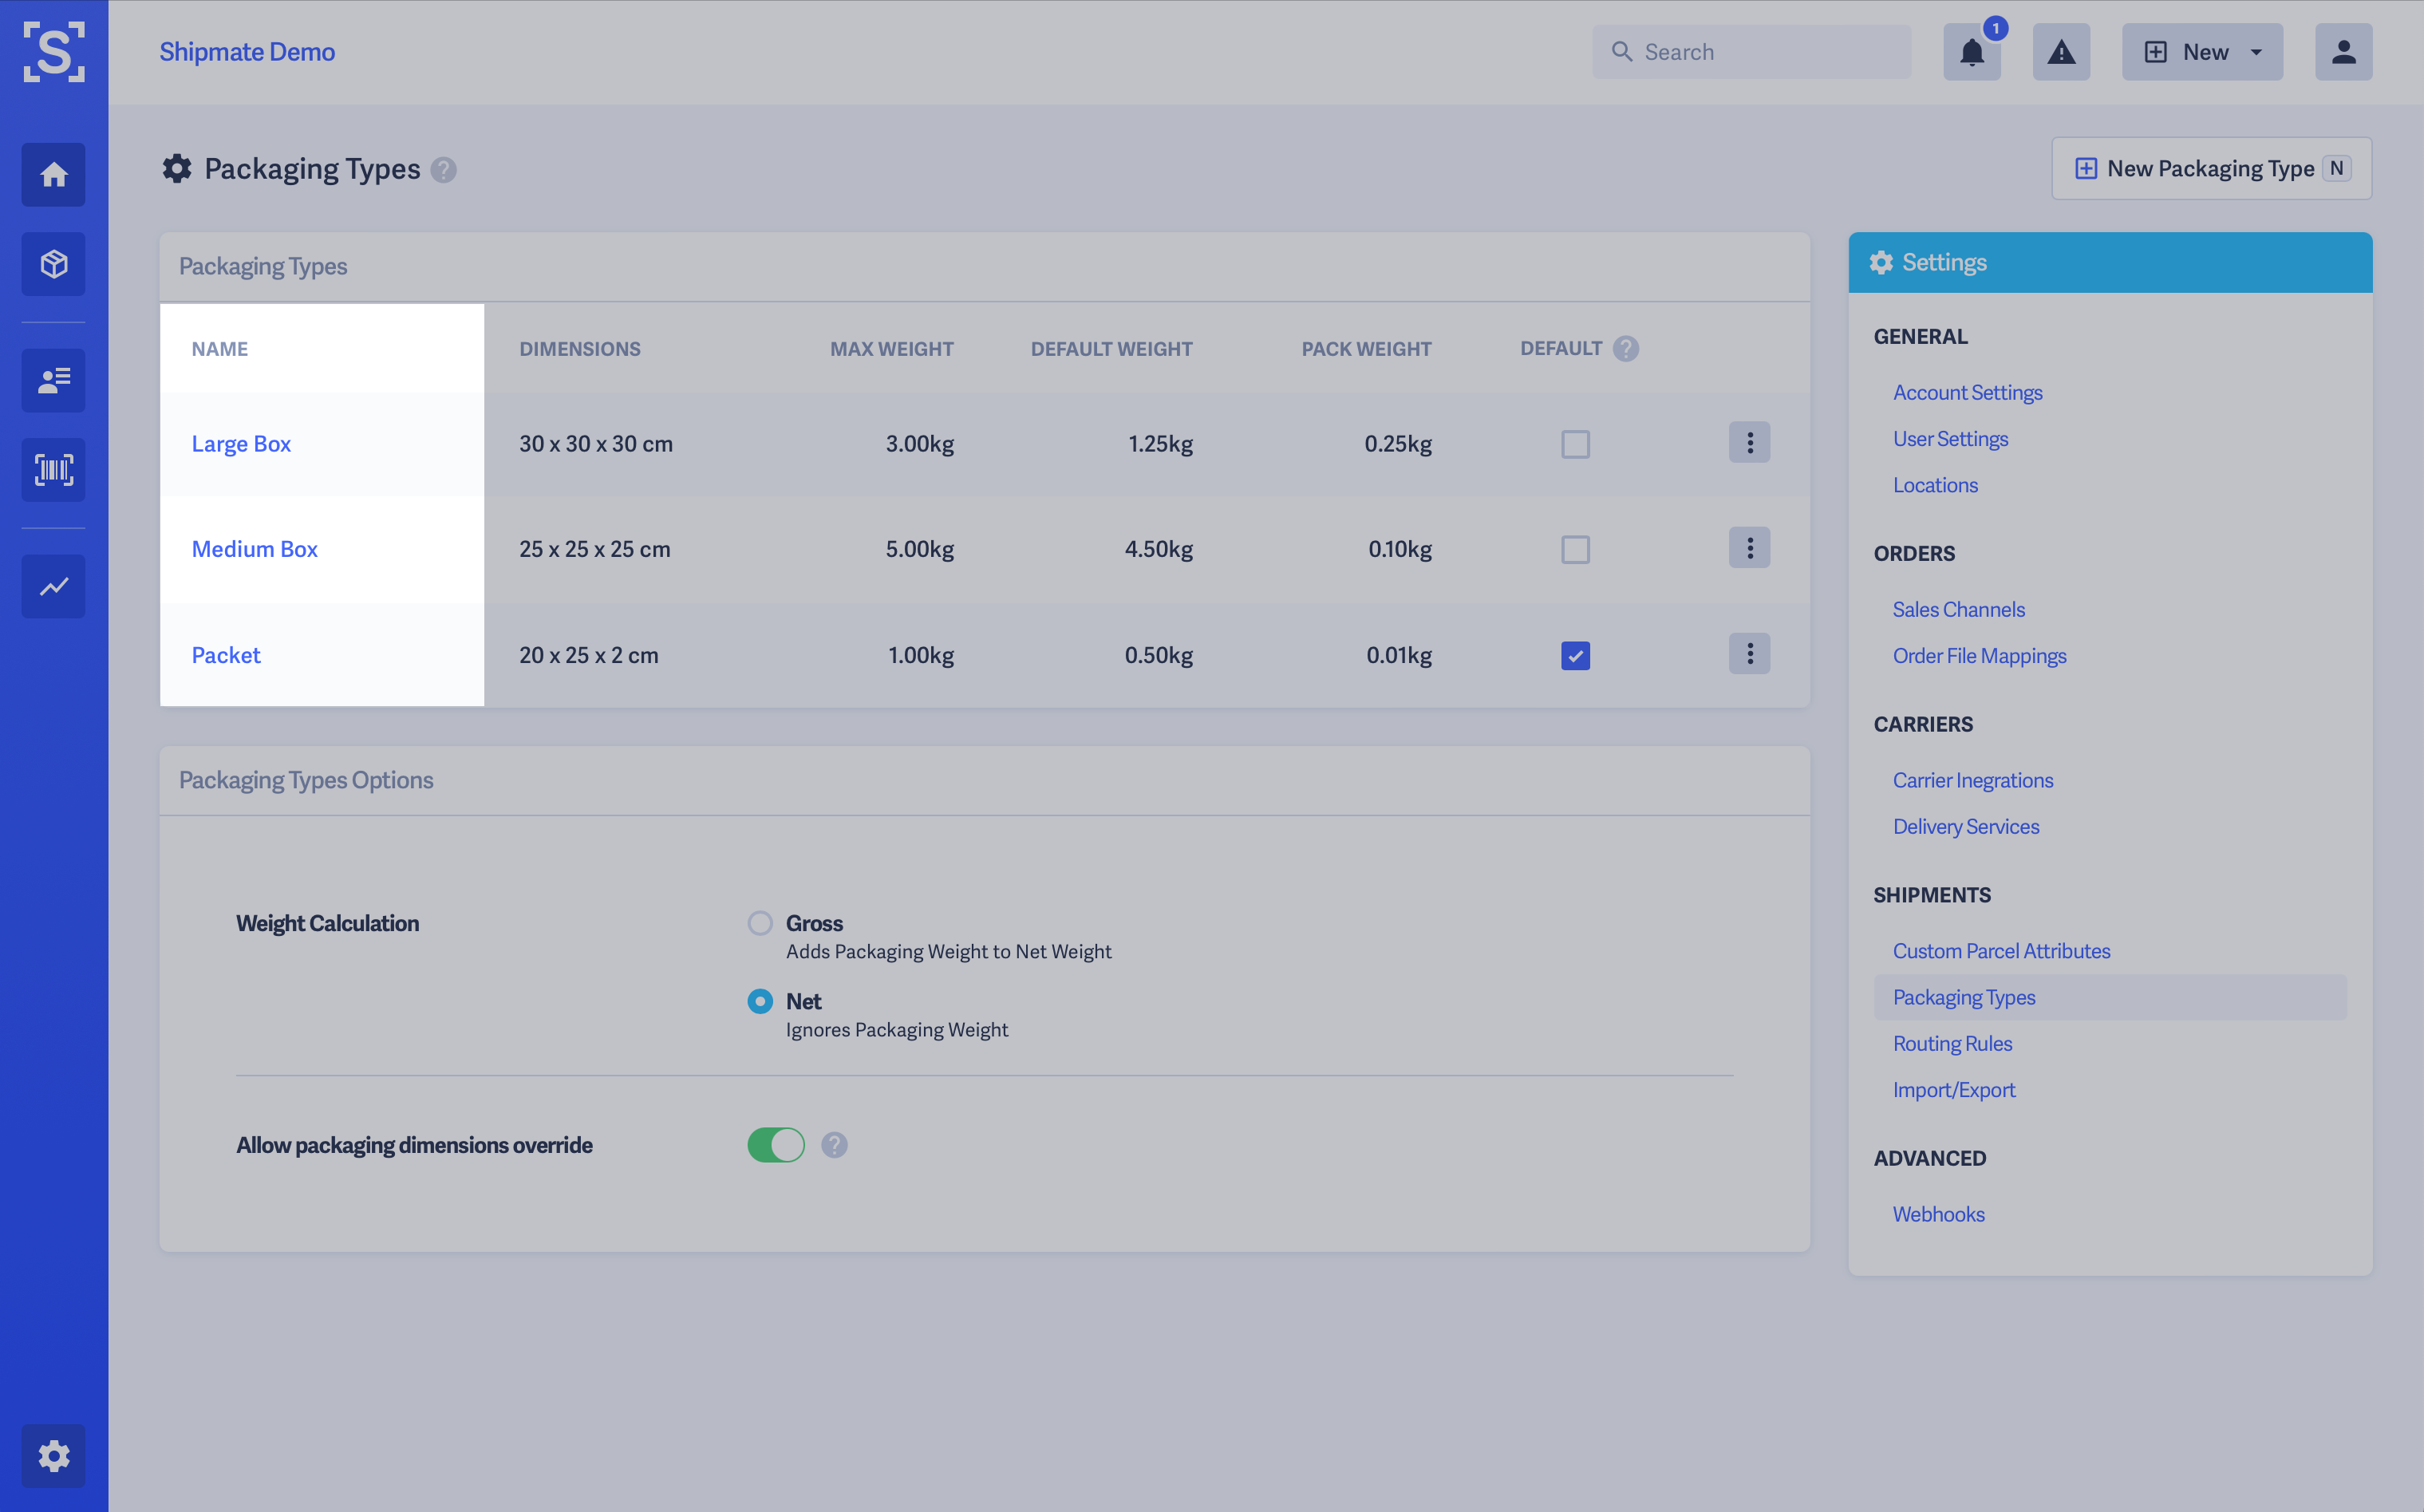
Deleting Packaging Types
If a Packaging Type is no longer required, you can easily remove it by first clicking the adjustment icon in the right-most column of the Packaging Types table, then select Delete Packaging Type. A confirmation box will appear to make sure you wish to delete the Packaging Type permanently.
If you are happy to proceed, click the red Delete button. The change is then made immediately across the platform.
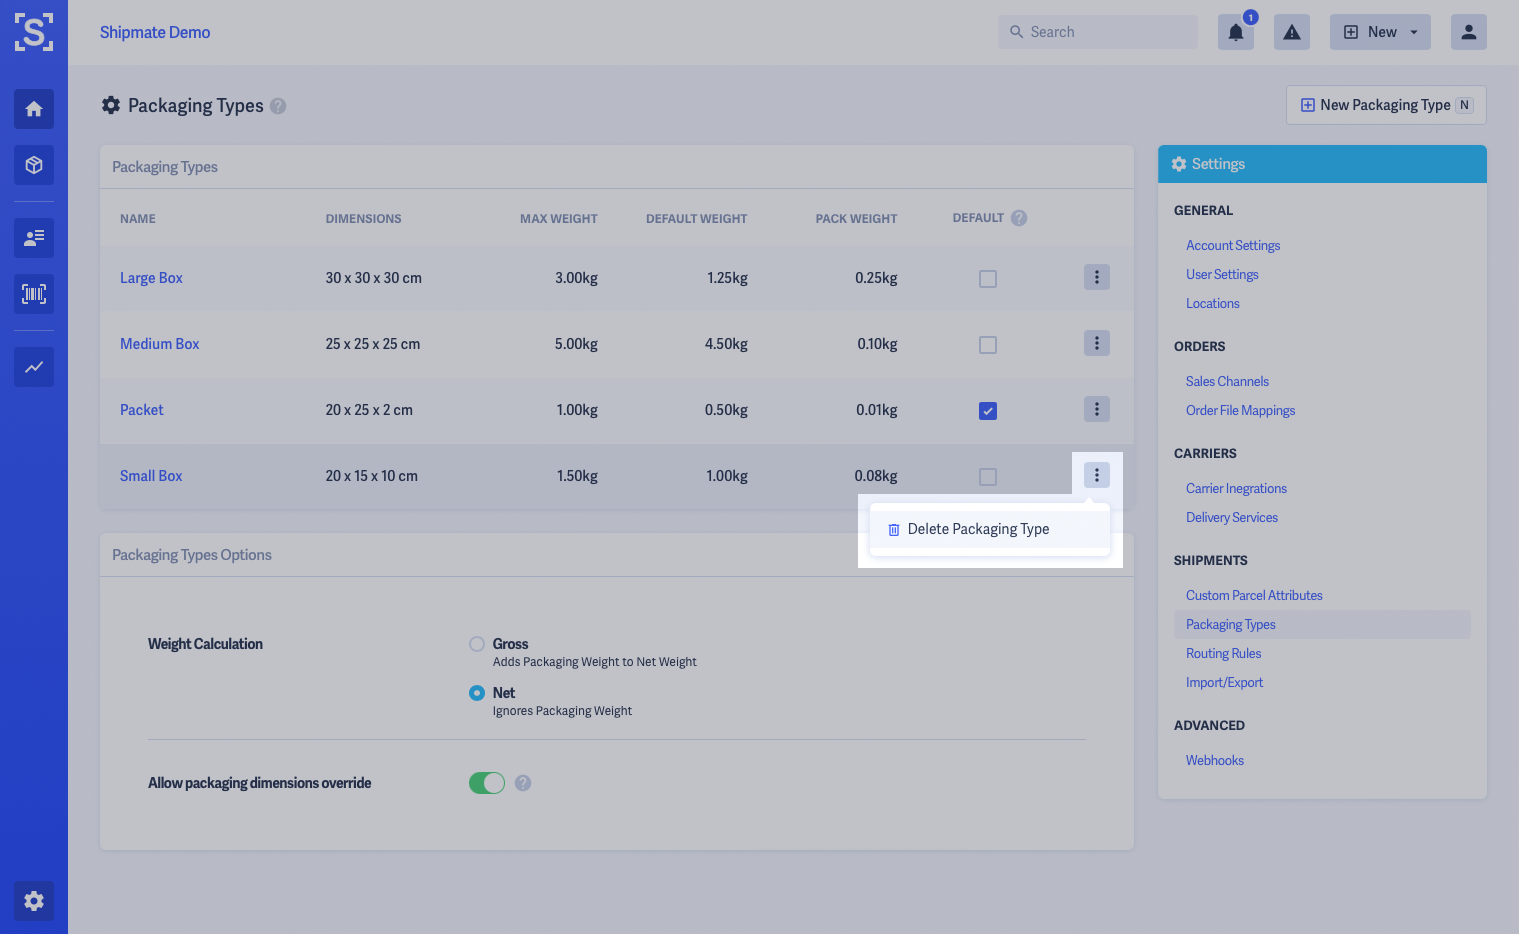
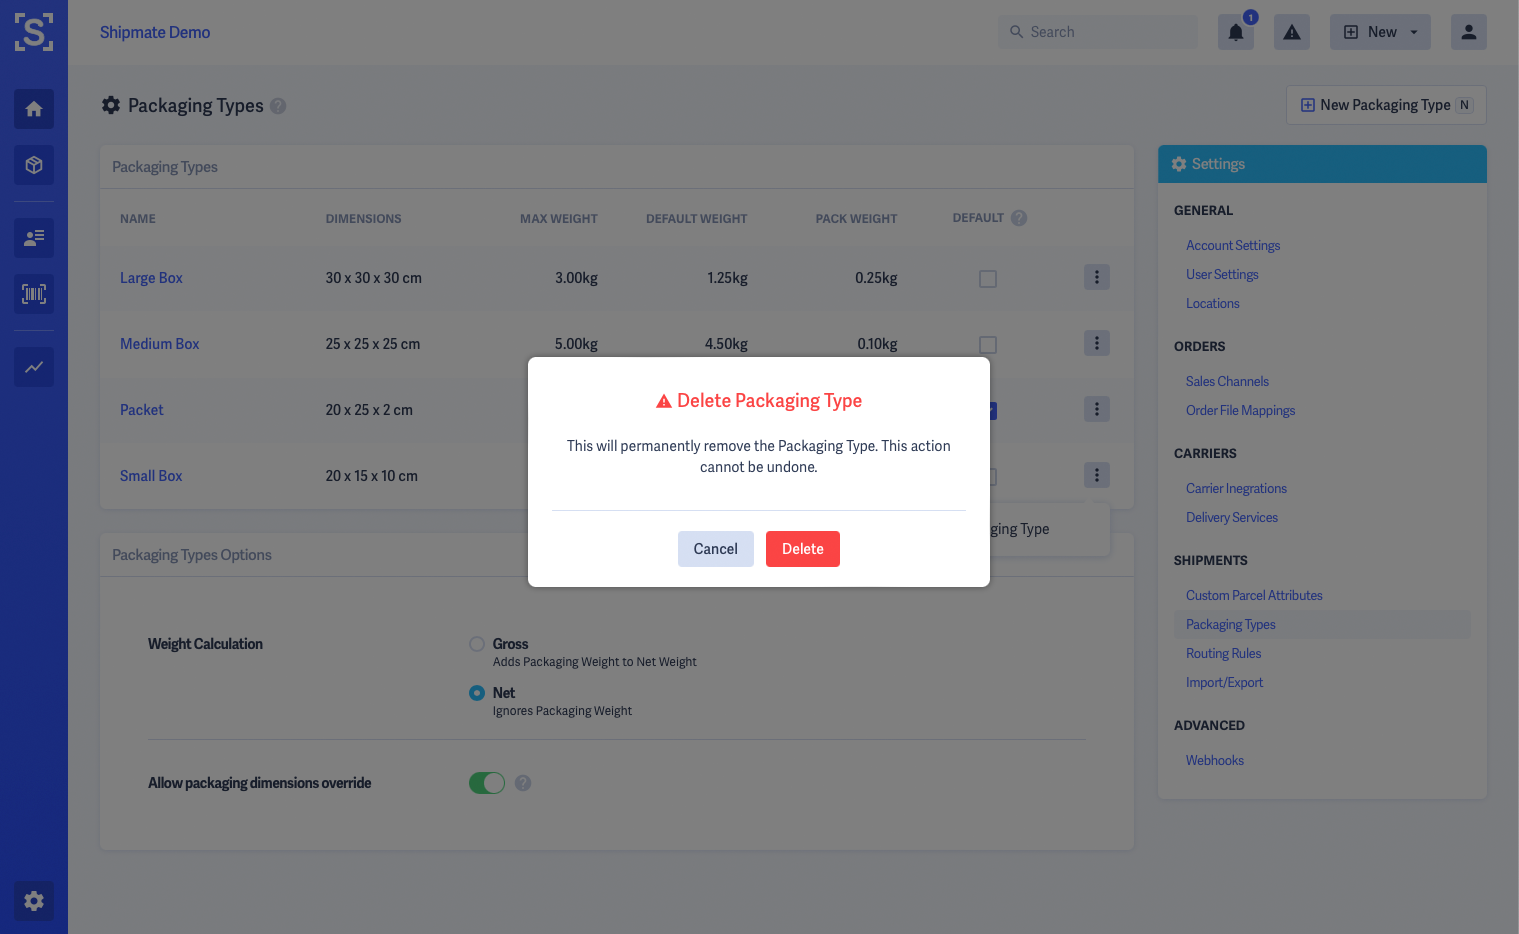
Packaging Types Options
Shipmate offers two additional options to choose how the platform handles your packaging. You may choose how Shipmate calculates your parcel weights, either Gross or Net, according to your requirements.
Gross adds the packaging weight to the contents weight. Net ignores the packaging weight.
You may also choose whether users may override dimensions across the platform. Switching this off means the dimensions will be fixed and cannot be edited when creating Shipments, and any values supplied in CSV files or using the API will be ignored. Allowing the override will enable you to use the Packaging Types as a starting point, and are free to change metrics when creating your Shipments.
Changes are applied immediately and you will see a green pop-up confirmation once your selection has been saved.

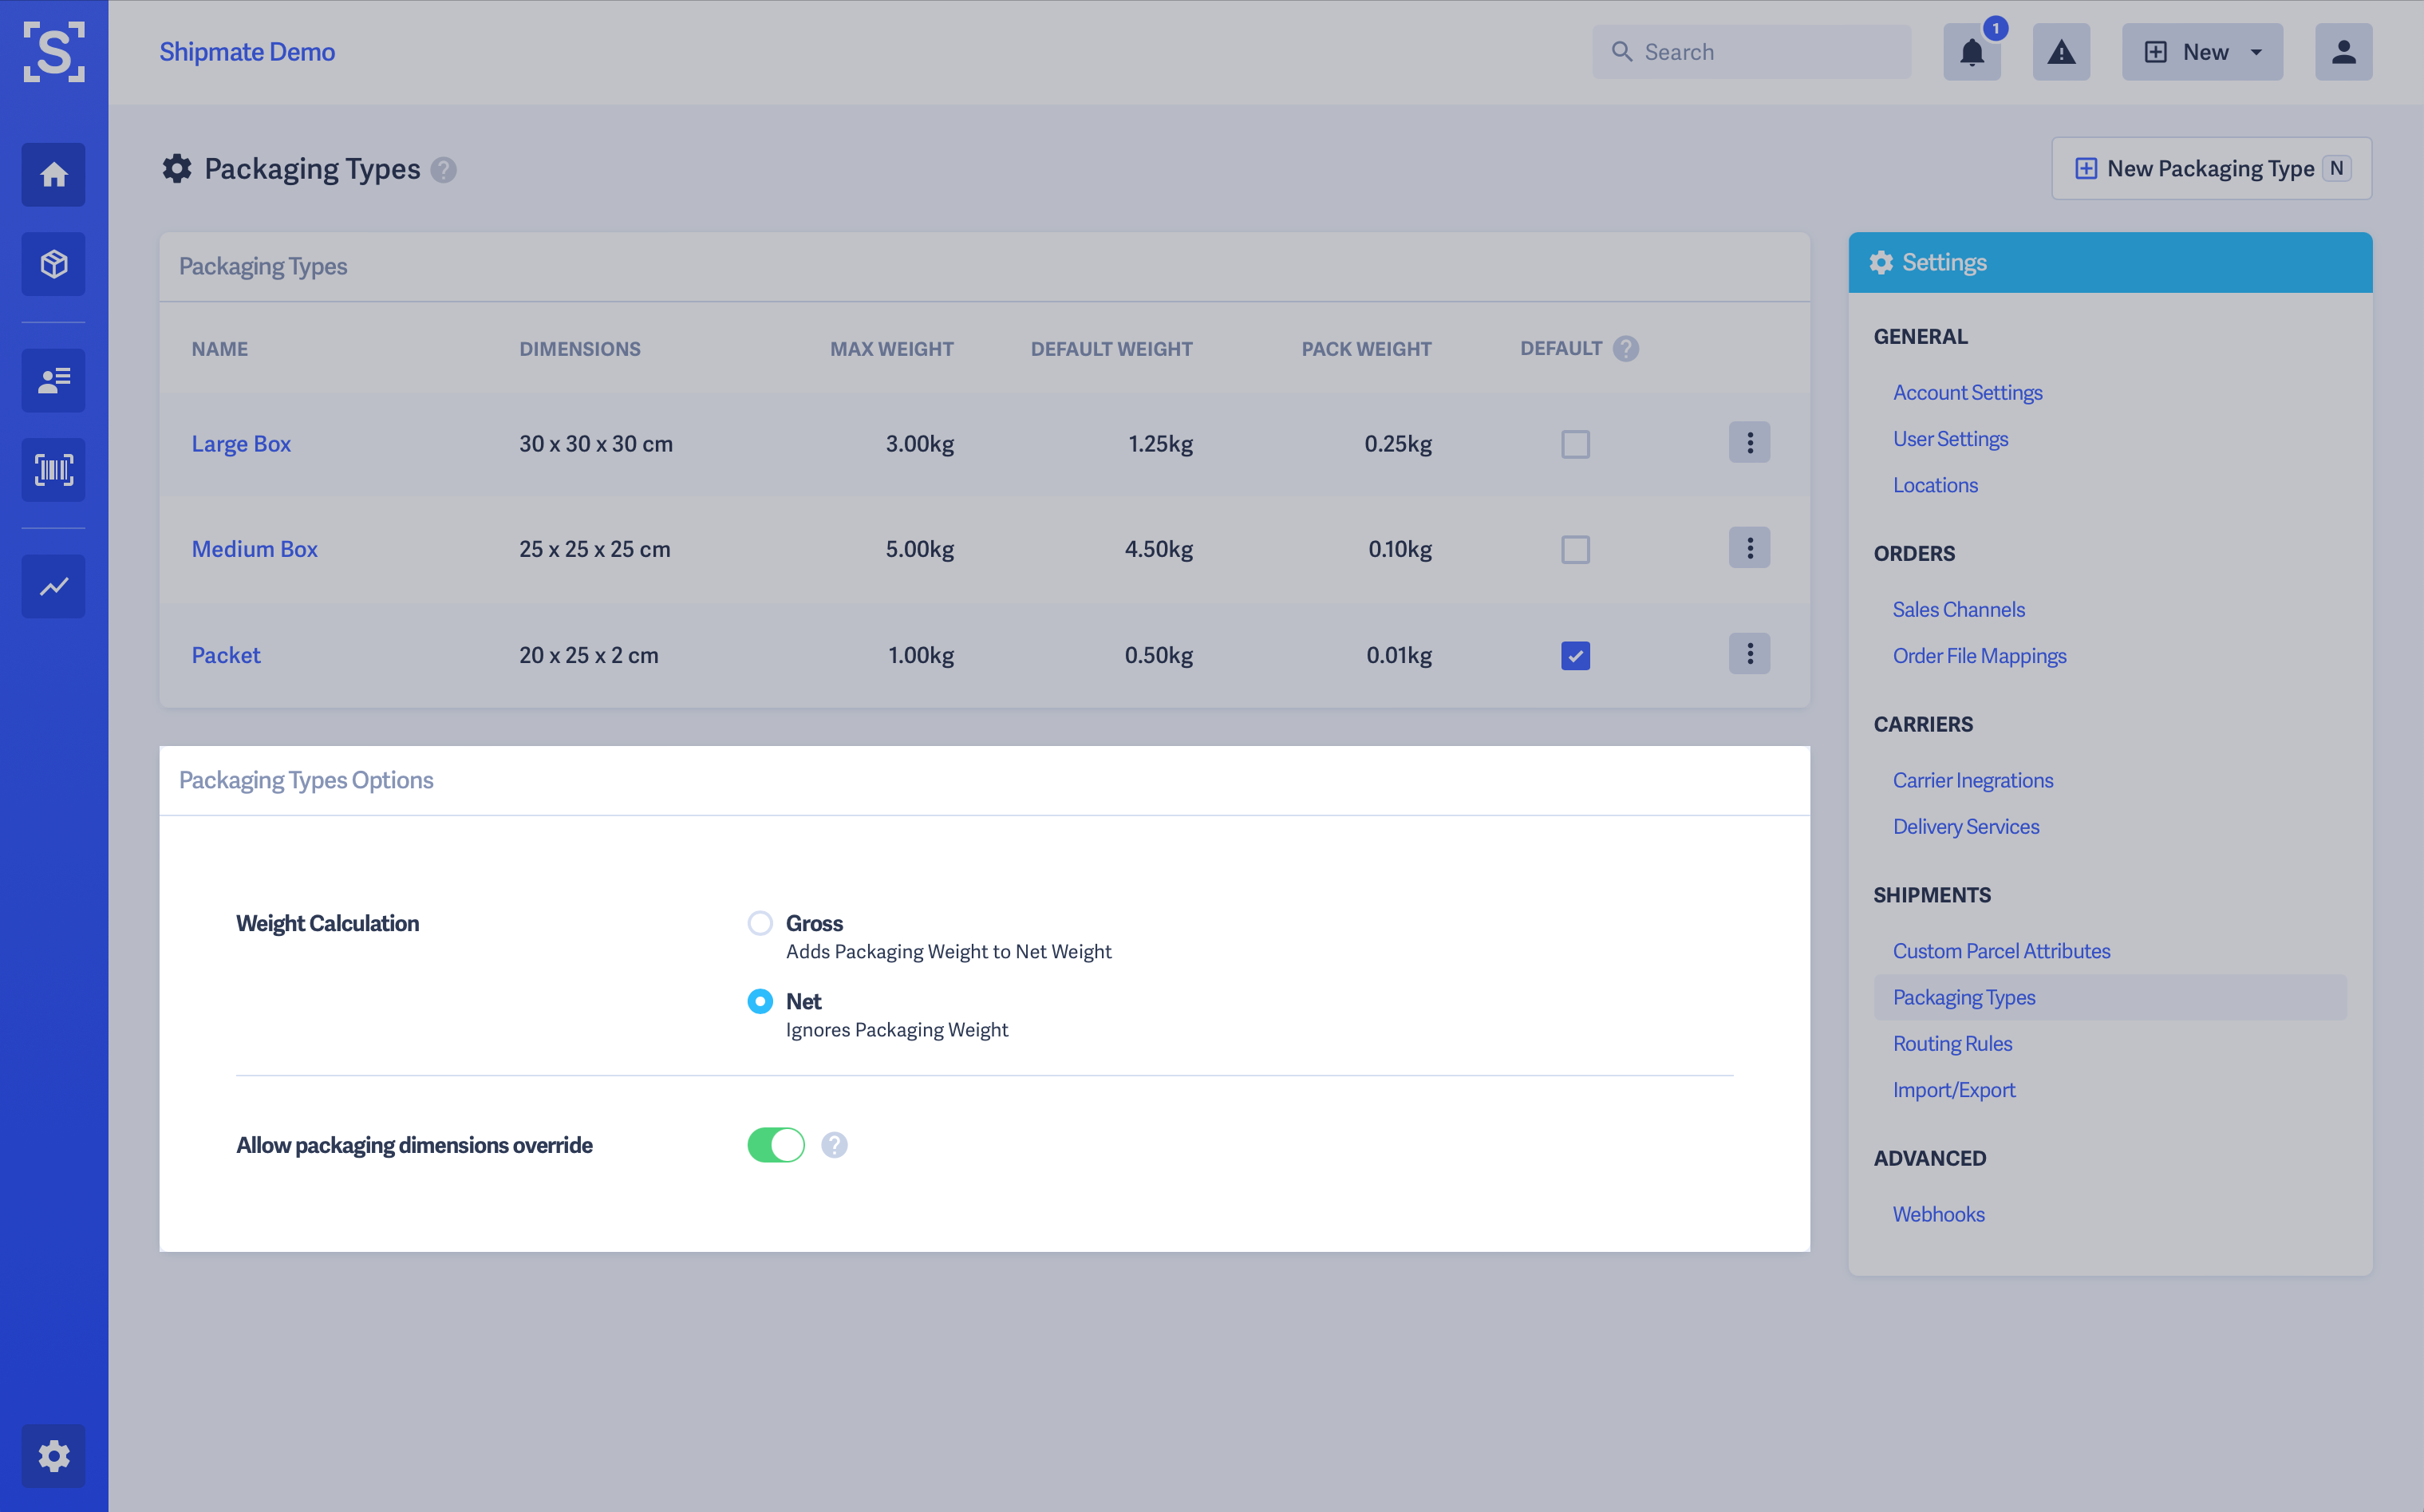
Routing Rules
Routing Rules are a way of automating your parcel labelling. Shipmate will choose the most appropriate carrier and delivery service based upon rules chosen by you. If you have multiple rules, Shipmate will evaluate each Shipment against each rule and then determine the most suitable service automatically, meaning you no longer have to select a service for each individual parcel.
The rules must be active for Shipmate to be able to evaluate them, so make sure to turn on any rules you wish to use. By default, any new rules you create will be inactive until you are happy that they are correct.

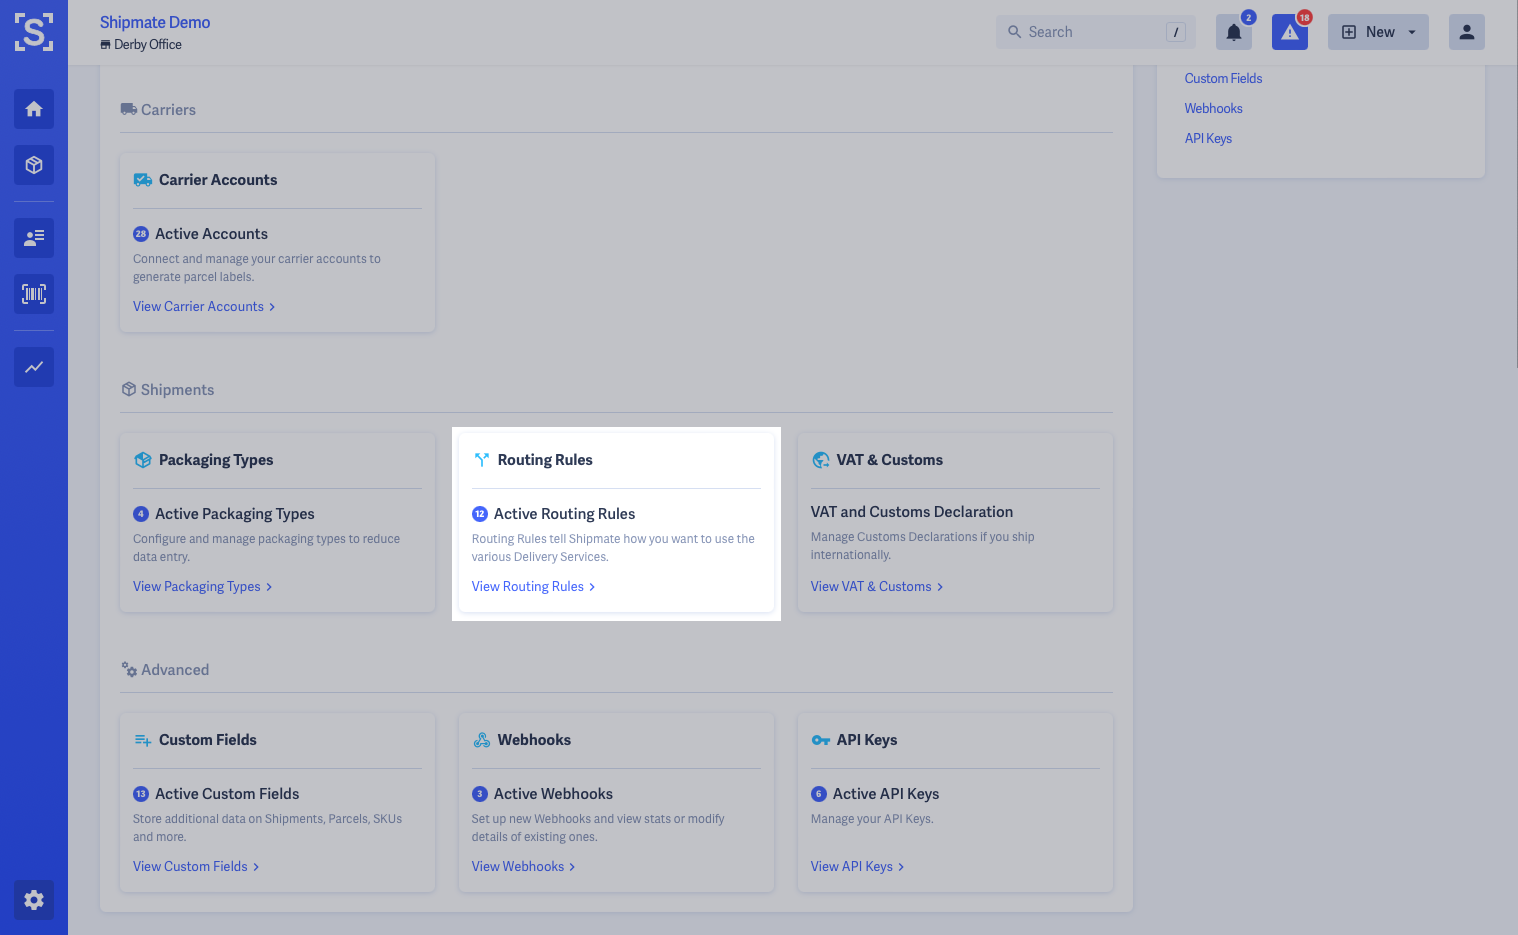
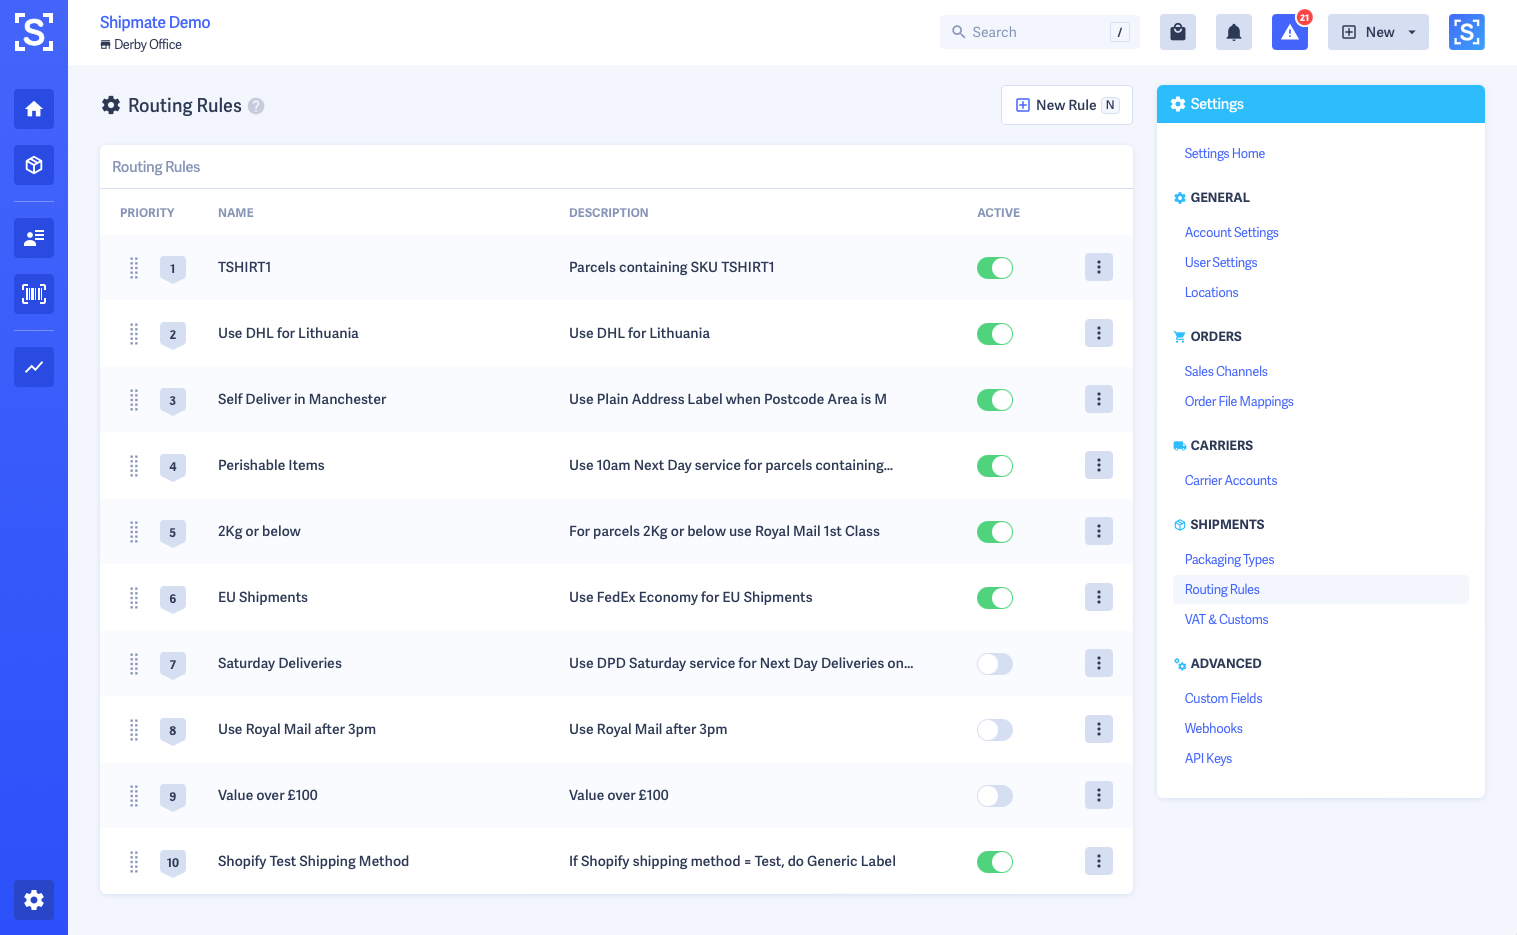
Creating Routing Rules
To create a new Routing Rule, click the Create New Rule button from the Routing Rules list.
Here you can name your rule, give it a description and choose criteria that the parcel needs to adhere to.
Rules may be configured using the following criteria:
- Parcel Metrics - such as the width, weight or value
- Contents - such as a particular SKU, list of SKUs, contents value
- Recipient - such as the destination country or postcode area
- Operational - such as the despatch location, current day of the week or time
- Custom Field Value - route parcels based on just about any criteria
You may apply multiple criteria for each Routing Rule. Criteria are logically AND-ed together, meaning all defined criteria must match for the rule to fire.
Once you are satisfied with your new Routing Rule configuration, click the Save Rule button.
You will then be returned to the list of Routing Rules. You can then determine how to Prioritise the Routing Rule, then Enable it.

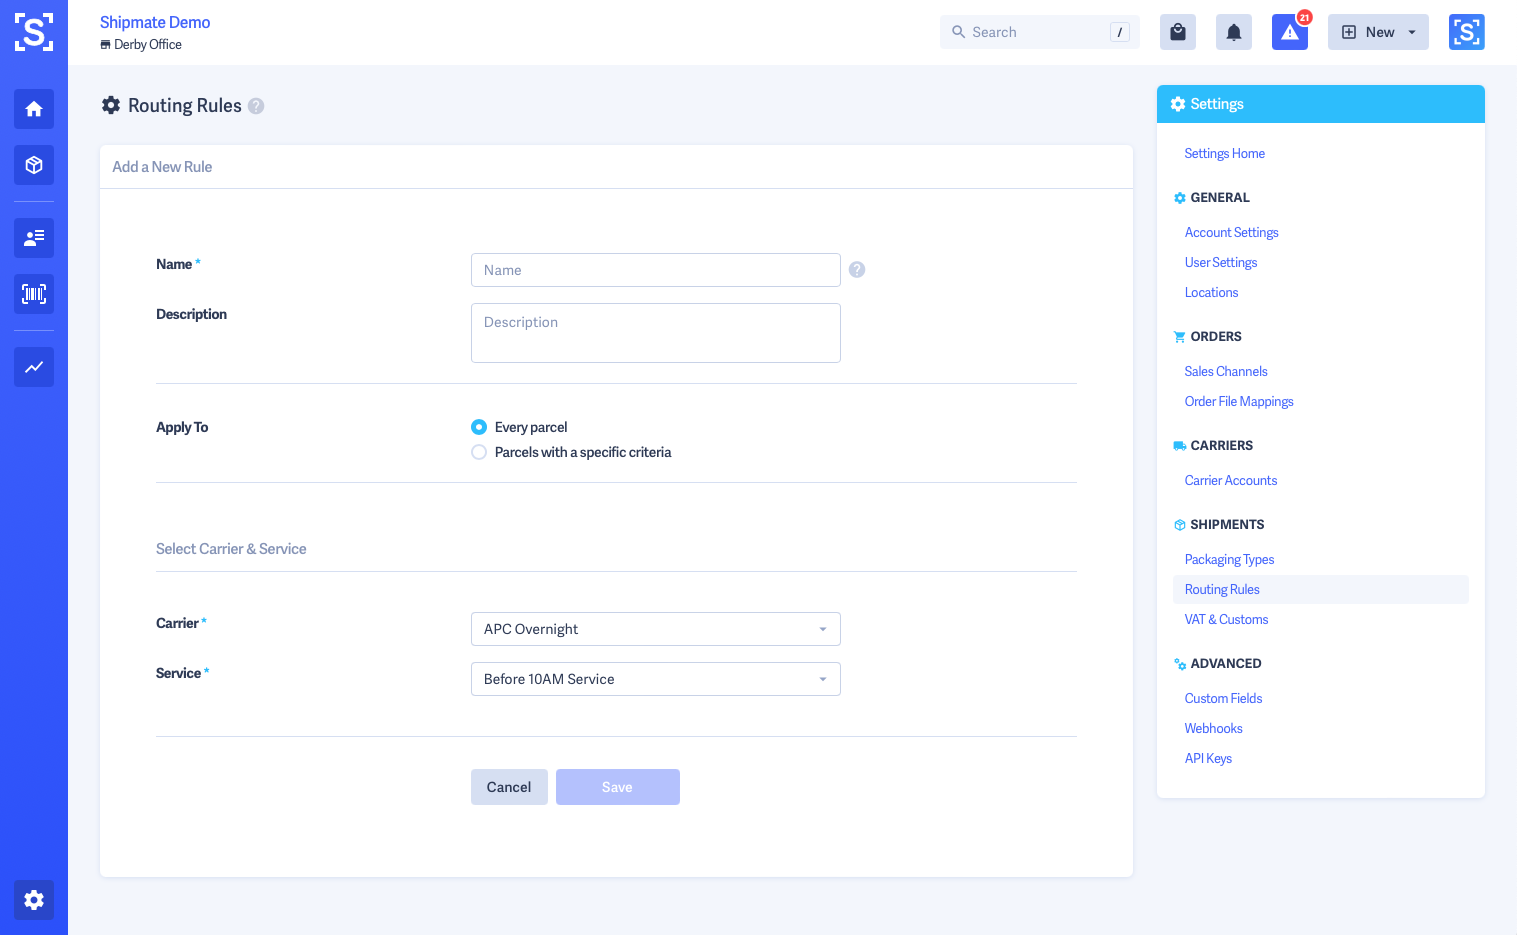
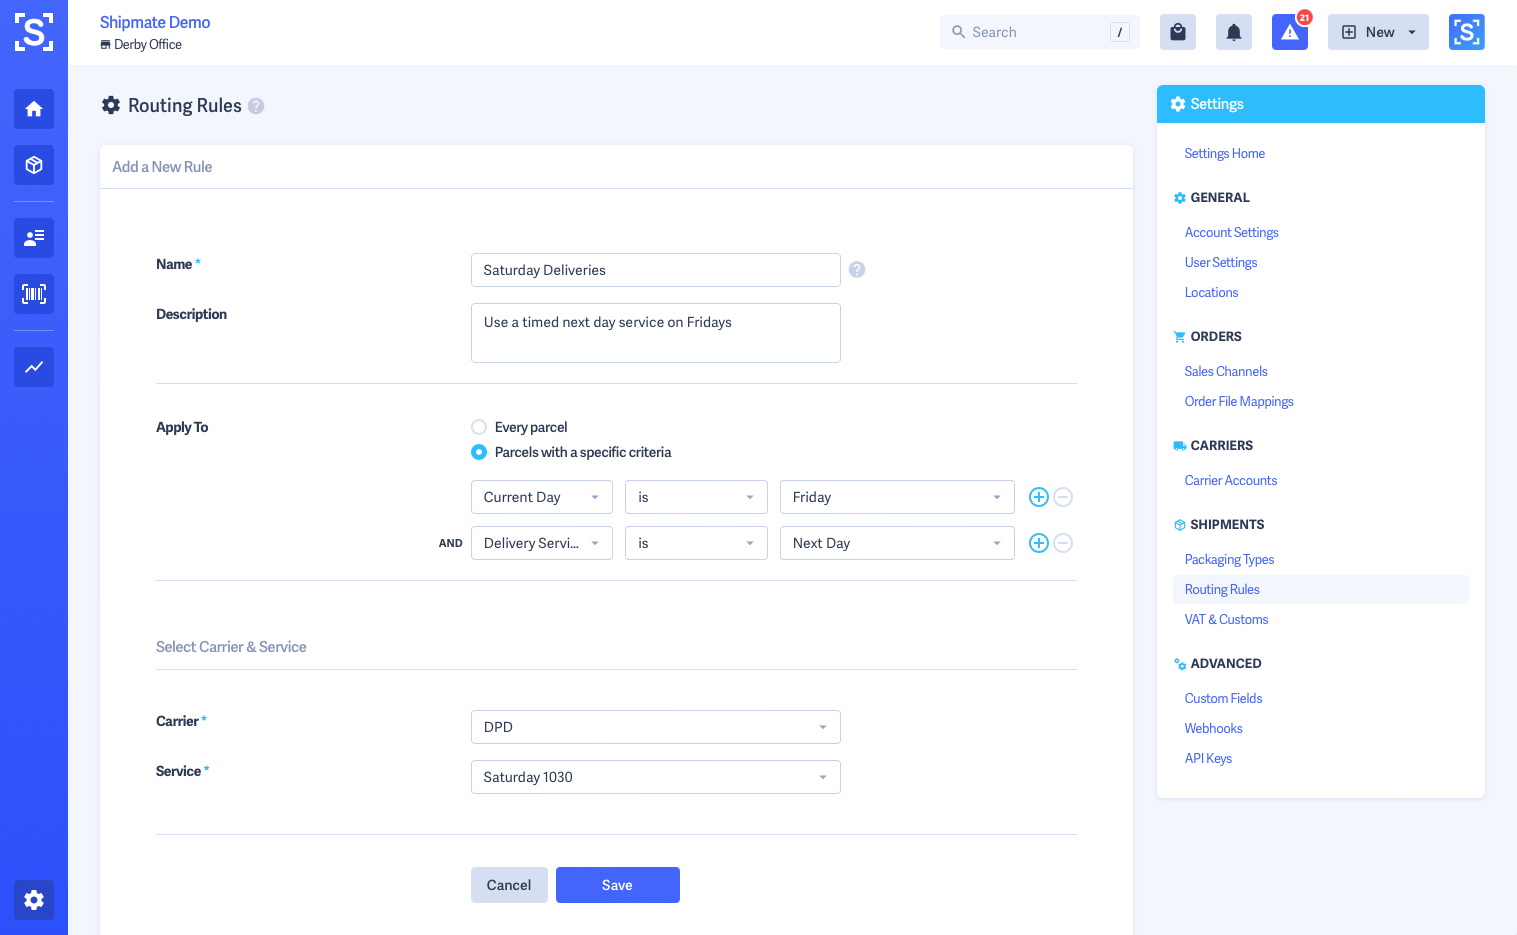
Enabling Routing Rules
Routing Rules must be Enabled before they will be evaluated.
On the Routing Rules list, each Routing Rule has a toggle denoting whether it is enabled or not.
Simply click the toggle to enable or disable the Routing Rule.

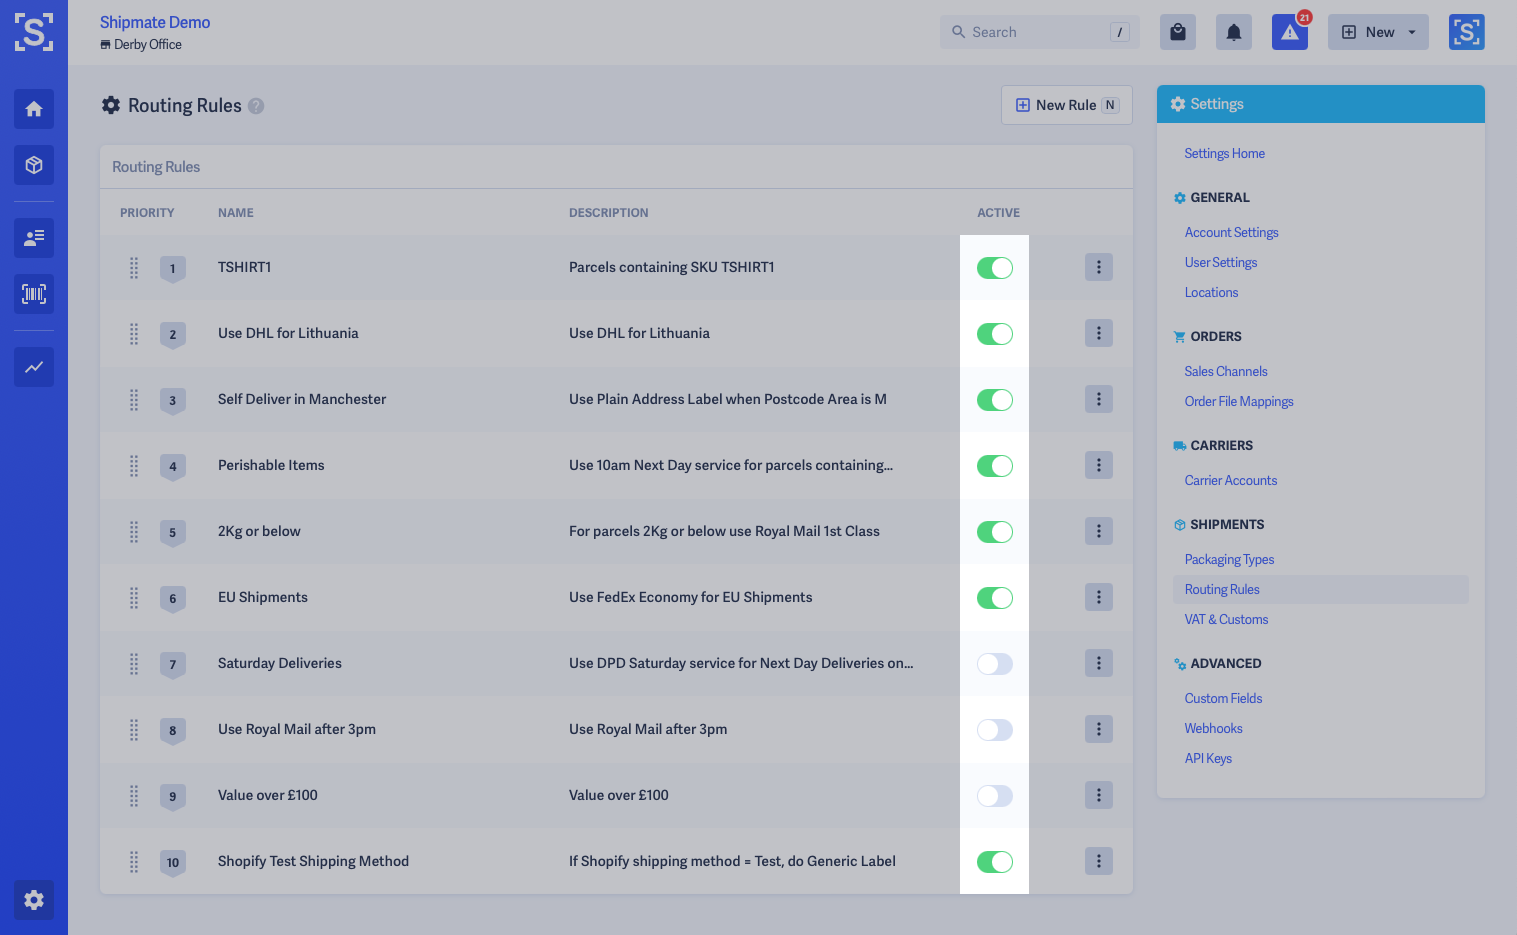
Prioritising Routing Rules
Routing Rules are evaluated from top to bottom, so if the first rule fails then the next rule will be evaluated until there is a rule that matches the parcel.
To re-order the priority of Routing Rules, simply drag the Rule up or down the table from the priority column. Your changes will be saved automatically.
Typically you will want to have the most specific rules towards the top of the priority list, broadening in scope down the list.

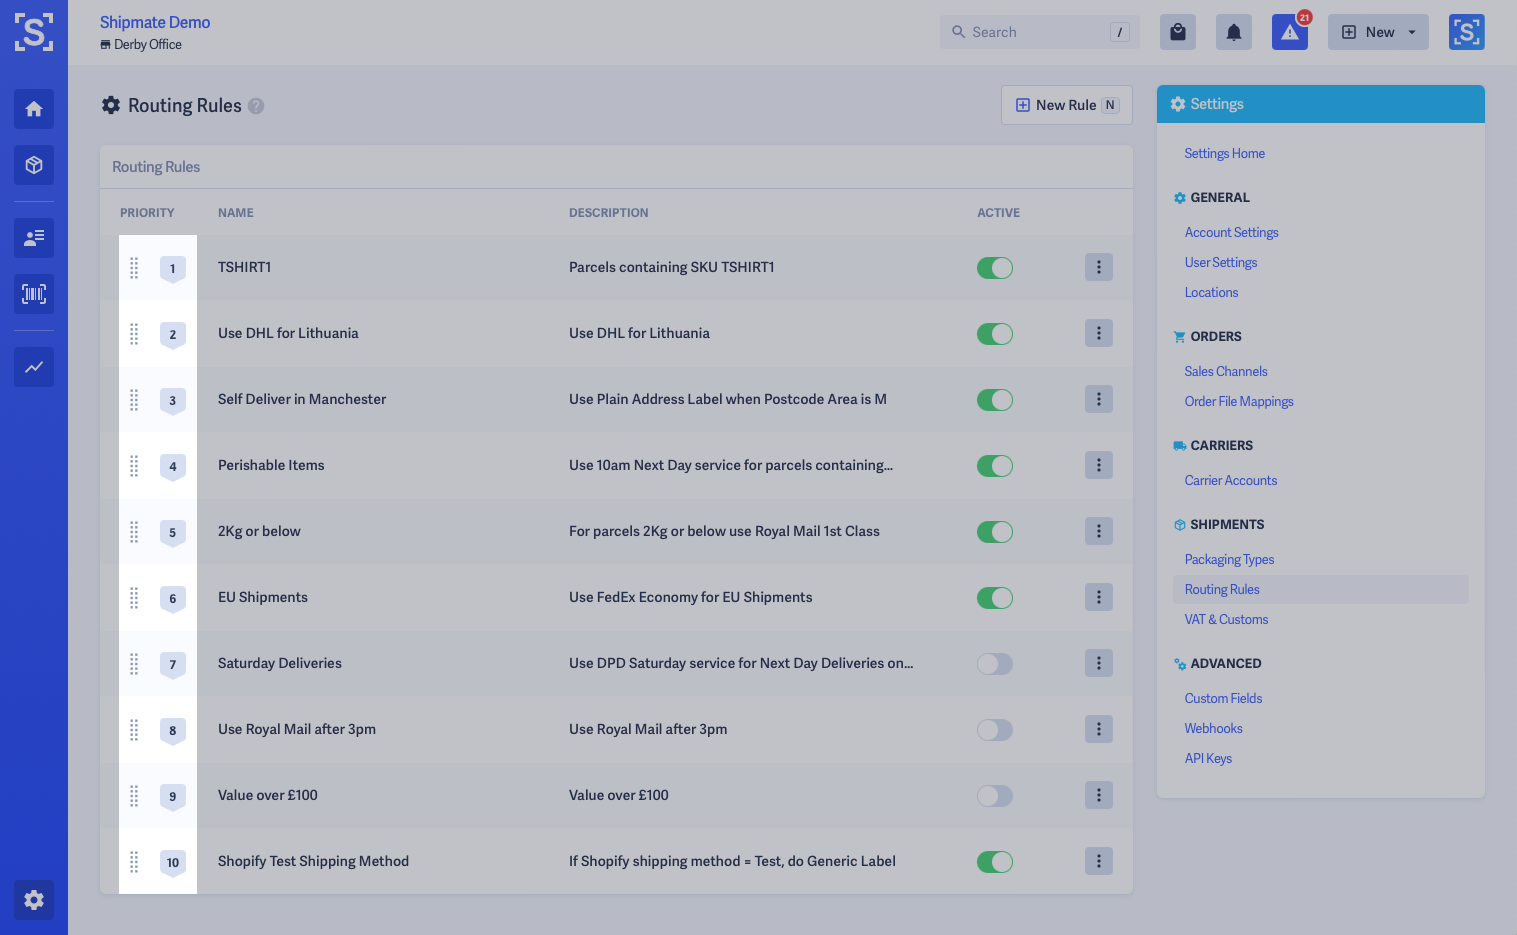
VAT & Customs Options
If you send internationally and need to apply customs declaration labels to your parcels, you can enable this using VAT & Customs Options.
From the Shipments section of the Settings screen, select VAT & Customs.
This opens the VAT & Customs Options form. On this form, you can provide your VAT, EORI and IOSS numbers, choose how Shipmate handles VAT for key regions, enable CN22 labels, set CN22 weight and value limits and select your default CN22 Purpose of Shipment, such as Sale of Goods. This will be automatically ticked on any CN22 labels that subsequently get generated.
UK accounts may also add their UKIMS number on this form, which is used when sending between Mainland UK and Northern Ireland as part of the UK Internal Market Scheme.
You are also able to set a default HS / Tariff Code and Country of Origin if you send items of the same class and origin.
For Commercial Invoices, you are able to set the default Terms of Trade (e.g., DAP or DDP), alongside the name of the person responsible for export in your organisation and their signature. These will be printed on Customs Declaration forms and Commercial Invoices.
Once you are happy with the details you have entered, click the Save button. The changes will be applied immediately across your account.

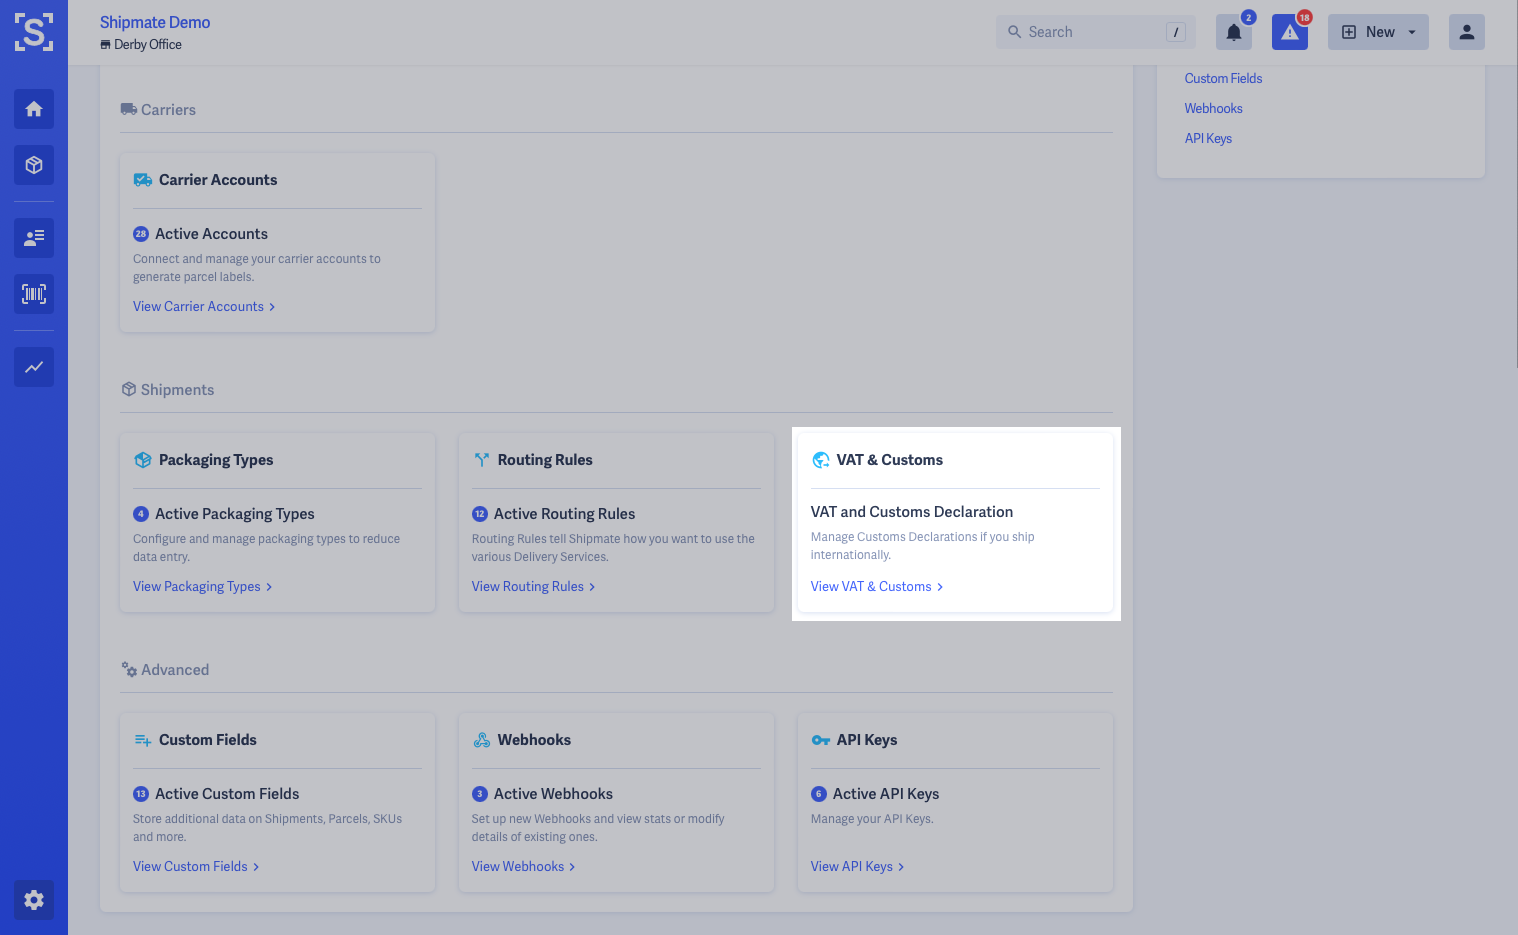
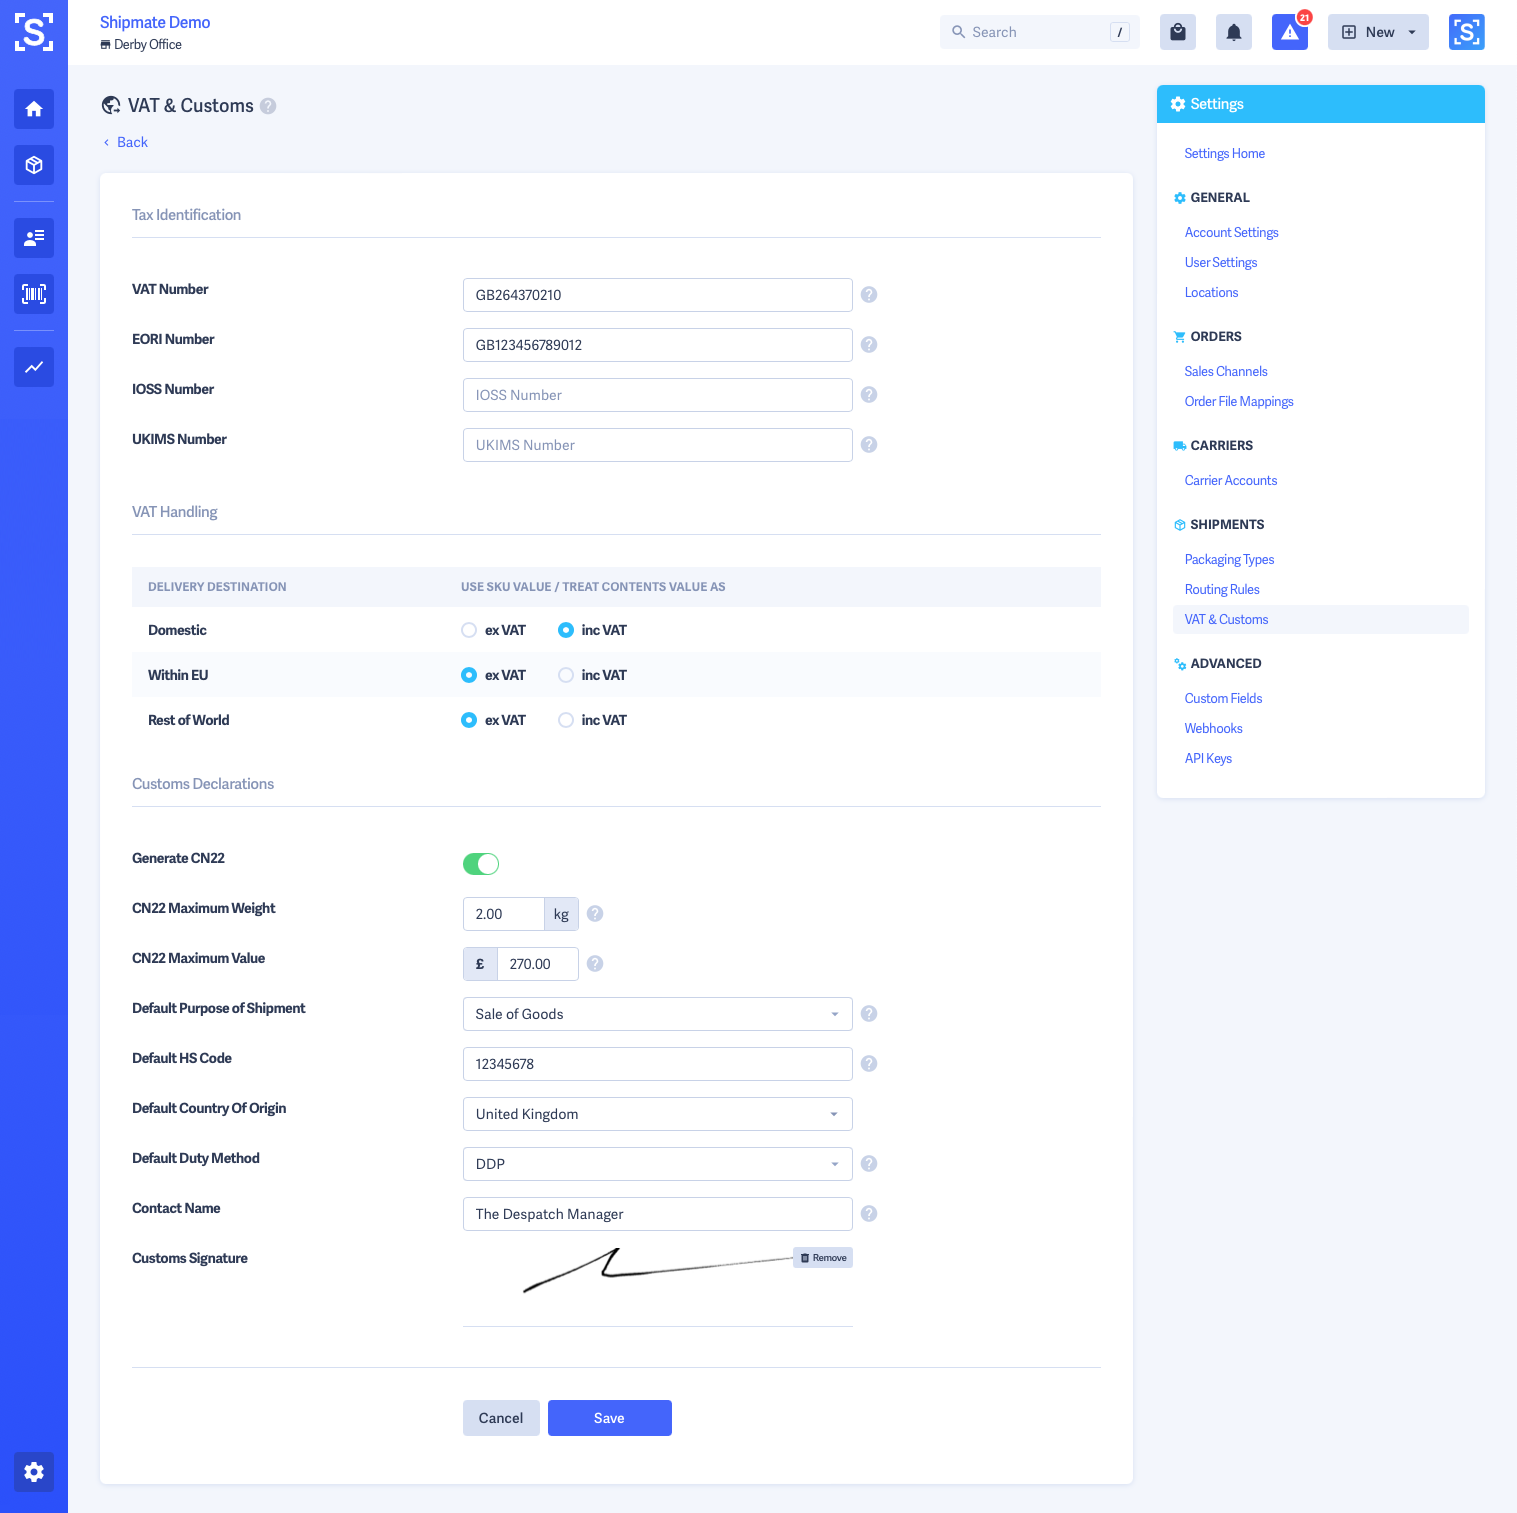
Order File Mappings
If you have previously saved CSV File Mappings when Importing Shipments, the mappings can be viewed in the Order File Mappings section of Settings.
From here you can view and delete existing mappings. To create a new Order File Mapping, follow the process for Importing Shipments.
You cannot edit mappings themselves however you are able to rename them and assign an icon to them. If you need to replace a mapping, create a new Order File Mapping, then delete the original from this area.


Reporting
Reporting
There are two types of reports that Shipmate can generate - a Parcels report and a Carrier Performance report. You can access the reports from the ‘Reports’ section in the header.
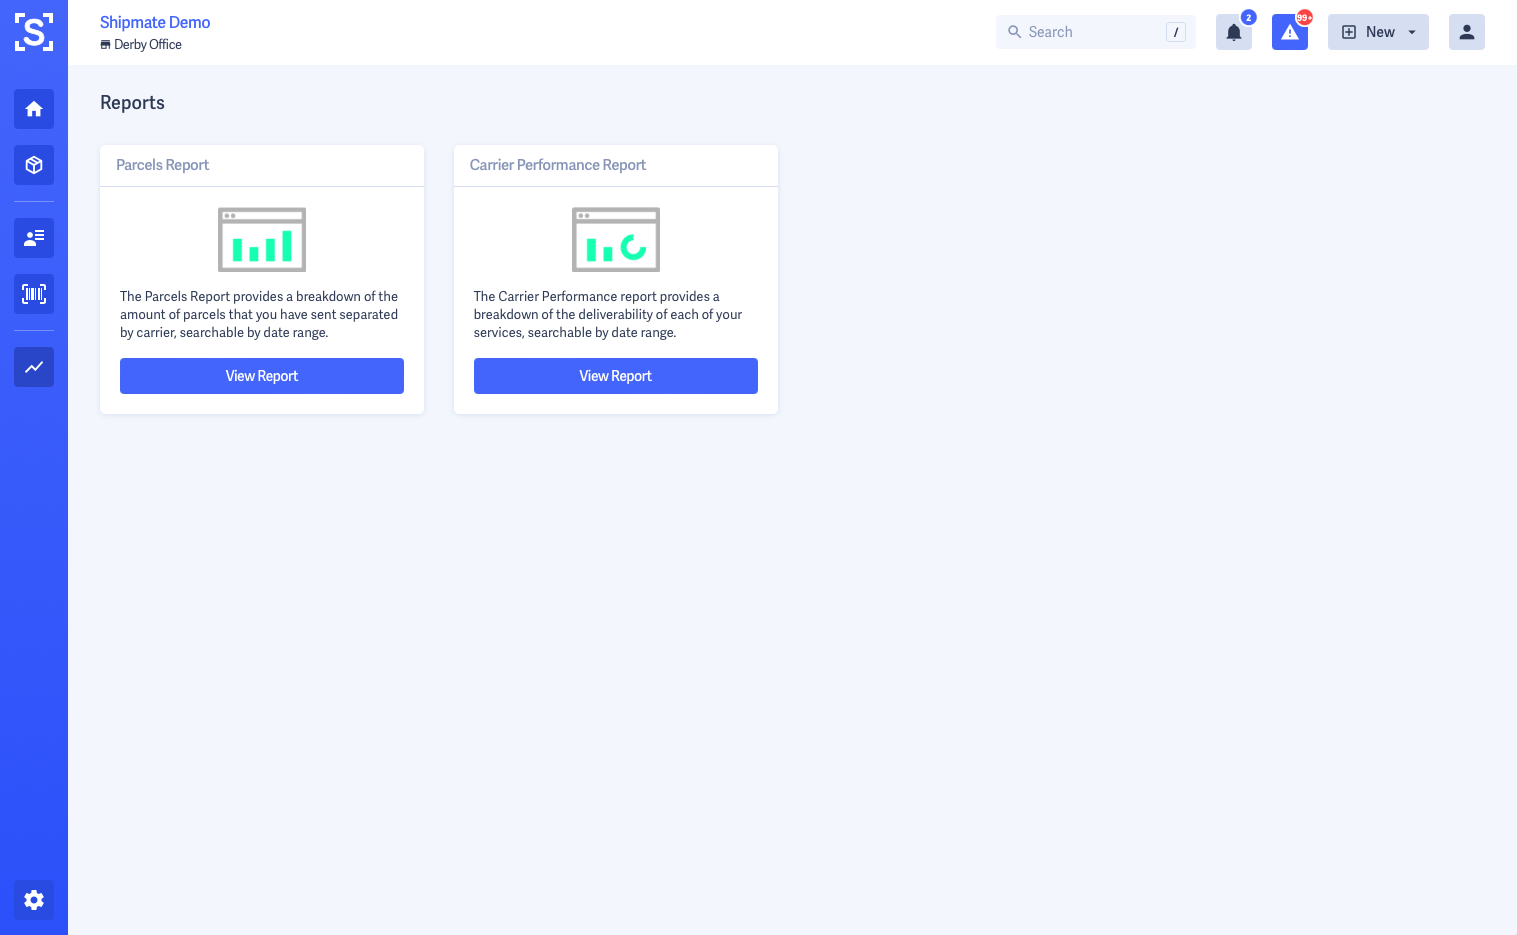
Carrier Performance Report
The carrier performance report is filtered on a month-by-month basis. The main dashboard for the carrier performance page will show you each carrier and an overview of the current SLA they have with you, how many days the SLA has been met and the overall performance.
If you click the ‘View’ menu for a carrier you can look at All Parcels and parcels both in and out of SLA. Once in this view, you can apply filters to the reports allowing you to broaden and narrow your search as you see fit.
The carrier-specific view gives a more detailed look into the performance of the carrier. You can see information such as how many parcels have been sent with the carrier, how many of these were within or outside of the SLA and what the longest and shortest delivery times have been.
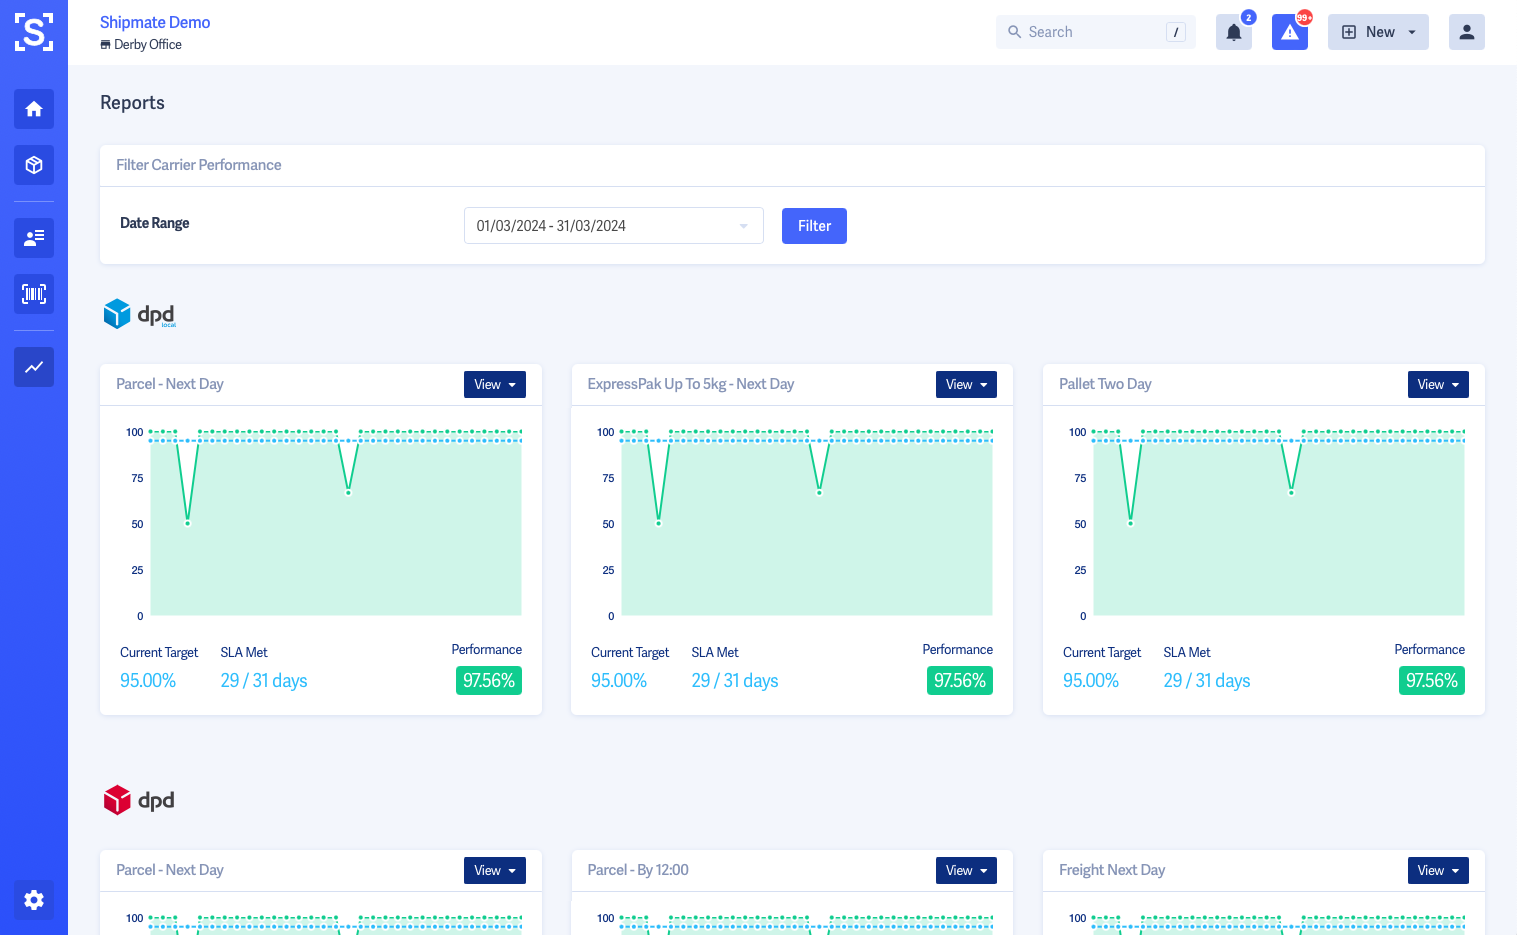
Systems Integration
CSV File Imports
You can upload a CSV file from almost any platform to import your parcels into Shipmate. Simply download a file extract from your order processing system, choosing options that include a header row and output as a comma separated text, or CSV file.
To access the upload area, click the ‘Import’ button in the top right of the Main Menu, then simply upload your file by dragging it to the drop-zone area or by clicking the ‘Choose File’ button to find the file on your computer.
Your file will be checked to ensure it can be processed, then you can select the file type from a list of presets you have previously configured, or set up a new one.
Windows Application
The Shipmate Windows App allows you to quickly and easily integrate your Warehouse or Order Management System and your label printer with Shipmate. This companion app works in the background and has a number of useful features to help you get the most out of Shipmate and easily generate labels in a fast-paced despatch environment.
If you wish to learn how to use the Shipmate Windows app, there is a dedicated guide to help you through this. You can find this at shipmate.co.uk/guides/windows-application
API and SDKs
If you wish to use the Shipmate API, you can find the official documents at shipmate.co.uk/guides/api.
Webhooks
Webhooks are outbound requests made by Shipmate when certain events have triggered inside the platform, such as tracking events or when a shipment is cancelled.
Find out how to set up and use Webhooks in our Webhooks Guide.
Channels
Brightpearl
WooCommerce
Further Information
Change Log
This page last updated 14-May-2025 (2 days ago). Changes include:
- NEW FEATURE – Brands now support the ability to self-configure Tracking Portals.
Previously updated on 28-Apr-2025. Changes include:
- NEW FEATURE – IP Allowlist provides granular control over network access to your Shipmate account.
- Improved – Account Settings renamed Account & Security to better reflect the features it contains.
- Improved – 2-Factor Authentication (2FA) can now be enabled at User level, with the ability to require 2FA at Account level.
Previously updated on 28-Mar-2025. Changes include:
- Improved – VAT & Customs Options now allows UK merchants to supply their UKIMS number as part of the UK Internal Market Scheme.
Previously updated on 06-Mar-2025. Changes include:
- NEW FEATURE – Chargeable Weight lets you calculate shipping costs based on actual and volumetric weight, or whichever is greatest.
- NEW FEATURE – 2-Factor Authentication adds a layer of security to your account when users log in.
- Improved – Surcharges updated with a variety of new options including Custom Fields and Carrier Data Mappings
Previously updated on 23-Jan-2025. Changes include:
- NEW FEATURE – Brands let you personalise the customer experience of your shipments with logos, returns details and more.
- NEW FEATURE – Carrier Manifests overhauled with manifest statistics and carrier account filtering, and Ad-hoc Manifests allow you to run the manifest process at any time
- NEW FEATURE – Error Labels provide real-time information about shipment creation failures for headless integrations
- Improved – VAT & Customs Options now let you manage your IOSS number
- Improved – Routing Rules updated with improved layout
- Improved – Delivery Service Performance Targets and Data Mappings updated with improved layout
Previously updated on 12-Nov-2024. Changes include:
- NEW FEATURE – Label Options let you choose from available templates, map data to labels and set CN22 output options on a carrier-by-carrier basis
- Improved – VAT & Customs Options now let you choose weight and value limits for outputting CN22 Customs Declaration labels
Previously updated on 09-Sep-2024. Changes include:
- NEW FEATURE – Consolidated Shipments
Previously updated on 22-Aug-2024. Changes include:
- NEW FEATURE – In-line Despatch Notes
- NEW FEATURE – Commercial Invoices
- Improved – Shipment View and Viewing Detailed Tracking updated with improved layout
- Improved – New Delivery Service Page updated with improved layout
- Improved – My Profile updated with improved layout
- Improved – Delivery Service SLA Settings moved to Delivery Service Advanced Settings
- Improved – You can now edit individual Item values when adding SKUs to Parcels
- Added International Shipments section
- Reorganised Printing section


